m (→top: clean up) Tag: apiedit |
No edit summary |
||
| (21 intermediate revisions by 4 users not shown) | |||
| Line 1: | Line 1: | ||
| + | '''The Mad Masker is no longer officially supported by Legacy, as the author, VICN, is no longer distributing it. The Legacy features will stay for those who already have the mod, but we can't link to the mod or share it.''' |
||
| ⚫ | |||
| ⚫ | |||
| − | All unenchanted versions of the items can be bought from The Mad Masker's Shop in the Mind of Madness. Most enchanted versions can only be found in certain spots or randomly as loot. If you use the leveled list version of the mod, all items are added to the leveled list and can be found randomly in loot containers. |
||
| + | Only the leveled list version of the mod works with Legacy. You will not be able to display most of the items if you use the non-leveled list version. |
||
| ⚫ | To get to |
||
| + | |||
| + | All unenchanted versions of the items can be bought from [[The Mad Masker]] in Pelagius's Mind. |
||
| + | |||
| ⚫ | To get to Pelagius's Mind, you need to complete the quest '{{Wiki|The_Mind_of_Madness|The Mind of Madness}}' given to you by {{Wiki|Dervenin_(Skyrim)|Dervenin}} in {{Wiki|Solitude_(Skyrim)|Solitude}}. The quest will require you to go to Pelagius' Wing in the Blue Palace. After quest completion, you will be able to return to Pelagius's Mind by equipping the [[Wabbajack]] and using [[Pelagius' Hip Bone]] when in the Blue Palace or Pelagius Wing. To get back to the door of the Blue Palace, use the bedroll inside Pelagius's Mind. |
||
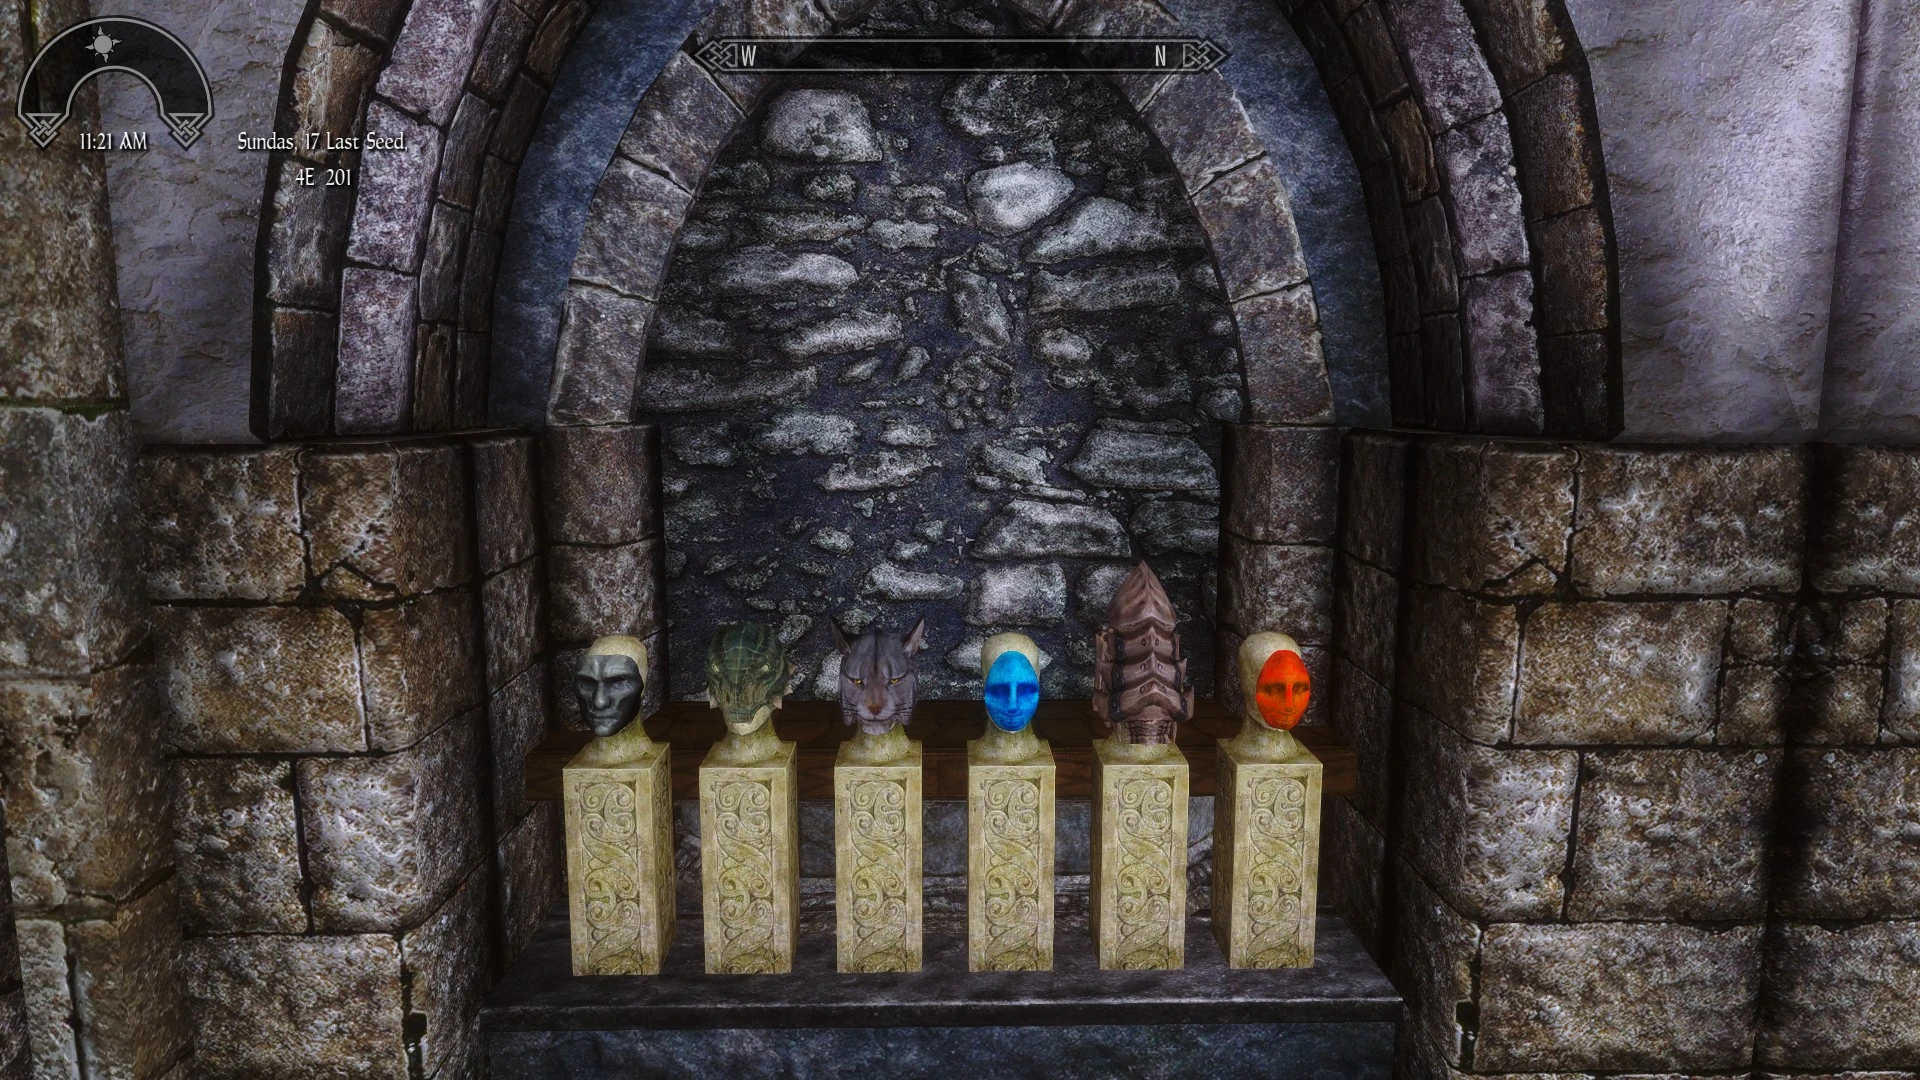
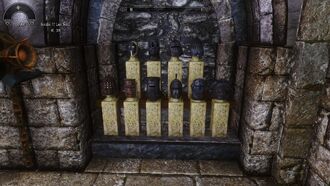
Below is a list of all displays in the room, starting from the left. |
Below is a list of all displays in the room, starting from the left. |
||
| − | == |
+ | ==Left side== |
[[File:Mad_Masker_1st_Masks_Display.jpg|thumb|330px|1st Masks Display]] |
[[File:Mad_Masker_1st_Masks_Display.jpg|thumb|330px|1st Masks Display]] |
||
| − | {| border="1" cellpadding="1" cellspacing="1" class="article-table" style="width: |
+ | {| border="1" cellpadding="1" cellspacing="1" class="article-table" style="width: 400px;" |
|- |
|- |
||
! scope="col"| |
! scope="col"| |
||
====1st Masks and Helms Display==== |
====1st Masks and Helms Display==== |
||
| − | ! scope="col"|Location |
||
|- |
|- |
||
|[[Akaviri Death Mask]] |
|[[Akaviri Death Mask]] |
||
| − | |{{:Akaviri Death Mask}} |
||
|- |
|- |
||
|[[Argonian Mask]] |
|[[Argonian Mask]] |
||
| − | |{{:Argonian Mask}} |
||
|- |
|- |
||
|[[Khajiit Mask]] |
|[[Khajiit Mask]] |
||
| − | |{{:Khajiit Mask}} |
||
|- |
|- |
||
|[[Blue Mask]] |
|[[Blue Mask]] |
||
| − | |{{:Blue Mask}} |
||
|- |
|- |
||
|[[Dragonbone Helm]] |
|[[Dragonbone Helm]] |
||
| − | |{{:Dragonbone Helm}} |
||
|- |
|- |
||
|[[Red Mask]] |
|[[Red Mask]] |
||
| − | |{{:Red Mask}} |
||
|} |
|} |
||
| + | |||
| + | {{Clrr}} |
||
<br /> |
<br /> |
||
[[File:Mad_Masker_2nd_Masks_Display.jpg|thumb|330px|2nd Masks Display]] |
[[File:Mad_Masker_2nd_Masks_Display.jpg|thumb|330px|2nd Masks Display]] |
||
| − | {| border="1" cellpadding="1" cellspacing="1" class="article-table" style="width: |
+ | {| border="1" cellpadding="1" cellspacing="1" class="article-table" style="width: 400px;" |
! scope="col"| |
! scope="col"| |
||
====2nd Masks and Helms Display==== |
====2nd Masks and Helms Display==== |
||
| − | ! scope="col"|Location |
||
|- |
|- |
||
|[[Ebony Chaplain Helm]] |
|[[Ebony Chaplain Helm]] |
||
| − | |{{:Ebony Chaplain Helm}} |
||
|- |
|- |
||
|[[Ebony Goggles]] |
|[[Ebony Goggles]] |
||
| − | |{{:Ebony Goggles}} |
||
|- |
|- |
||
|[[Ebony Cap]] |
|[[Ebony Cap]] |
||
| − | |{{:Ebony Cap}} |
||
|- |
|- |
||
|[[Ebony Masque]] |
|[[Ebony Masque]] |
||
| − | |{{:Ebony Masque}} |
||
|- |
|- |
||
|[[Ebony Knight Helmet]] |
|[[Ebony Knight Helmet]] |
||
| − | |{{:Ebony Knight Helmet}} |
||
|- |
|- |
||
|[[Ebony Vinland Helm]] |
|[[Ebony Vinland Helm]] |
||
| − | |{{:Ebony Vinland Helm}} |
||
|- |
|- |
||
|[[Ebony Helm]] |
|[[Ebony Helm]] |
||
| − | |{{:Ebony Helm}} |
||
|} |
|} |
||
| + | |||
| + | {{Clrr}} |
||
<br /> |
<br /> |
||
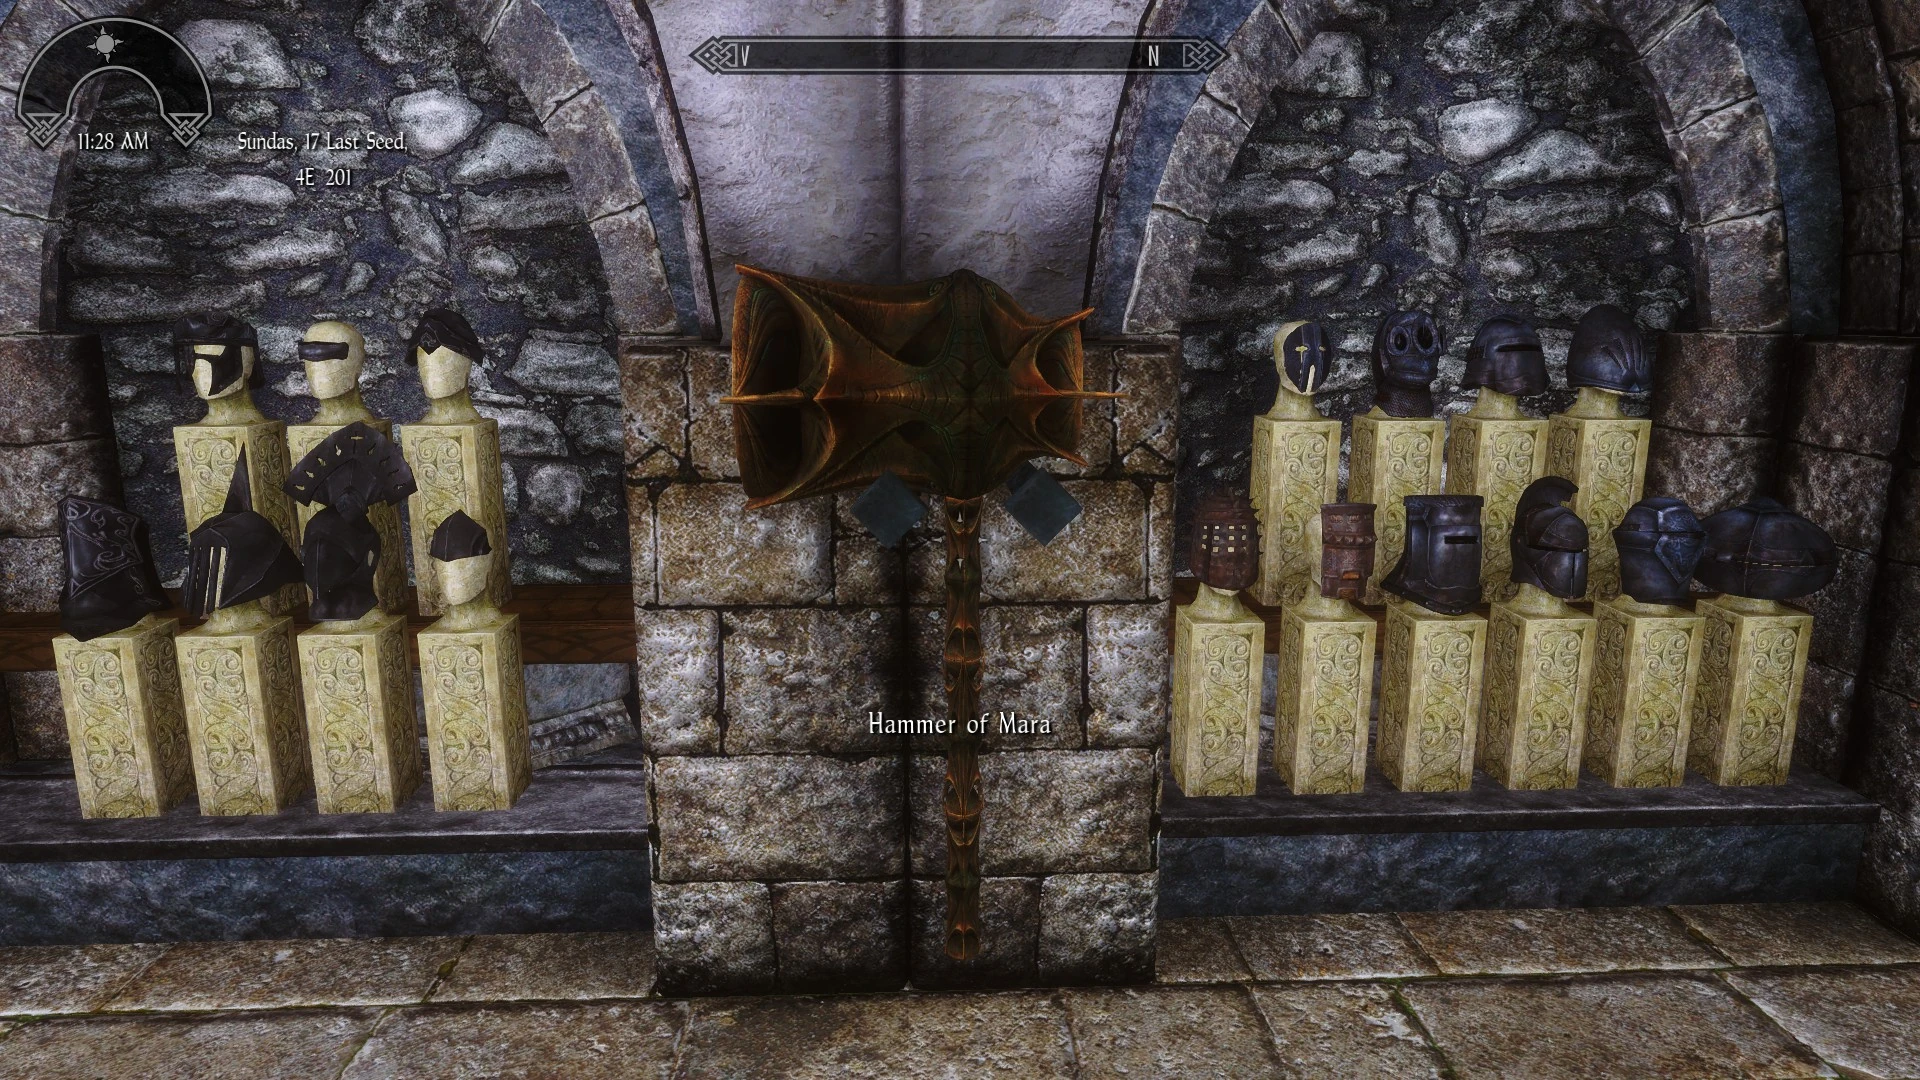
[[File:Mad_Masker_Hammer_of_Mara.jpg|thumb|330px|Hammer of Mara]] |
[[File:Mad_Masker_Hammer_of_Mara.jpg|thumb|330px|Hammer of Mara]] |
||
| − | {| border="1" cellpadding="1" cellspacing="1" class="article-table" style="width: |
+ | {| border="1" cellpadding="1" cellspacing="1" class="article-table" style="width: 400px;" |
|- |
|- |
||
! scope="col"| |
! scope="col"| |
||
====Hammer of Platonic Love Display==== |
====Hammer of Platonic Love Display==== |
||
| − | ! scope="col"|Location |
||
|- |
|- |
||
|[[Hammer of Mara]] |
|[[Hammer of Mara]] |
||
| − | |{{:Hammer of Platonic Love}} |
||
|} |
|} |
||
| + | |||
| + | {{Clrr}} |
||
<br /> |
<br /> |
||
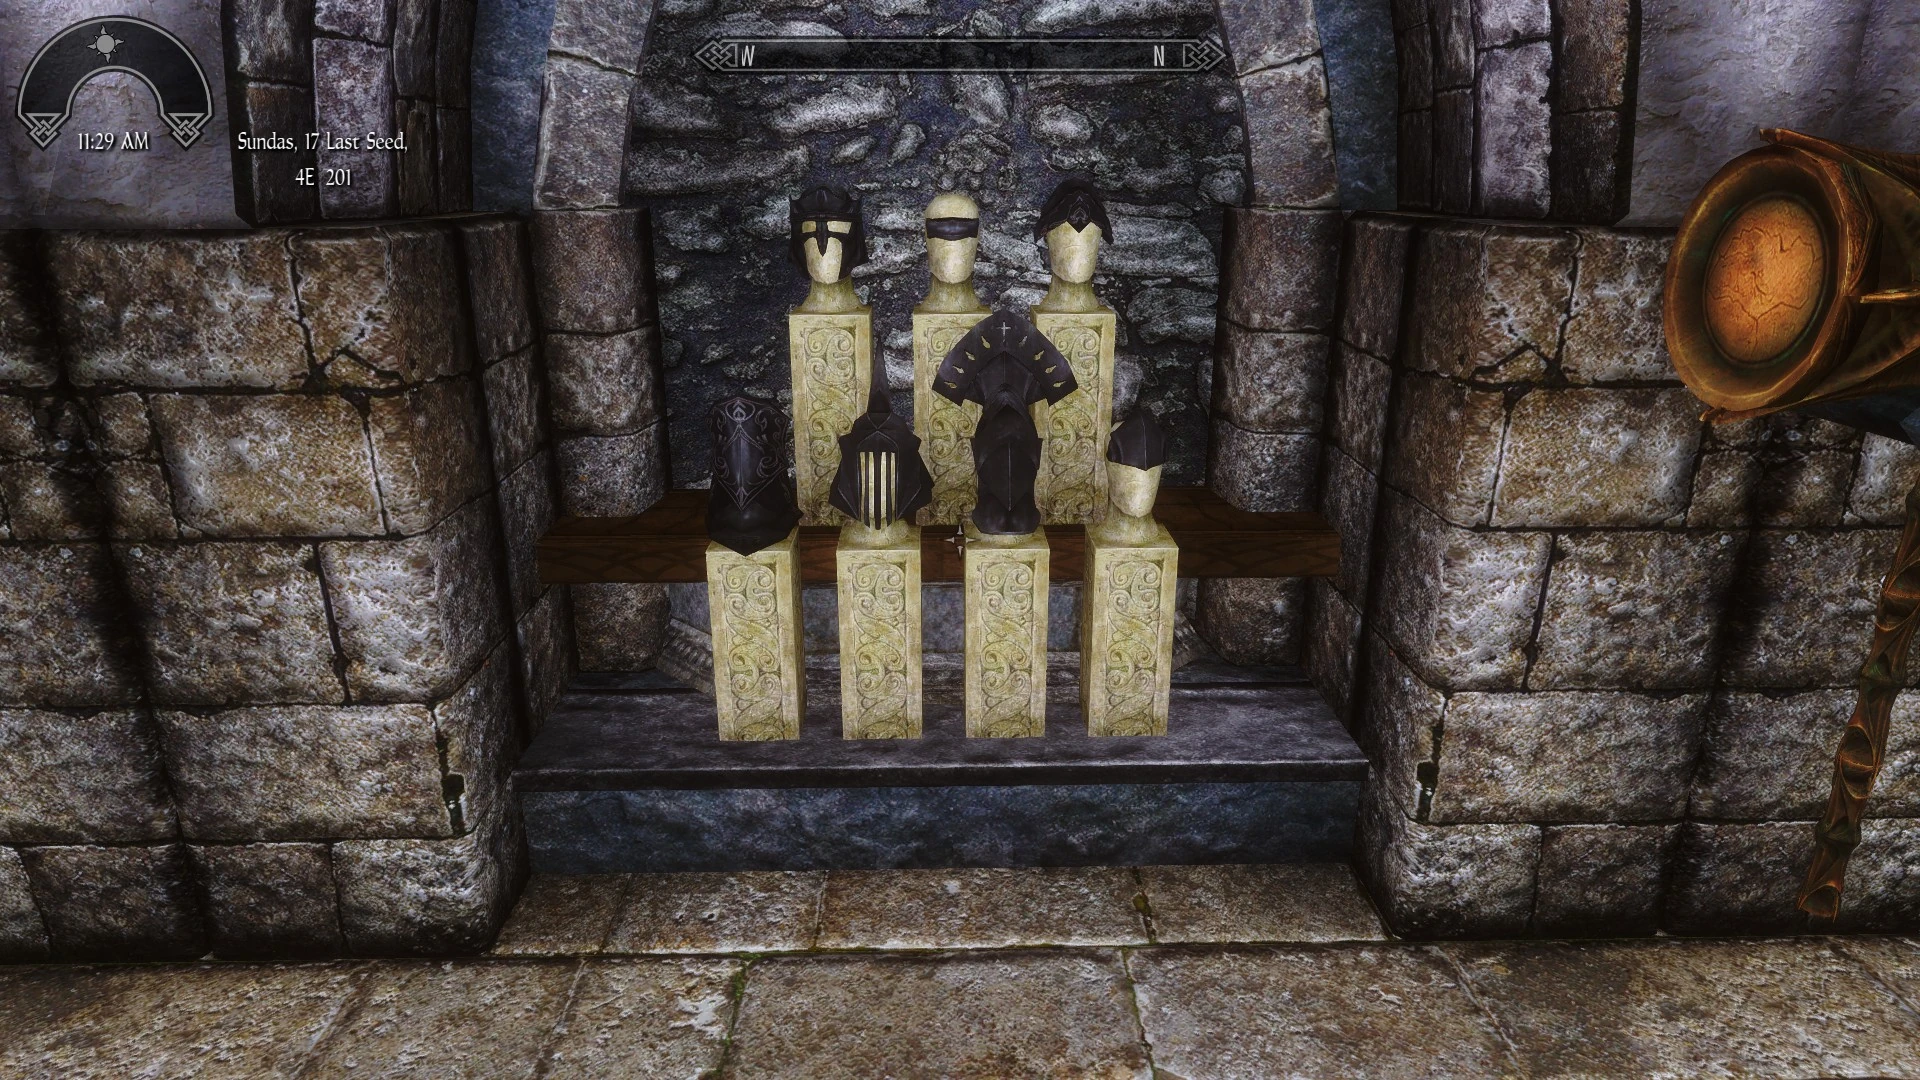
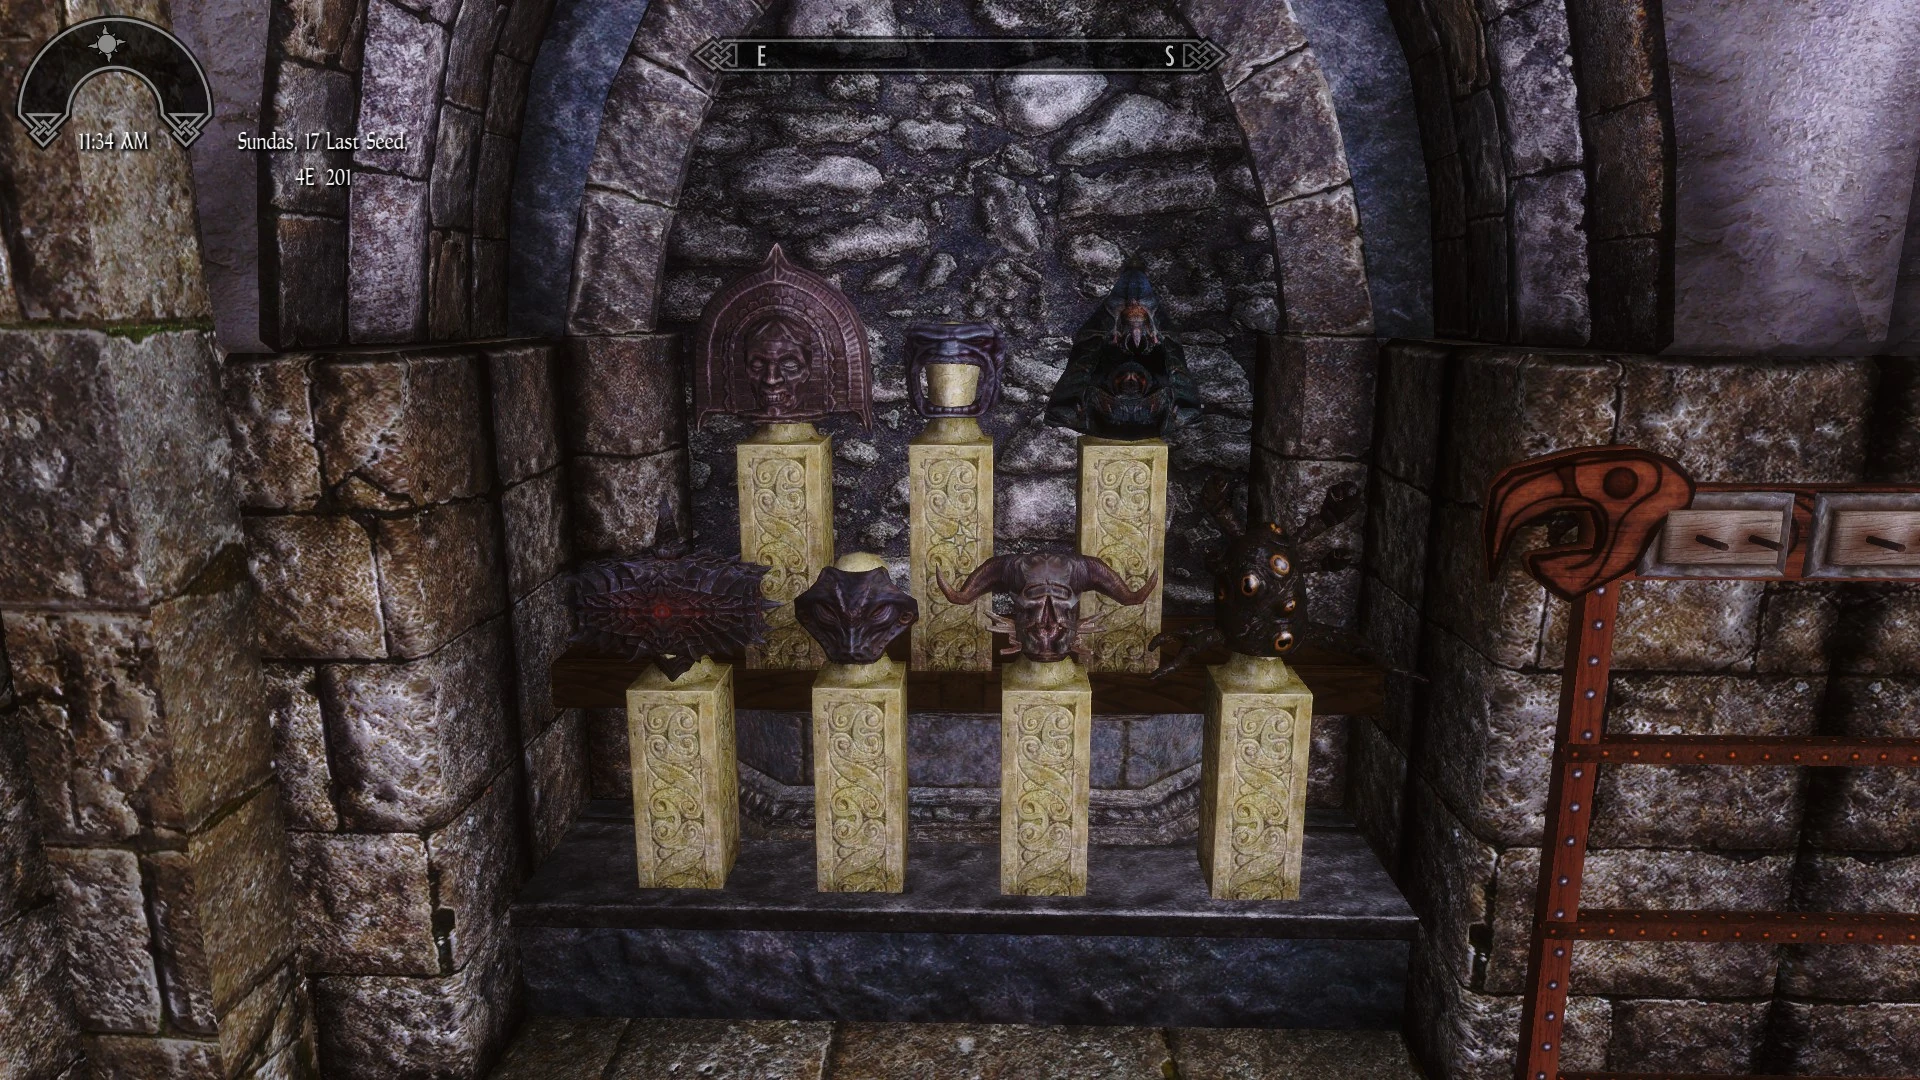
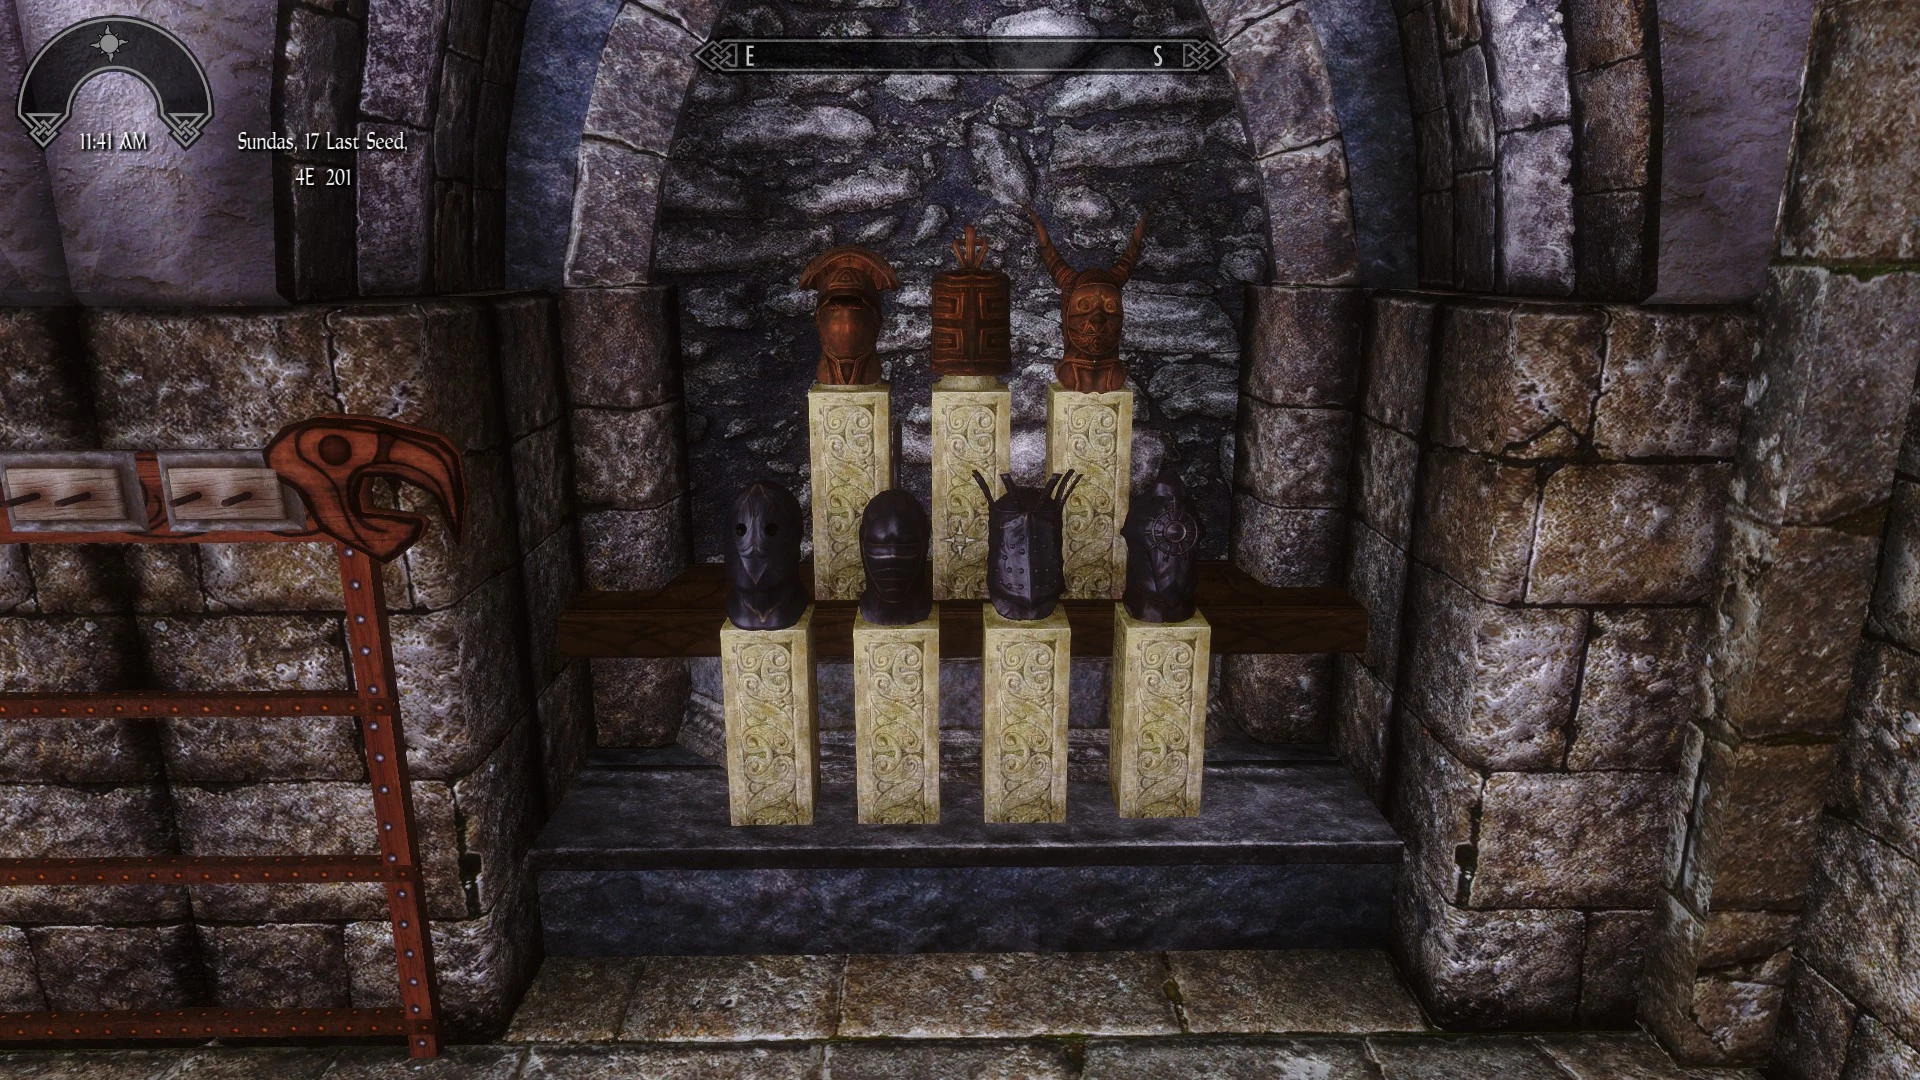
[[File:Mad_Masker_3rd_Masks_Display.jpg|thumb|330px|3rd Masks Display]] |
[[File:Mad_Masker_3rd_Masks_Display.jpg|thumb|330px|3rd Masks Display]] |
||
| − | {| border="1" cellpadding="1" cellspacing="1" class="article-table" style="width: |
+ | {| border="1" cellpadding="1" cellspacing="1" class="article-table" style="width: 400px;" |
! scope="col"| |
! scope="col"| |
||
====3rd Masks and Helms Display==== |
====3rd Masks and Helms Display==== |
||
| − | ! scope="col"|Location |
||
|- |
|- |
||
|[[Steel Mask]] |
|[[Steel Mask]] |
||
| − | |{{:Steel Mask}} |
||
|- |
|- |
||
|[[Steel Oktavia Helm]] |
|[[Steel Oktavia Helm]] |
||
| − | |{{:Steel Oktavia Helm}} |
||
|- |
|- |
||
|[[Steel Swordman Helm]] |
|[[Steel Swordman Helm]] |
||
| − | |{{:Steel Swordman Helm}} |
||
|- |
|- |
||
|[[Steel Tolmekian Helm]] |
|[[Steel Tolmekian Helm]] |
||
| − | |{{:Steel Tolmekian Helm}} |
||
|- |
|- |
||
|[[Helm of Thorn]] |
|[[Helm of Thorn]] |
||
| − | |{{:Helm of Thorn}} |
||
|- |
|- |
||
|[[Welder's Helm]] |
|[[Welder's Helm]] |
||
| − | |{{:Welder's Helm}} |
||
|- |
|- |
||
|[[Steel Bucket Helm]] |
|[[Steel Bucket Helm]] |
||
| − | |{{:Steel Bucket Helm}} |
||
|- |
|- |
||
|[[Steel Faraam Helm]] |
|[[Steel Faraam Helm]] |
||
| − | |{{:Steel Faraam Helm}} |
||
|- |
|- |
||
|[[Steel Frog-mouth Helm]] |
|[[Steel Frog-mouth Helm]] |
||
| − | |{{:Steel Frog-mouth Helm}} |
||
|- |
|- |
||
|[[Steel Katarina Helm]] |
|[[Steel Katarina Helm]] |
||
| − | |{{:Steel Katarina Helm}} |
||
|} |
|} |
||
| + | |||
| + | {{Clrr}} |
||
<br /> |
<br /> |
||
[[File:Mad_Masker_Mannequin_Display.jpg|thumb|330px|Mannequin Display]] |
[[File:Mad_Masker_Mannequin_Display.jpg|thumb|330px|Mannequin Display]] |
||
| − | === |
+ | ===Mannequin Display=== |
| − | {| border="1" cellpadding="1" cellspacing="1" class="article-table" style="width: |
+ | {| border="1" cellpadding="1" cellspacing="1" class="article-table" style="width: 400px;" |
! scope="col"| |
! scope="col"| |
||
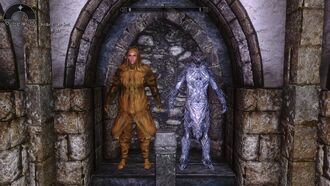
====Love Mannequin==== |
====Love Mannequin==== |
||
| − | ! scope="col"|Location |
||
|- |
|- |
||
| − | |[[Masque of Mara]] or [[Mara's Hood]] |
+ | |[[Masque of Mara]] '''or''' [[Mara's Hood]] |
| − | |{{:Masque of Mara}} |
||
|- |
|- |
||
|[[Mara Armor]] |
|[[Mara Armor]] |
||
| − | |{{:Mara Armor}} |
||
|- |
|- |
||
|[[Mara Boots]] |
|[[Mara Boots]] |
||
| − | |{{:Mara Boots}} |
||
|- |
|- |
||
|[[Mara Gauntlets]] |
|[[Mara Gauntlets]] |
||
| − | |{{:Mara Gauntlets}} |
||
|} |
|} |
||
| + | |||
| + | {{Clrr}} |
||
<br /> |
<br /> |
||
| − | {| border="1" cellpadding="1" cellspacing="1" class="article-table" style="width: |
+ | {| border="1" cellpadding="1" cellspacing="1" class="article-table" style="width: 400px;" |
|- |
|- |
||
! scope="col"| |
! scope="col"| |
||
====Hate Mannequin==== |
====Hate Mannequin==== |
||
| − | ! scope="col"|Location |
||
|- |
|- |
||
|[[Masque of Molag Bal]] |
|[[Masque of Molag Bal]] |
||
| − | |{{:Masque of Molag Bal}} |
||
|- |
|- |
||
|[[Molag Bal Armor]] |
|[[Molag Bal Armor]] |
||
| − | |{{:Molag Bal Armor}} |
||
|- |
|- |
||
|[[Molag Bal Boots]] |
|[[Molag Bal Boots]] |
||
| − | |{{:Molag Bal Boots}} |
||
|- |
|- |
||
|[[Molag Bal Gauntlets]] |
|[[Molag Bal Gauntlets]] |
||
| − | |{{:Molag Bal Gauntlets}} |
||
|} |
|} |
||
| + | |||
| + | {{Clrr}} |
||
<br /> |
<br /> |
||
| ⚫ | |||
| ⚫ | |||
| ⚫ | |||
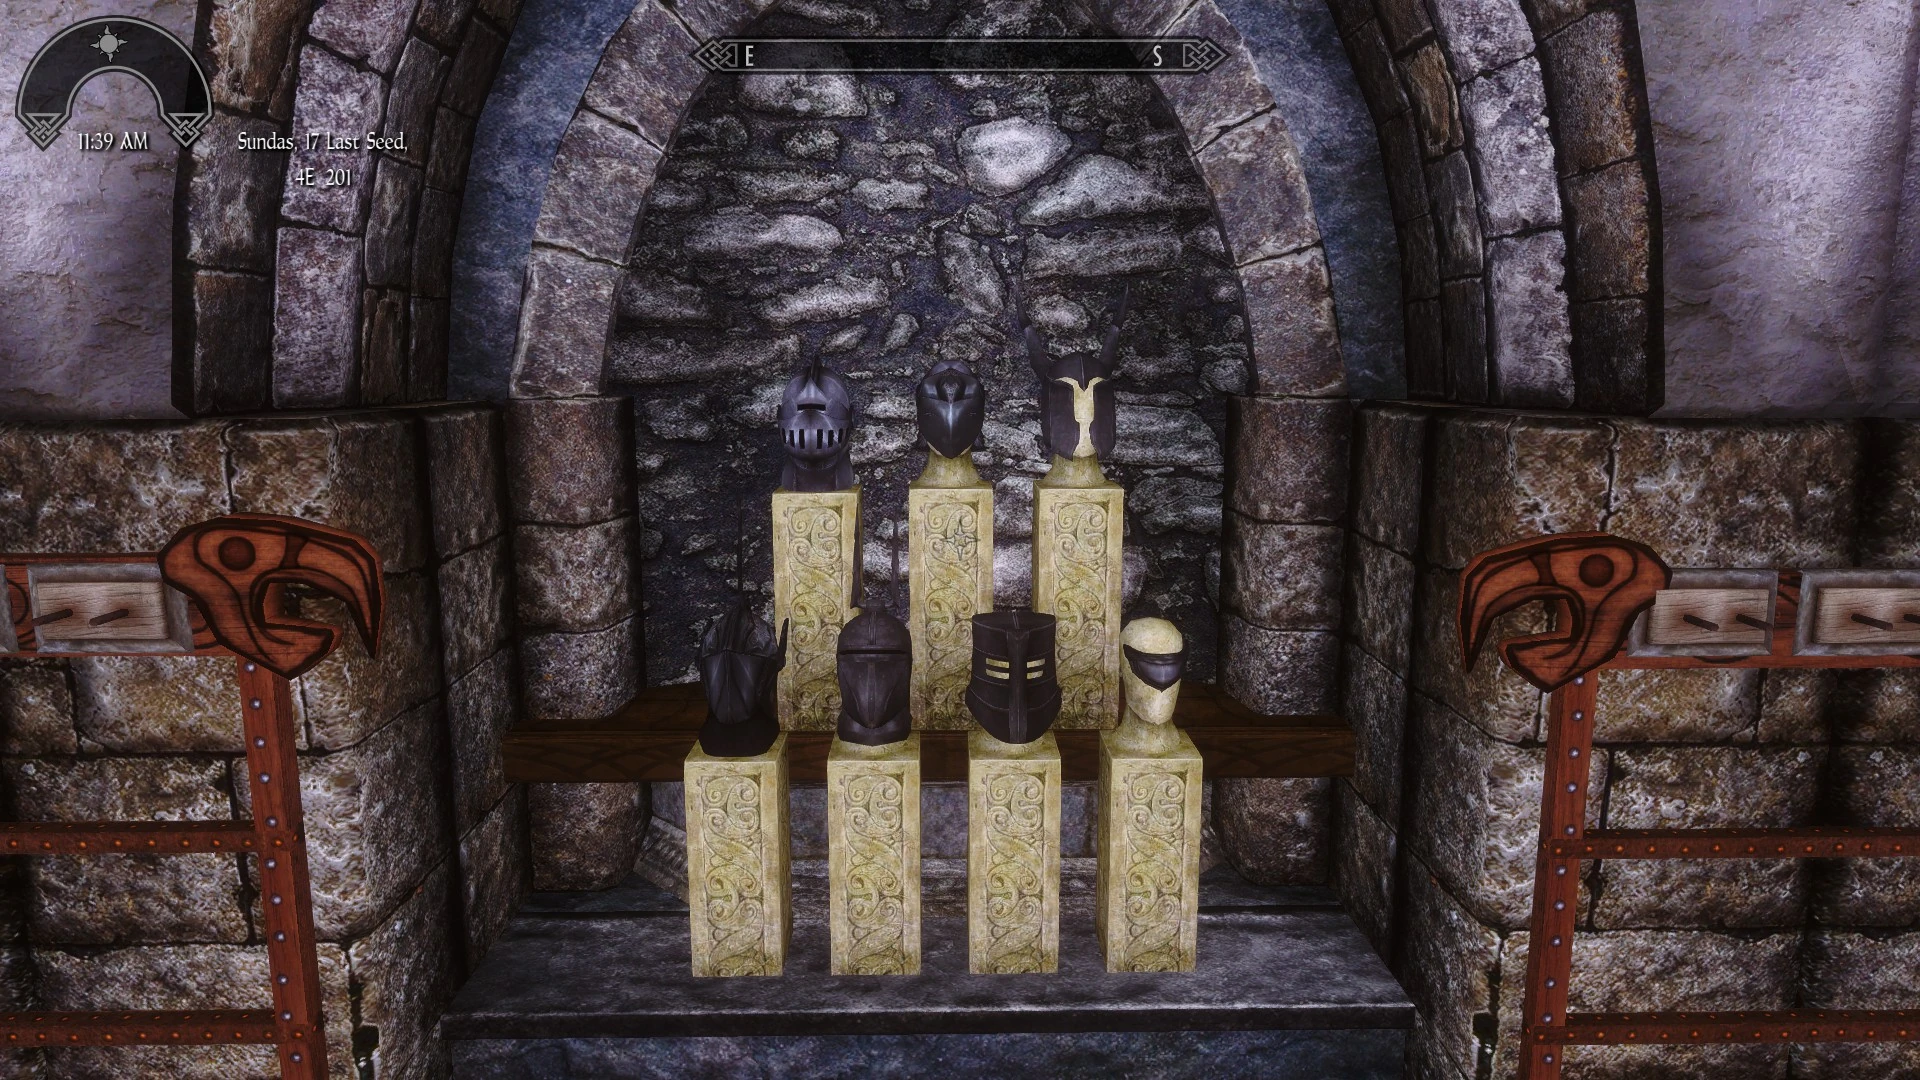
[[File:Mad_Masker_4th_Masks_Display.jpg|thumb|330px|4th Masks Display]] |
[[File:Mad_Masker_4th_Masks_Display.jpg|thumb|330px|4th Masks Display]] |
||
| − | {| border="1" cellpadding="1" cellspacing="1" class="article-table" style="width: |
+ | {| border="1" cellpadding="1" cellspacing="1" class="article-table" style="width: 400px;" |
! scope="col"| |
! scope="col"| |
||
====4th Masks and Helms Display==== |
====4th Masks and Helms Display==== |
||
| − | ! scope="col"|Location |
||
|- |
|- |
||
|[[Masque of the Night Mother]] |
|[[Masque of the Night Mother]] |
||
| − | |{{:Masque of the Night Mother}} |
||
|- |
|- |
||
|[[Masque of Sheogorath]] |
|[[Masque of Sheogorath]] |
||
| − | |{{:Masque of Sheogorath}} |
||
|- |
|- |
||
|[[Masque of Namira]] |
|[[Masque of Namira]] |
||
| − | |{{:Masque of Namira}} |
||
|- |
|- |
||
|[[Malacath Visor]] |
|[[Malacath Visor]] |
||
| − | |{{:Malacath Visor}} |
||
|- |
|- |
||
|[[Hircine Ritual Mask]] |
|[[Hircine Ritual Mask]] |
||
| − | |{{:Hircine Ritual Mask}} |
||
|- |
|- |
||
|[[Masque of Vaermina]] |
|[[Masque of Vaermina]] |
||
| − | |{{:Masque of Vaermina}} |
||
|- |
|- |
||
|[[Masque of Hermaeus Mora]] |
|[[Masque of Hermaeus Mora]] |
||
| − | |{{:Masque of Hermaeus Mora}} |
||
|} |
|} |
||
| + | |||
| + | {{Clrr}} |
||
<br /> |
<br /> |
||
| − | [[File: |
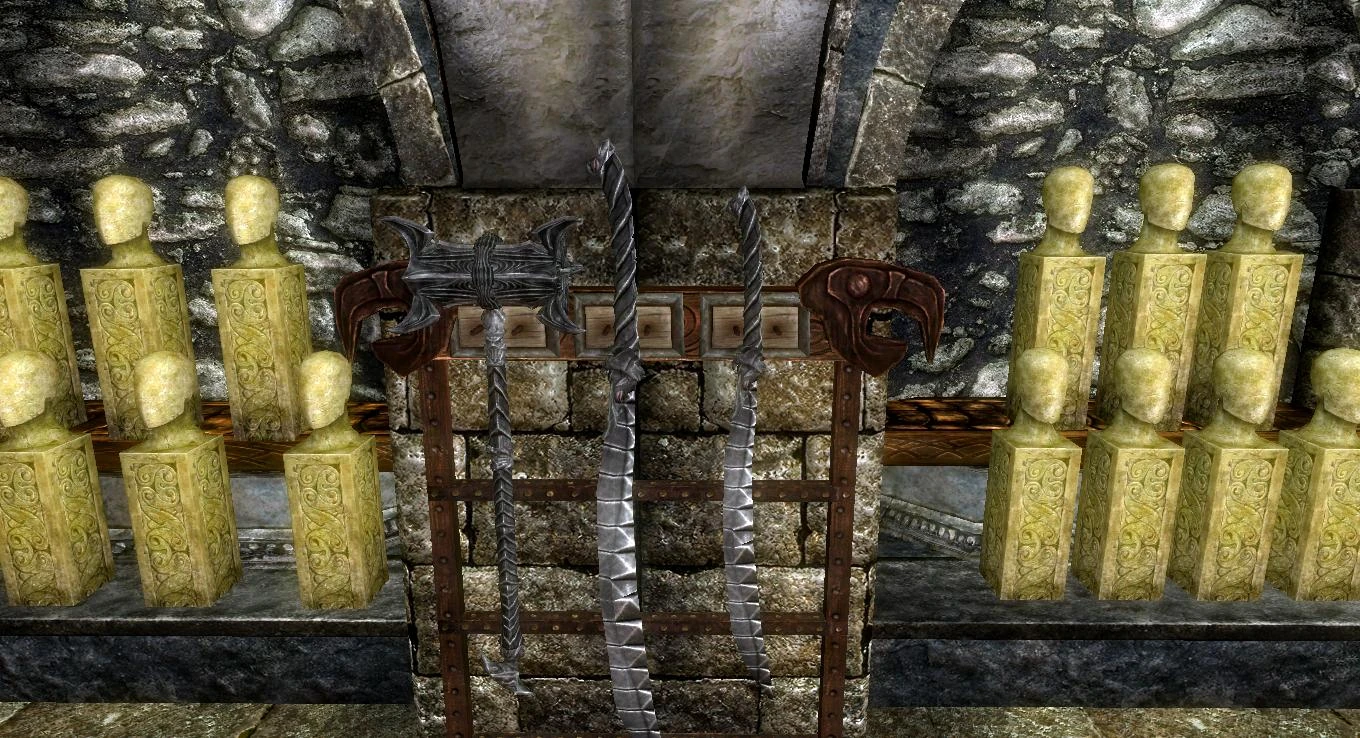
+ | [[File:TESV 2017-02-05 18-14-16-69.jpg|thumb|330px|1st Weapons Display]] |
| − | {| border="1" cellpadding="1" cellspacing="1" class="article-table" style="width: |
+ | {| border="1" cellpadding="1" cellspacing="1" class="article-table" style="width: 400px;" |
! scope="col"| |
! scope="col"| |
||
====1st Weapons Display==== |
====1st Weapons Display==== |
||
| − | ! scope="col"|Location |
||
|- |
|- |
||
|[[Warhammer of Blood Curse]] |
|[[Warhammer of Blood Curse]] |
||
| − | |{{:Warhammer of Blood Curse}} |
||
|- |
|- |
||
|[[Greatsword of Blood Curse]] |
|[[Greatsword of Blood Curse]] |
||
| − | |{{:Greatsword of Blood Curse}} |
||
|- |
|- |
||
|[[Sword of Blood Curse]] |
|[[Sword of Blood Curse]] |
||
| − | |{{:Sword of Blood Curse}} |
||
|} |
|} |
||
| + | |||
| + | {{Clrr}} |
||
<br /> |
<br /> |
||
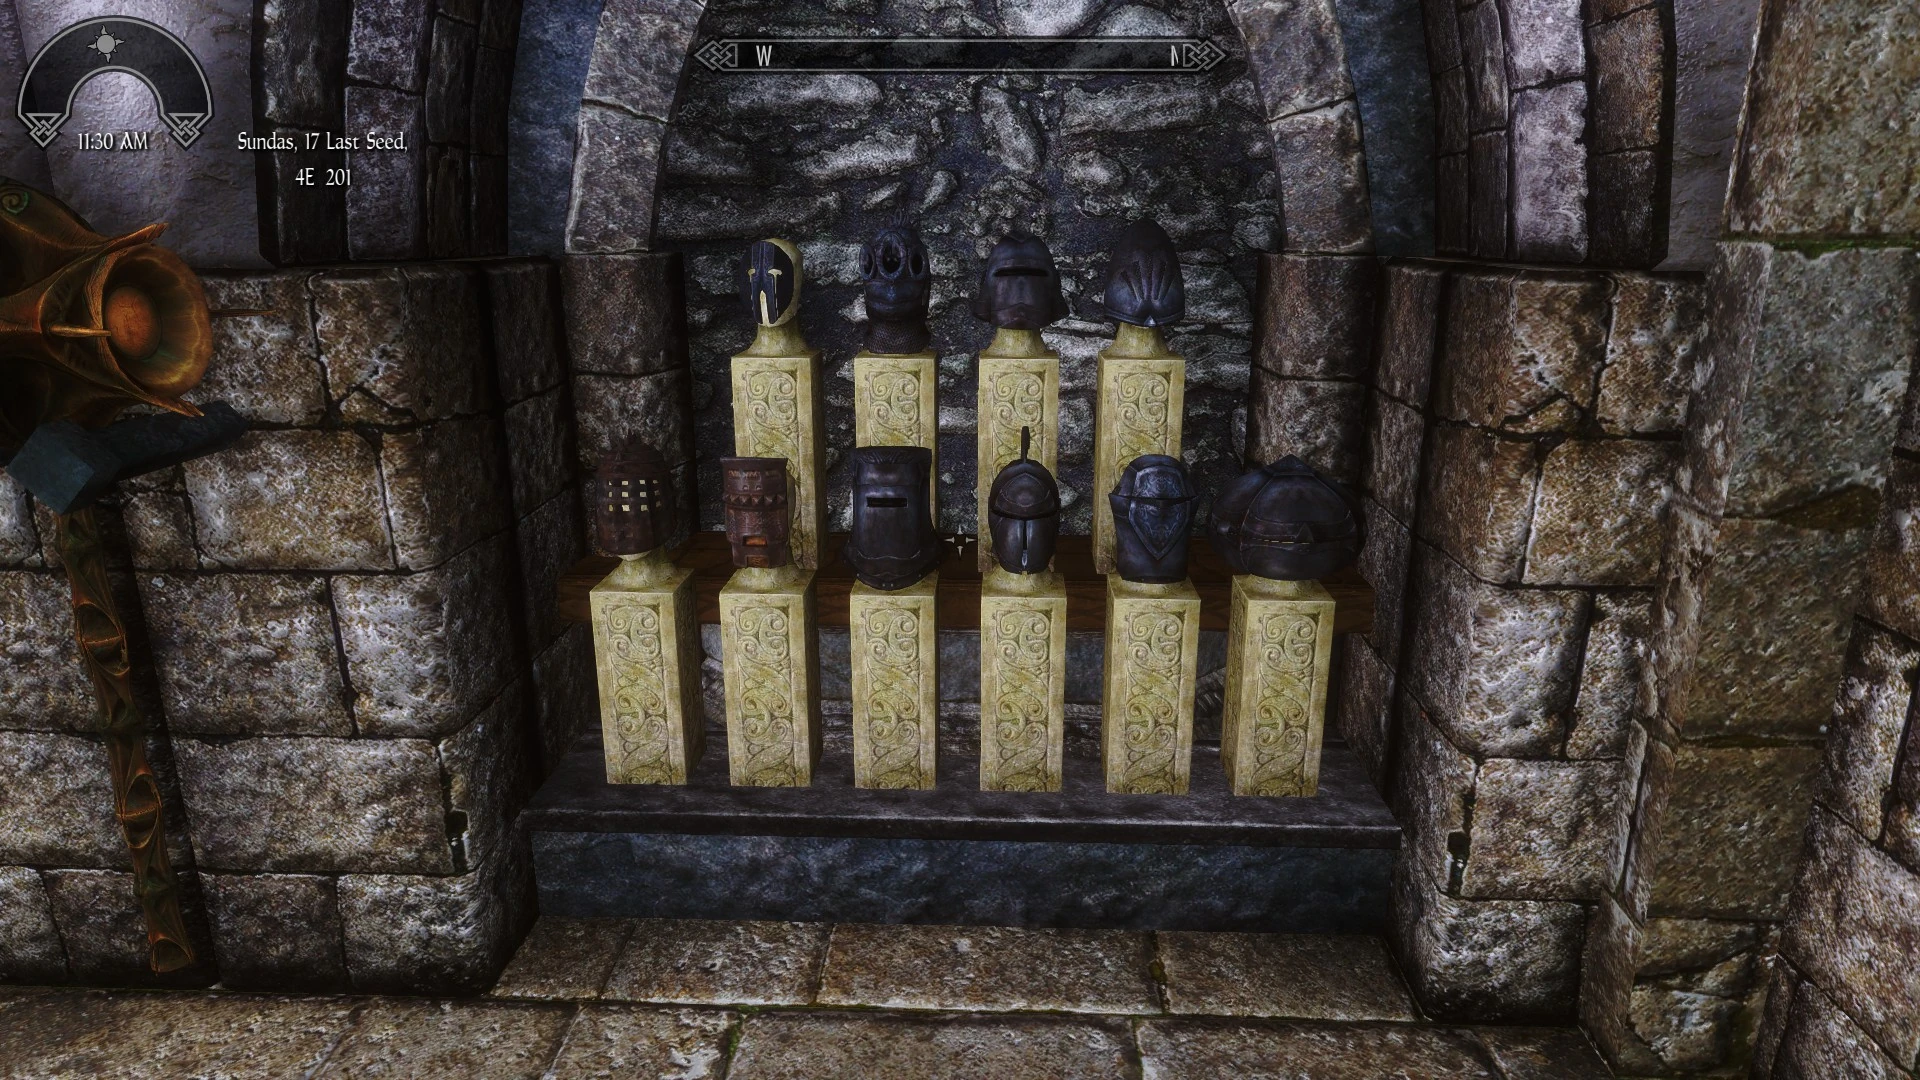
[[File:Mad_Masker_5th_Masks_Display.jpg|thumb|330px|5th Masks Display]] |
[[File:Mad_Masker_5th_Masks_Display.jpg|thumb|330px|5th Masks Display]] |
||
| − | {| border="1" cellpadding="1" cellspacing="1" class="article-table" style="width: |
+ | {| border="1" cellpadding="1" cellspacing="1" class="article-table" style="width: 400px;" |
! scope="col"| |
! scope="col"| |
||
====5th Masks and Helms Display==== |
====5th Masks and Helms Display==== |
||
| − | ! scope="col"|Location |
||
|- |
|- |
||
|[[Ebony Duck Helm]] |
|[[Ebony Duck Helm]] |
||
| − | |{{:Ebony Duck Helm}} |
||
|- |
|- |
||
|[[Ebony Aron Helm]] |
|[[Ebony Aron Helm]] |
||
| − | |{{:Ebony Aron Helm}} |
||
|- |
|- |
||
|[[Black Knight Helm]] |
|[[Black Knight Helm]] |
||
| − | |{{:Black Knight Helm}} |
||
|- |
|- |
||
|[[Ebony Northern Helm]] |
|[[Ebony Northern Helm]] |
||
| − | |{{:Ebony Northern Helm}} |
||
|- |
|- |
||
|[[Gloom Helm]] |
|[[Gloom Helm]] |
||
| − | |{{:Gloom Helm}} |
||
|- |
|- |
||
|[[Black Iron Helmet]] |
|[[Black Iron Helmet]] |
||
| − | |{{:Black Iron Helmet}} |
||
|- |
|- |
||
|[[Ebony Halfmask]] |
|[[Ebony Halfmask]] |
||
| − | |{{:Ebony Halfmask}} |
||
|} |
|} |
||
| + | |||
| + | {{Clrr}} |
||
<br /> |
<br /> |
||
| − | [[File: |
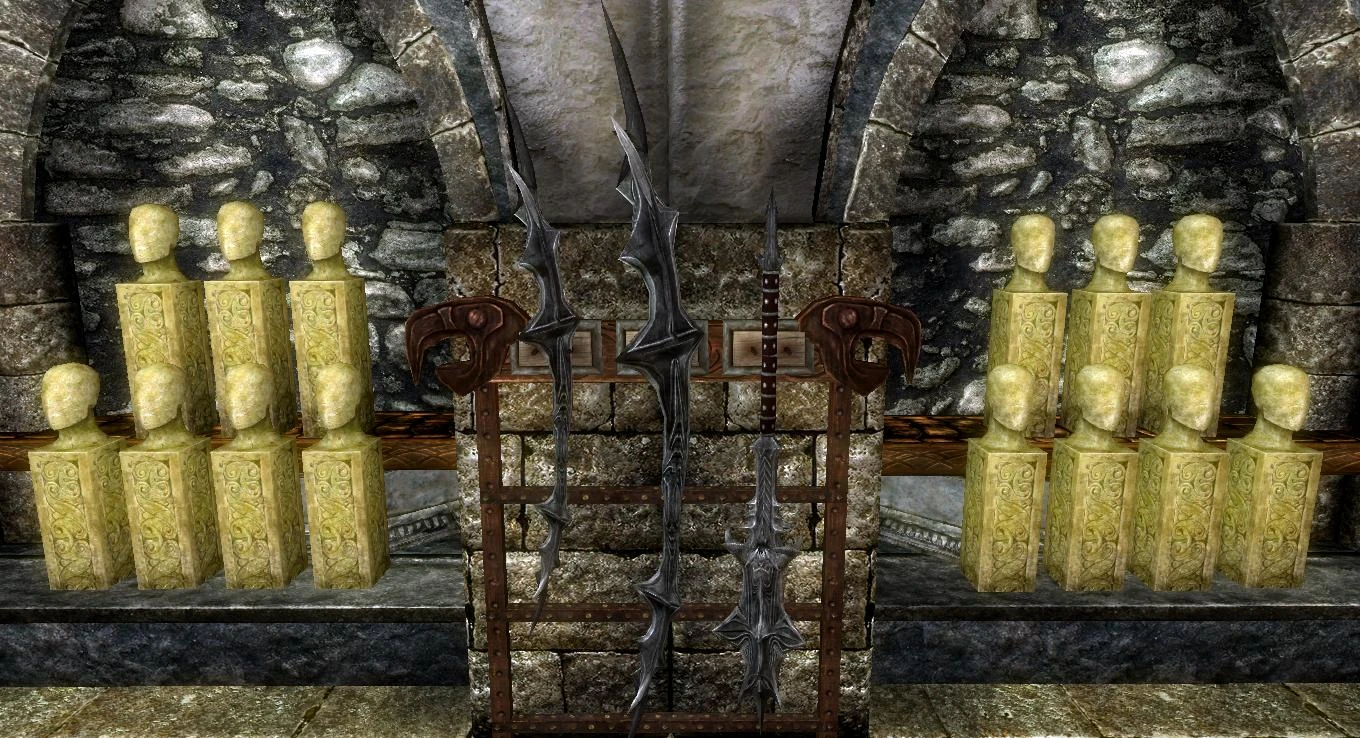
+ | [[File:TESV 2017-02-05 18-14-22-69.jpg|thumb|330px|2nd Weapons Display]] |
| − | {| border="1" cellpadding="1" cellspacing="1" class="article-table" style="width: |
+ | {| border="1" cellpadding="1" cellspacing="1" class="article-table" style="width: 400px;" |
! scope="col"| |
! scope="col"| |
||
====2nd Weapons Display==== |
====2nd Weapons Display==== |
||
| − | ! scope="col"|Location |
||
|- |
|- |
||
|[[Spike of Blood Curse]] |
|[[Spike of Blood Curse]] |
||
| − | |{{:Spike of Blood Curse}} |
||
|- |
|- |
||
|[[Greatspike of Blood Curse]] |
|[[Greatspike of Blood Curse]] |
||
| − | |{{:Greatspike of Blood Curse}} |
||
|- |
|- |
||
|[[Greatmace of Blood Curse]] |
|[[Greatmace of Blood Curse]] |
||
| − | |{{:Greatmace of Blood Curse}} |
||
|} |
|} |
||
| + | |||
| + | {{Clrr}} |
||
<br /> |
<br /> |
||
[[File:Mad_Masker_6th_Masks_Display.jpg|thumb|330px|6th Masks Display]] |
[[File:Mad_Masker_6th_Masks_Display.jpg|thumb|330px|6th Masks Display]] |
||
| − | {| border="1" cellpadding="1" cellspacing="1" class="article-table article-table-selected" style="width: |
+ | {| border="1" cellpadding="1" cellspacing="1" class="article-table article-table-selected" style="width: 400px;" |
! scope="col"| |
! scope="col"| |
||
====6th Masks Display==== |
====6th Masks Display==== |
||
| − | ! scope="col"|Location |
||
|- |
|- |
||
|[[Dwarven Guardian Helm]] |
|[[Dwarven Guardian Helm]] |
||
| − | |{{:Dwarven Guardian Helm}} |
||
|- |
|- |
||
|[[Dwarven Great Helm]] |
|[[Dwarven Great Helm]] |
||
| − | |{{:Dwarven Great Helm}} |
||
|- |
|- |
||
|[[Masque of Zenithar]] |
|[[Masque of Zenithar]] |
||
| − | |{{:Masque of Zenithar}} |
||
|- |
|- |
||
|[[Elven Mask]] |
|[[Elven Mask]] |
||
| − | |{{:Elven Mask}} |
||
|- |
|- |
||
|[[Elven Knight Helm]] |
|[[Elven Knight Helm]] |
||
| − | |{{:Elven Knight Helm}} |
||
|- |
|- |
||
|[[Elven Helm of Favor]] |
|[[Elven Helm of Favor]] |
||
| − | |{{:Elven Helm of Favor}} |
||
|- |
|- |
||
|[[Elven Helm of the Wheel]] |
|[[Elven Helm of the Wheel]] |
||
| − | |{{:Elven Helm of the Wheel}} |
||
|} |
|} |
||
| + | |||
| + | |||
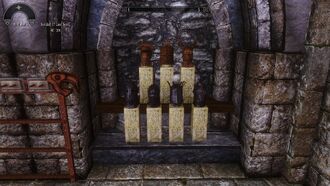
| + | ==SPOILER list - How to get all items== |
||
| ⚫ | |||
| + | |||
| + | <div class="mw-customtoggle-Spoiler_1 wikia-menu-button">Show Spoiler</div> |
||
| + | <div class="wikitable mw-collapsible mw-collapsed" id="mw-customcollapsible-Spoiler_1"> |
||
| + | <onlyinclude> |
||
| + | |||
| + | </onlyinclude> |
||
| + | </div> |
||
| + | {{Navbox gallery}} |
||
| + | [[ru:Комната Безумного Масочника]] |
||
[[Category:Hall of Oddities]] |
[[Category:Hall of Oddities]] |
||
[[Category:Gallery]] |
[[Category:Gallery]] |
||
Revision as of 13:28, 15 February 2020
The Mad Masker is no longer officially supported by Legacy, as the author, VICN, is no longer distributing it. The Legacy features will stay for those who already have the mod, but we can't link to the mod or share it.
If you have The Mad Masker mod and the Legacy patch for it loaded, this room will be added to the Hall of Oddities.
Only the leveled list version of the mod works with Legacy. You will not be able to display most of the items if you use the non-leveled list version.
All unenchanted versions of the items can be bought from The Mad Masker in Pelagius's Mind.
To get to Pelagius's Mind, you need to complete the quest 'The Mind of Madness' given to you by Dervenin in Solitude. The quest will require you to go to Pelagius' Wing in the Blue Palace. After quest completion, you will be able to return to Pelagius's Mind by equipping the Wabbajack and using Pelagius' Hip Bone when in the Blue Palace or Pelagius Wing. To get back to the door of the Blue Palace, use the bedroll inside Pelagius's Mind.
Below is a list of all displays in the room, starting from the left.
Left side
1st Masks Display
1st Masks and Helms Display |
|---|
| Akaviri Death Mask |
| Argonian Mask |
| Khajiit Mask |
| Blue Mask |
| Dragonbone Helm |
| Red Mask |
2nd Masks Display
2nd Masks and Helms Display |
|---|
| Ebony Chaplain Helm |
| Ebony Goggles |
| Ebony Cap |
| Ebony Masque |
| Ebony Knight Helmet |
| Ebony Vinland Helm |
| Ebony Helm |
Hammer of Mara
Hammer of Platonic Love Display |
|---|
| Hammer of Mara |
3rd Masks Display

Mannequin Display
Mannequin Display
Love Mannequin |
|---|
| Masque of Mara or Mara's Hood |
| Mara Armor |
| Mara Boots |
| Mara Gauntlets |
Hate Mannequin |
|---|
| Masque of Molag Bal |
| Molag Bal Armor |
| Molag Bal Boots |
| Molag Bal Gauntlets |
Right side
4th Masks Display
4th Masks and Helms Display |
|---|
| Masque of the Night Mother |
| Masque of Sheogorath |
| Masque of Namira |
| Malacath Visor |
| Hircine Ritual Mask |
| Masque of Vaermina |
| Masque of Hermaeus Mora |

1st Weapons Display
1st Weapons Display |
|---|
| Warhammer of Blood Curse |
| Greatsword of Blood Curse |
| Sword of Blood Curse |
5th Masks Display
5th Masks and Helms Display |
|---|
| Ebony Duck Helm |
| Ebony Aron Helm |
| Black Knight Helm |
| Ebony Northern Helm |
| Gloom Helm |
| Black Iron Helmet |
| Ebony Halfmask |

2nd Weapons Display
2nd Weapons Display |
|---|
| Spike of Blood Curse |
| Greatspike of Blood Curse |
| Greatmace of Blood Curse |
6th Masks Display
6th Masks Display |
|---|
| Dwarven Guardian Helm |
| Dwarven Great Helm |
| Masque of Zenithar |
| Elven Mask |
| Elven Knight Helm |
| Elven Helm of Favor |
| Elven Helm of the Wheel |
SPOILER list - How to get all items
| ||||||||||||||||||||||||||||||||||||||||||