mNo edit summary |
No edit summary |
||
| (33 intermediate revisions by 3 users not shown) | |||
| Line 1: | Line 1: | ||
{{Museum Gallery |
{{Museum Gallery |
||
| − | |image1= |
+ | |image1=Gallery_of_Natural_Science.jpg |
|mod= |
|mod= |
||
|displays= |
|displays= |
||
| Line 7: | Line 7: | ||
}} |
}} |
||
<gallery type="slideshow"> |
<gallery type="slideshow"> |
||
| + | Gallery_of_Natural_Science_1.jpg |
||
| − | Image_needed.jpg |
||
| + | Gallery_of_Natural_Science_2.jpg |
||
| − | Image_needed.jpg |
||
| + | Gallery_of_Natural_Science_3.jpg |
||
| − | Chaurus.jpg |
||
| + | Gallery_of_Natural_Science_4.jpg |
||
| − | Bugs.jpg |
||
| + | Gallery_of_Natural_Science_5.jpg |
||
| − | Wolf.jpg |
||
| + | Gallery_of_Natural_Science_6.jpg |
||
| + | Gallery_of_Natural_Science_7.jpg |
||
| + | Gallery_of_Natural_Science_8.jpg |
||
</gallery> |
</gallery> |
||
__NOEDITSECTION__ |
__NOEDITSECTION__ |
||
The [[Gallery of Natural Science]] is the part of the museum that covers the rich flora, fauna and minerals Skyrim has. Its entrance is in the [[Main Gallery]] in the same wing as the [[Hall of Oddities]]. Instead of going straight to the Oddities Room, you have to turn to the right and go downstairs. Along the stairs there about 12 paintings spots. |
The [[Gallery of Natural Science]] is the part of the museum that covers the rich flora, fauna and minerals Skyrim has. Its entrance is in the [[Main Gallery]] in the same wing as the [[Hall of Oddities]]. Instead of going straight to the Oddities Room, you have to turn to the right and go downstairs. Along the stairs there about 12 paintings spots. |
||
| − | The [[Gallery of Natural Science]] features buildable static displays. |
+ | The [[Gallery of Natural Science]] features buildable static displays. There is also a Gemstone display and Tidal Pool display for seashells. |
There are additional displays if the mods {{Abb|BGCF}} and/or {{Nexus|mod|63537|BadGremlins Something Fishy}} are installed. |
There are additional displays if the mods {{Abb|BGCF}} and/or {{Nexus|mod|63537|BadGremlins Something Fishy}} are installed. |
||
When the {{Nexus|mod|84307|Fossil Mining}} mod is installed, a new [[Fossil Mining Room]] below the natural science gallery becomes available for displaying the fossils. The door to the room can be found by the supplies cabinet in one end of the gallery. |
When the {{Nexus|mod|84307|Fossil Mining}} mod is installed, a new [[Fossil Mining Room]] below the natural science gallery becomes available for displaying the fossils. The door to the room can be found by the supplies cabinet in one end of the gallery. |
||
| Line 23: | Line 26: | ||
==Flora Exhibit== |
==Flora Exhibit== |
||
| − | [[File: |
+ | [[File:Flora_Display.jpg|thumb|380px]] |
This display is a interactive representation of the flora that can be found in Skyrim. It works with a regular fertile soil system like the Hearthfire DLC provides. |
This display is a interactive representation of the flora that can be found in Skyrim. It works with a regular fertile soil system like the Hearthfire DLC provides. |
||
| − | Additionally this display is home to {{Abb|BGCF}} if the mod is installed. |
+ | Additionally, this display is home to the fairies from {{Abb|BGCF}}, if the mod is installed. |
{{Clrr}} |
{{Clrr}} |
||
===Fairy Shelves=== |
===Fairy Shelves=== |
||
| − | [[File: |
+ | [[File:Free_Fairies.jpg|thumb|380px]] |
With {{Nexus|mod|62340|BadGremlins Captured Fairies}} installed, shelves will be activated in the [[Gallery of Natural Science]] whereupon you can place the fairy cages. When they are placed, they will become empty (except for a few fairies) as the fairies reclaim their freedom in the [[Gallery of Natural Science#Flora display|Flora display]]. The map with the locations of all the fairies that comes with the mod can be found by {{Wiki|Crabber's_Shanty|Crabber's Shanty}}. |
With {{Nexus|mod|62340|BadGremlins Captured Fairies}} installed, shelves will be activated in the [[Gallery of Natural Science]] whereupon you can place the fairy cages. When they are placed, they will become empty (except for a few fairies) as the fairies reclaim their freedom in the [[Gallery of Natural Science#Flora display|Flora display]]. The map with the locations of all the fairies that comes with the mod can be found by {{Wiki|Crabber's_Shanty|Crabber's Shanty}}. |
||
Below is a list of all the captured fairies displays. The list goes from left to right, top to bottom. |
Below is a list of all the captured fairies displays. The list goes from left to right, top to bottom. |
||
{| style="width: 800px;" class="article-table" border="1" cellpadding="1" cellspacing="1" |
{| style="width: 800px;" class="article-table" border="1" cellpadding="1" cellspacing="1" |
||
| ⚫ | |||
| + | | scope="col" colspan="6" |[[File:Fairy_Display.jpg|center|380px]] |
||
|- |
|- |
||
| scope="col" colspan="6" |'''Fairies''' |
| scope="col" colspan="6" |'''Fairies''' |
||
| Line 42: | Line 47: | ||
|Fairy Cage 2:<br />[[Fairy 14]] |
|Fairy Cage 2:<br />[[Fairy 14]] |
||
|Fairy Cage 3:<br />[[Fairy 03]] |
|Fairy Cage 3:<br />[[Fairy 03]] |
||
| − | | |
+ | |[[Goth Fairy]] |
| − | | |
+ | |[[Zelda's Fairy]] |
| − | | |
+ | |[[Tinker Fairy]] |
|- |
|- |
||
| colspan="6" |'''2nd row''' |
| colspan="6" |'''2nd row''' |
||
| Line 51: | Line 56: | ||
|Fairy Cage 5:<br />[[Fairy 05]] |
|Fairy Cage 5:<br />[[Fairy 05]] |
||
|Fairy Cage 6:<br />[[Fairy 06]] |
|Fairy Cage 6:<br />[[Fairy 06]] |
||
| − | | |
+ | |[[Great Fairy]] |
| − | |Fairy Cage |
+ | |Fairy Cage 11:<br />[[Fairy 12]] |
| − | |Fairy Cage |
+ | |Fairy Cage 12:<br />[[Fairy 11]] |
|- |
|- |
||
| colspan="6" |'''3rd row''' |
| colspan="6" |'''3rd row''' |
||
| Line 60: | Line 65: | ||
|Fairy Cage 8:<br />[[Fairy 08]] |
|Fairy Cage 8:<br />[[Fairy 08]] |
||
|Fairy Cage 9:<br />[[Fairy 09]] |
|Fairy Cage 9:<br />[[Fairy 09]] |
||
| − | |Fairy Cage |
+ | |Fairy Cage 13:<br />[[Fairy 15]] |
| − | |Fairy Cage |
+ | |Fairy Cage 14:<br />[[Fairy 10]] |
| − | |Fairy Cage |
+ | |Fairy Cage 15:<br />[[Fairy 13]] |
|- |
|- |
||
| colspan="6" |'''4th row''' |
| colspan="6" |'''4th row''' |
||
|- |
|- |
||
| − | | |
+ | |[[Rotting Fairy]] |
| − | | |
+ | |[[Dead Fairy (Captured Fairies)|Dead Fairy]] |
| − | |Fairy Cage |
+ | |Fairy Cage 10:<br />[[Fairy 02]] |
| − | | |
+ | |[[Hag Fairy]] |
| |
| |
||
| |
| |
||
| Line 75: | Line 80: | ||
{{Clrr}} |
{{Clrr}} |
||
| − | ==Chaurus |
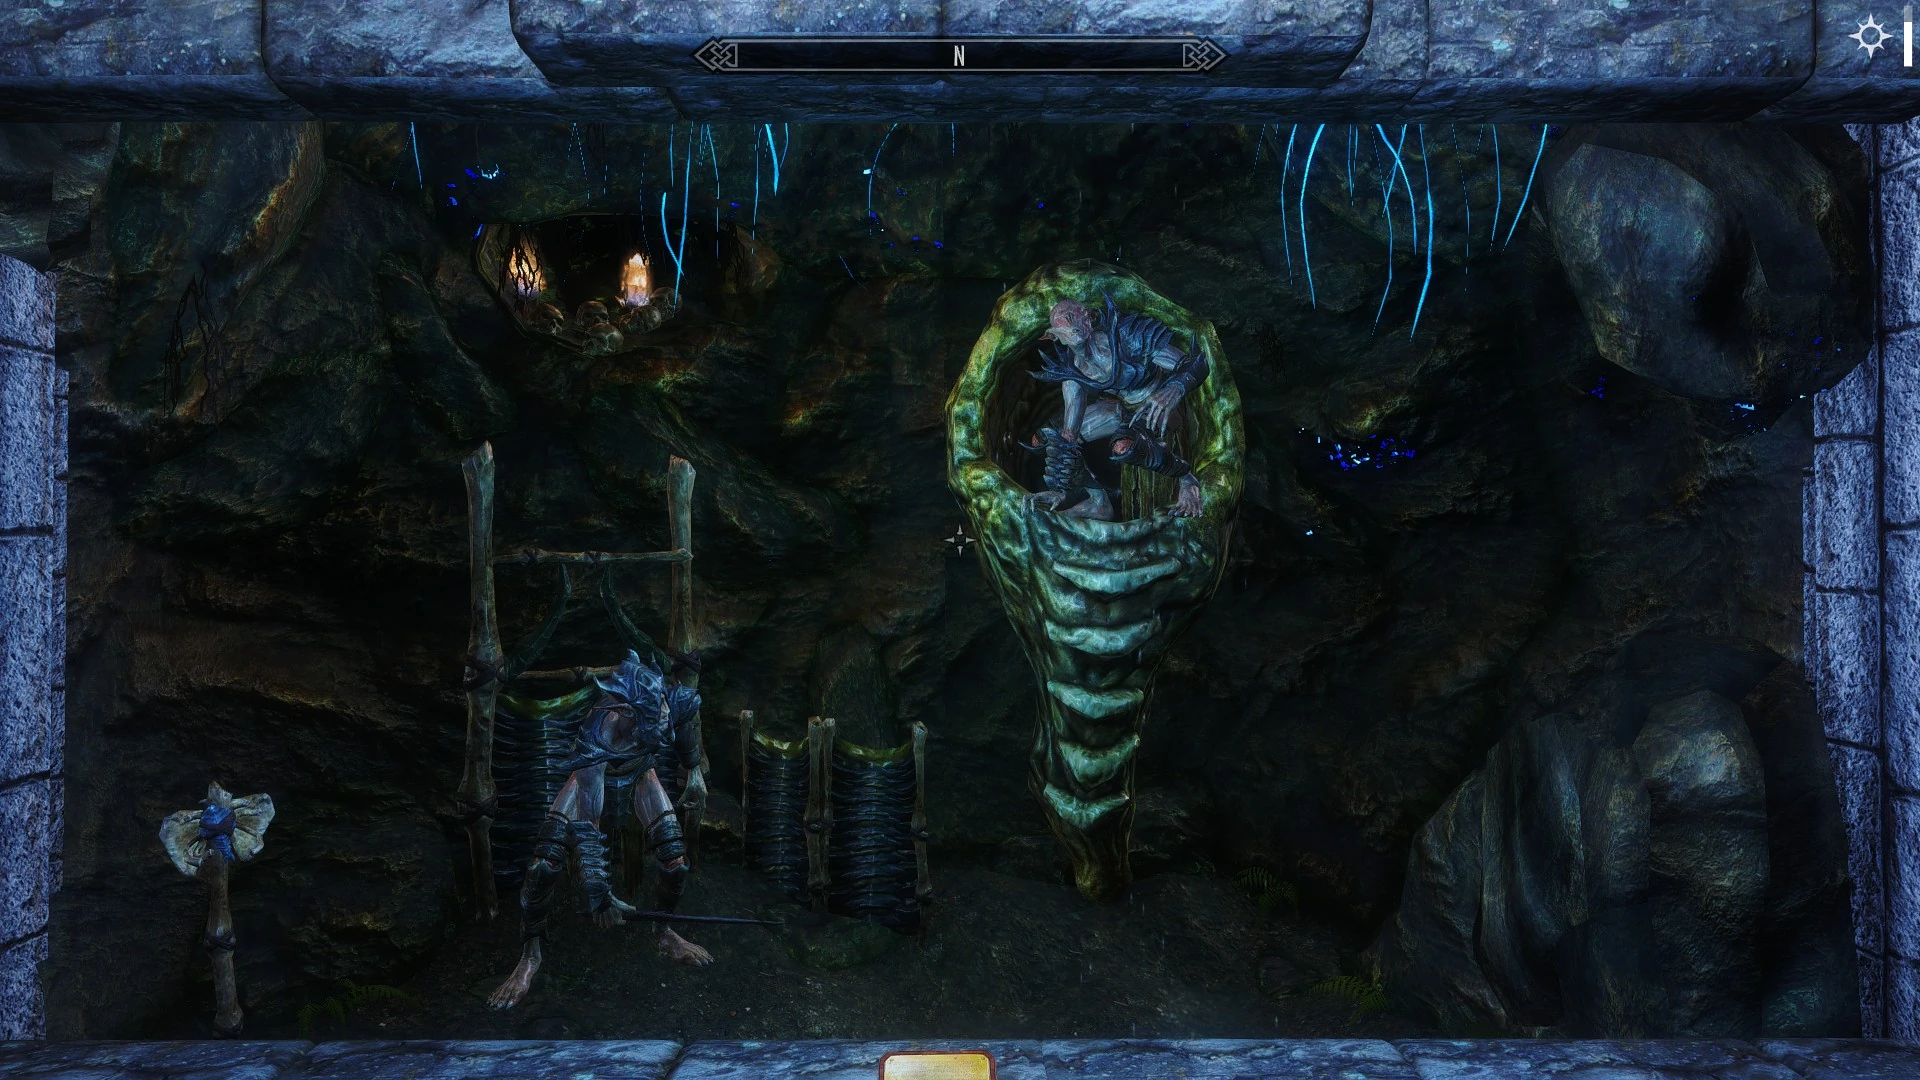
+ | ==Chaurus and Spider Exhibit== |
| − | [[File: |
+ | [[File:Spider_and_Chaurus.jpg|thumb|380px]] |
Spider: |
Spider: |
||
*[[Spider Egg]] |
*[[Spider Egg]] |
||
| Line 86: | Line 91: | ||
==Entomology Exhibit== |
==Entomology Exhibit== |
||
| − | [[File: |
+ | [[File:Entomology_Display.jpg|thumb|380px]] |
The five bug jars from Skyrim can be placed on display here. |
The five bug jars from Skyrim can be placed on display here. |
||
| Line 97: | Line 102: | ||
{{Clrr}} |
{{Clrr}} |
||
| − | ==Wolf |
+ | ==Wolf and Deer Exhibit== |
| − | [[File: |
+ | [[File:Wolf_and_Elk.jpg|thumb|380px]] |
Deer: |
Deer: |
||
*[[Elk Hide]] |
*[[Elk Hide]] |
||
| Line 106: | Line 111: | ||
{{Clrr}} |
{{Clrr}} |
||
| − | ==Sabre Cat |
+ | ==Sabre Cat and Bear Exhibit== |
| − | [[File: |
+ | [[File:Sabre_Cat_and_Bear.jpg|thumb|380px]] |
Bear: |
Bear: |
||
*[[Bear Claws]] |
*[[Bear Claws]] |
||
| Line 116: | Line 121: | ||
{{Clrr}} |
{{Clrr}} |
||
| − | ==Horker |
+ | ==Horker and Mudcrab Exhibit== |
| − | [[File: |
+ | [[File:Horker_and_Mudcrab.jpg|thumb|380px]] |
Mudcrab: |
Mudcrab: |
||
*3 x [[Mudcrab Chitin]] |
*3 x [[Mudcrab Chitin]] |
||
| Line 126: | Line 131: | ||
==Falmer Exhibit== |
==Falmer Exhibit== |
||
| − | [[File:Falmer.jpg|thumb| |
+ | [[File:Falmer.jpg|thumb|380px]] |
Falmer: |
Falmer: |
||
| − | *2 x [[ |
+ | *2 x [[Chaurus Chitin]] |
*2 x [[Falmer Ear]]s |
*2 x [[Falmer Ear]]s |
||
{{Clrr}} |
{{Clrr}} |
||
==Farm Exhibit== |
==Farm Exhibit== |
||
| − | [[File: |
+ | [[File:Farm_Display.jpg|thumb|380px]] |
Chicken: |
Chicken: |
||
*[[Chicken Breast]] |
*[[Chicken Breast]] |
||
| Line 146: | Line 151: | ||
{{Clrr}} |
{{Clrr}} |
||
| − | ==Troll |
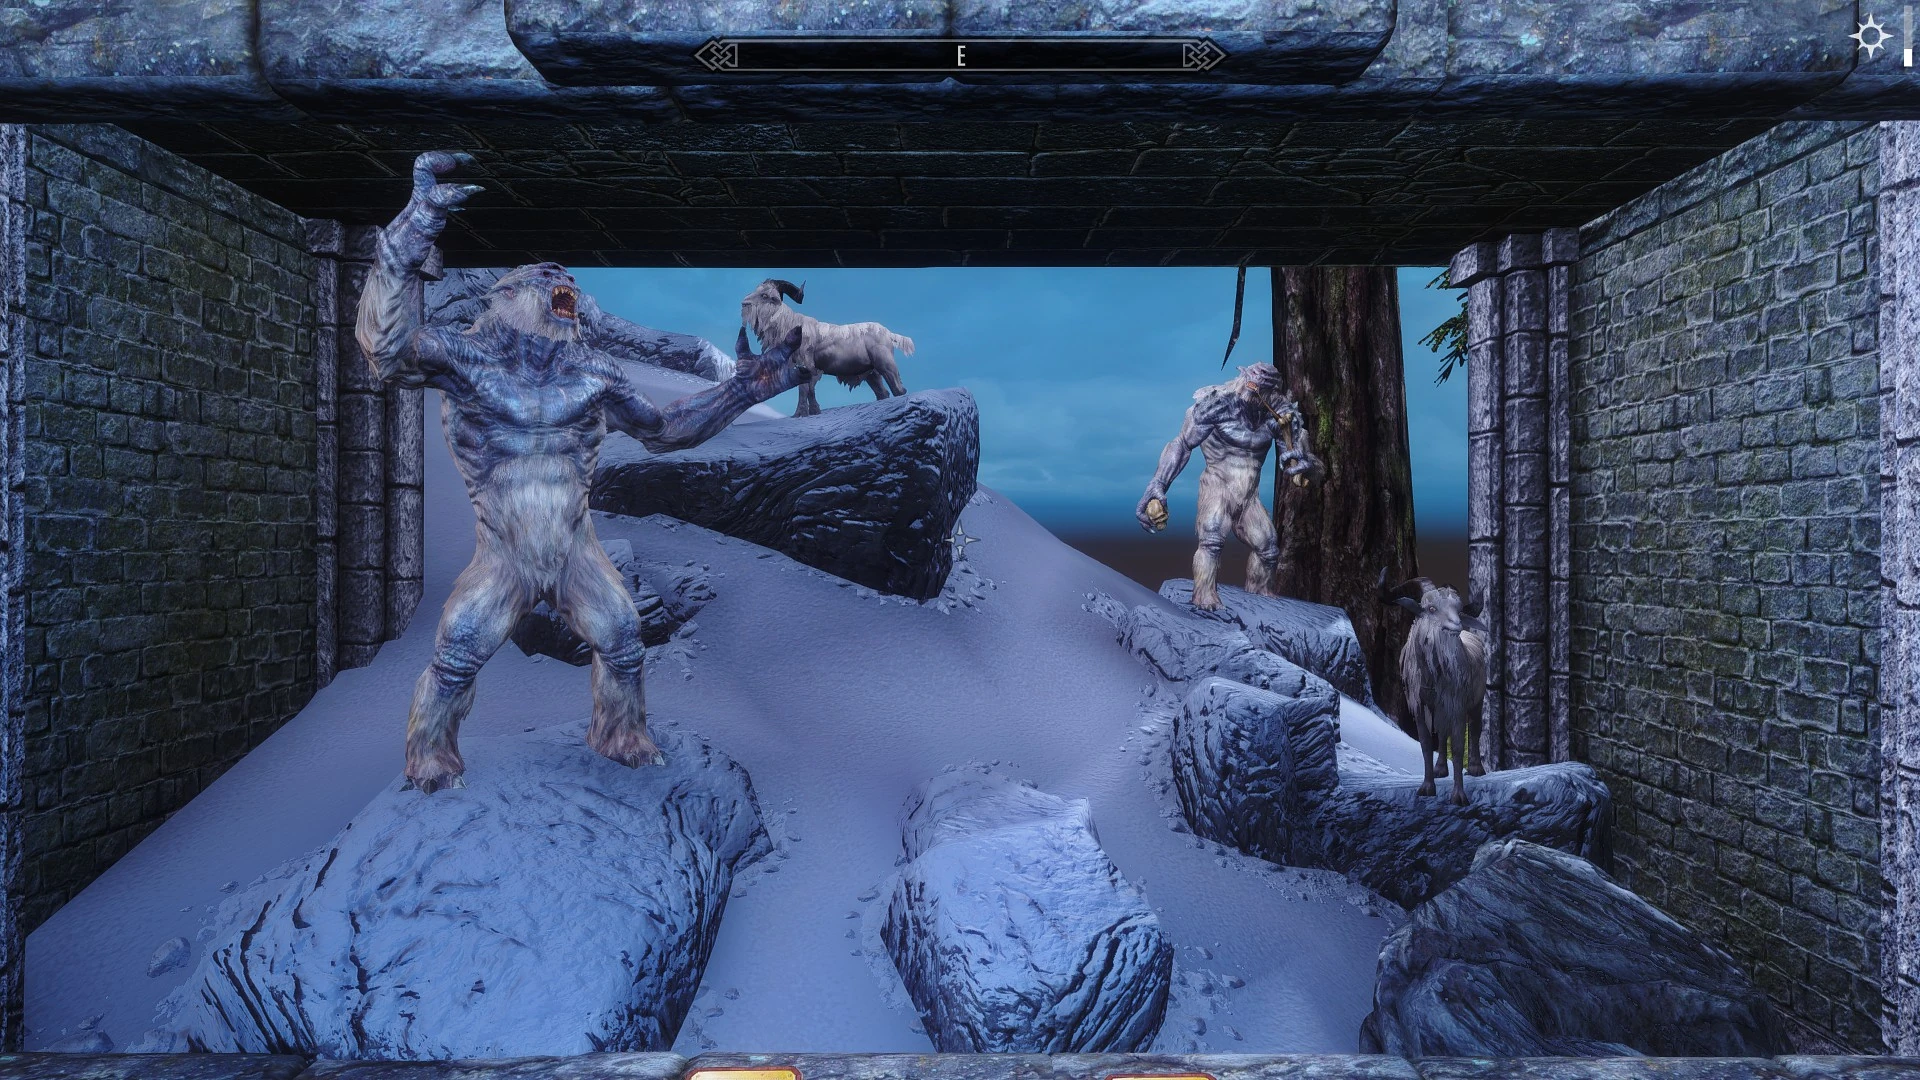
+ | ==Troll and Goat Exhibit== |
| − | [[File: |
+ | [[File:Troll_and_Goat.jpg|thumb|380px]] |
Troll: |
Troll: |
||
*2 x [[Troll Fat]] |
*2 x [[Troll Fat]] |
||
| Line 157: | Line 162: | ||
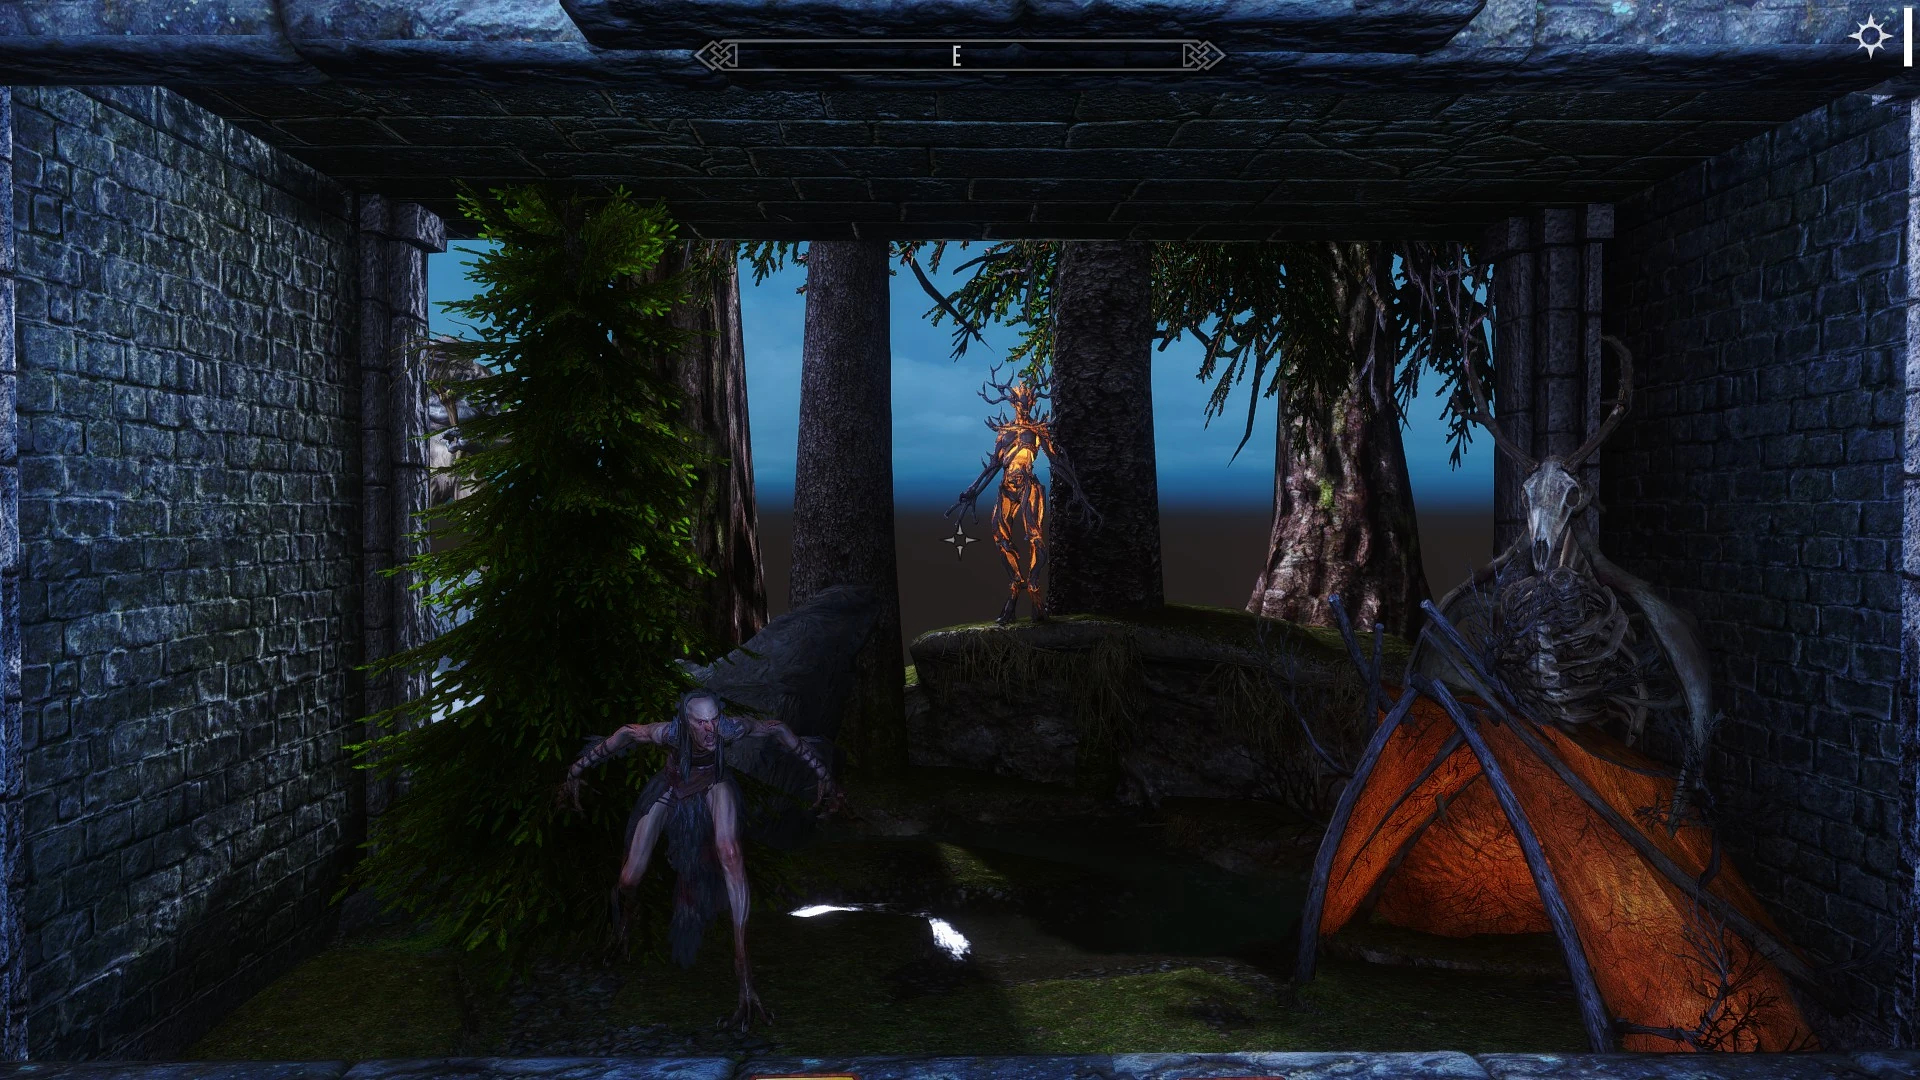
==Hagraven & Spriggan Exhibit== |
==Hagraven & Spriggan Exhibit== |
||
| − | [[File: |
+ | [[File:Hagraven_and_Spriggan.jpg|thumb|380px]] |
Hagraven: |
Hagraven: |
||
*[[Hagraven Claw]] |
*[[Hagraven Claw]] |
||
| Line 167: | Line 172: | ||
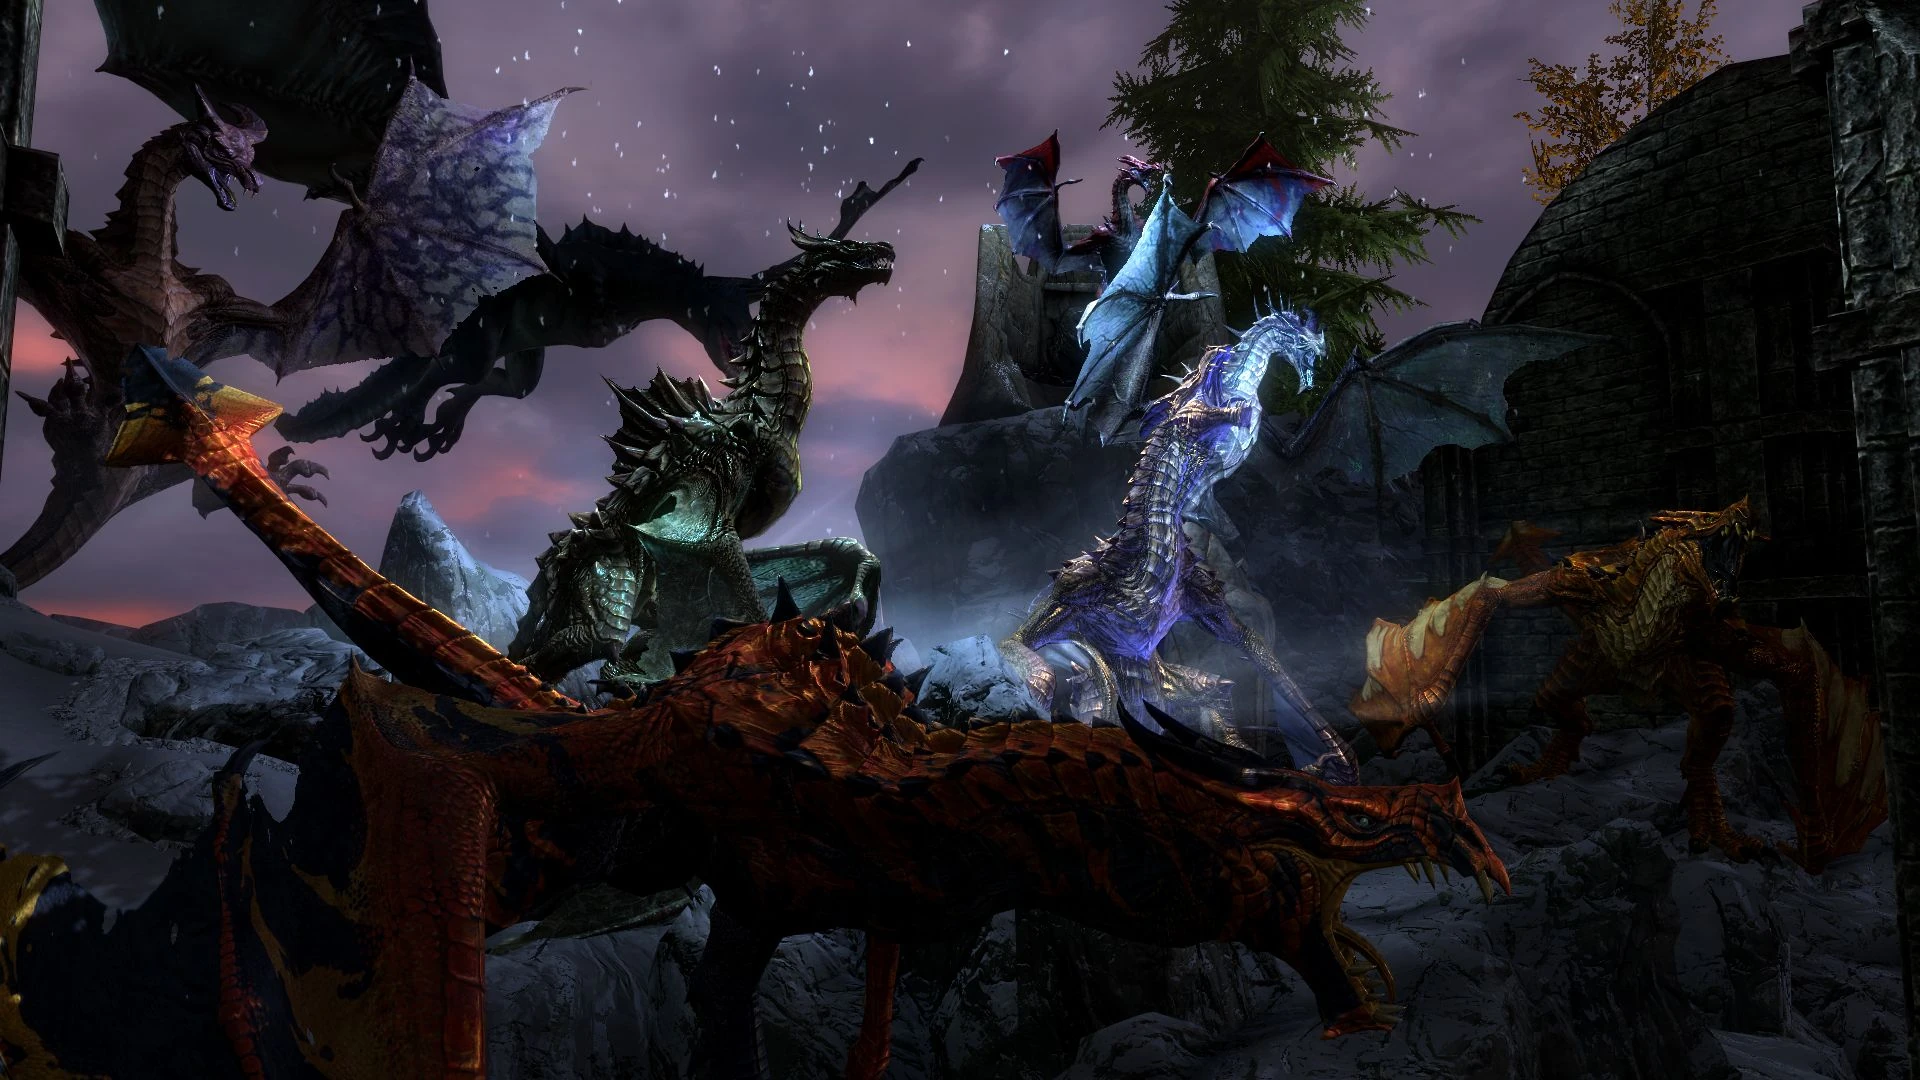
==Dragon Exhibit== |
==Dragon Exhibit== |
||
| − | [[File:Dragons.jpg|thumb| |
+ | [[File:Dragons.jpg|thumb|380px]] |
Sorgul: |
Sorgul: |
||
*[[Dragon Bone]] |
*[[Dragon Bone]] |
||
| Line 184: | Line 189: | ||
*[[Dragon Bone]] |
*[[Dragon Bone]] |
||
*[[Dragon Scales]] |
*[[Dragon Scales]] |
||
| + | Yekrem: |
||
| − | Yekren: |
||
*[[Dragon Bone]] |
*[[Dragon Bone]] |
||
| − | *[[Scales of |
+ | *[[Scales of Yekrem]] |
Vulthuryol: |
Vulthuryol: |
||
*[[Dragon Bone]] |
*[[Dragon Bone]] |
||
*[[Scales of Vulthuryol]] |
*[[Scales of Vulthuryol]] |
||
| ⚫ | |||
| + | |||
| ⚫ | |||
| + | [[File:Elemental_Dragons_Display.jpg|thumb|380px]] |
||
| ⚫ | |||
| + | |||
| + | It wasn't possible to make all displayable items fit in a table that mirrors the display, so instead items will be listed from left to right, top to bottom. |
||
| ⚫ | |||
| ⚫ | |||
| + | ! scope="col" colspan="6" |'''Gems, Stones and Talons''' |
||
| ⚫ | |||
| ⚫ | |||
| ⚫ | |||
| ⚫ | |||
| ⚫ | |||
| + | |[[Cobalt Gem]] |
||
| + | |[[Thunder Gem]] |
||
| ⚫ | |||
| + | |<center>-</center> |
||
| ⚫ | |||
| ⚫ | |||
| ⚫ | |||
| ⚫ | |||
| + | |<center>-</center> |
||
| ⚫ | |||
| ⚫ | |||
| ⚫ | |||
| ⚫ | |||
| ⚫ | |||
| ⚫ | |||
| ⚫ | |||
| + | |<center>-</center> |
||
| + | |<center>-</center> |
||
| ⚫ | |||
| ⚫ | |||
| ⚫ | |||
| + | |<center>-</center> |
||
| + | |<center>-</center> |
||
| ⚫ | |||
| ⚫ | |||
| ⚫ | |||
| ⚫ | |||
| ⚫ | |||
| + | ! scope="col" colspan="6" |'''Scales, Bottom Left 1''' |
||
| ⚫ | |||
| ⚫ | |||
| ⚫ | |||
| ⚫ | |||
| ⚫ | |||
| ⚫ | |||
| ⚫ | |||
| ⚫ | |||
| + | ! scope="col" colspan="5" |'''Scales, Bottom Left 2''' |
||
| ⚫ | |||
| ⚫ | |||
| + | |[[Aqua Dragon Scale]] |
||
| + | |[[Ice Dragon Scale]] |
||
| + | |[[Dragon Scale]] |
||
| + | |[[Wind Dragon Scale]] |
||
| ⚫ | |||
| + | ! scope="col" colspan="5" |'''Scales, Bottom Right 1''' |
||
| ⚫ | |||
| + | |[[Thunder Dragon Scale]] |
||
| + | |[[Earth Dragon Scale]] |
||
| + | |[[Eclipse Dragon Scale]] |
||
| + | |[[Elder Dragon Scale (Gold)]] |
||
| + | |[[Elder Dragon Scale (Green)]] |
||
| ⚫ | |||
| + | ! scope="col" colspan="5" |'''Scales, Bottom Right 2''' |
||
| ⚫ | |||
| + | |[[Fire Dragon Scale]] |
||
| + | |[[Spriggan Dragon Scale]] |
||
| + | |[[Dragon Lich Scale]] |
||
| + | |[[Lesser Dragon Scale (Blue)]] |
||
| + | |[[Lesser Dragon Scale (Brown)]] |
||
| ⚫ | |||
{{Clrr}} |
{{Clrr}} |
||
==The Aquarium== |
==The Aquarium== |
||
| − | [[File: |
+ | [[File:Aquarium.jpg|thumb|380px]] |
With {{Abb|BGSF}} installed there are shelves to display the fishbowls, and the fish will be set free in the Aquarium, otherwise it is just a display with some fish swimming around in it. |
With {{Abb|BGSF}} installed there are shelves to display the fishbowls, and the fish will be set free in the Aquarium, otherwise it is just a display with some fish swimming around in it. |
||
{{Clrr}} |
{{Clrr}} |
||
| Line 228: | Line 309: | ||
{{Clrr}} |
{{Clrr}} |
||
| − | ==Mammoth |
+ | ==Mammoth and Giant Exhibit== |
| − | [[File: |
+ | [[File:Mammoth_and_Giant.jpg|thumb|380px]] |
Mammoth: |
Mammoth: |
||
*[[Mammoth Snout]] |
*[[Mammoth Snout]] |
||
| Line 235: | Line 316: | ||
{{Clrr}} |
{{Clrr}} |
||
| − | == |
+ | ==Tide Pool Display== |
| − | [[File: |
+ | [[File:Tide_Pool.jpg|thumb|380px]] |
Displays the seashells of the fully integrated mod {{Nexus|mod|58164|Seashells}}. They spawn randomly along {{Wiki|Sea_of_Ghosts|The Sea of Ghosts}} in the northern-most part of Skyrim. |
Displays the seashells of the fully integrated mod {{Nexus|mod|58164|Seashells}}. They spawn randomly along {{Wiki|Sea_of_Ghosts|The Sea of Ghosts}} in the northern-most part of Skyrim. |
||
| Line 414: | Line 495: | ||
{{Clrr}} |
{{Clrr}} |
||
| − | ==Skeletal Dragon Display== |
+ | ==Skeletal Dragon Display (Skyrim Special Edition)== |
| − | [[File:Image_needed.jpg|thumb| |
+ | [[File:Image_needed.jpg|thumb|380px]] |
| − | Added after the mage's Guild quest "{{ |
+ | Added after the mage's Guild quest "{{Wiki|The_Staff_of_Magnus_(Skyrim)|The Staff of Magnus}}. It is presumably the skeletal dragon slain early in the Labyrinthian dungeon. |
{{Clrr}} |
{{Clrr}} |
||
==Red Mountain Display== |
==Red Mountain Display== |
||
| − | [[File:Red_Mountain.jpg|thumb| |
+ | [[File:Red_Mountain.jpg|thumb|380px]] |
The red mountain display is the only display in the [[Gallery of Natural Science]] that doesn't need anything to be displayed. It is just an enjoyable view with some information. |
The red mountain display is the only display in the [[Gallery of Natural Science]] that doesn't need anything to be displayed. It is just an enjoyable view with some information. |
||
{{Clrr}} |
{{Clrr}} |
||
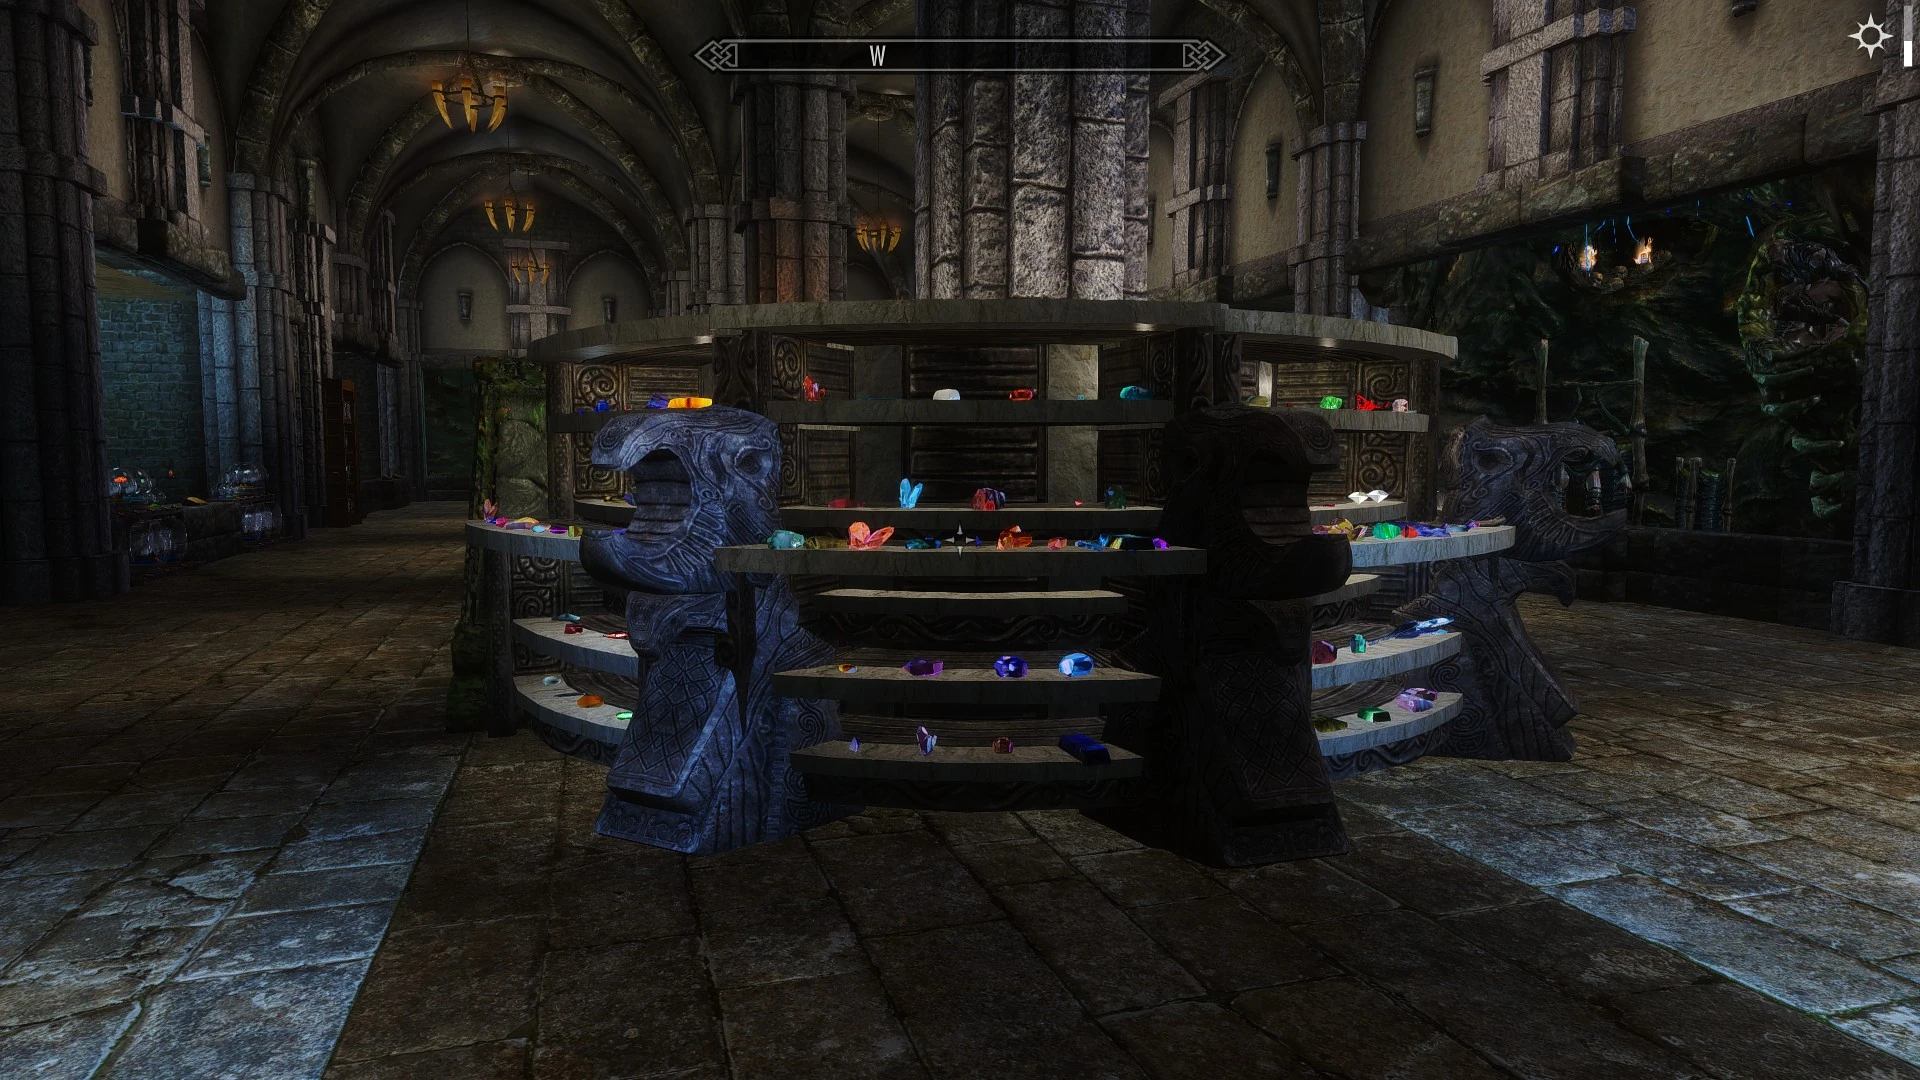
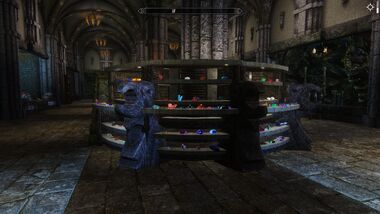
==Gemstone Display== |
==Gemstone Display== |
||
| − | [[File:Gemstone_Display.jpg|thumb| |
+ | [[File:Gemstone_Display.jpg|thumb|380px]] |
A display for the fully integrated mod {{Nexus|mod|35150|The Gemstone Collector}}. |
A display for the fully integrated mod {{Nexus|mod|35150|The Gemstone Collector}}. |
||
They can mainly be found randomly in loot containers and through mining. Most can also be found in fixed locations. |
They can mainly be found randomly in loot containers and through mining. Most can also be found in fixed locations. |
||
| Line 737: | Line 818: | ||
|- |
|- |
||
|[[Zircon]] |
|[[Zircon]] |
||
| ⚫ | |||
| ⚫ | |||
| − | |||
| ⚫ | |||
| ⚫ | |||
| ⚫ | |||
| ⚫ | |||
| − | | colspan="6" |'''Upper Row''' |
||
| ⚫ | |||
| ⚫ | |||
| ⚫ | |||
| ⚫ | |||
| ⚫ | |||
| ⚫ | |||
| ⚫ | |||
| ⚫ | |||
| ⚫ | |||
| ⚫ | |||
| ⚫ | |||
| ⚫ | |||
| ⚫ | |||
| ⚫ | |||
| ⚫ | |||
| ⚫ | |||
| ⚫ | |||
| ⚫ | |||
| ⚫ | |||
| ⚫ | |||
| ⚫ | |||
| ⚫ | |||
| ⚫ | |||
| ⚫ | |||
| ⚫ | |||
| ⚫ | |||
| ⚫ | |||
| ⚫ | |||
| ⚫ | |||
| ⚫ | |||
| ⚫ | |||
| ⚫ | |||
| ⚫ | |||
| ⚫ | |||
| − | |_ |
||
| − | |_ |
||
| − | |_ |
||
| − | |_ |
||
| − | |_ |
||
| − | |_ |
||
| ⚫ | |||
| − | | colspan="6" |'''Gem Pedestals''' |
||
| ⚫ | |||
| ⚫ | |||
| ⚫ | |||
| ⚫ | |||
| − | |_ |
||
| ⚫ | |||
| − | |_ |
||
|} |
|} |
||
{{Clrr}} |
{{Clrr}} |
||
| Line 831: | Line 855: | ||
*1 [[Horker Tusk]]: {{:Horker Tusk}} |
*1 [[Horker Tusk]]: {{:Horker Tusk}} |
||
'''Falmer display''' |
'''Falmer display''' |
||
| − | *2 [[ |
+ | *2 [[Chaurus Chitin]]: {{:Chaurus Chitin}} |
*2 [[Falmer Ear]]s: {{:Falmer Ear}} |
*2 [[Falmer Ear]]s: {{:Falmer Ear}} |
||
'''Farm display''' |
'''Farm display''' |
||
| Line 874: | Line 898: | ||
*1 [[Dragon Bone]]: {{:Dragon Bone}} |
*1 [[Dragon Bone]]: {{:Dragon Bone}} |
||
*1 [[Dragon Scales]]: {{:Dragon Scales}} |
*1 [[Dragon Scales]]: {{:Dragon Scales}} |
||
| − | '' |
+ | ''Yekrem:'' |
*1 [[Dragon Bone]]: {{:Dragon Bone}} |
*1 [[Dragon Bone]]: {{:Dragon Bone}} |
||
| − | *1 [[Scales of |
+ | *1 [[Scales of Yekrem]]: {{:Scales of Yekrem}} |
''Vulthuryol:'' |
''Vulthuryol:'' |
||
*1 [[Dragon Bone]]: {{:Dragon Bone}} |
*1 [[Dragon Bone]]: {{:Dragon Bone}} |
||
| Line 995: | Line 1,019: | ||
*[[Sinhalite]]: {{:Sinhalite}} |
*[[Sinhalite]]: {{:Sinhalite}} |
||
*[[Smithsonite]]: {{:Smithsonite}} |
*[[Smithsonite]]: {{:Smithsonite}} |
||
| − | *[[Sodalite]]: {{Wiki|Alvor_and_Sigrid's_House|Alvor and Sigrid's House}} in {{Wiki|Riverwood_(Skyrim)|Riverwood}}, on the table in the basement.<br> |
+ | *[[Sodalite]]: {{Wiki|Alvor_and_Sigrid's_House|Alvor and Sigrid's House}} in {{Wiki|Riverwood_(Skyrim)|Riverwood}}, on the table in the basement.<br>[[Sargruunde]] in the {{Wiki|Sunken_Barrow|Sunken Barrow}} (unmarked location), in the treasure room. |
| − | *[[Sargruunde]] in the {{Wiki|Sunken_Barrow|Sunken Barrow}} (unmarked location), in the treasure room. |
||
*[[Spessartine Garnet]]: {{:Spessartine Garnet}} |
*[[Spessartine Garnet]]: {{:Spessartine Garnet}} |
||
*[[Spinel]] |
*[[Spinel]] |
||
| Line 1,014: | Line 1,037: | ||
*[[Zircon]]: {{:Zircon}} |
*[[Zircon]]: {{:Zircon}} |
||
</onlyinclude> |
</onlyinclude> |
||
| ⚫ | |||
| − | <br /> |
||
| ⚫ | |||
*'''[[Fairy 01]]''': {{:Fairy 01}} |
*'''[[Fairy 01]]''': {{:Fairy 01}} |
||
| − | *'''[[Fairy |
+ | *'''[[Fairy 14]]''': {{:Fairy 14}} |
*'''[[Fairy 03]]''': {{:Fairy 03}} |
*'''[[Fairy 03]]''': {{:Fairy 03}} |
||
*'''[[Fairy 04]]''': {{:Fairy 04}} |
*'''[[Fairy 04]]''': {{:Fairy 04}} |
||
| Line 1,025: | Line 1,047: | ||
*'''[[Fairy 08]]''': {{:Fairy 08}} |
*'''[[Fairy 08]]''': {{:Fairy 08}} |
||
*'''[[Fairy 09]]''': {{:Fairy 09}} |
*'''[[Fairy 09]]''': {{:Fairy 09}} |
||
| − | *'''[[ |
+ | *'''[[Rotting Fairy]]''': {{:Rotting Fairy}} |
| − | *'''[[Fairy |
+ | *'''[[Dead Fairy (Captured Fairies)|Dead Fairy]]''': {{:Dead Fairy (Captured Fairies)}} |
| − | *'''[[Fairy |
+ | *'''[[Fairy 02]]''': {{:Fairy 02}} |
| ⚫ | |||
| ⚫ | |||
| ⚫ | |||
*'''[[Goth Fairy]]''': {{:Goth Fairy}} |
*'''[[Goth Fairy]]''': {{:Goth Fairy}} |
||
*'''[[Zelda's Fairy]]''': {{:Zelda's Fairy}} |
*'''[[Zelda's Fairy]]''': {{:Zelda's Fairy}} |
||
*'''[[Tinker Fairy]]''': {{:Tinker Fairy}} |
*'''[[Tinker Fairy]]''': {{:Tinker Fairy}} |
||
*'''[[Great Fairy]]''': {{:Great Fairy}} |
*'''[[Great Fairy]]''': {{:Great Fairy}} |
||
| − | *'''[[ |
+ | *'''[[Fairy 12]]''': {{:Fairy 12}} |
| − | *'''[[ |
+ | *'''[[Fairy 11]]''': {{:Fairy 11}} |
| ⚫ | |||
| ⚫ | |||
| ⚫ | |||
*'''[[Hag Fairy]]''': {{:Hag Fairy}} |
*'''[[Hag Fairy]]''': {{:Hag Fairy}} |
||
| + | |||
| − | <br /> |
||
| − | '''Fish Shelves (requires {{Abb|BGSF}})''' |
+ | <br />'''Fish Shelves (requires {{Abb|BGSF}})''' |
*'''[[Betta - Red]]''': {{:Betta - Red}} |
*'''[[Betta - Red]]''': {{:Betta - Red}} |
||
*'''[[Betta - Blue]]''': {{:Betta - Blue}} |
*'''[[Betta - Blue]]''': {{:Betta - Blue}} |
||
| Line 1,051: | Line 1,073: | ||
*'''[[Diver]]''': {{:Diver}} |
*'''[[Diver]]''': {{:Diver}} |
||
*'''[[Jellyfish]]''': {{:Jellyfish}} |
*'''[[Jellyfish]]''': {{:Jellyfish}} |
||
| ⚫ | |||
| ⚫ | |||
*'''[[Fishbowl 3]]''': {{:Fishbowl 3}} |
*'''[[Fishbowl 3]]''': {{:Fishbowl 3}} |
||
| ⚫ | |||
*'''[[Fishbowl 12]]''': {{:Fishbowl 12}} |
*'''[[Fishbowl 12]]''': {{:Fishbowl 12}} |
||
*'''[[Fishbowl 15]]''': {{:Fishbowl 15}} |
*'''[[Fishbowl 15]]''': {{:Fishbowl 15}} |
||
| ⚫ | |||
</div> |
</div> |
||
| Line 1,061: | Line 1,083: | ||
==Total list of items needed for all wildlife exhibits (listed alphabetically)== |
==Total list of items needed for all wildlife exhibits (listed alphabetically)== |
||
<br /> |
<br /> |
||
| − | |||
<div class="mw-customtoggle-Spoiler_2 wikia-menu-button">Show Spoiler</div> |
<div class="mw-customtoggle-Spoiler_2 wikia-menu-button">Show Spoiler</div> |
||
<div id="mw-customcollapsible-Spoiler_2" class="wikitable mw-collapsible mw-collapsed"> |
<div id="mw-customcollapsible-Spoiler_2" class="wikitable mw-collapsible mw-collapsed"> |
||
| Line 1,101: | Line 1,122: | ||
*2 [[Wolf Pelt]]s: {{:Wolf Pelt}} |
*2 [[Wolf Pelt]]s: {{:Wolf Pelt}} |
||
*1 [[Venison]]: {{:Venison}} |
*1 [[Venison]]: {{:Venison}} |
||
| − | *1 [[Scales of |
+ | *1 [[Scales of Yekrem]]: {{:Scales of Yekrem}} |
</div> |
</div> |
||
Revision as of 13:33, 2 January 2020


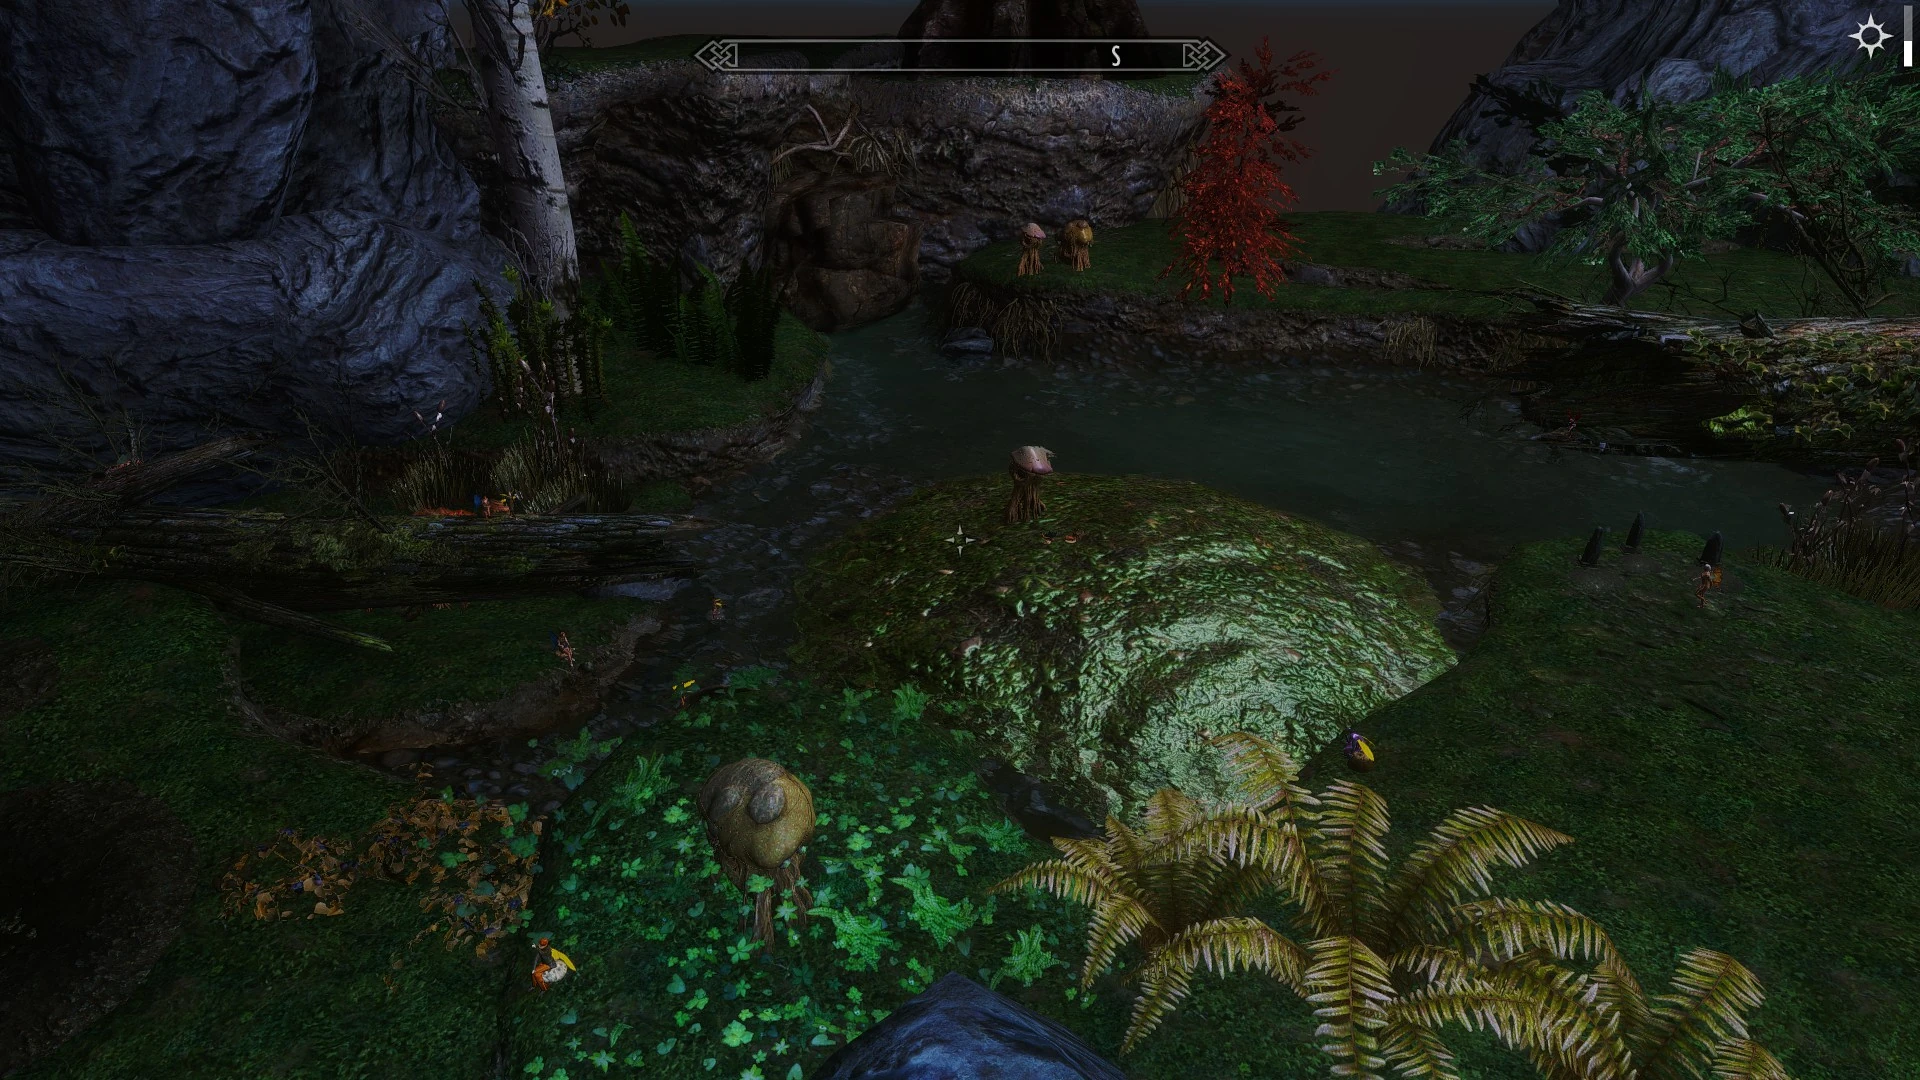
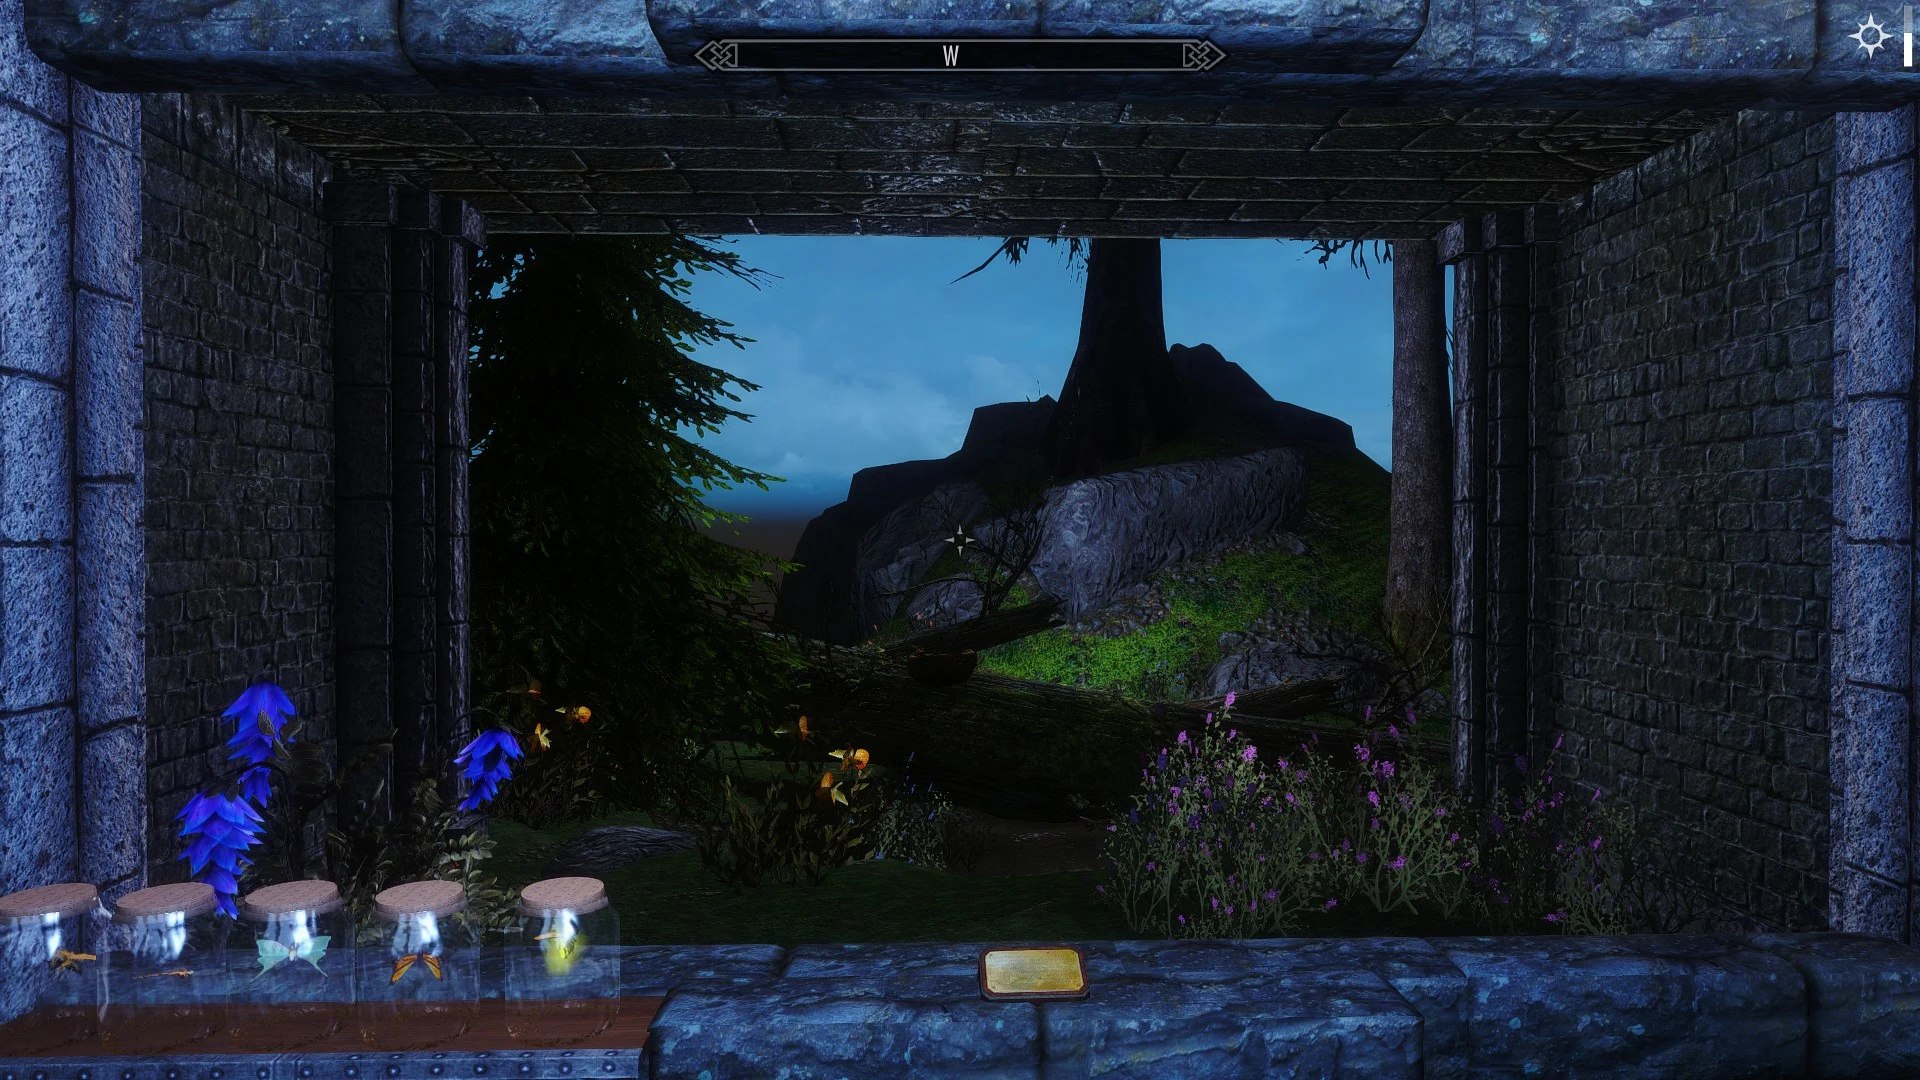
The Gallery of Natural Science is the part of the museum that covers the rich flora, fauna and minerals Skyrim has. Its entrance is in the Main Gallery in the same wing as the Hall of Oddities. Instead of going straight to the Oddities Room, you have to turn to the right and go downstairs. Along the stairs there about 12 paintings spots.
The Gallery of Natural Science features buildable static displays. There is also a Gemstone display and Tidal Pool display for seashells. There are additional displays if the mods BadGremlin's Captured Fairies and/or BadGremlins Something Fishy are installed. When the Fossil Mining mod is installed, a new Fossil Mining Room below the natural science gallery becomes available for displaying the fossils. The door to the room can be found by the supplies cabinet in one end of the gallery.
The displays are listed below from left to right to center:
Flora Exhibit

This display is a interactive representation of the flora that can be found in Skyrim. It works with a regular fertile soil system like the Hearthfire DLC provides. Additionally, this display is home to the fairies from BadGremlin's Captured Fairies, if the mod is installed.
Fairy Shelves
With BadGremlins Captured Fairies installed, shelves will be activated in the Gallery of Natural Science whereupon you can place the fairy cages. When they are placed, they will become empty (except for a few fairies) as the fairies reclaim their freedom in the Flora display. The map with the locations of all the fairies that comes with the mod can be found by Crabber's Shanty.
Below is a list of all the captured fairies displays. The list goes from left to right, top to bottom.
 | |||||
| Fairies | |||||
| 1st row | |||||
| Fairy Cage 1: Fairy 01 |
Fairy Cage 2: Fairy 14 |
Fairy Cage 3: Fairy 03 |
Goth Fairy | Zelda's Fairy | Tinker Fairy |
| 2nd row | |||||
| Fairy Cage 4: Fairy 04 |
Fairy Cage 5: Fairy 05 |
Fairy Cage 6: Fairy 06 |
Great Fairy | Fairy Cage 11: Fairy 12 |
Fairy Cage 12: Fairy 11 |
| 3rd row | |||||
| Fairy Cage 7: Fairy 07 |
Fairy Cage 8: Fairy 08 |
Fairy Cage 9: Fairy 09 |
Fairy Cage 13: Fairy 15 |
Fairy Cage 14: Fairy 10 |
Fairy Cage 15: Fairy 13 |
| 4th row | |||||
| Rotting Fairy | Dead Fairy | Fairy Cage 10: Fairy 02 |
Hag Fairy | ||
Chaurus and Spider Exhibit
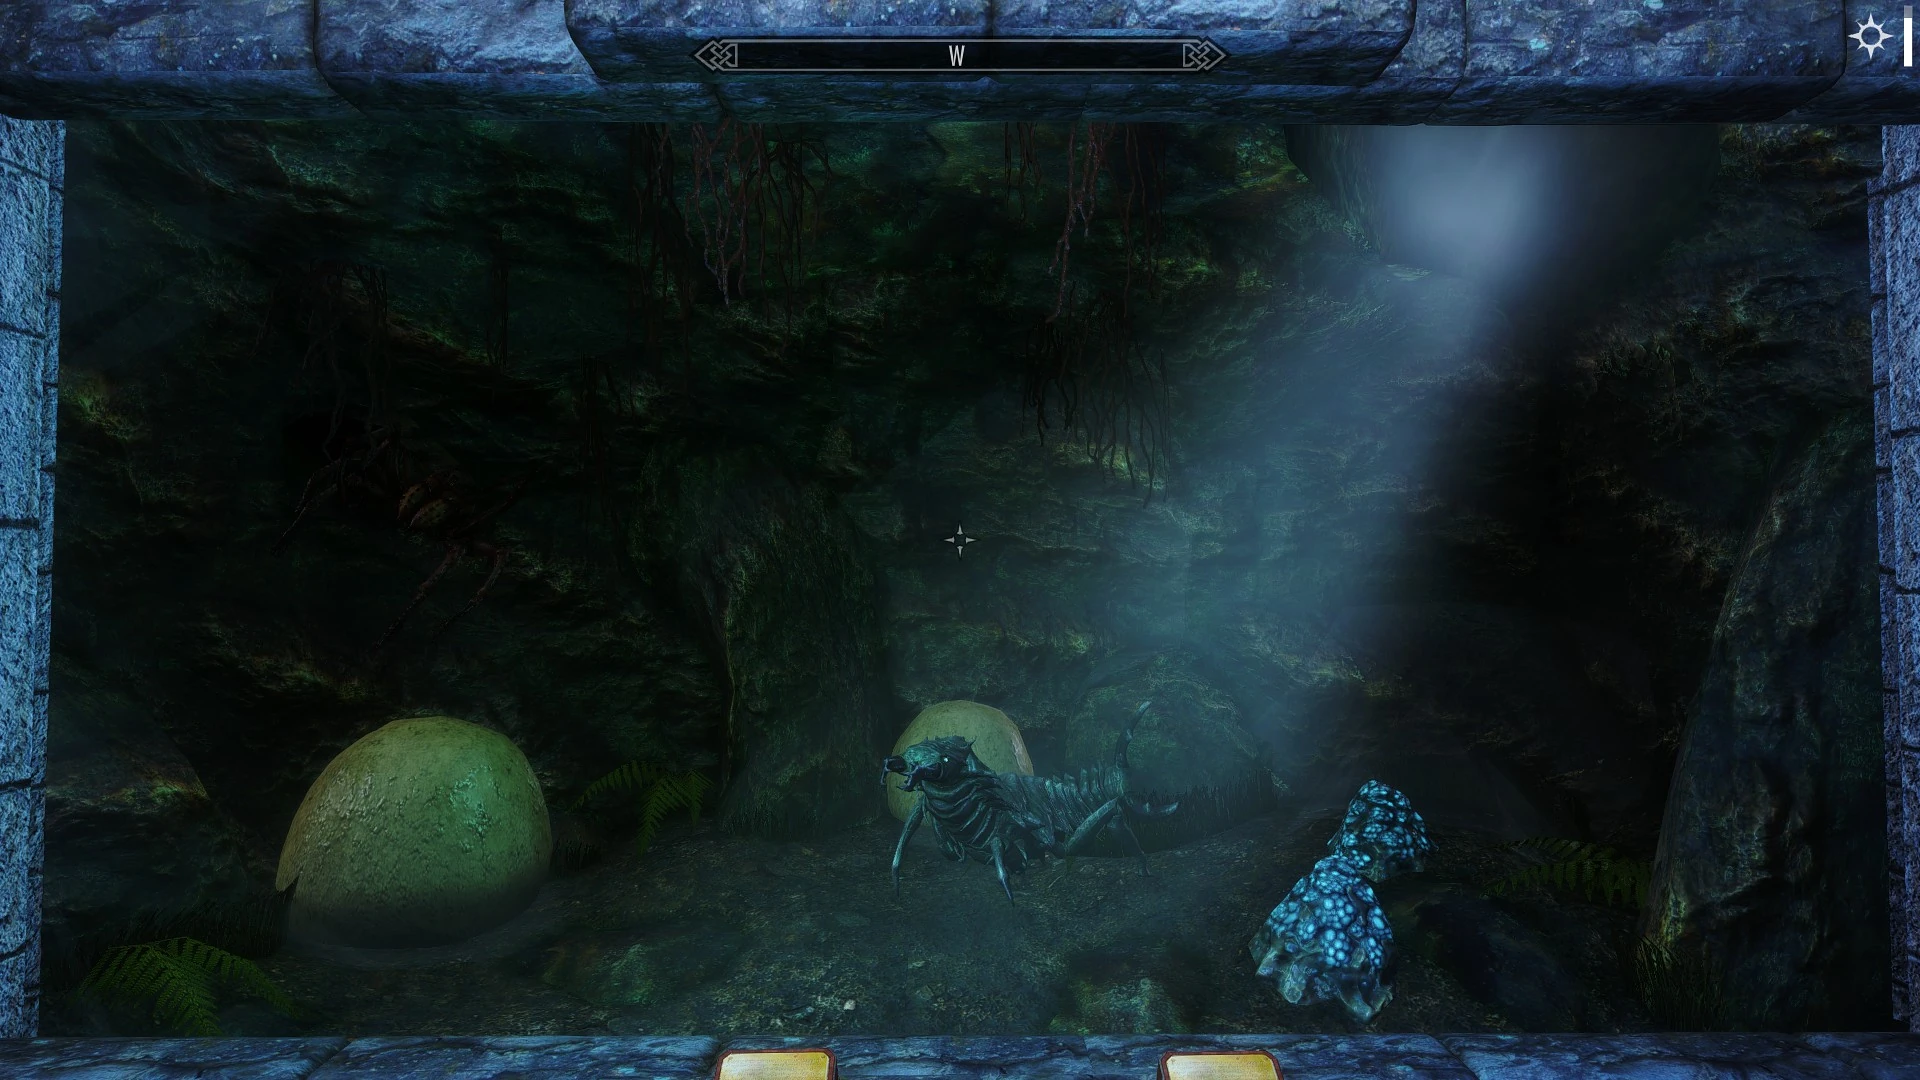

Spider:
- Spider Egg
- Frostbite Venom
Chaurus:
- Chaurus Chitin
- Chaurus Eggs
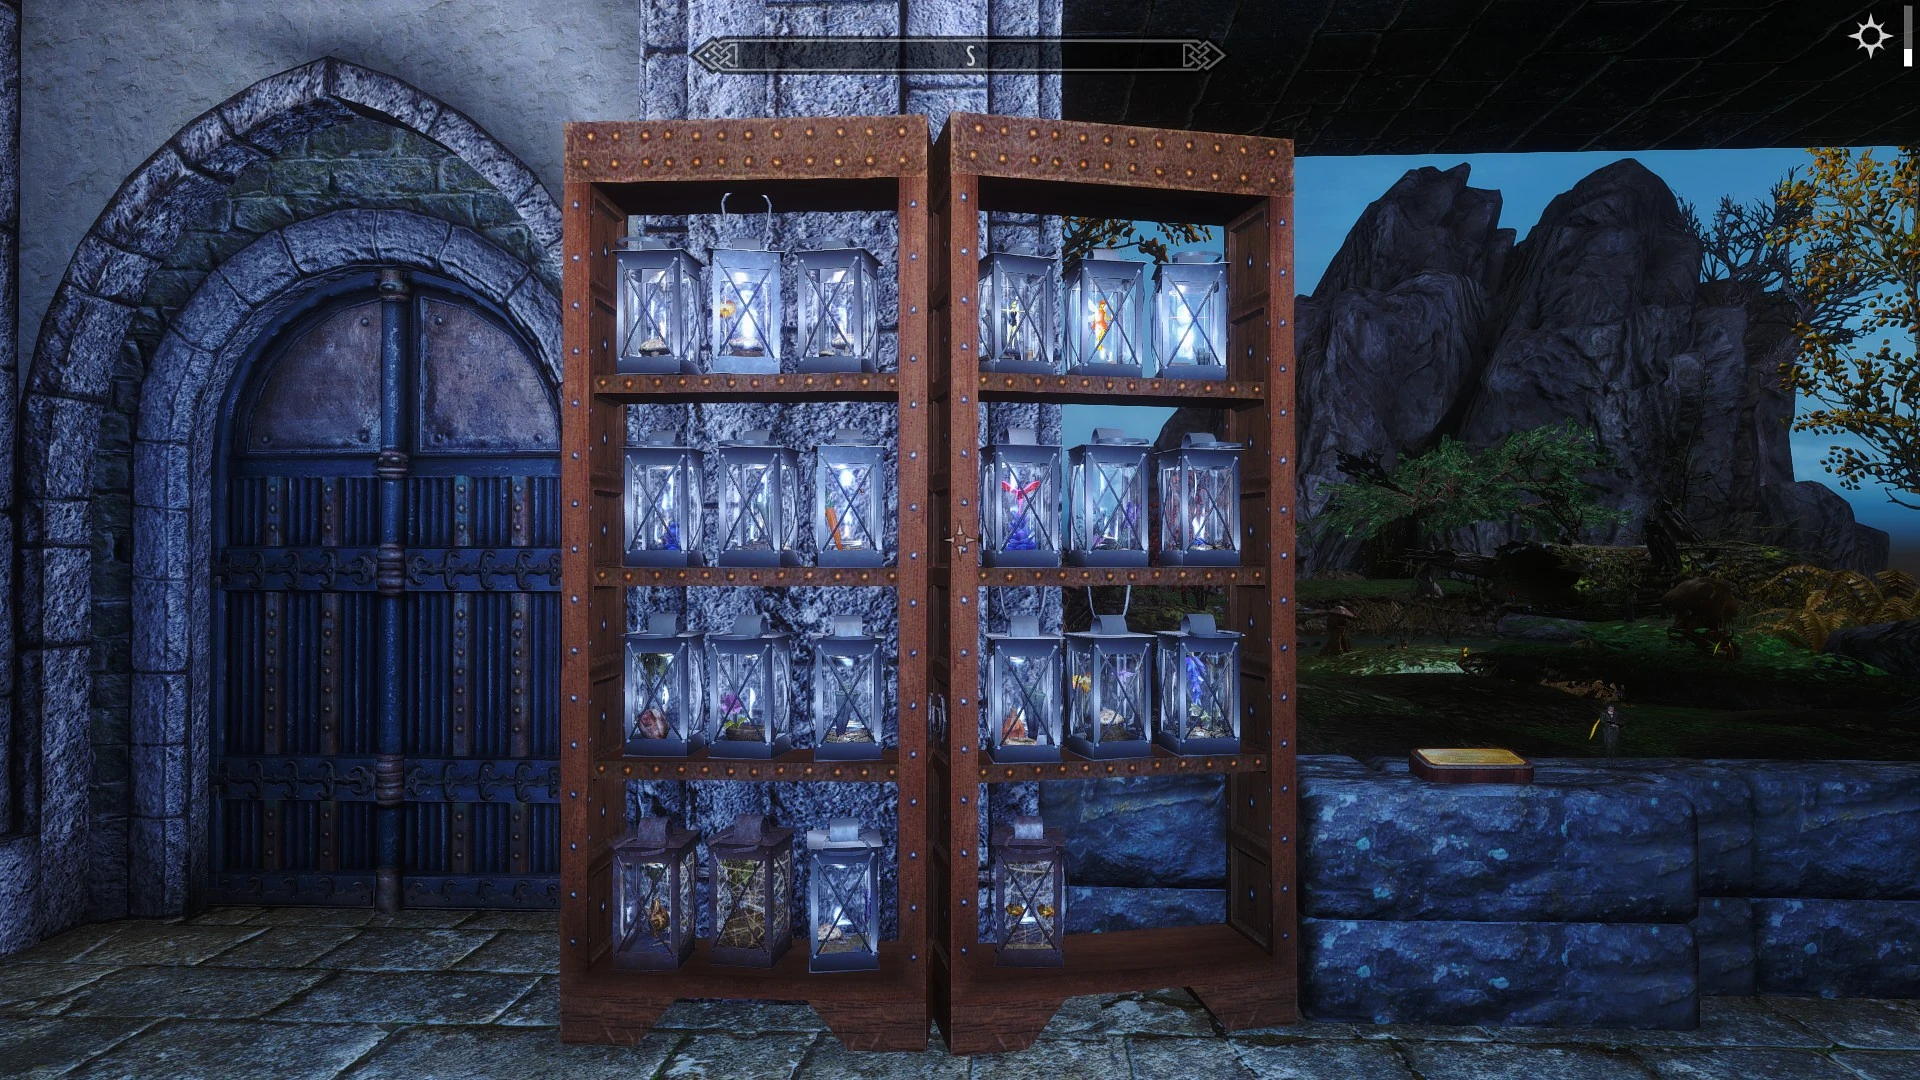
Entomology Exhibit
The five bug jars from Skyrim can be placed on display here.
List of bugs:
Wolf and Deer Exhibit

Deer:
- Elk Hide
- Venison
Wolf:
- 2 x Wolf Pelts
Sabre Cat and Bear Exhibit

Bear:
- Bear Claws
- Bear Pelt
Sabre Cat:
- Sabre Cat Tooth
- Sabre Cat Pelt
Horker and Mudcrab Exhibit

Mudcrab:
- 3 x Mudcrab Chitin
Horker:
- Horker Meat
- Horker Tusk
Falmer Exhibit
Falmer:
- 2 x Chaurus Chitin
- 2 x Falmer Ears
Farm Exhibit
Chicken:
- Chicken Breast
- Chicken's Egg
Horse:
- Horse Meat
- Horse Hide
Cow:
- 2 x Cow Hides
Dog:
- 2 x Dog Meat
Troll and Goat Exhibit

Troll:
- 2 x Troll Fat
- 2 x Troll Skulls
Goat:
- 2 x Goat Hides
- 2 x Goat Horns
Hagraven & Spriggan Exhibit

Hagraven:
- Hagraven Claw
- Hagraven Feathers
Spriggan:
- Spriggan Sap
- Taproot
Dragon Exhibit
Sorgul:
- Dragon Bone
- Scales of Sorgul
Elder Dragon:
- Dragon Bone
- Dragon Scales
Naaslaarum or Voslaarum:
- Dragon Bone
- Scales of Naaslaarum OR
- Scales of Voslaarum
Sahrotaar:
- Dragon Bone
- Scales of Sahrotaar
Legendary Dragon:
- Dragon Bone
- Dragon Scales
Yekrem:
- Dragon Bone
- Scales of Yekrem
Vulthuryol:
- Dragon Bone
- Scales of Vulthuryol
Elemental Dragons Display

With the Elemental Dragons mod installed, some dragons may drop special scales that can be equipped as jewelry. These scales can be displayed on a shelf located in front of the Dragon Display.
It wasn't possible to make all displayable items fit in a table that mirrors the display, so instead items will be listed from left to right, top to bottom.
| Gems, Stones and Talons | |||||
|---|---|---|---|---|---|
| Inferno Gem | Ice Gem | Melt Dragon Core | Elemental Gem | Cobalt Gem | Thunder Gem |
| Black Dragon Talon | Lake Dragon Stone | Serpentine Dragon Stone | White Dragon Talon | ||
| Scales, Middle Left | |||||
| Oblivion Dragon Scale | Silver Dragon Scale | Sunlight Dragon Scale | Gale Dragon Scale | ||
| Scales, Middle Right | |||||
| Mystic Dragon Scale | Legendary Dragon Scale | Invisible Dragon Scale | Iron Dragon Scale | ||
| Scales, Bottom Left 1 | |||||
| Illusion Dragon Scale | Green Dragon Scale | Forest Dragon Scale | Red Dragon Scale | Gold Dragon Scale | Ancient Dragon Scale (Blue) |
| Scales, Bottom Left 2 | |||||
| Ancient Dragon Scale (Red) | Aqua Dragon Scale | Ice Dragon Scale | Dragon Scale | Wind Dragon Scale | |
| Scales, Bottom Right 1 | |||||
| Thunder Dragon Scale | Earth Dragon Scale | Eclipse Dragon Scale | Elder Dragon Scale (Gold) | Elder Dragon Scale (Green) | |
| Scales, Bottom Right 2 | |||||
| Fire Dragon Scale | Spriggan Dragon Scale | Dragon Lich Scale | Lesser Dragon Scale (Blue) | Lesser Dragon Scale (Brown) | |
The Aquarium
With BadGremlin's Something Fishy installed there are shelves to display the fishbowls, and the fish will be set free in the Aquarium, otherwise it is just a display with some fish swimming around in it.
Fish Shelves
Requires BadGremlin's Something Fishy. Below is a list of all the fish. The list goes from left to right, top to bottom.
| Fish | |||||||||
|---|---|---|---|---|---|---|---|---|---|
| Top row | |||||||||
| Betta - Red | Betta - Blue | Betta - Green | Abeclongfin | Cyrospade | Riverbetty | Histcarp | Silverperch | Guppy | Diver |
| Bottom row | |||||||||
| Jellyfish | Fishbowl 3 | Fishbowl 2 | Fishbowl 12 | Fishbowl 15 | Fishbowl 1 | ||||
Mammoth and Giant Exhibit
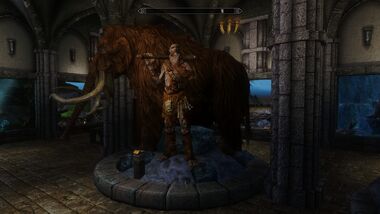
Mammoth:
- Mammoth Snout
- Mammoth Tusk
Tide Pool Display
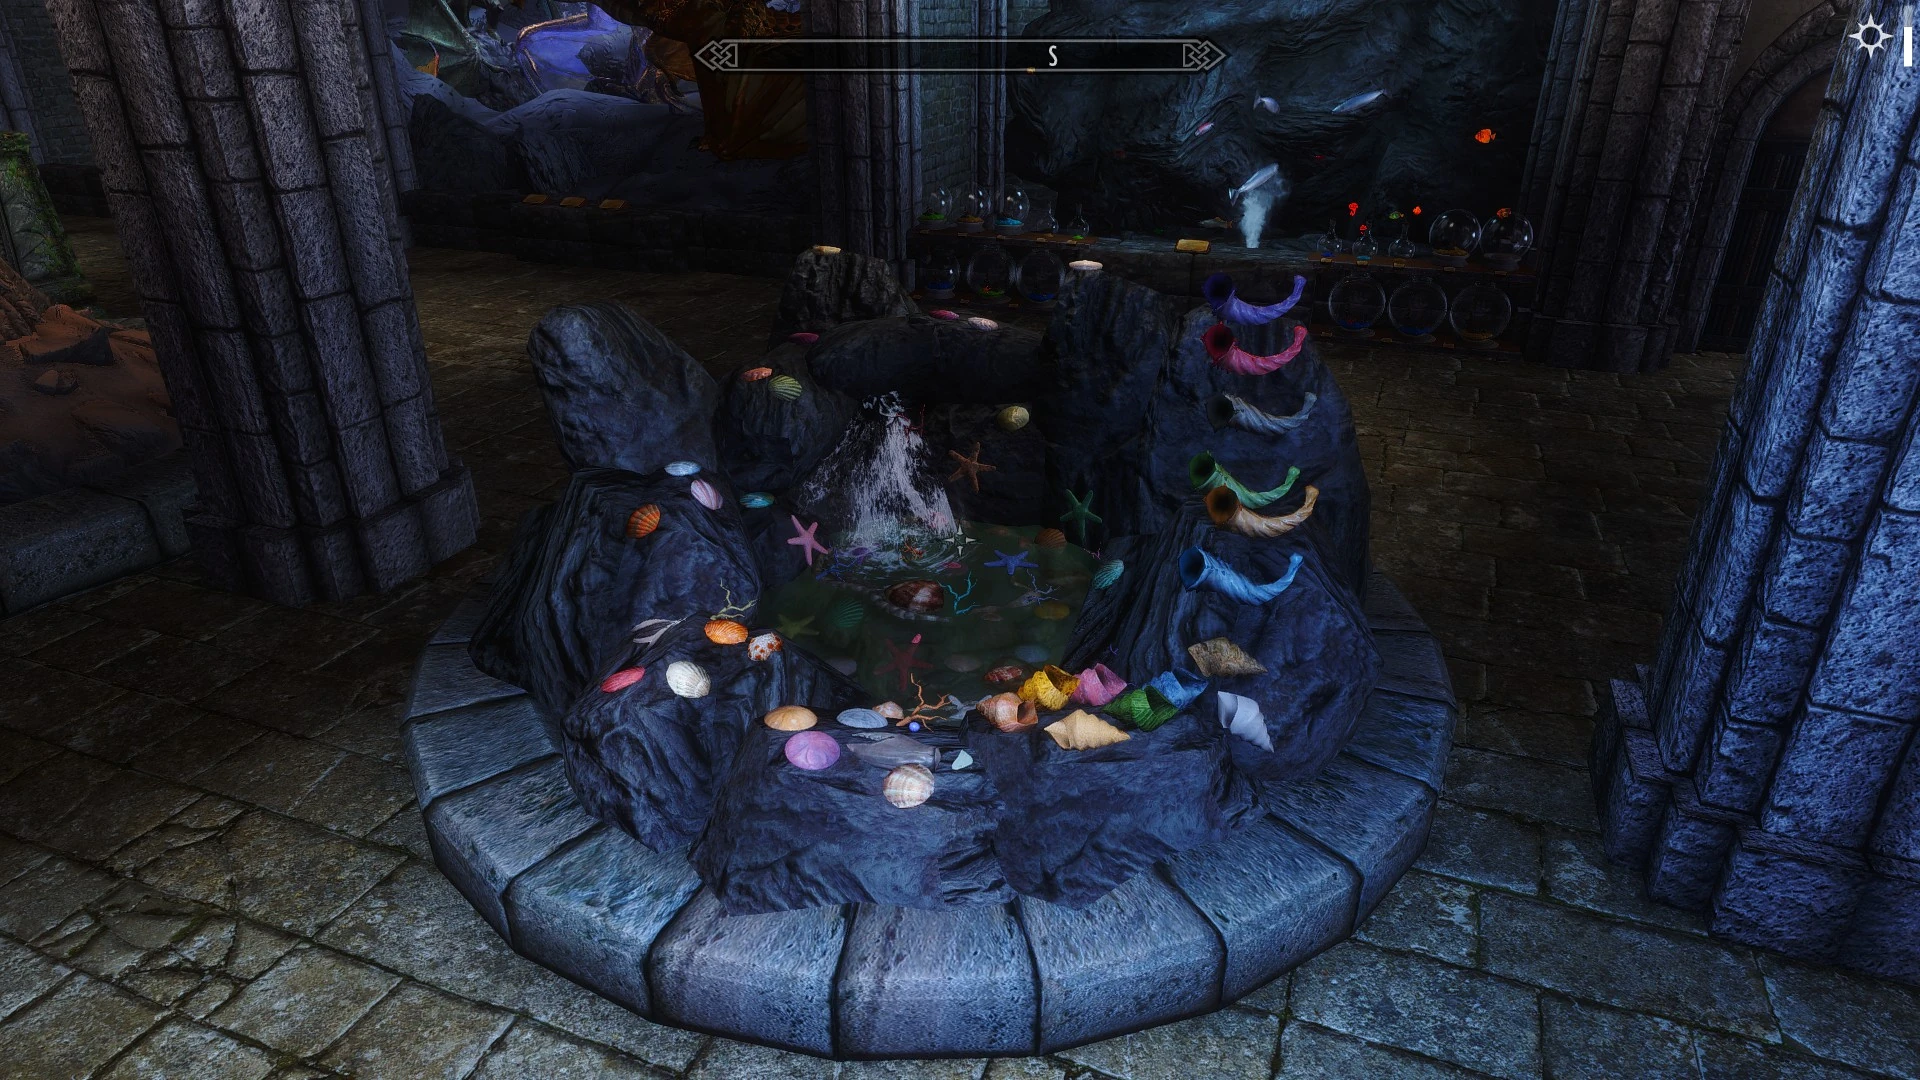

Displays the seashells of the fully integrated mod Seashells. They spawn randomly along The Sea of Ghosts in the northern-most part of Skyrim.
List of seashells:
| Conch |
|---|
| Conch - Blue |
| Conch - Green |
| Conch - Orange |
| Conch - Red |
| Conch - Spotted |
| Conch - Striped |
| Conch - Weathered |
| Conch - White |
| Coral |
|---|
| Coral - Blue |
| Coral - Gray |
| Coral - Green |
| Coral - Orange |
| Coral - Pink |
| Coral - Purple |
| Coral - Red |
| Coral - Slate |
| Coral - Spiked |
| Coral - Yellow |
| Large Shell |
|---|
| Large Shell - Beige |
| Large Shell - Blue |
| Large Shell - Gray |
| Large Shell - Green |
| Large Shell - Purple |
| Large Shell - Red |
| Old Clam |
|---|
| Old Clam - Large |
| Old Clam - Medium |
| Old Clam - Thin |
| Pansy Shell |
|---|
| Pansy Shell - Brown |
| Pansy Shell - Gray |
| Pansy Shell - Purple |
| Porceletta |
|---|
| Porceletta - Spotted |
| Porceletta - Striped |
| Starfish |
|---|
| Starfish - Blue |
| Starfish - Gray |
| Starfish - Green |
| Starfish - Pink |
| Starfish - Purple |
| Starfish - Red |
| Starfish - Spotted |
| Other |
|---|
| Seabird Feathers |
| Sea Crystal |
| Small Mudcrab Chitin |
| Smooth Pearl |
Skeletal Dragon Display (Skyrim Special Edition)

Added after the mage's Guild quest "The Staff of Magnus. It is presumably the skeletal dragon slain early in the Labyrinthian dungeon.
Red Mountain Display
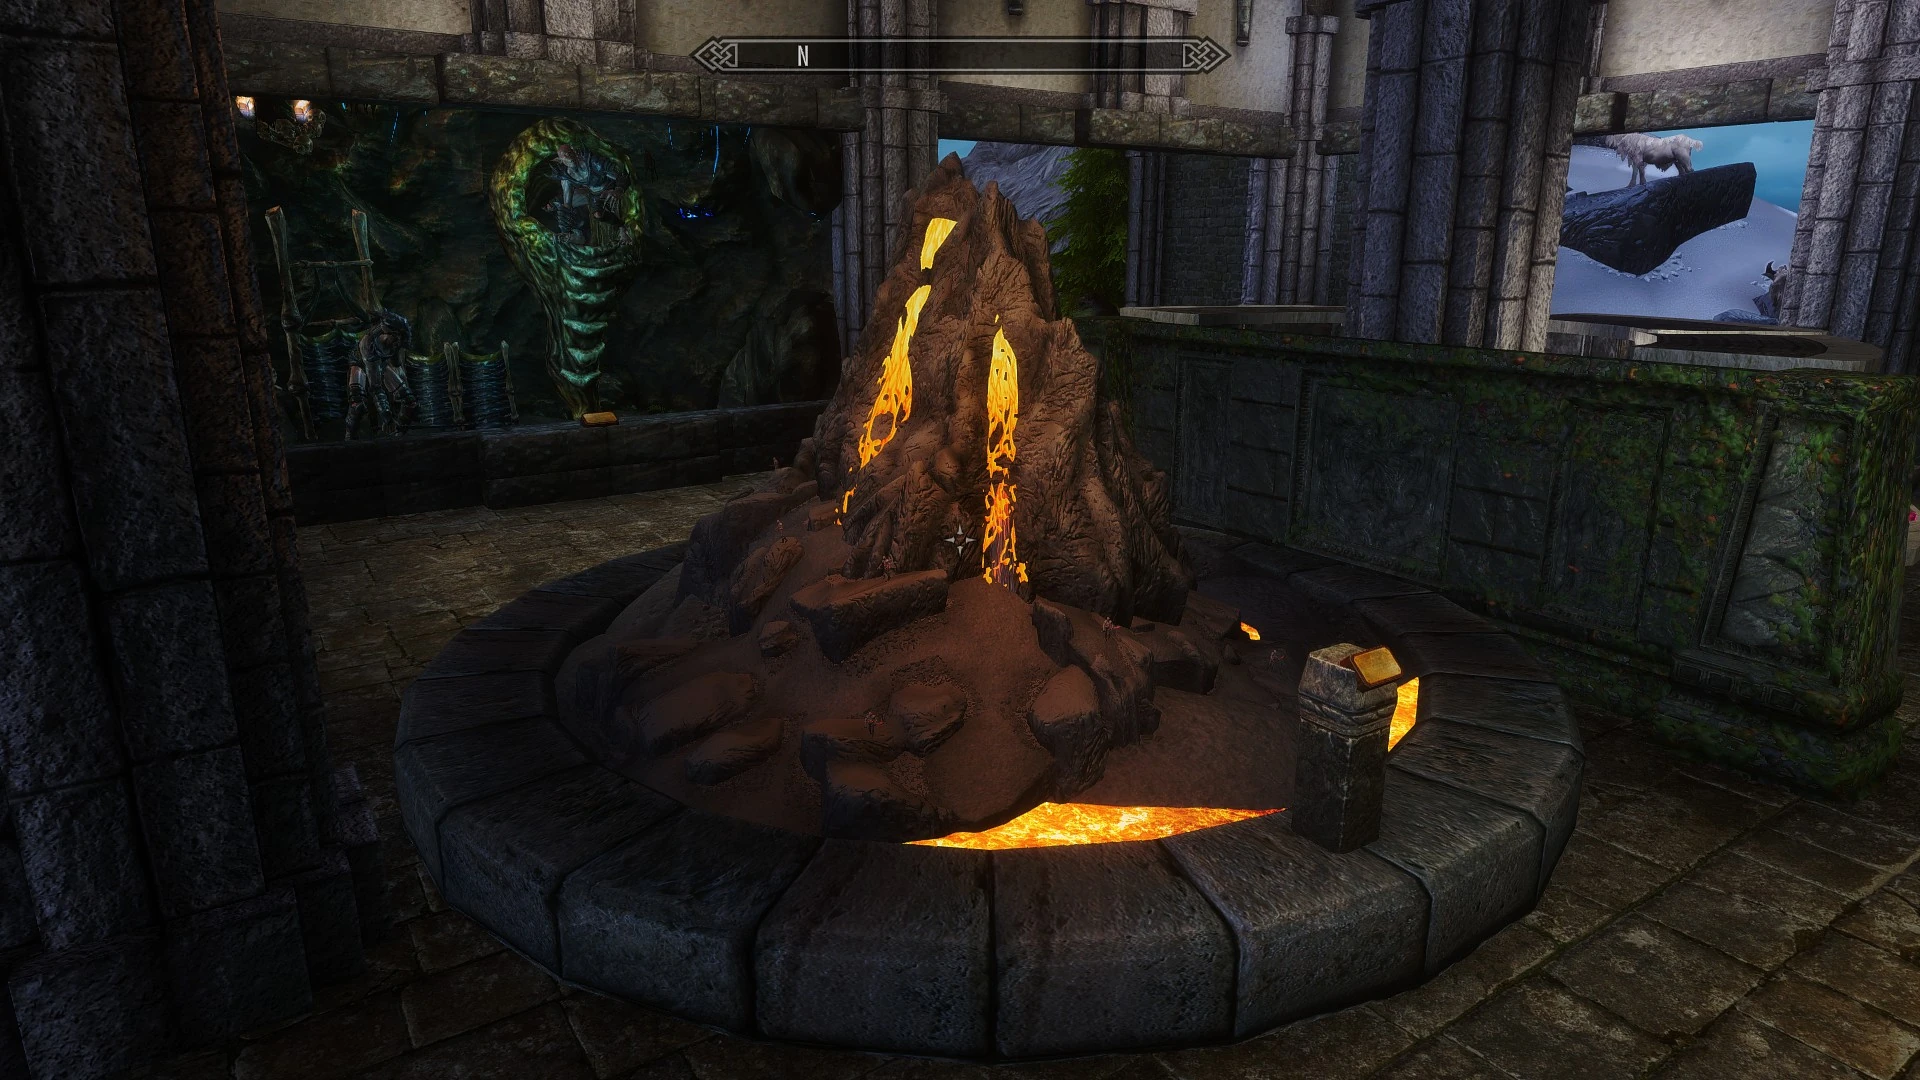
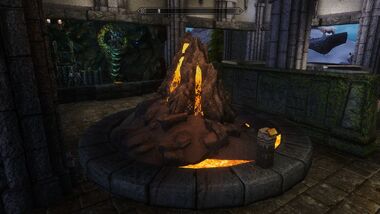
The red mountain display is the only display in the Gallery of Natural Science that doesn't need anything to be displayed. It is just an enjoyable view with some information.
Gemstone Display
A display for the fully integrated mod The Gemstone Collector. They can mainly be found randomly in loot containers and through mining. Most can also be found in fixed locations.
NOTE: The seemingly not-worth-the-effort power "Prowler's Profit" from No Stone Unturned actually becomes almost crucial to obtaining all gemstones. This power will not only make sure you find at least 3 gemstones in every container, you'll also be finding the rarest ones a little more often. Remember that all of your spare gemstones can be sold at the Sell Cart for profit.
List of gemstones:
| A |
|---|
| Achroite Tourmaline |
| Agate |
| Ajoite |
| Alexandrite |
| Almandine Garnet |
| Amazonite |
| Amber (treesap) |
| Amethyst |
| Ametrine |
| Andradite Garnet |
| Apatite |
| Aqua Aura |
| Aquamarine |
| Aragonite |
| Aventurine |
| Axinite |
| B |
|---|
| Baryte |
| Benitoite |
| Black Opal |
| Bloodstone |
| Blue Garnet |
| Blue Topaz |
| Boleite |
| Brazilianite |
| C |
|---|
| Calcite |
| Carnelian |
| Celestite |
| Chatoyant Quartz |
| Chrysocolla |
| Chrysoprase |
| Citrine |
| Coral |
| Cuprite |
| D |
|---|
| Demantoid Garnet |
| Diamond |
| Dioptase |
| Dravite Tourmaline |
| E |
|---|
| Emerald |
| Enstatite |
| Epidote |
| Euclase |
| Exquisite Sapphire |
| F |
|---|
| Flawless Amethyst |
| Flawless Diamond |
| Flawless Emerald |
| Flawless Garnet |
| Flawless Ruby |
| Flawless Sapphire |
| Flourite |
| G |
|---|
| Garnet |
| Goshenite |
| Grandidierite |
| Green Tourmaline |
| Gypsum |
| H |
|---|
| Helidor |
| Hematite |
| Hessonite Garnet |
| Hiddenite |
| I |
|---|
| Imperial Jadeite |
| Indicolite Tourmaline |
| Iolite |
| Ivory |
| J |
|---|
| Jade |
| Jasper |
| Jeremejevite |
| Johacidolite |
| K |
|---|
| Kornerupine |
| Kunzite |
| Kyanite |
| L |
|---|
| Labradorite |
| Lapis Lazuli |
| Larimar |
| Lepidolite |
| M |
|---|
| Meteorite |
| Morganite |
| Musgravite |
| O |
|---|
| Opal |
| P |
|---|
| Padparadscha |
| Painite |
| Peridot |
| Petalite |
| Pezzotteite |
| Platinum |
| Poudretteite |
| Pyrite |
| Pyromorphite |
| Q |
|---|
| Quantum Quattro Silica |
| Quartz |
| R |
|---|
| Red Diamond |
| Red Emerald |
| Rhodochrosite |
| Rhodonite |
| Rubilite Tourmaline |
| Ruby |
| S |
|---|
| Sapphire |
| Schorl Tourmaline |
| Seraphinite |
| Serendibite |
| Serpentine |
| Sinhalite |
| Smithsonite |
| Sodalite |
| Spessartine Garnet |
| Spinel |
| Staurolite |
| Sulphur (Explosive) |
| Sunstone |
| T |
|---|
| Taaffeite |
| Tanzanite |
| Thomsonite |
| Titanite (Radioactive) |
| Tsavorite Garnet |
| Turquoise |
| V |
|---|
| Vesuvianite |
| W |
|---|
| Watermelon Tourmaline |
| X |
|---|
| Xenotime Y |
| Z |
|---|
| Zincite |
| Zircon |
SPOILER list - How to get all items
Chaurus and Spider display
Chaurus:
- 1 Chaurus Chitin: Chaurus Chitin
- 1 Chaurus Eggs: Chaurus Eggs
Spider:
- 1 Spider Egg: Spider Egg
- 1 Frostbite Venom: Frostbite Venom
Wolf and Deer display
Deer:
- 1 Elk Hide: Elk Hide
- 1 Venison: Venison
Wolf:
- 2 Wolf Pelts: Wolf Pelt
Sabre Cat and Bear display
Bear:
- 1 Bear Claws: Bear Claws
- 1 Bear Pelt: Bear Pelt
Sabre Cat:
- 1 Sabre Cat Tooth: Sabre Cat Tooth
- 1 Sabre Cat Pelt: Sabre Cat Pelt
Horker and Mudcrab display
Mudcrab:
- 3 Mudcrab Chitin: Mudcrab Chitin
Horker:
- 1 Horker Meat: Horker Meat
- 1 Horker Tusk: Horker Tusk
Falmer display
- 2 Chaurus Chitin: Chaurus Chitin
- 2 Falmer Ears: Falmer Ear
Farm display
Chicken:
- 1 Chicken Breast: Chicken Breast
- 1 Chicken's Egg: Chicken's Egg
Horse:
- 1 Horse Meat: Horse Meat
- 1 Horse Hide: Horse Hide
Cow:
- 2 Cow Hides: Cow Hide
Dog:
- 2 Dog Meat: Dog Meat
Troll and Goat display
Troll:
- 2 Troll Fat: Troll Fat
- 2 Troll Skulls: Troll Skull
Goat:
- 2 Goat Hides: Goat Hide
- 2 Goat Horns: Goat Horns
Hagraven and Spriggan display
Hagraven:
- 1 Hagraven Claw: Hagraven Claw
- 1 Hagraven Feathers: Hagraven Feathers
Spriggan:
- 1 Spriggan Sap: Spriggan Sap
- 1 Taproot: Taproot
Dragon display:
Sorgul:
- 1 Dragon Bone: Dragon Bone
- 1 Scales of Sorgul: Looted from the dragon Izvenyah in Windcaller's Retreat during the quest 'Excavation of Windcaller Pass'.
Elder Dragon:
- 1 Dragon Bone: Dragon Bone
- 1 Dragon Scales: Dragon Scales
Naaslaarum or Voslaarum:
- 1 Dragon Bone: Dragon Bone
- 1 Scales of Naaslaarum or Scales of Voslaarum: Looted from the dragons Naaslaarum and Voslaarum during the quest Touching the Sky. Both dragons can be found in the Forgotten Vale.
Sahrotaar:
- 1 Dragon Bone: Dragon Bone
- 1 Scales of Sahrotaar: Looted from the dragon Sahrotaar, encountered during the quest 'At the Summit of Apocrypha'.
Legendary Dragon:
- 1 Dragon Bone: Dragon Bone
- 1 Dragon Scales: Dragon Scales
Yekrem:
- 1 Dragon Bone: Dragon Bone
- 1 Scales of Yekrem: Looted from the dragon Kreindeinvith in Windcaller's Retreat during the quest 'Excavation of Windcaller Pass'.
Vulthuryol:
- 1 Dragon Bone: Dragon Bone
- 1 Scales of Vulthuryol: Looted from the dragon Vulthuryol in Blackreach. Access the center building area in Blackreach where there is a large yellow orb above the Blackreach Debate Hall and the Hall of Rumination. To summon Vulthuryol, use Unrelenting Force on the orb.
Mammoth and Giant display
- 1 Mammoth Snout: Mammoth Snout
- 1 Mammoth Tusk: Mammoth Tusk
Entomology Display
- Bee in a Jar: Goldenglow Estate Second Floor, in Aringoth’s bedroom on a dresser.
- Butterfly in a Jar: Alchemist's Shack, on a bottom shelf.
- Dragonfly in a Jar: Burguk's Longhouse Cellar in Dushnikh Yal, on a shelf under the scaffolding.
- Moth in a Jar: Duskglow Crevice, on the end table near a clothes iron in the final room on the west side of the map.
- Torchbug in a Jar: Frostflow Lighthouse, on the fireplace mantel on the ground floor.
Gemstones
They can mainly be found randomly in loot containers and through mining. Most can also be found in fixed locations.
- Achroite Tourmaline
- Agate: Warmaiden's in Whiterun, on the counter.
Sargruunde in the Sunken Barrow (unmarked location), in the treasure room.
2 in Temple of the Venerable Ones, behind the seventh door from the left, in a pile of gold. - Ajoite
- Alexandrite
- Almandine Garnet: Hollyfrost Farm, on a middle shelf.
- Amazonite: Merryfair Farm, on the fireplace mantel.
- Amber (treesap): Can be made at a smelter with the following materials: 2 Sleeping Tree Sap.
2 can be found in Temple of the Venerable Ones, behind the seventh door from the left, in a pile of gold. - Amethyst: Found in many fixed locations throughout Skyrim and Solstheim.
- Ametrine: Temple of the Venerable Ones inside the Glacial Crevice, behind the seventh door from the left, in a pile of gold.
- Andradite Garnet: Bolli's House in Riften, on the end table in his bedroom.
Temple of the Venerable Ones, behind the seventh door from the left, in a pile of gold. - Apatite
- Aqua Aura: Can be made at a smelter with the following materials: 1 Quartz, 1 [http://elderscrolls.wikia.com/wiki/Gold_Ingot Gold Ingot].
Treasury House in Markarth, on the counter. - Aquamarine: Goldenglow Estate, on the top floor on a small, square table.
2 in Temple of the Venerable Ones, behind the seventh door from the left, in a pile of gold. - Aragonite: Dead Man's Drink in Falkreath, on the counter.
Sargruunde in the Sunken Barrow (unmarked location), in the treasure room. - Aventurine: Ysolda's House in Whiterun, on the table to the left of the entrance.
- Axinite: Arnleif and Sons Trading Company in Markarth, on the counter.
- Baryte: Honeyside in Riften, on a table.
Temple of the Venerable Ones, behind the seventh door from the left, in a pile of gold. - Benitoite: Temple of the Venerable Ones inside the Glacial Crevice, behind the seventh door from the left, in a pile of gold.
- Black Opal: Sargruunde in the Sunken Barrow (unmarked location in Lake Ilinalta), in the treasure room.
- Bloodstone: The Scorched Hammer in Riften, on a cupboard near the safe.
- In the Phantasmal Chest.
- Blue Garnet: Temple of the Venerable Ones inside the Glacial Crevice, behind the seventh door from the left, in a pile of gold.
- Blue Topaz: Temple of the Venerable Ones inside the Glacial Crevice, behind the seventh door from the left, in a pile of gold.
- Boleite
- Brazilianite: Sargruunde in the Sunken Barrow (unmarked location in Lake Ilinalta), in the treasure room.
- Calcite: Olava the Feeble's House in Whiterun, on top of the cupboard.
Temple of the Venerable Ones, behind the seventh door from the left, in a pile of gold. - Carnelian: Jarl's Longhouse in Falkreath, on the table in the war room.
- Celestite: Jala's House in Solitude, on the table right next to the door.
- Chatoyant Quartz: Amren's House in Whiterun, on top of the cupboard by the door.
Sargruunde in the Sunken Barrow (unmarked location), in the treasure room.
Temple of the Venerable Ones, behind the seventh door from the left, in a pile of gold. - Chrysocolla: Irgnir's House in Dawnstar, on the small, round table in the corner at the back of the room.
- Chrysoprase: Falion's House in Morthal, on the square table between the bed and the wardrobe.
- In the Phantasmal Chest.
- Citrine: Sorli's House in Stonehills, on the cupboard next to the double bed.
- Coral: Riften Fishery, on some crates to the right near the western entrance.
Sargruunde in the Sunken Barrow (unmarked location), in the treasure room.
Temple of the Venerable Ones, behind the seventh door from the left, in a pile of gold. - Cuprite: Fellstar Farm in Ivarstead, on the dining table.
- Demantoid Garnet
- Diamond: Found in many fixed locations throughout Skyrim and Solstheim.
- Dioptase
- Dravite Tourmaline: Moorside Inn in Morthal, on the table close to the entrance door.
- Emerald: Castle Volkihar Keep, in a bowl on a dresser by a bed in a master bedroom.
Riftweald Manor in Riften, in a bowl on the table in Mercer Frey's secret office in the tunnels under the manor. - Enstatite: Ogmund's House in Markarth, on the table.
Sargruunde in the Sunken Barrow (unmarked location), in the treasure room.
Temple of the Venerable Ones, behind the seventh door from the left, in a pile of gold. - Epidote: Erikur's House in Solitude, on a small table by one of the entrances.
Temple of the Venerable Ones, behind the first door from the left, in a pile of gold. - Euclase: Katla's Farm, on the table on the ground floor.
- Flawless Amethyst:
- Found randomly in loot containers and when mining.
- Flawless Diamond
- Flawless Emerald:
- Found randomly in loot containers and when mining.
- Flawless Garnet:
- Found randomly in loot containers and when mining.
- Flawless Ruby
- Flawless Sapphire
- Flourite: Hod and Gerdur's House, in Riverwood, on the end table next to the small bed.
- Garnet: Castle Volkihar Keep, on a plate on a long, small table in Harkon's quarters, and in a bowl on a dresser by a bed in a master bedroom.
Embershard Mine in Falkreath Hold, on the table in the storeroom at the back of the mine.
Riftweald Manor in Riften, in a bowl on the table in Mercer Frey's secret office in the tunnels under the manor. - Goshenite: Vittoria Vici's House in Solitude, upstairs on a little table with a mead barrel.
- Grandidierite: Sargruunde in the Sunken Barrow (unmarked location in Lake Ilinalta), in the treasure room.
- Green Tourmaline: Battle-Born Farm, on a shelf above the stack of firewood.
- Gypsum: Rustleif's House in Dawnstar, on the small, round table in the corner of the room.
Temple of the Venerable Ones, behind the first door from the left, in a pile of gold. - Helidor: Arcadia's Cauldron in Whiterun, on the counter.
- Hematite: Gray Pine Goods in Falkreath, on the counter.
Temple of the Venerable Ones, behind the seventh door from the left, in a pile of gold. - Hessonite Garnet: Solitude Blacksmith, on a low table at the top of the stairs.
Temple of the Venerable Ones, behind the first door from the left, in a pile of gold. - Hiddenite: Sargruunde in the Sunken Barrow (unmarked location in Lake Ilinalta), in the treasure room.
- Imperial Jadeite
- Indicolite Tourmaline
- Iolite: Dragonsreach in Whiterun, in Farengar's Quarters on a shelf on the counter.
Temple of the Venerable Ones, behind the seventh door from the left, in a pile of gold. - Ivory: Black-Briar Manor in Riften, on an end table in the master bedroom on the top floor.
- Jade: Sleeping Giant Inn in Riverwood, on the table opposite the entrance.
- In the Phantasmal Chest.
- Jasper: Fruki's House in Dawnstar, on the table to the right of the entrance.
Temple of the Venerable Ones, behind the seventh door from the left, in a pile of gold. - Jeremejevite
- Johacidolite: Sargruunde in the Sunken Barrow (unmarked location in Lake Ilinalta), in the treasure room.
- In the Phantasmal Chest.
- Kornerupine: 2 in Temple of the Venerable Ones inside the Glacial Crevice, behind the seventh door from the left, in a pile of gold.
- Kunzite: Anise's Cabin, on the counter in the basement.
- Kyanite: The Drunken Huntsman in Whiterun, on the counter.
- Labradorite: Belethor's General Goods in Whiterun, on the counter.
Temple of the Venerable Ones, behind the first door from the left, in a pile of gold. - Lapis Lazuli: Bards College in Solitude, on the counter in the library on the ground floor.
- In the Phantasmal Chest.
- Larimar
- Lepidolite: Pelagia Farm, on the cupboard next to the firepit.
- Meteorite: Sargruunde in the Sunken Barrow (unmarked location in Lake Ilinalta), in the treasure room.
- Morganite
- Musgravite: Temple of the Venerable Ones inside the Glacial Crevice, behind the seventh door from the left, in a pile of gold.
- Opal
- Padparadscha
- Painite: Sargruunde in the Sunken Barrow (unmarked location in Lake Ilinalta), in the treasure room.
- Peridot: Blacksmith Quarters in Windhelm, just as you enter, on a round table.
- Petalite: Moorside Inn in Morthal, on the counter.
- In the Phantasmal Chest.
- Pezzotteite: Sargruunde in the Sunken Barrow (unmarked location in Lake Ilinalta), in the treasure room.
- Platinum: Temple of the Venerable Ones inside the Glacial Crevice, behind the seventh door from the left, in a pile of gold.
- Poudretteite
- Pyrite: Sven and Hilde's House in Riverwood, on an end table next to the bed.
- Pyromorphite: Sargruunde in the Sunken Barrow (unmarked location in Lake Ilinalta), in the treasure room.
- Quantum Quattro Silica
- Quartz: Riverwood Trader, on the counter.
- Red Diamond
- Red Emerald
- Rhodochrosite: Arch-Mage's Quarters in the College of Winterhold, on a small table close to the alchemy lab.
- Rhodonite: Elgrim's Elixirs in Riften, on the counter.
Sargruunde in the Sunken Barrow (unmarked location), in the treasure room. - Rubilite Tourmaline
- Ruby: Castle Dour in Solitude, on a table in the room to the north of the war room.
Embershard Mine in Falkreath Hold, on the table in the storeroom at the back of the mine.
Riftweald Manor in Riften, in a bowl on the table in Mercer Frey's secret office in the tunnels under the manor. - Sapphire: Castle Volkihar Keep, on a plate on a long, small table in Harkon's quarters.
Mara's Eye Pond, on the table.
Temple of the Venerable Ones, behind the fifth door from the left, in a pile of gold. - Schorl Tourmaline: Bits and Pieces in Solitude, on the counter.
- Seraphinite: Temple of the Venerable Ones inside the Glacial Crevice, behind the seventh door from the left, in a pile of gold.
- Serendibite
- Serpentine: Leigelf's House in Dawnstar, on the small, round table in the corner of the room.
Sargruunde in the Sunken Barrow (unmarked location), in the treasure room. - Sinhalite: Temple of the Venerable Ones inside the Glacial Crevice, behind the seventh door from the left, in a pile of gold.
- Smithsonite: Jorrvaskr Living Quarters in Whiterun, on the round table outside Kodlak's quarters.
- Sodalite: Alvor and Sigrid's House in Riverwood, on the table in the basement.
Sargruunde in the Sunken Barrow (unmarked location), in the treasure room. - Spessartine Garnet: The Pawned Prawn in Riften, on the counter.
- Spinel
- Staurolite
- Sulphur (Explosive): The Mortar and Pestle in Dawnstar, on the top floor on the dresser by the bed, among some alchemy ingredients.
- Sunstone: Solitude Sawmill, on the counter.
- Taaffeite: Sargruunde in the Sunken Barrow (unmarked location in Lake Ilinalta), in the treasure room.
- Tanzanite: Temple of the Venerable Ones inside the Glacial Crevice, behind the seventh door from the left, in a pile of gold.
- Thomsonite: The Arcanaeum in the College of Winterhold, on a shelf below the counter.
- Titanite (Radioactive)
- Tsavorite Garnet: Sargruunde in the Sunken Barrow (unmarked location in Lake Ilinalta), in the treasure room.
- TurquoiseThe Winking Skeever in Solitude, on the ground floor on a long table in the hallway leading to the stairs.
Temple of the Venerable Ones, behind the seventh door from the left, in a pile of gold. - Vesuvianite: Blue Palace in Solitude, on the top floor on a shelf in Sybille's quarters.
- Watermelon Tourmaline
- Xenotime Y: Sargruunde in the Sunken Barrow (unmarked location in Lake Ilinalta), in the treasure room.
- Zincite
- Zircon: The Bee and Barb in Riften, on the counter.
Fairy Shelves (requires BadGremlin's Captured Fairies)
- Fairy 01: Crabber's Shanty, on the table outside.
- Fairy 14: Orphan's Tear, next to a bedroll in the superstructure.
- Fairy 03: Hunter's Camp, an unmarked location west of the Guardian Stones at the riverbank, next to the tent.
- Fairy 04: Outside Fort Neugrad, in the boat at the dock near the fort, next to the Mudcrab in a Jar.
- Fairy 05: Outside Goldenglow Estate, only accessible during or after the quest 'Loud and Clear', on the dock by the boats.
- Fairy 06: Riften Plankside outside Riften, on the big fishing ship docked northwest of the Riften Fishery.
- Fairy 07: Outside Stony Creek Cave, on the dock next to the boat.
- Fairy 08: Mara's Eye Pond, in the small boat docked at the island.
- Fairy 09: Windhelm Docks, on the deck of Kjar's ship.
- Rotting Fairy: Riften Plankside outside Riften, on a small fisher boat under a bridge.
- Dead Fairy: The Silvermoon in Lake Ilinalta (unmarked location south of the Lady Stone), near the table in the former captain's quarters.
- Fairy 02: Lake Ilinalta Fisherman's Camp, an unmarked location on the Lake Ilinalta shoreline east of Moss Mother Cavern, next to the bedroll inside the tent.
- Goth Fairy: The Sea Squall, docked in the harbor of Dawnstar, on the northern side of the deck.
- Zelda's Fairy: Fisherman's Island, an unmarked location in the southern part of Lake Ilinalta, near the boat.
- Tinker Fairy: Near Hela's Folly, on a barrel in Deekus' camp.
- Great Fairy: Solitude Lighthouse, at the very top of the lighthouse, next to the stairs.
- Fairy 12: East Empire Company store in Solitude Docks, on a crate on the second floor.
- Fairy 11: Wreck of the Brinehammer, on a shelf in the captain's quarters.
- Fairy 15: Broken Oar Grotto, on top of some crates in the first room of the top cabin.
- Fairy 10: Outside the Wreck of The Pride of Tel Vos, to the west, next to a bedroll in a small shelter.
- Fairy 13: Dainty Sload, on top of a barrel behind the superstructure.
- Hag Fairy: Outside Septimus Signus' Outpost, in a boat near the entrance.
Fish Shelves (requires BadGremlin's Something Fishy)
- Betta - Red: The White Hall in Dawnstar, on a dresser in a corner of the Jarl's quarters.
- Betta - Blue: Jarl's Longhouse in Winterhold, on a shelf in the left corner behind the throne.
- Betta - Green: Understone Keep in Markarth, on a stone pedestal in a curved side corridor in the Dwemer Museum.
- Abeclongfin: Understone Keep in Markarth, on a pedestal with other dwemer items at Calcelmo's excavation base.
- Cyrospade: Mistveil Keep in Riften, on the counter in Wylandriah's shop.
- Riverbetty: The White Hall in Dawnstar, on a shelf behind the counter in the war room with the alchemy shop.
- Histcarp: Dragonsreach in Whiterun, on the table near the alchemy lab in Farengar's quarters.
- Silverperch: Blue Palace in Solitude, on the top floor on a nightstand by the bed in Sybille's quarters.
- Guppy: Mistveil Keep in Riften, on a small table in the corridor behind the Jarl's throne.
- Diver: Treasury House in Markarth, on a pedestal between two bedrooms.
- Jellyfish: Blue Palace in Solitude, on the dresser to the right of the door leading to the kitchen.
- Fishbowl 3: Understone Keep in Markarth, to the left of the Jarl's throne.
- Fishbowl 2: Palace of the Kings in Windhelm, on a table at the back of the war room.
- Fishbowl 12: Highmoon Hall in Morthal, upper left bedroom, on the bookshelf to the left of the entrance.
- Fishbowl 15: Jarl's Longhouse in Falkreath, in the upper left bedroom, on the top shelf behind the door.
- Fishbowl 1: Dragonsreach Jarl's Quarters in Whiterun, on a shelf above the desk in the bedroom above the stairs in Proventus Avenicci's Chambers.
Total list of items needed for all wildlife exhibits (listed alphabetically)
- 1 Bear Claws: Bear Claws
- 1 Bear Pelt: Bear Pelt
- 1 Chaurus Chitin: Chaurus Chitin
- 1 Chaurus Eggs: Chaurus Eggs
- 1 Chicken Breast: Chicken Breast
- 1 Chicken's Egg: Chicken's Egg
- 2 Cow Hides: Cow Hide
- 2 Dog Meat: Dog Meat
- 7 Dragon Bones: Dragon Bone
- 2 Dragon Scales: Dragon Scales
- 1 Elk Hide: Elk Hide
- 2 Falmer Armor:
- Mzinchaleft Depths, on a table in the far northeastern corner of the cave (the complete armor set can be found here).
- Blackreach, in a Falmer hut near the entrance to Raldbthar Deep Market.
- Worn by Alvasorr the Rat at Arcwind Point during the quest 'Bones for a Crow' (requires the Alternative Armors - Dragon Plate creation).
- Worn by the "Falmer" in Amicus' dream during the quest 'Idle Dreams' (requires Interesting NPCs).
- 2 Falmer Ears: Falmer Ear
- 1 Frostbite Venom: Frostbite Venom
- 2 Goat Hides: Goat Hide
- 2 Goat Horns: Goat Horns
- 1 Hagraven Claw: Hagraven Claw
- 1 Hagraven Feathers: Hagraven Feathers
- 1 Horker Meat: Horker Meat
- 1 Horker Tusk: Horker Tusk
- 1 Horse Hide: Horse Hide
- 1 Horse Meat: Horse Meat
- 1 Mammoth Snout: Mammoth Snout
- 1 Mammoth Tusk: Mammoth Tusk
- 3 Mudcrab Chitin: Mudcrab Chitin
- 1 Scales of Naaslaarum OR 1 Scales of Voslaarum: Looted from the dragons Naaslaarum and Voslaarum during the quest Touching the Sky. Both dragons can be found in the Forgotten Vale.
- 1 Sabre Cat Pelt: Sabre Cat Pelt
- 1 Sabre Cat Tooth: Sabre Cat Tooth
- 1 Scales of Sahrotaar: Looted from the dragon Sahrotaar, encountered during the quest 'At the Summit of Apocrypha'.
- 1 Scales of Sorgul: Looted from the dragon Izvenyah in Windcaller's Retreat during the quest 'Excavation of Windcaller Pass'.
- 1 Spider Egg: Spider Egg
- 1 Spriggan Sap: Spriggan Sap
- 1 Taproot: Taproot
- 2 Troll Fat: Troll Fat
- 2 Troll Skulls: Troll Skull
- 2 Wolf Pelts: Wolf Pelt
- 1 Venison: Venison
- 1 Scales of Yekrem: Looted from the dragon Kreindeinvith in Windcaller's Retreat during the quest 'Excavation of Windcaller Pass'.
| ||||||||||||||||||||||||||||||||||||||||||