|
Nominated for deletion, because No longer in use i think?.
If you disagree with this page's deletion, please explain why on its talk page. If this page does not break any policies and therefore should not be deleted, or if you intend to fix it, please remove this template, but do not remove this notice from pages that you have created yourself.
|
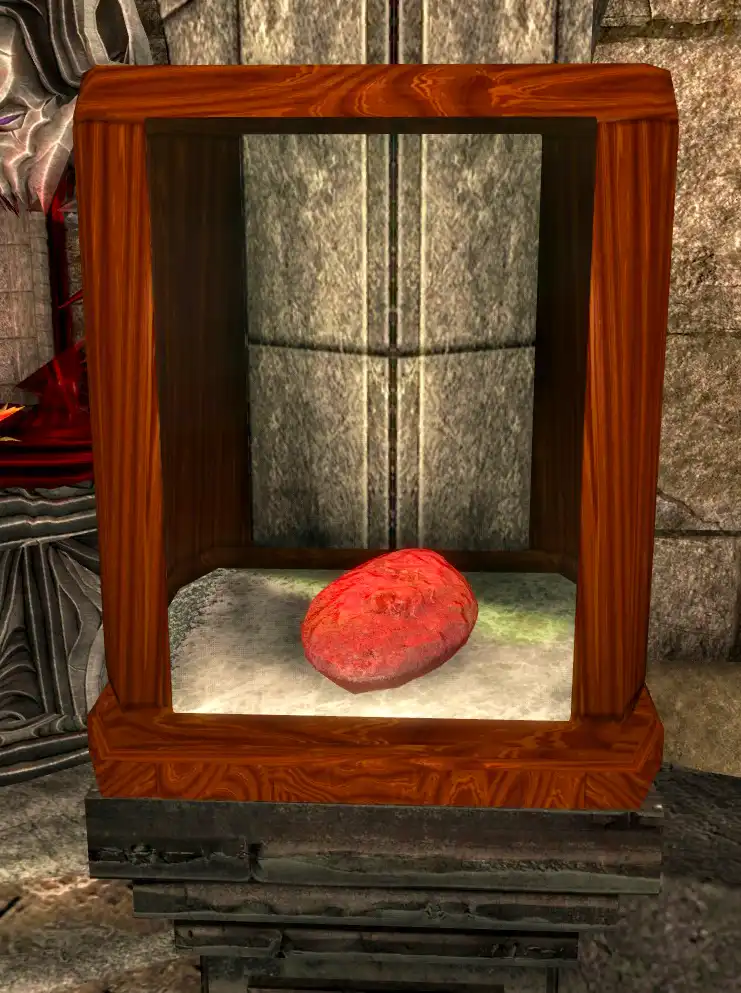
This will be a list of all museum items and their locations.
Template:Wikiportal:Main/Section Completion
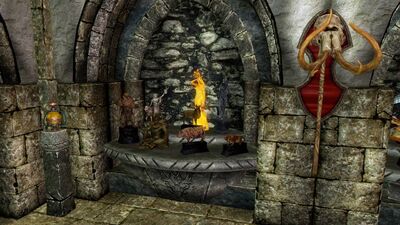
Entrance
- Thieves Guild Accomplishment Display: Become the master of the Thieves Guild.
- Dark Brotherhood Accomplishment Display: Either complete the Dark Brotherhood questline or destroy the Dark Brotherhood.
- The Companions Accomplishment Display: Complete The Companions' questline.
- College of Winterhold Accomplishment Display: Become the Arch-Mage of the College of Winterhold.
Reception Hall
The Reception Hall and Staff Barracks are located to the right of the Hall of Heroes. The Reception Hall has a few displays, as well as a door to the Explorer's Society Guild House. The Staff Barracks has beds for the Museum Guards, as well as a bedroom for Auryen. A stairway out the Staff Barracks leads to the Museum Storeroom and the Safehouse, while the corridor leads to the Curator's Office.
An Additional display patch; Legacy of the Dragonborn - Ryn's Snazzy Last Vigil - Ebony Warrior Overhaul Patch will add a display for the items of the Ebony Warrior added by Ryn's Snazzy Last Vigil - An Ebony Warrior Overhaul.
Reception Hall
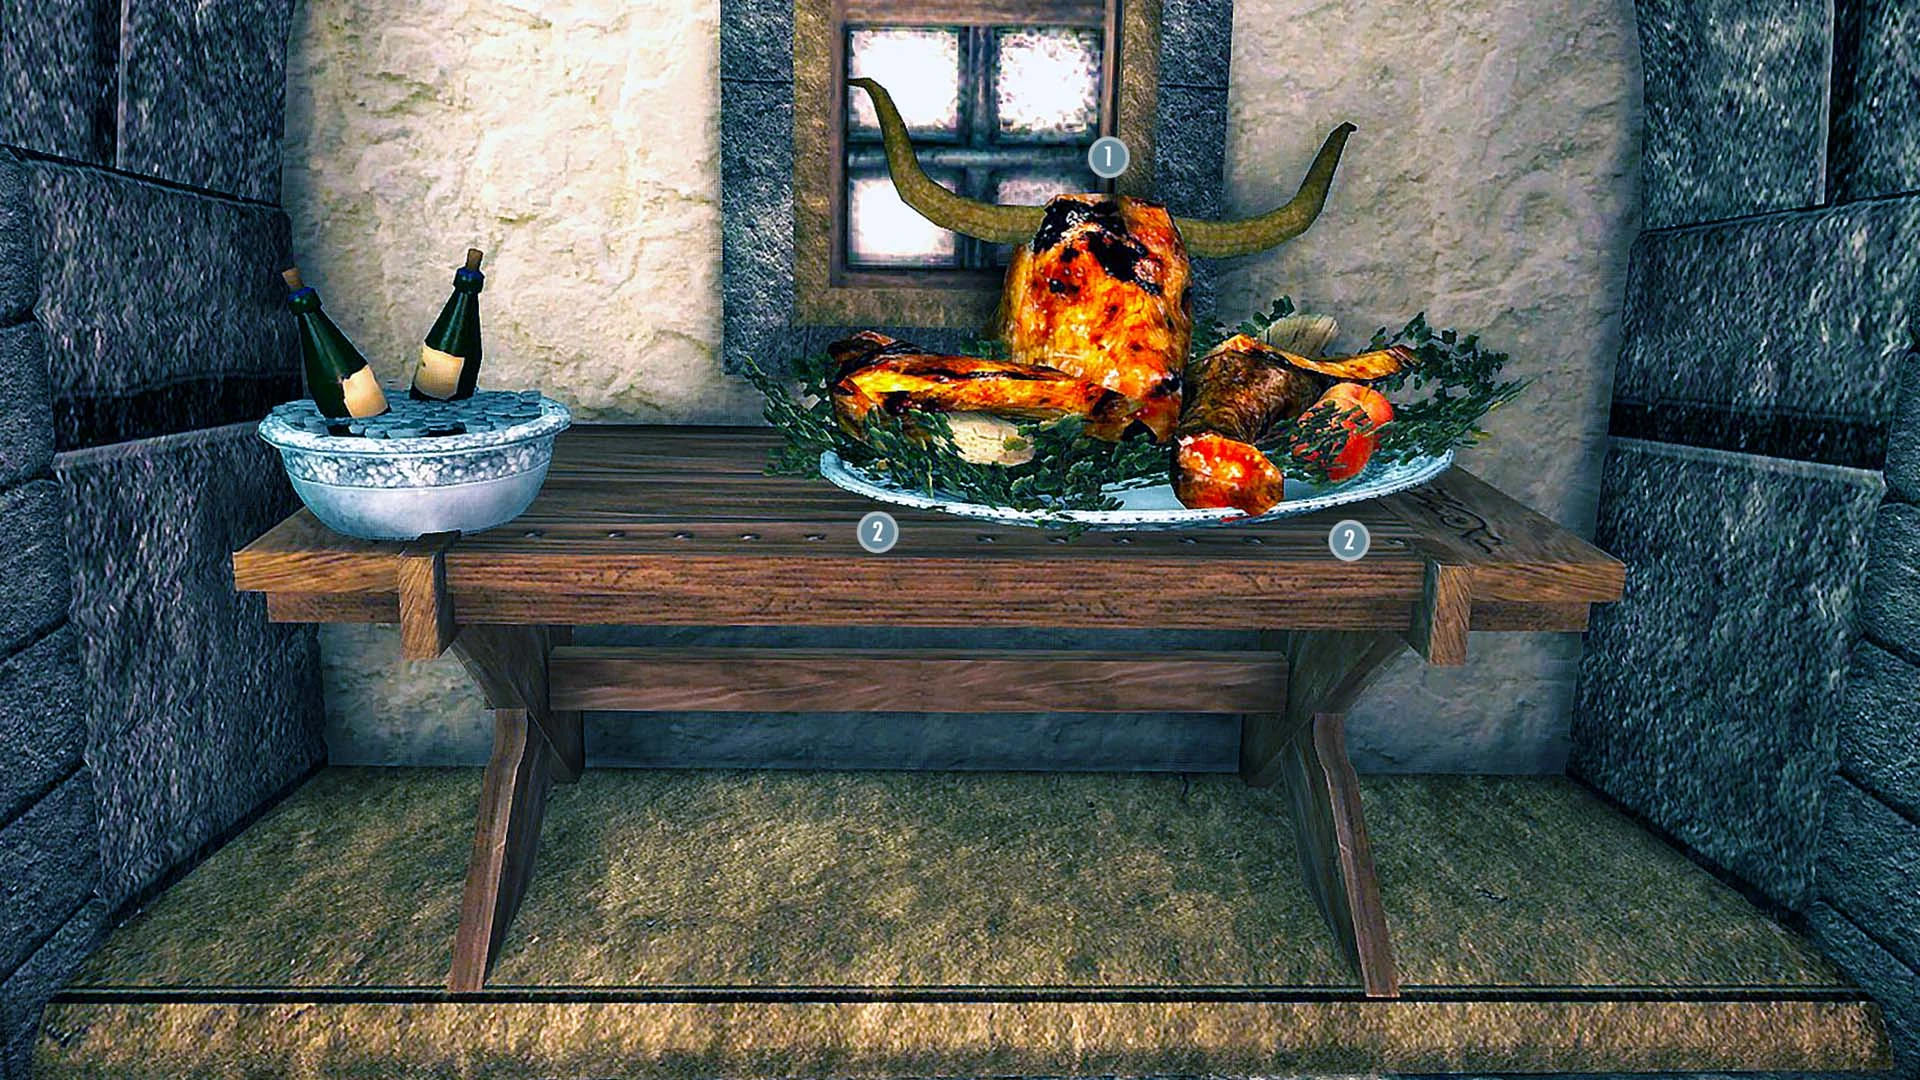
The Reception Hall has a large dining table. The food on the table is not interactable, except for the Cinnaspice Cookie. To the right are displays, as well as the Macnarian Portrait from the Night at the Museum quest. To the left is an Explorer's Society display, unlocked during Trial of Trinimac.
")
")
Dining Table | |
|---|---|
| 1) Roasted Ox Head | 2) Roasted Ox Leg x2 |

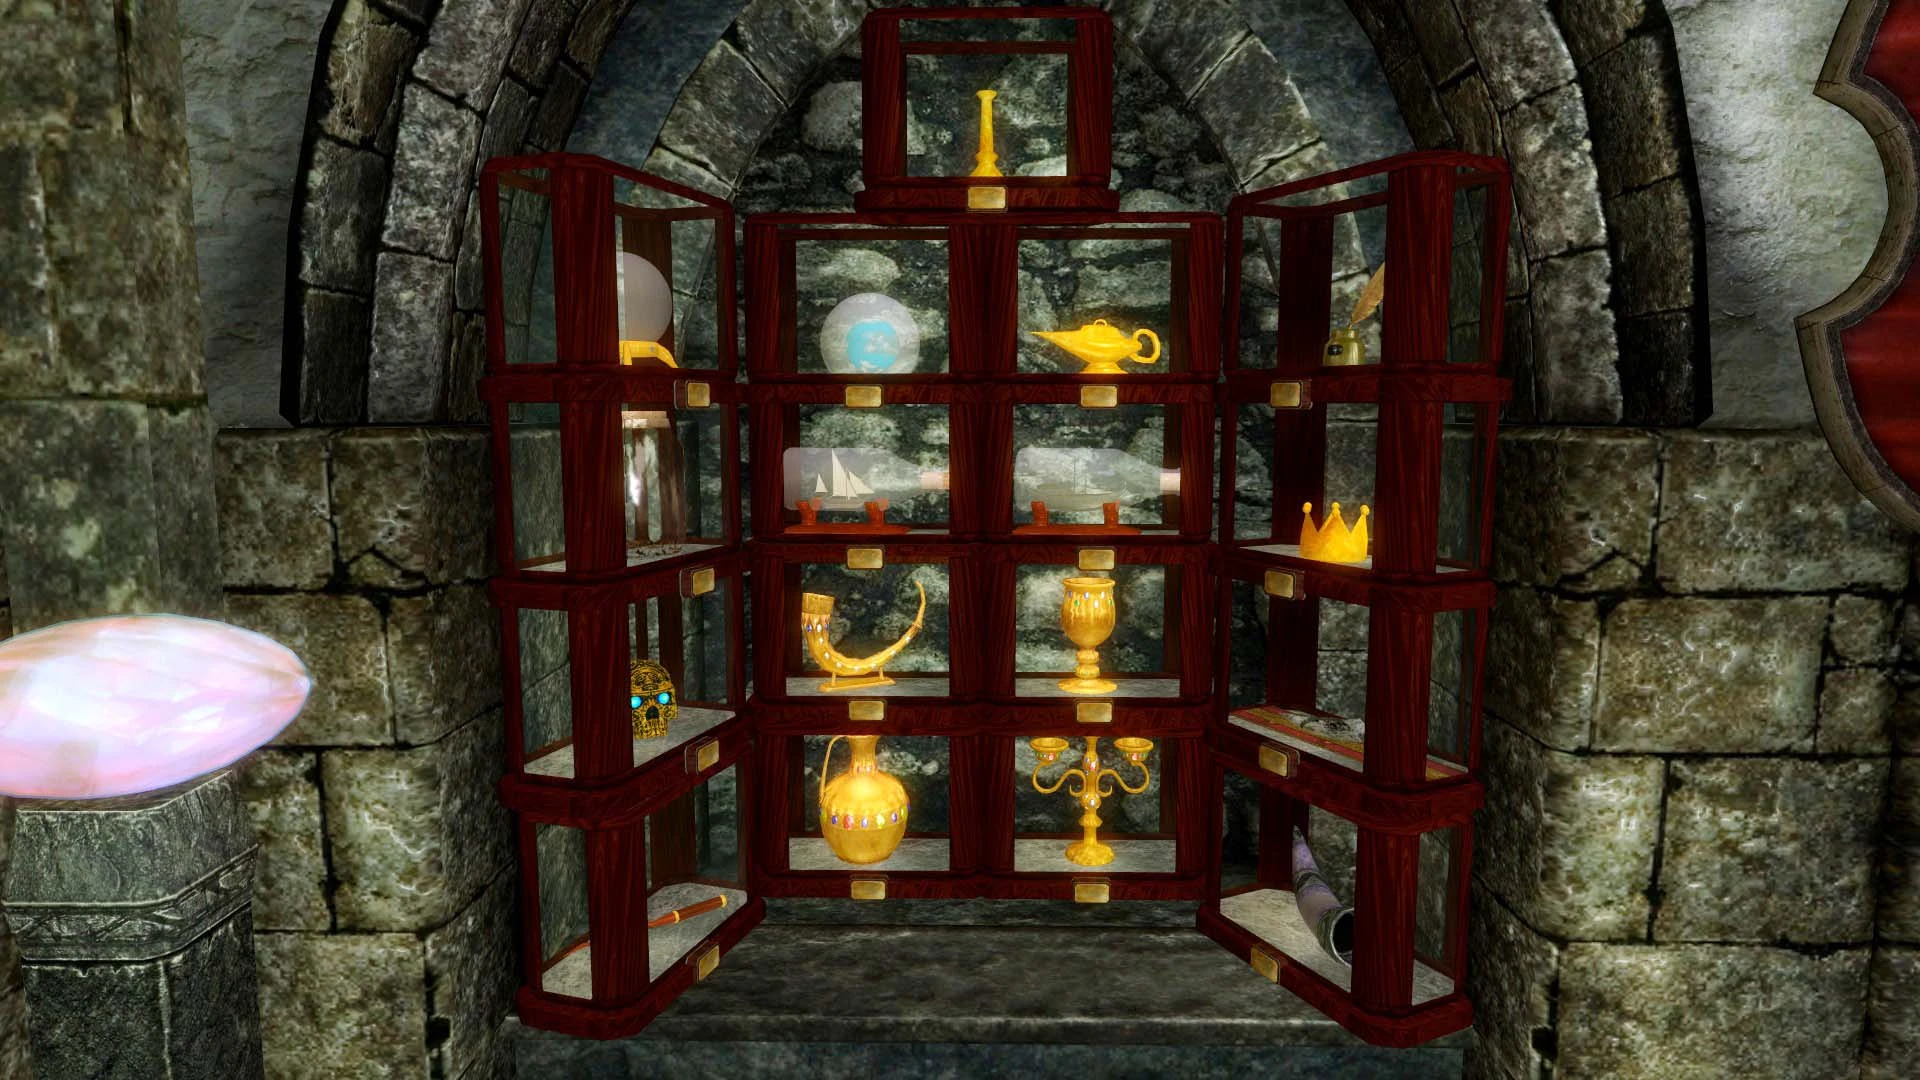
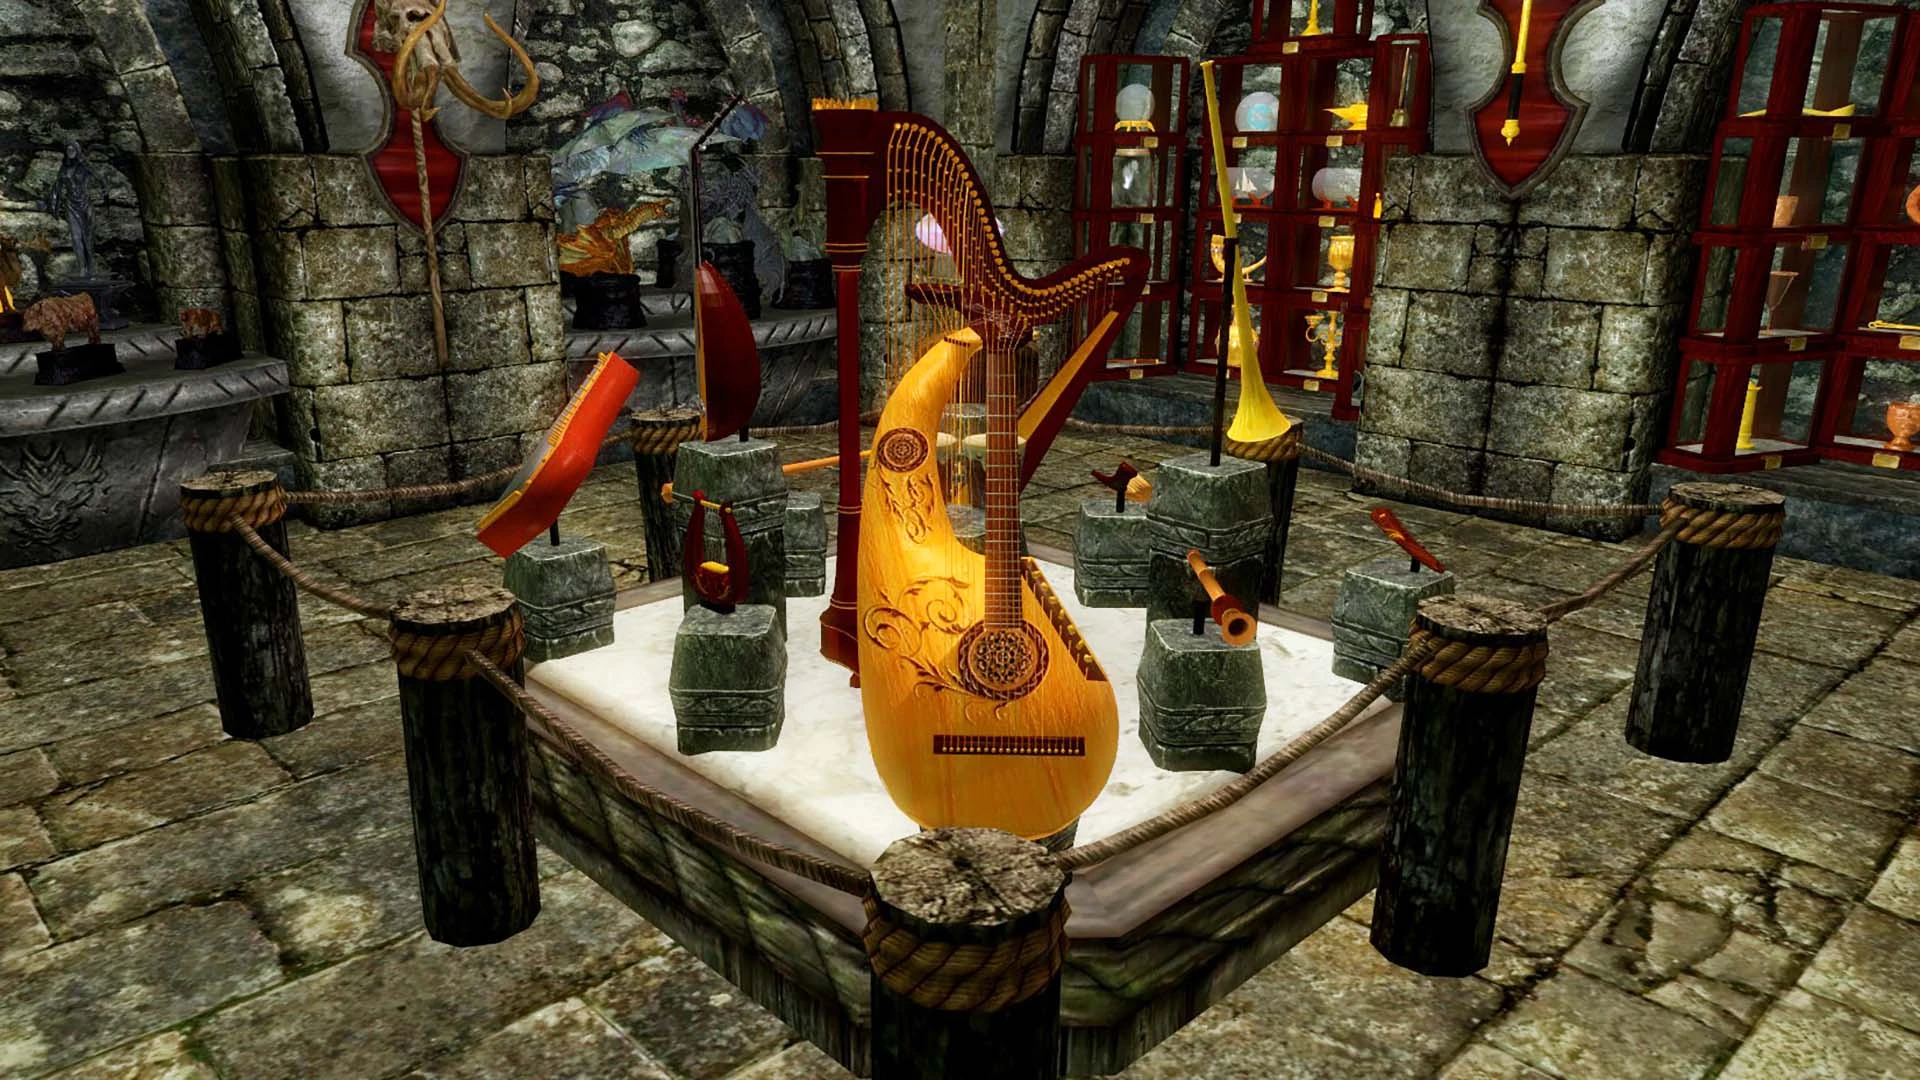
Archeology Displays
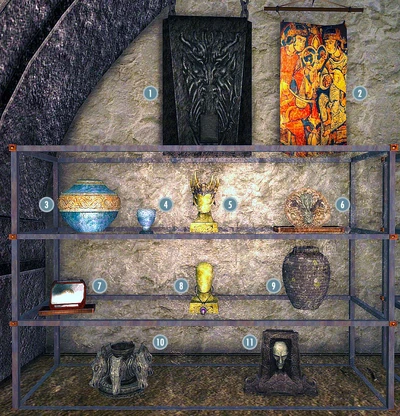
Nordic Archeology Display | ||
|---|---|---|
| Wall display | ||
| 1) Nord Tomb Relief | 2) Ancient Nordic Tapestry | |
| 1st shelf | ||
| 3) Ornate Nordic Urn | 4) Ornate Nordic Cup | |
| 5) Ashking Crown | 6) Merethic Crest | |
| 2nd shelf | ||
| 7) Mark of the Five Hundred | 8) Nord Wedding Amulet | |
| 9) Dragonscale Coffer | ||
| 3rd shelf | ||
| 10) Totemic Brazier | 11) Ancient Nordic Burial Shrine | |

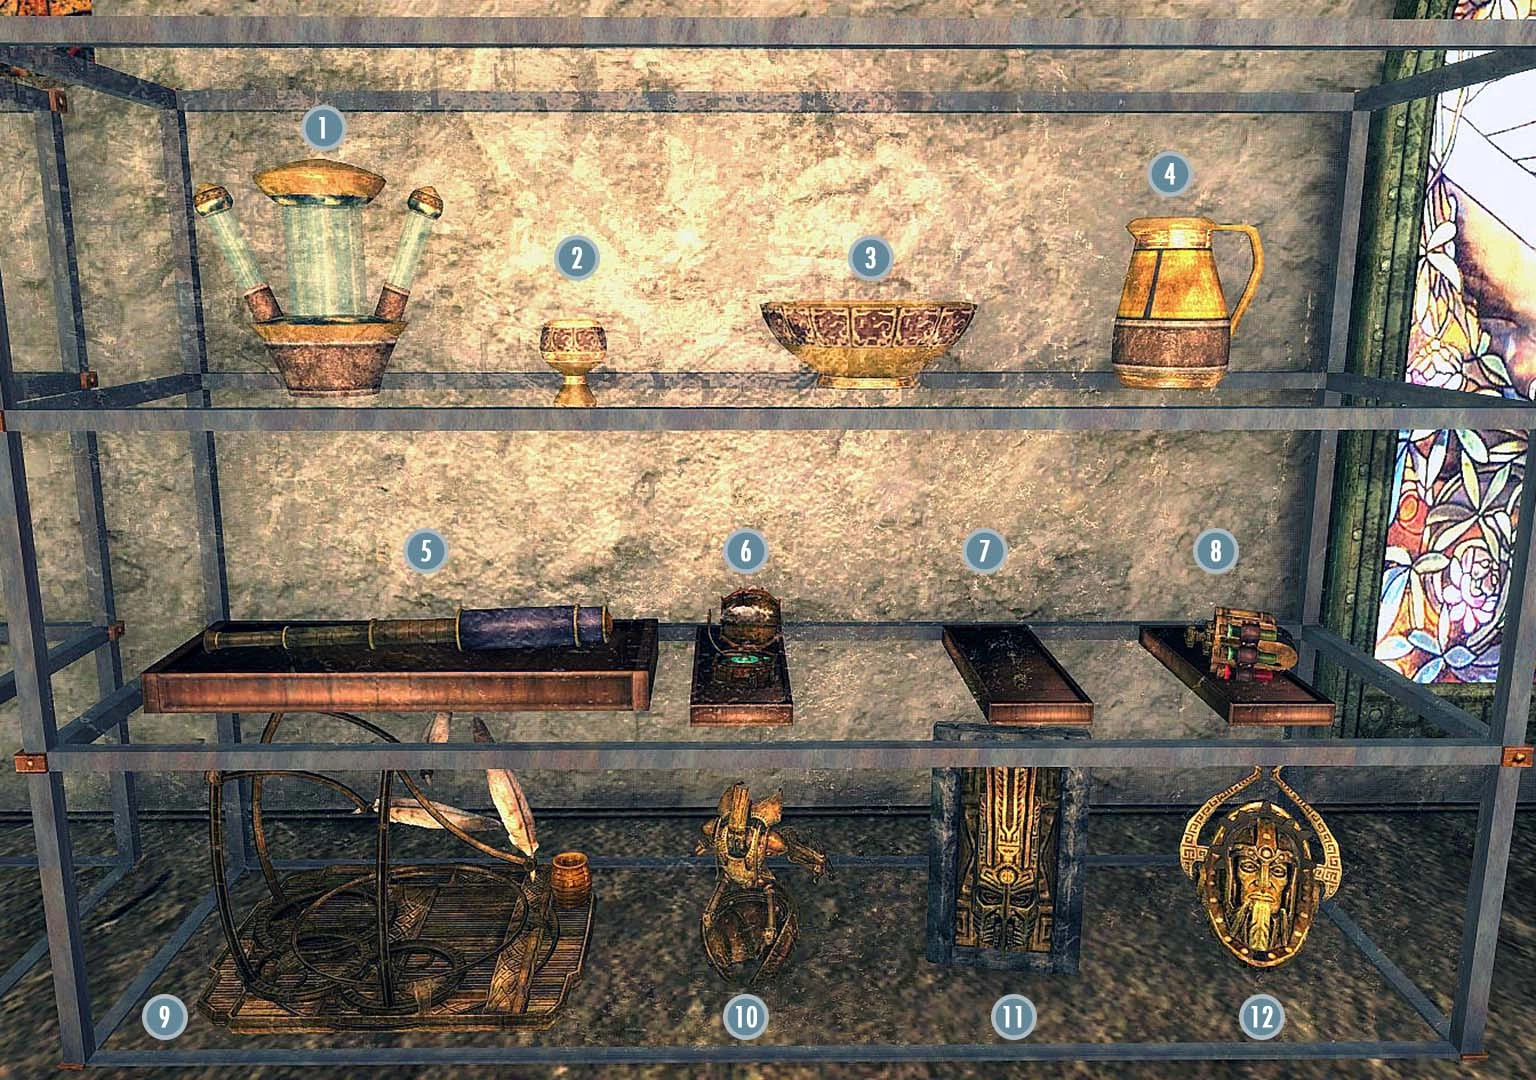
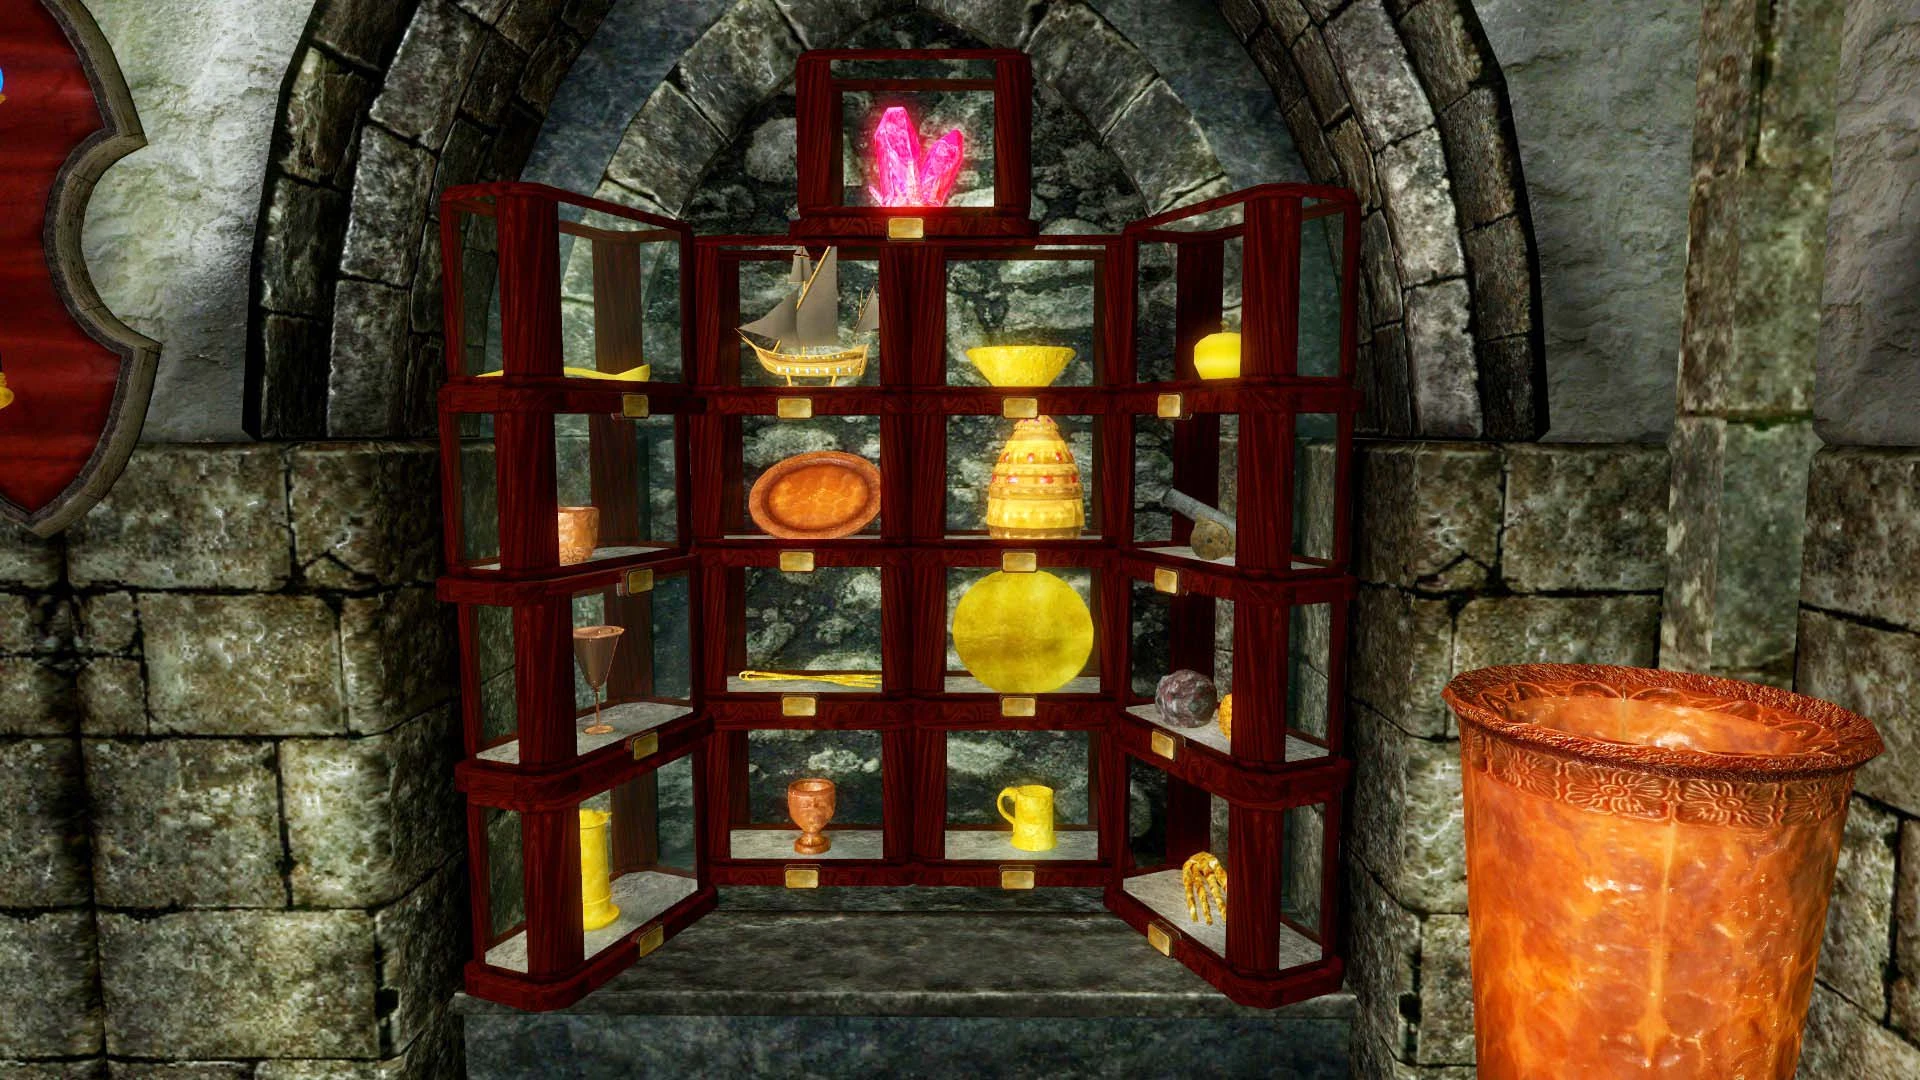
Dwemer Archeology Display | ||
|---|---|---|
| 1st shelf | ||
| 1) Morrowind Dwemer Device | 2) Morrowind Dwemer Goblet | |
| 3) Morrowind Dwemer Bowl | 4) Morrowind Dwemer Pitcher | |
| 2nd shelf | ||
| 5) Dwemer Telescope | 6) Dwemer Compass | |
| 7) Dwemer Engraving Tool | 8) Dwemer Automated Apothecary | |
| 3rd shelf | ||
| 9) Dwemer Transcription Machine | 10) Dwemer Sphere Model | |
| 11) Dwemer Relief Carving | 12) Dwemer Royal Bust | |

Falmer Archeology Display | ||
|---|---|---|
| Wall display / 1st shelf | ||
| 1) Snow Elf Pictoglass | 2) The Eldenroot Staff | |
| 2nd shelf | ||
| 3) Falmer Scepter | 4) Shrine of Y'ffre | |
| 5) Snow Elf Chalice | 6) Snow Elf Kulniir Bowl | |
| 7) Snow Elf Crown | 8) Falmer Hexing Shrine | |
| 3rd shelf | ||
| 9) Solid Bronze Tablet | 10) Snow Elf Urn | |
| 11) Snow Elf Crest | 12) Falmer Totemic Sconce | |


Staff Barracks
In the Staff Barracks are 5 beds for Museum Guards. There's also an oven, a cooking pot and a bedroom for Auryen Morellus. The Staff Barracks have no displays.
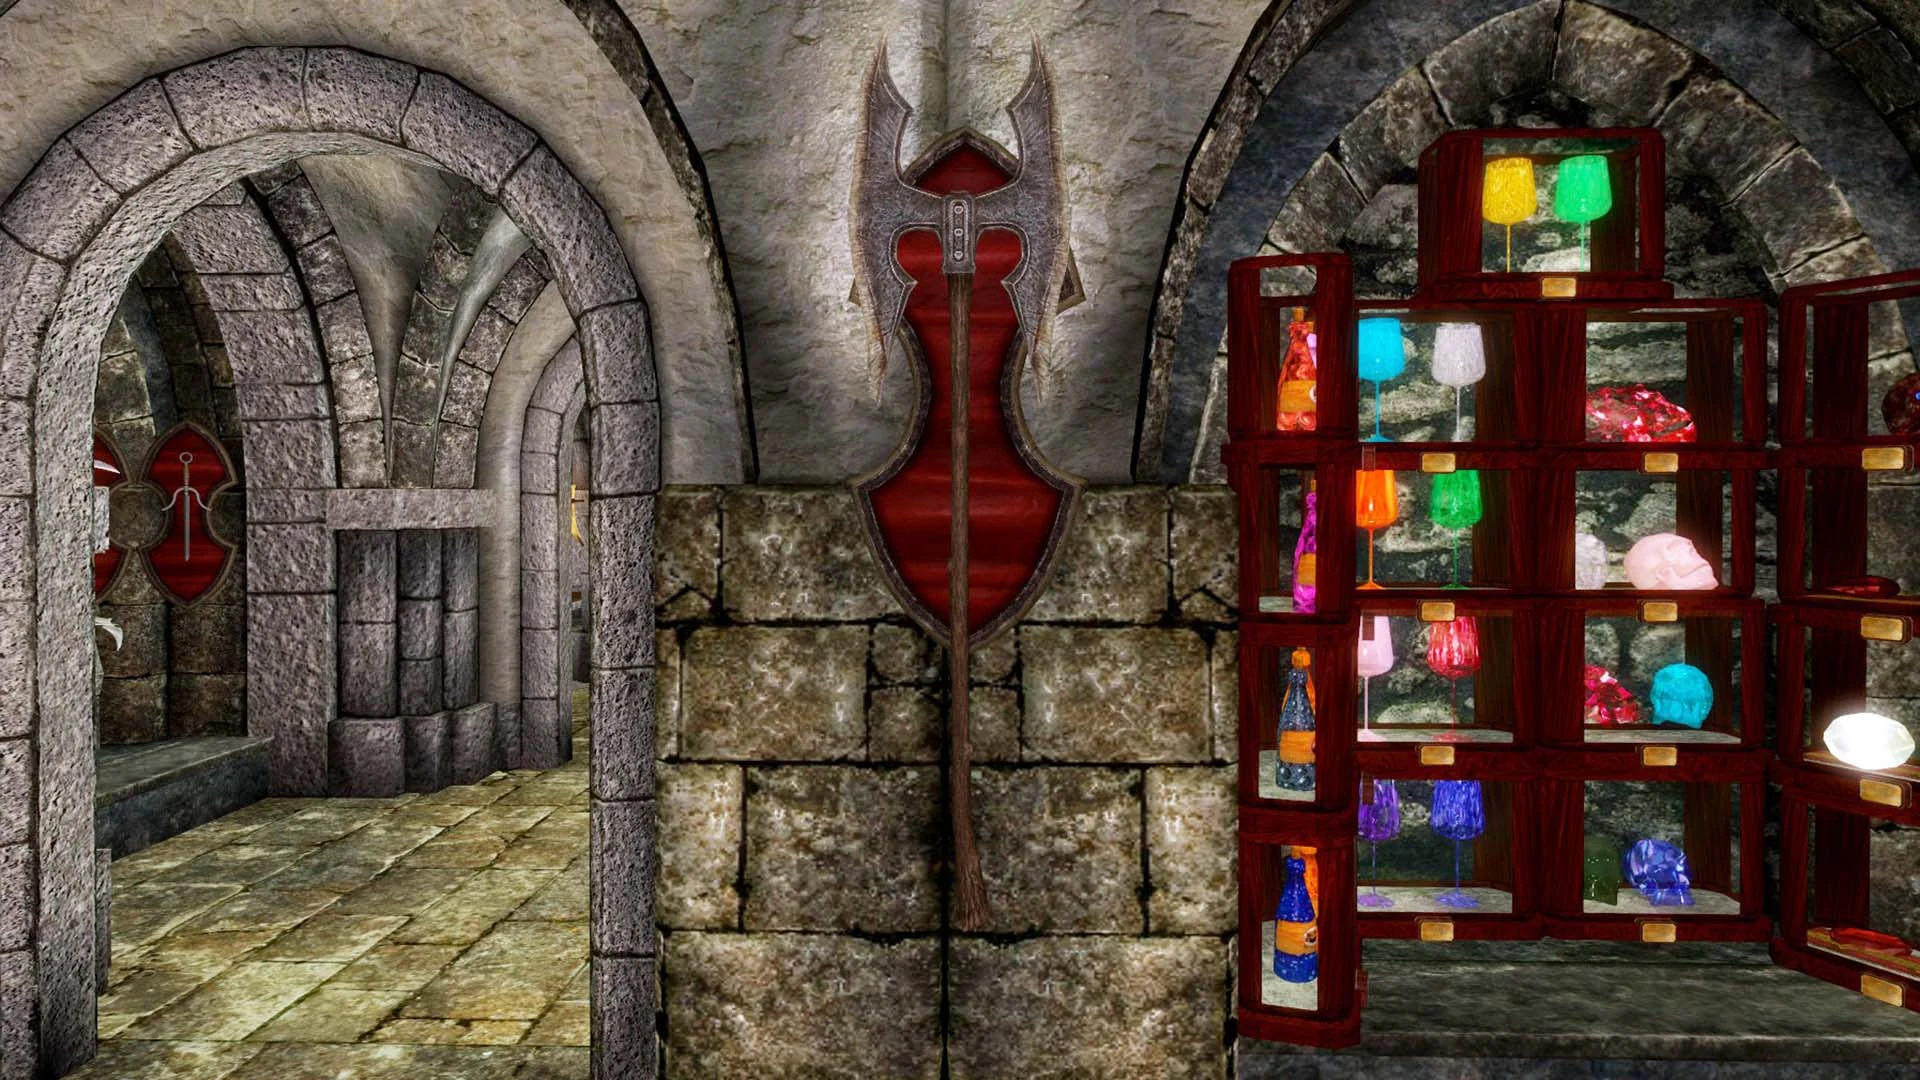
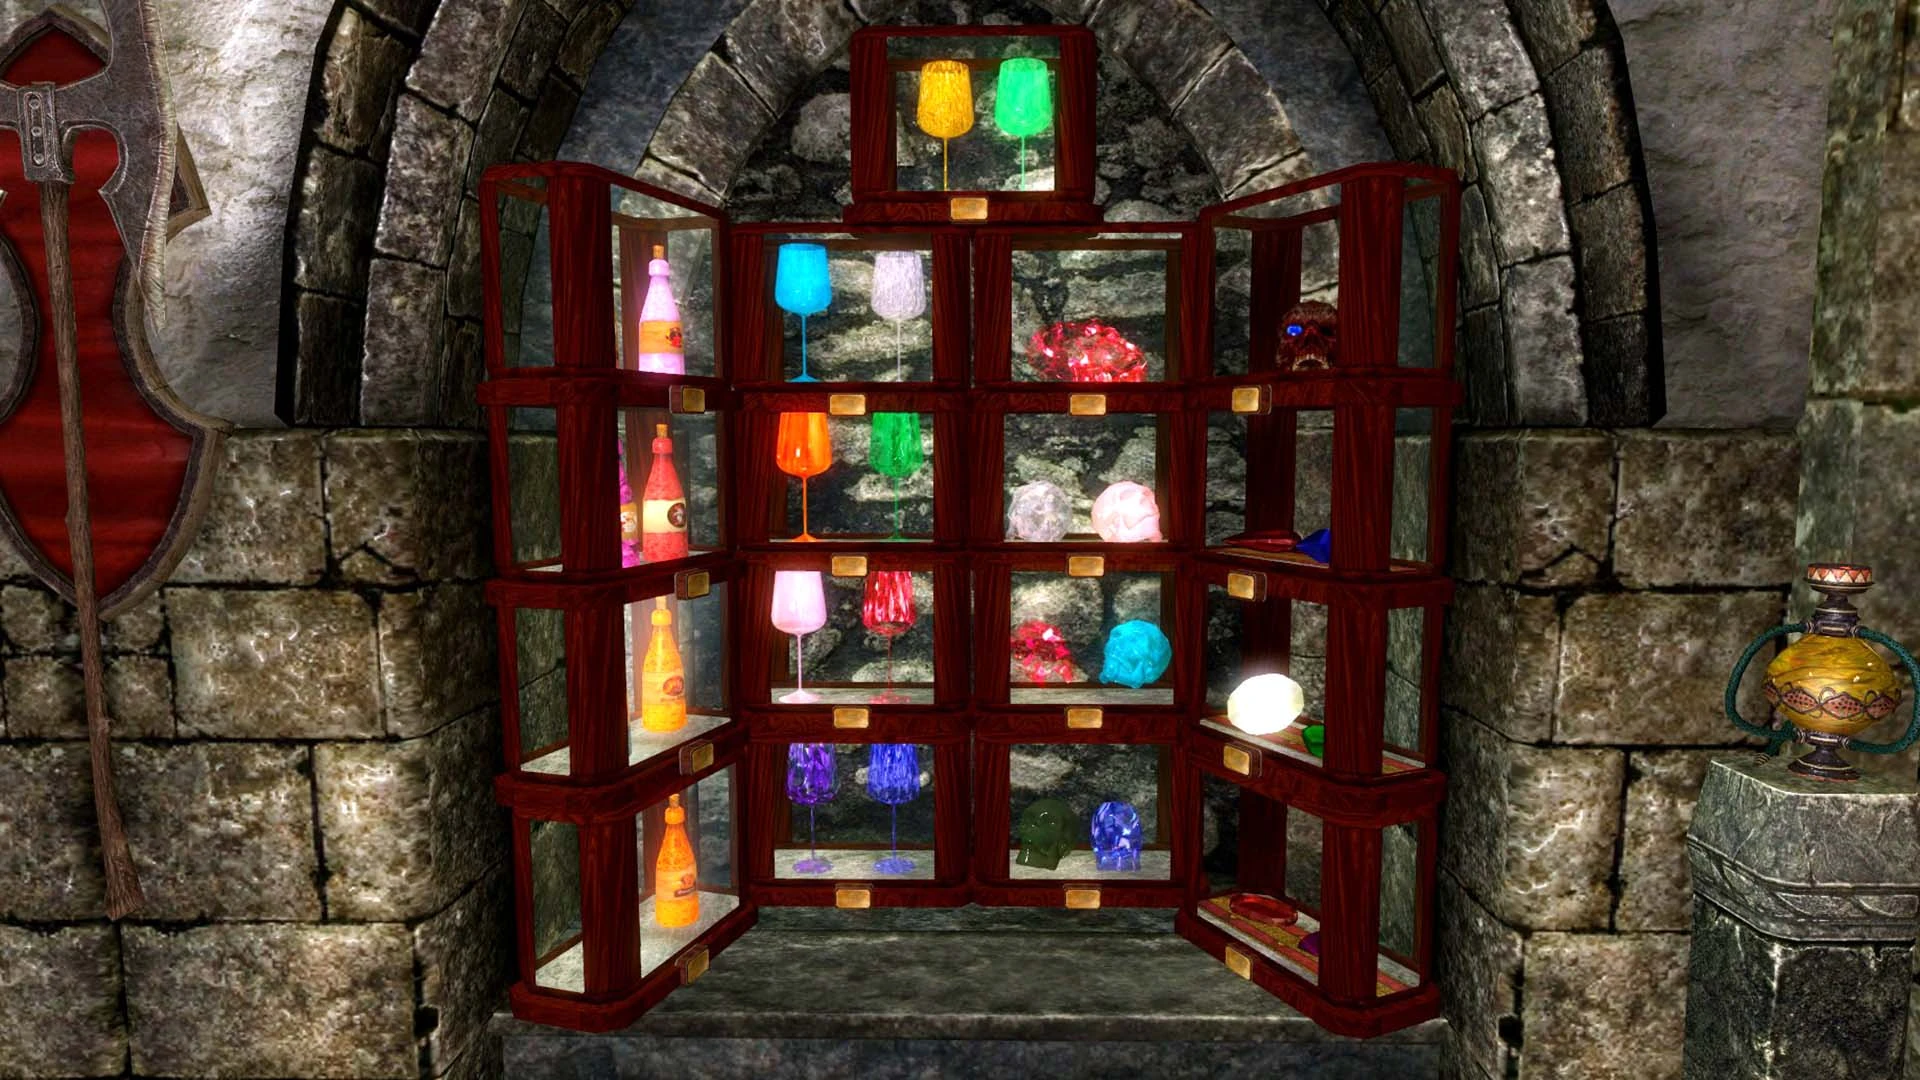
Wine Cellar
- Dragon's Breath Mead: In a small cove guarded by three wolves to the southwest of Dragon Bridge. The bottle is in a crate behind some bushes at the back of the cove.
- Argonian Ale: The Bannered Mare in Whiterun, on a shelf in the kitchen. It can be stolen or simply taken if the innkeeper is a friend.
- Mead with Juniper Berry: Helgen, in the burned down inn, 5 bottles can be found on the second floor. You can get there by jumping off the mid-section of the tower next to it, or by climbing on the fallen tree right next to the inn.
- Firebrand Wine:
- Temple of the Divines in Solitude, in a Firebrand Wine Case by a bed in a room in the basement.
- Blue Palace in Solitude, in a Firebrand Wine Case on a table on the ground floor, to the left of the stairs. Both must be stolen.
- SSE only: Tenmar Forest Hideout in Elsweyr, during 'Moonpath to Elsweyr', on a stone slab as you go up the steps towards the alchemy area (requires Moonpath to Elsweyr).
- Cyrodilic Brandy: Fort Frostmoth, on a shelf in a room behind a master-locked gate on the first of the lower floors.
Given by Brelas at the Thalmor Embassy when asking him for a drink during the quest 'Diplomatic Immunity'.
Carried by Plautis Carvain. - Stros M'Kai Rum: Given to the player by Sorex Vinius at The Winking Skeever in Solitude during the radiant quest 'Delivery'.
- Jessica's Wine: Jorgen and Lami's House in Morthal, behind a barrel near the double bed.
- Redwater Skooma: Redwater Den, behind the front desk.
- Kordir's Skooma:
- SSE only: Tenmar Forest Hideout in Elsweyr, during 'Moonpath to Elsweyr', on a stone slab as you go up the steps towards the alchemy area (requires Moonpath to Elsweyr). If Moonpath to Elsweyr is not installed, it will be found in the Smuggler's Hold of the Dev Aveza.
- Classic only: Tenmar Forest Hideout in Elsweyr, during 'Moonpath to Elsweyr', on a crate below the alchemy & enchanting area.
- Balmora Blue: Solitude Docks, underneath the docks near the Red Wave, in an expert-locked chest owned by Sabine Nytte. She will sell the key for 1500, but she can also be pickpocketed for it, or the chest can be picked.
- Double-Distilled Skooma: New Gnisis Cornerclub in Windhelm after the start of the quest 'Some Light Theft', hidden among some boxes behind the stairwell on one of the upper floors.
Tenmar Forest Hideout in Elsweyr, during Moonpath to Elsweyr, in the water. - Velvet LeChance: Bought from Talen-Jei at The Bee and Barb in Riften.
- White-Gold Tower: Bought from Talen-Jei at The Bee and Barb in Riften.
- Cliff Racer: Bought from Talen-Jei at The Bee and Barb in Riften.
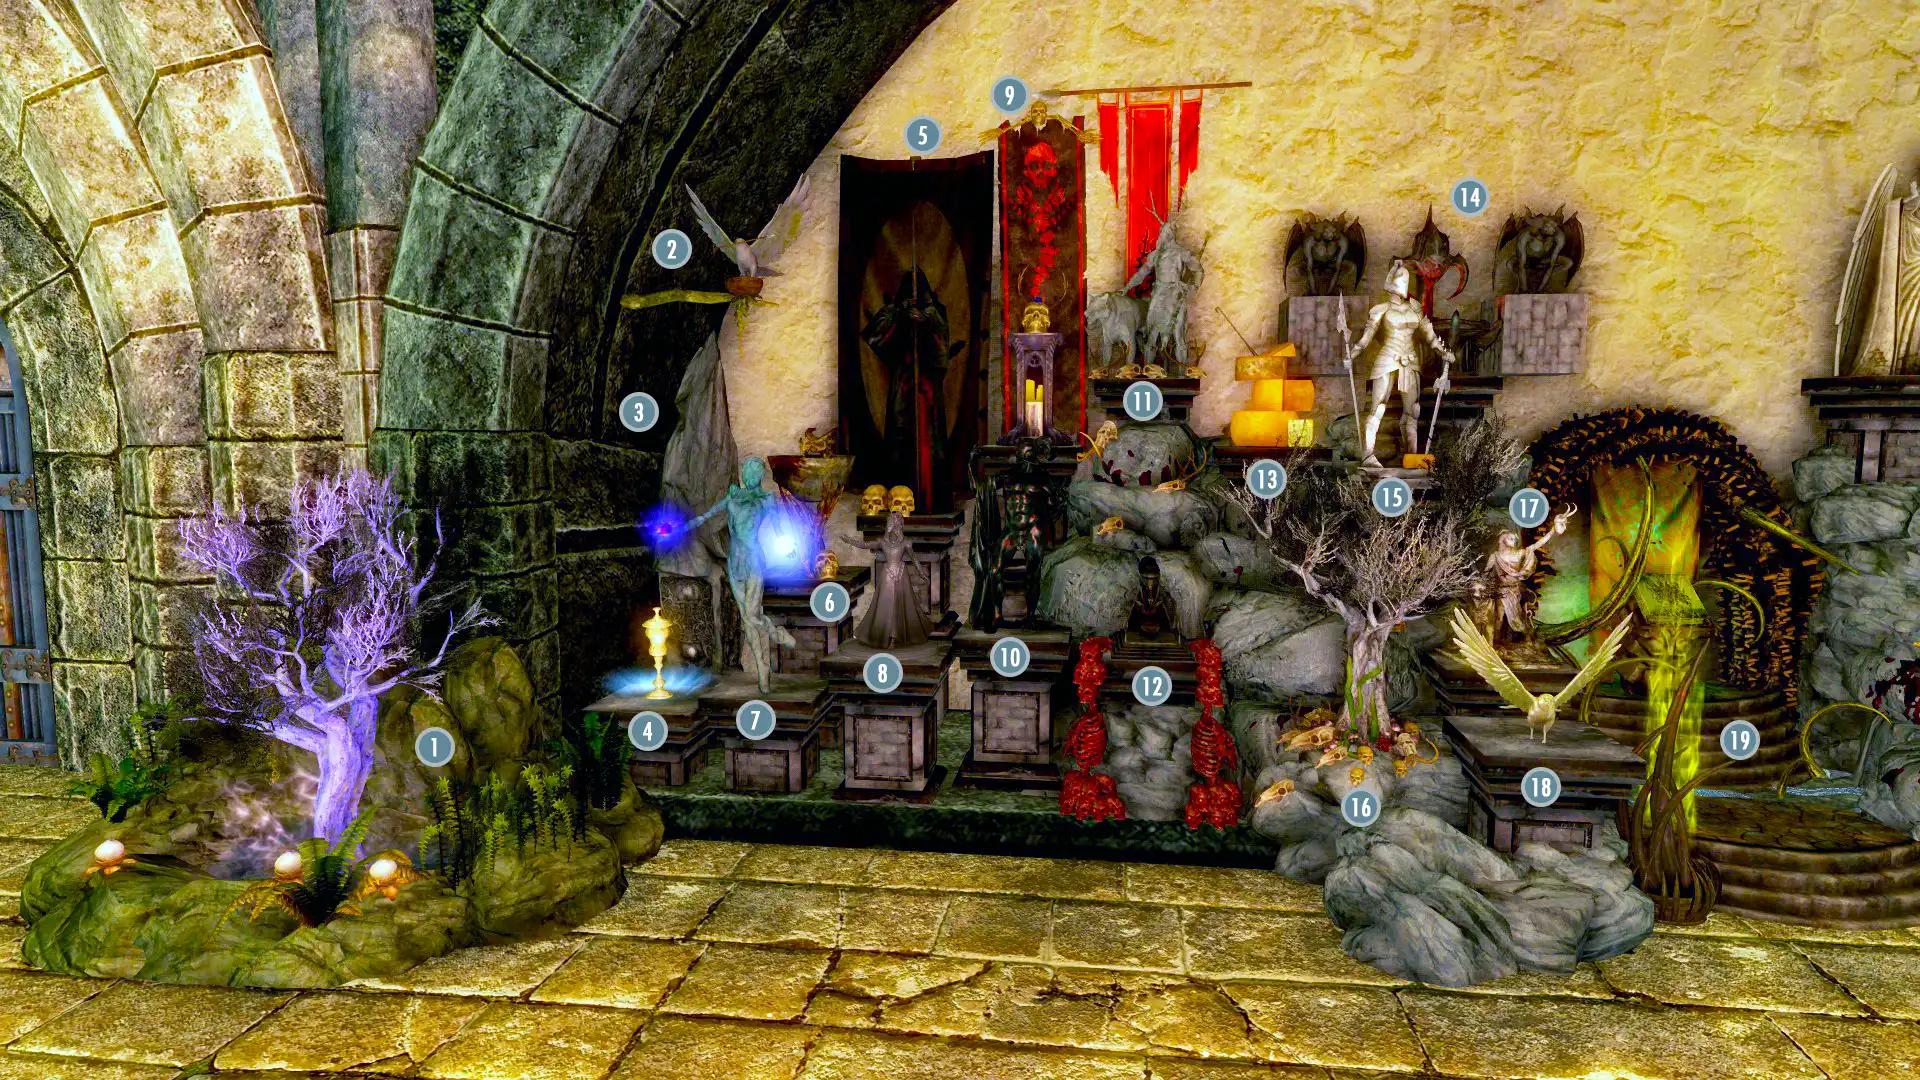
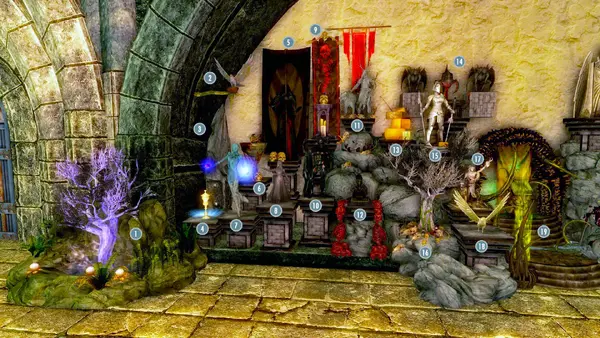
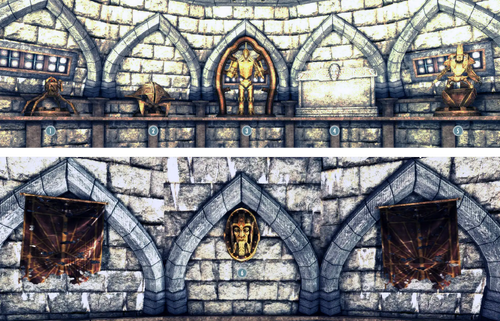
Hall of Heroes
The Hall of Heroes is a large room immediately in front of you when you enter the museum. It contains displays for many different items. It has two separate floors. The lower gallery is listed on this page, see Upper Gallery for the displays on the second floor.
To the left of the main Hall is the Culture and Arts Exhibit. This hallway has a door to the East Exhibit Halls, the first floor of the Library, as well as the Curator's Office. There's also a stairway leading to the Upper Gallery and down to the Armory. If the Official Creation Club Patch is installed, a new door to the Hall of Wonders will be added next to the Armory.
To the right of the main hall are the Reception Hall and Staff Barracks, which provide access to the Museum Storeroom and the Safehouse.
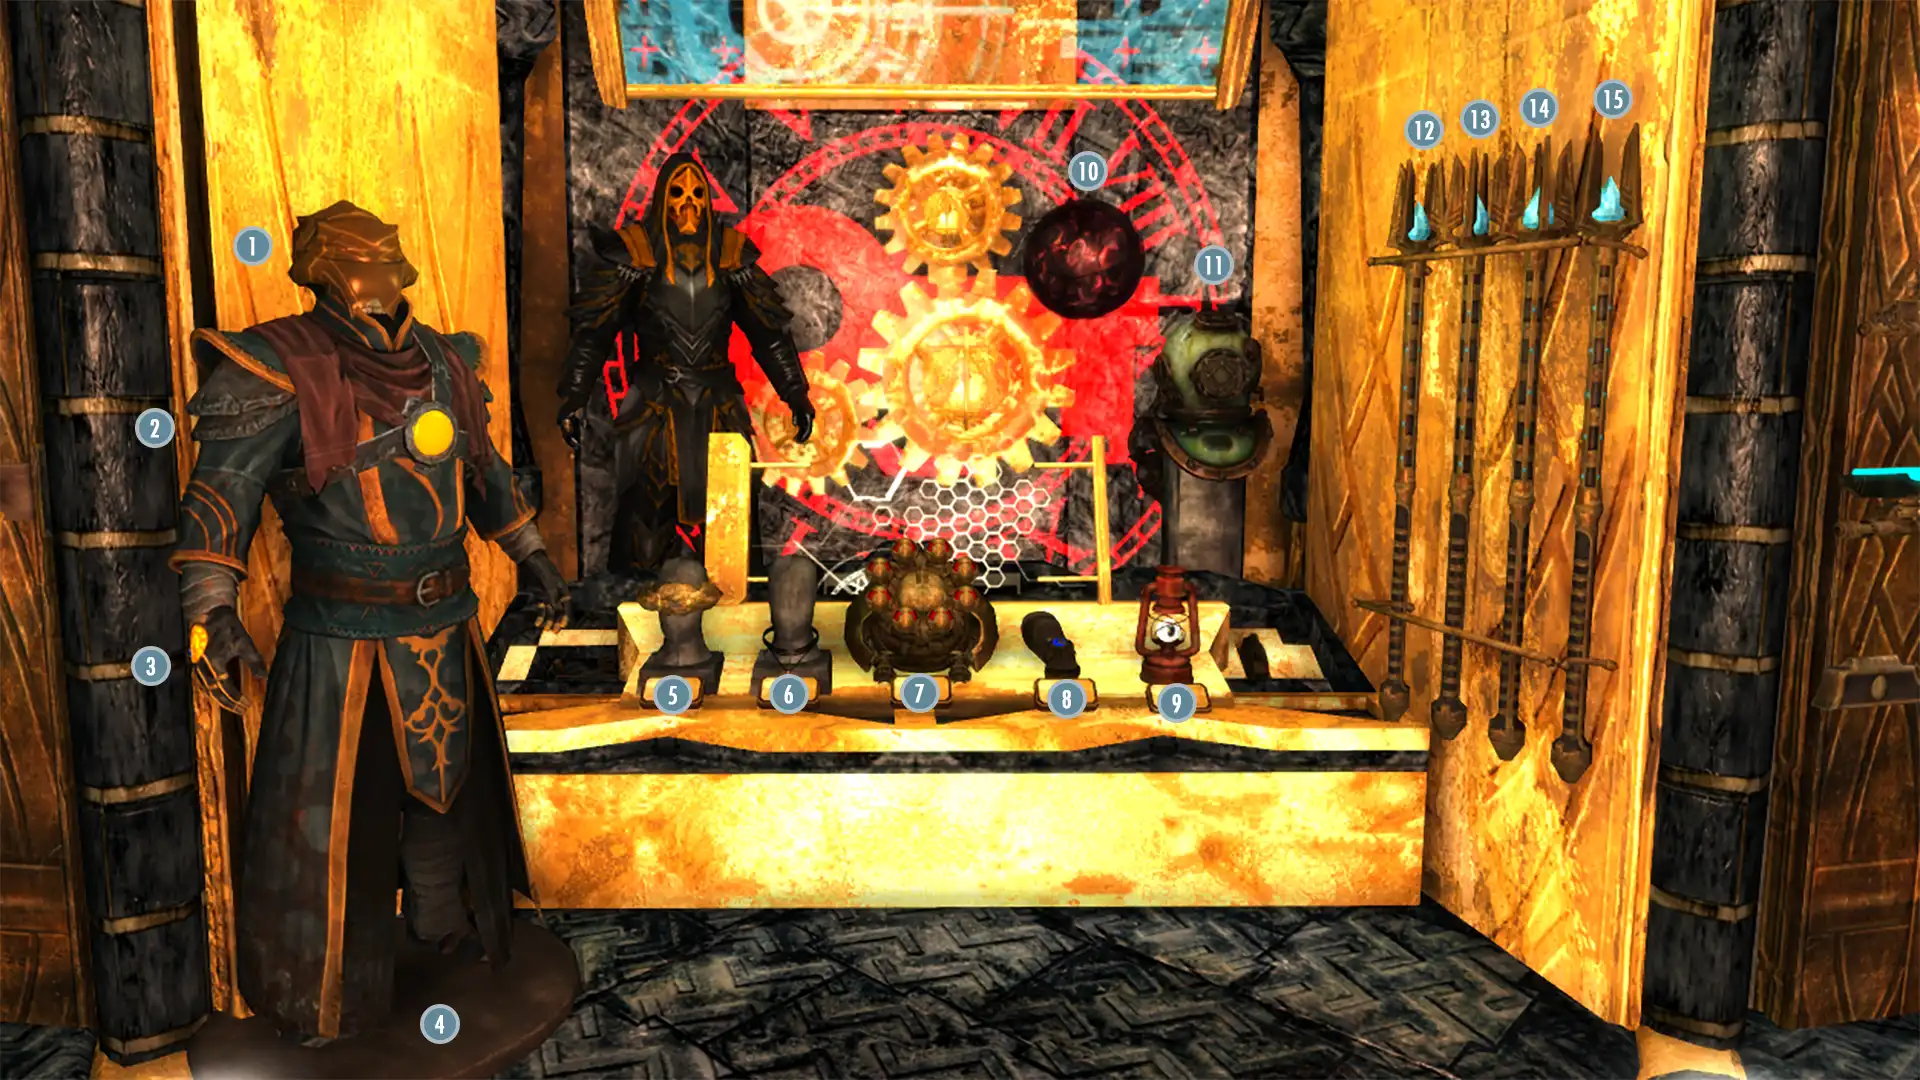
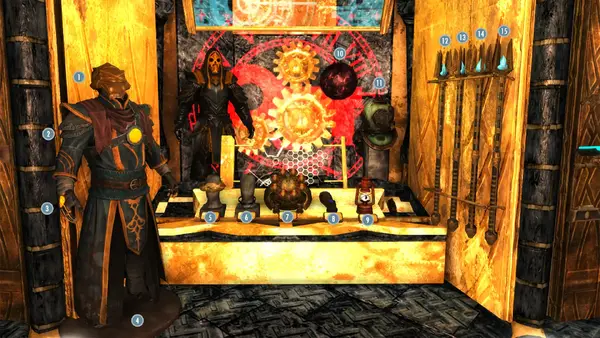
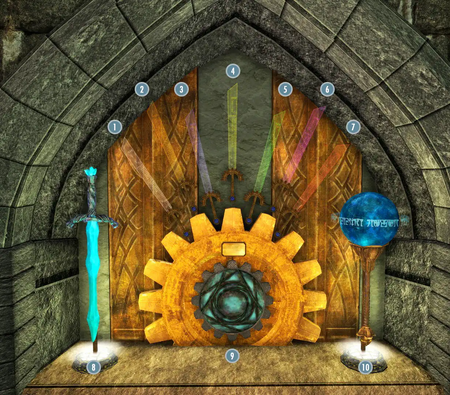
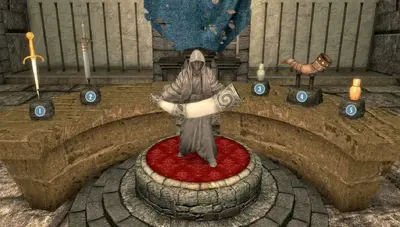
Entrance
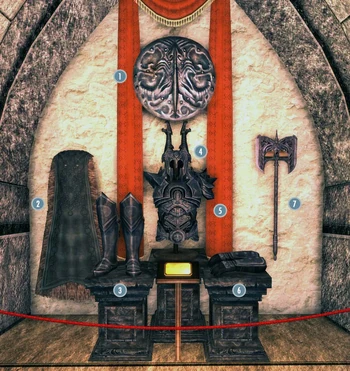
The entrance to the museum directly connects to the main Dragonborn Hall. On the left there is a bench, above that is a spot for a Painting. There is a cabinet with a chest for safe storage. On top of the cabinet is the Donations Box, as well as the Curator's Guide. On the wall is a plaque that shows the current museum display count.
On the right is another spot for a Painting. Below this is the "In Commemoration" display. This activates after you talked to Auryen after the Trial of Trinimac quest. It can be activated to watch the credit scene again.
")
")
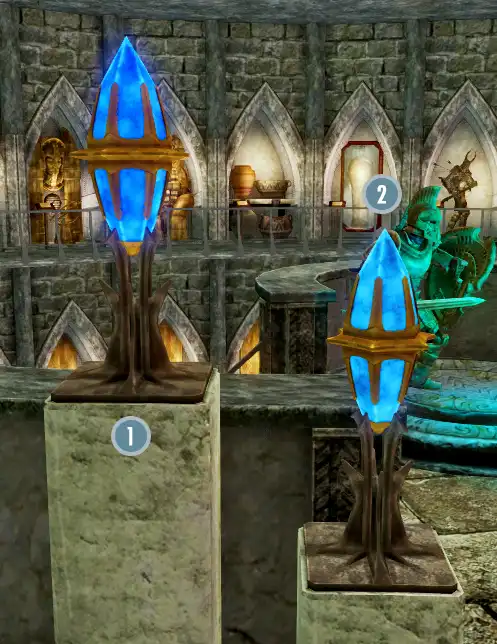
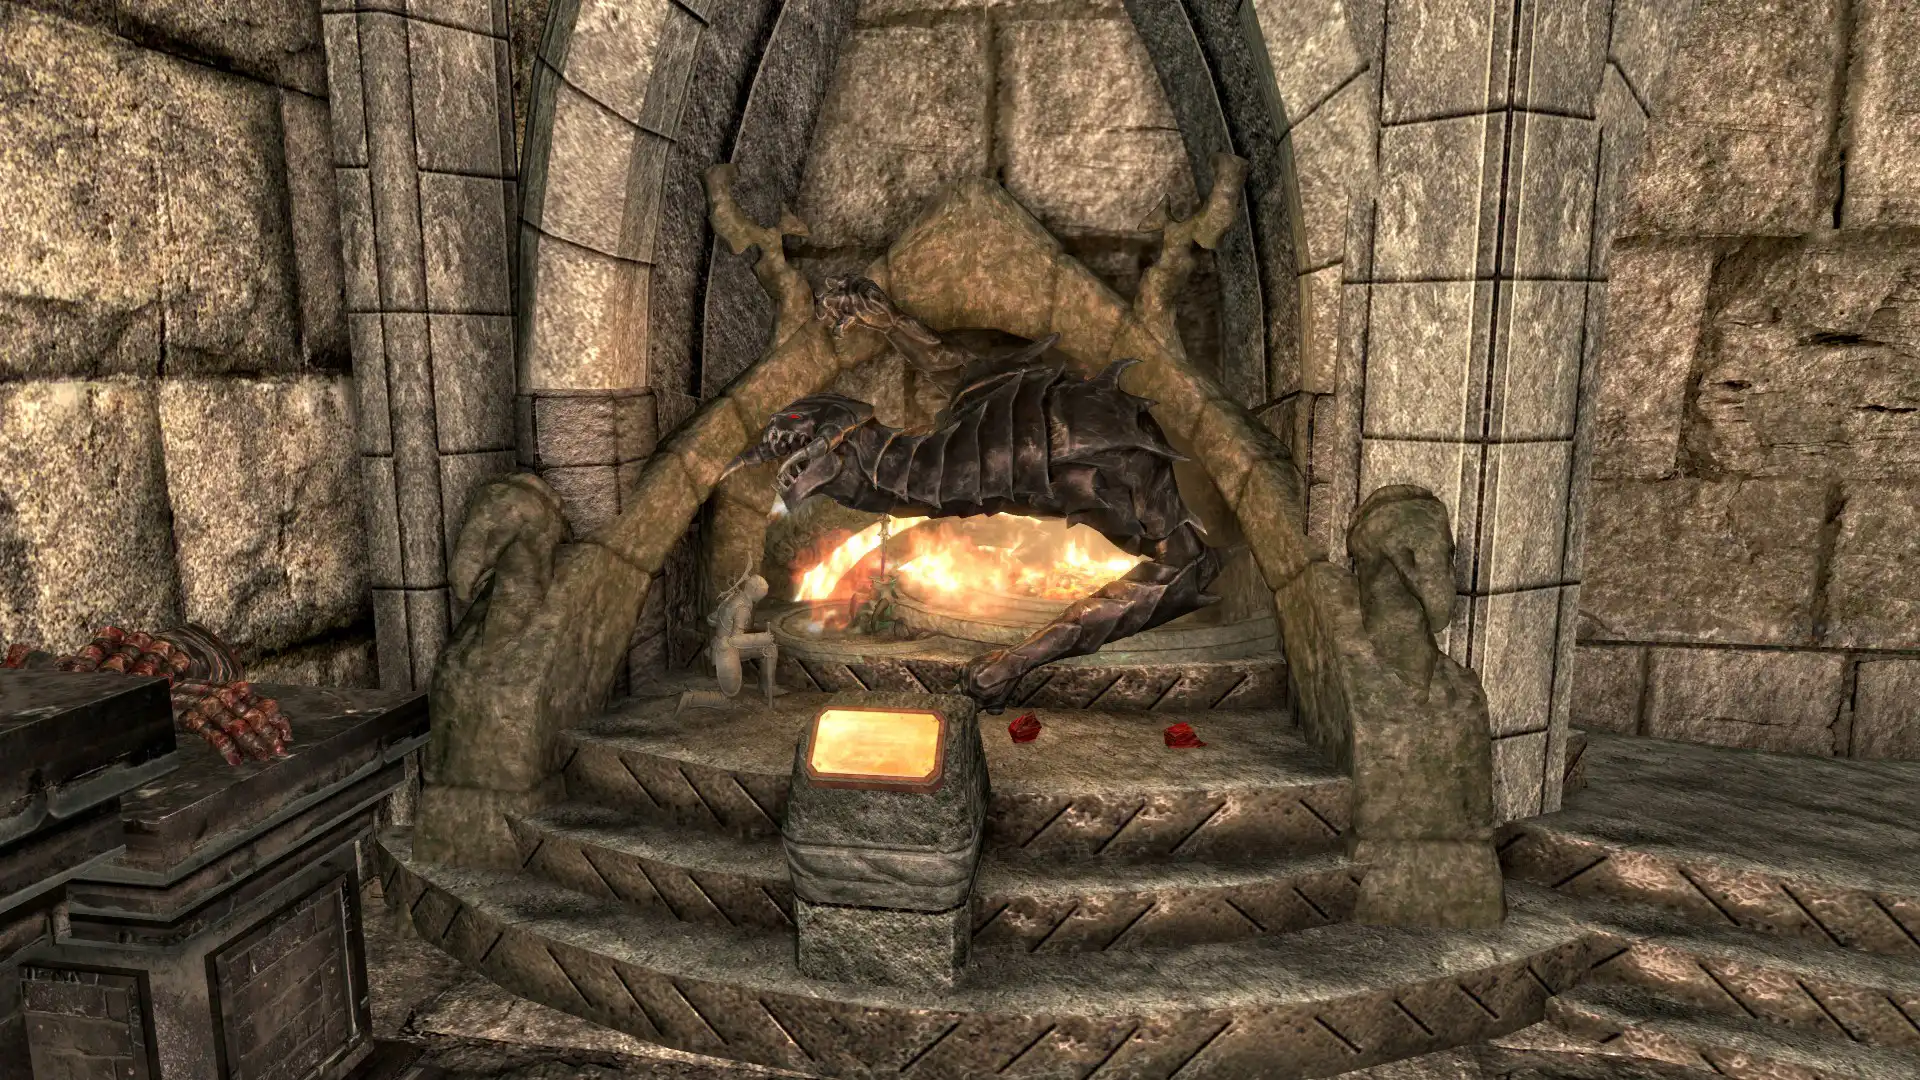
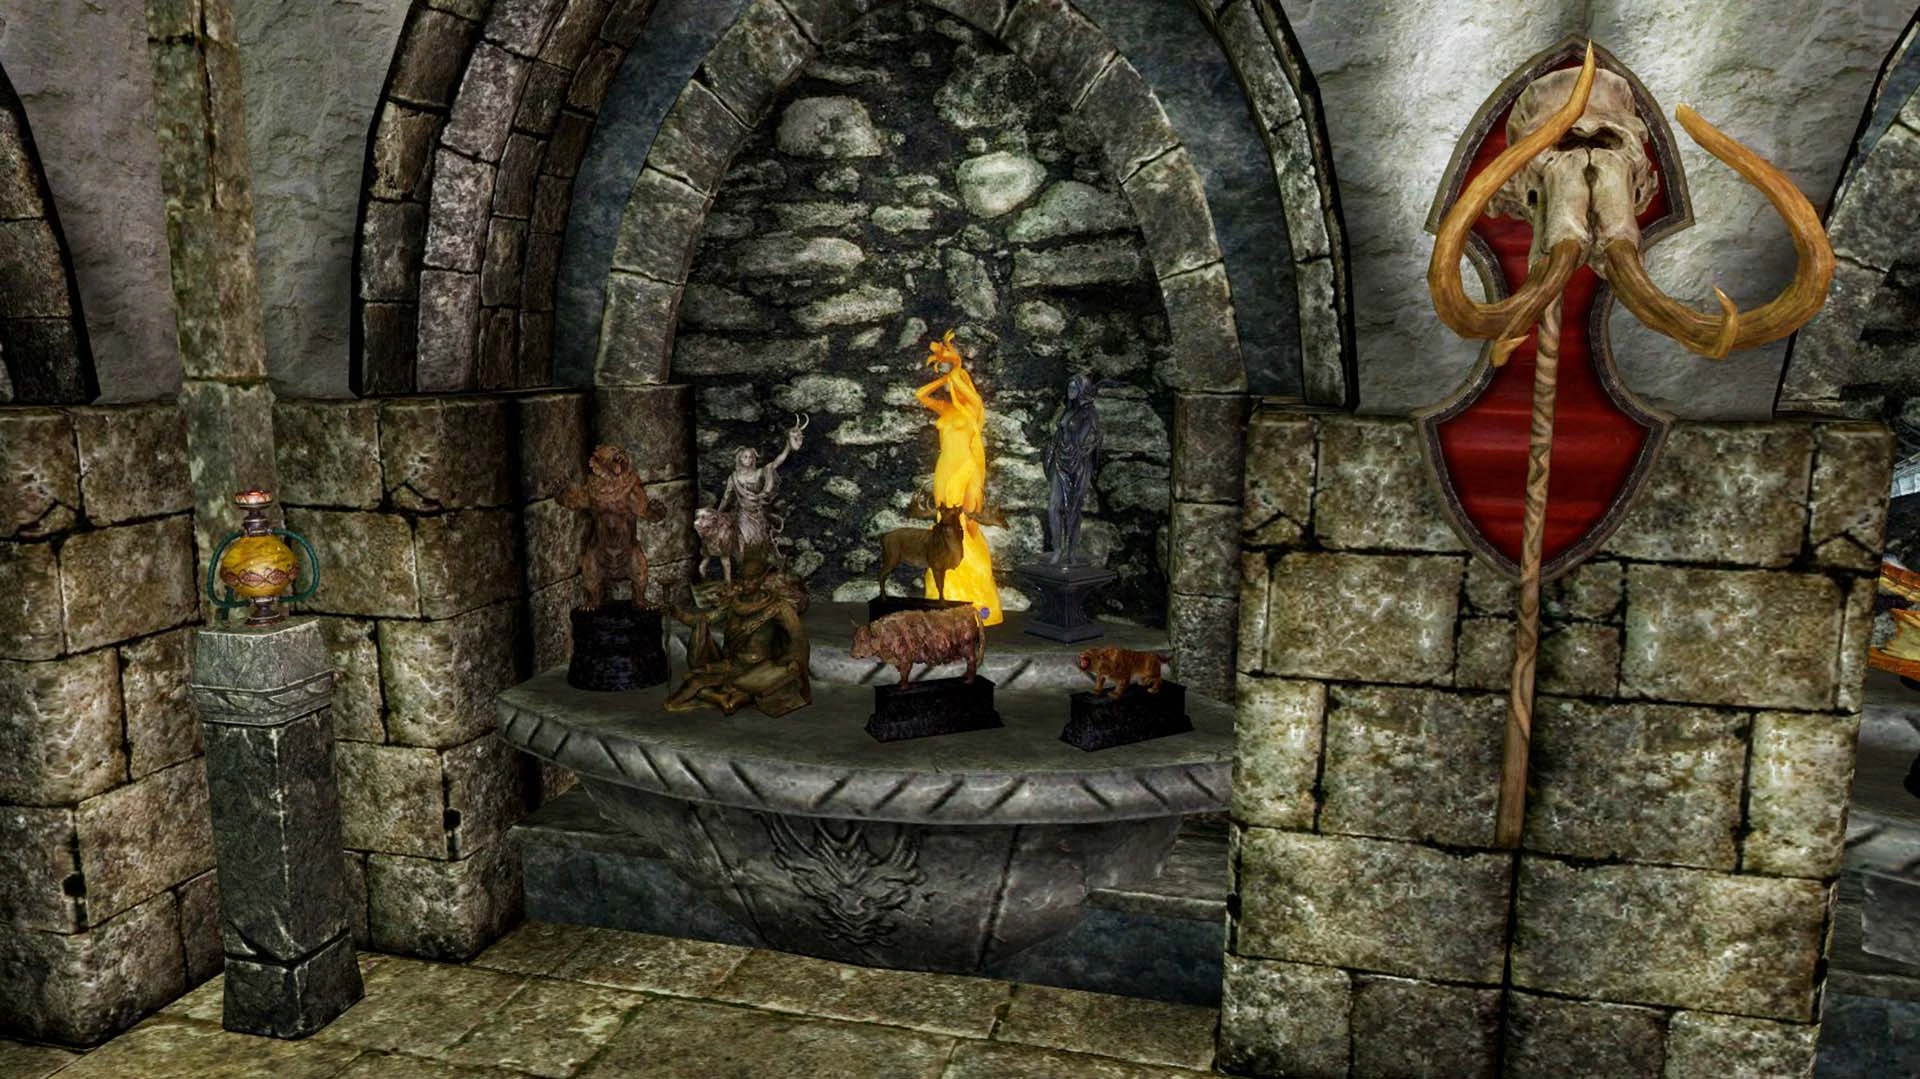
Statues
On top of the fountain are three statues.
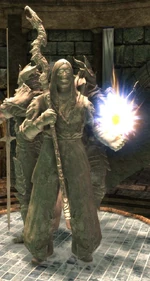
The Combat statue is unlocked by reaching level 100 in three out of five combat skills (Archery, Block, Heavy Armor, One-Handed, Two-Handed).
The Stealth statue is unlocked by reaching level 100 in three out of five stealth skills (Light Armor, Lockpicking, Pickpocket, Sneak, Speech).
The Magic statue is unlocked by reaching level 100 in three out of five magic skills (Alteration, Conjuration, Destruction, Illusion, Restoration).
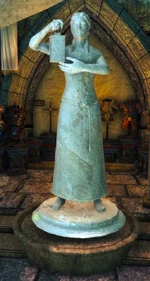
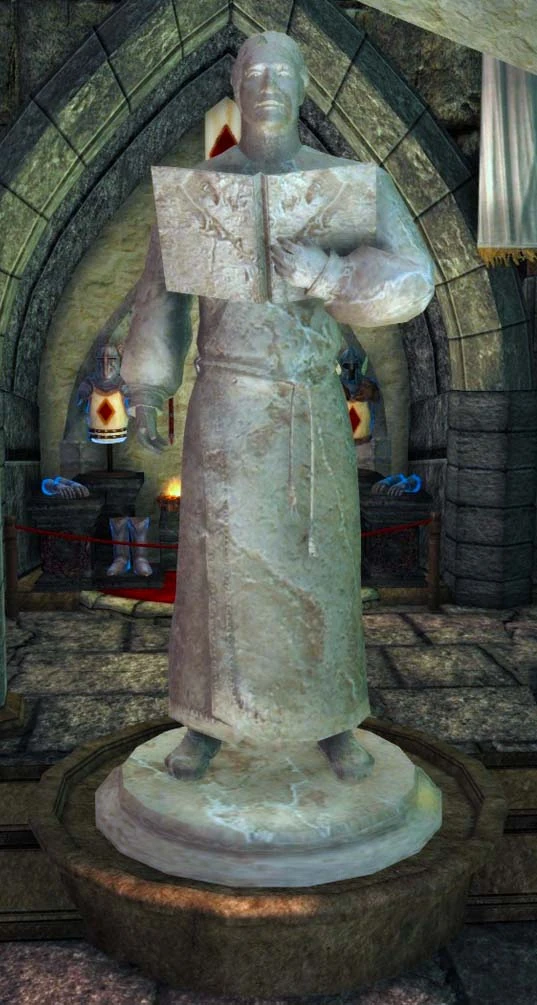
Behind the fountain is a statue holding a lantern on the left, this is called "Truth". On the right is a statue holding a book, this is called "Wisdom".


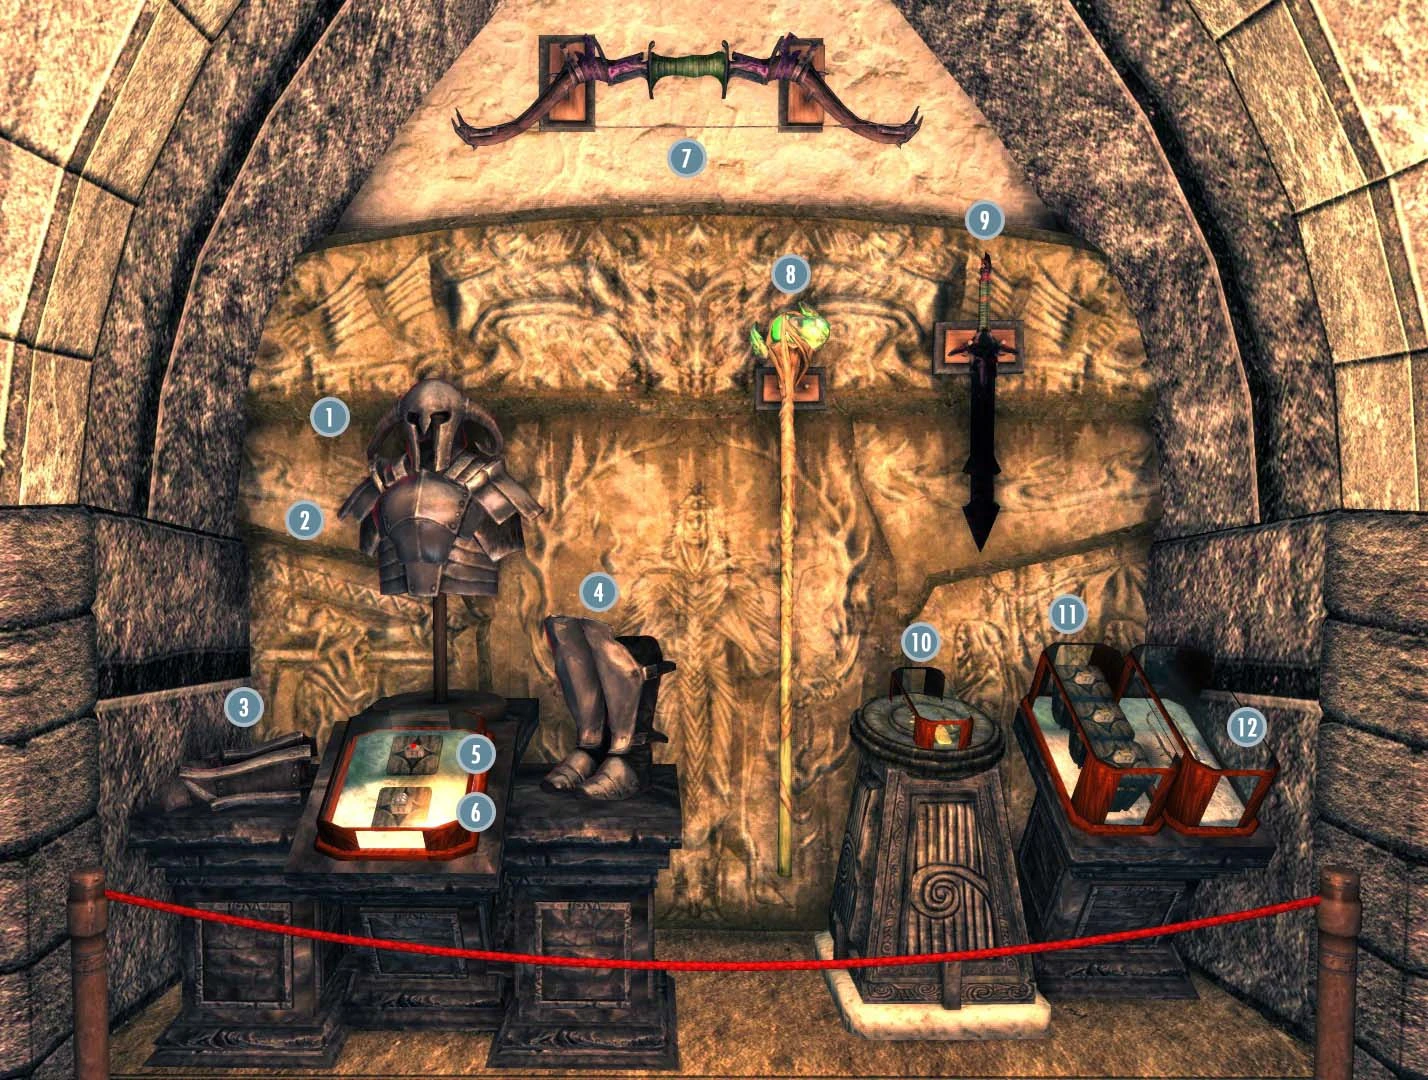
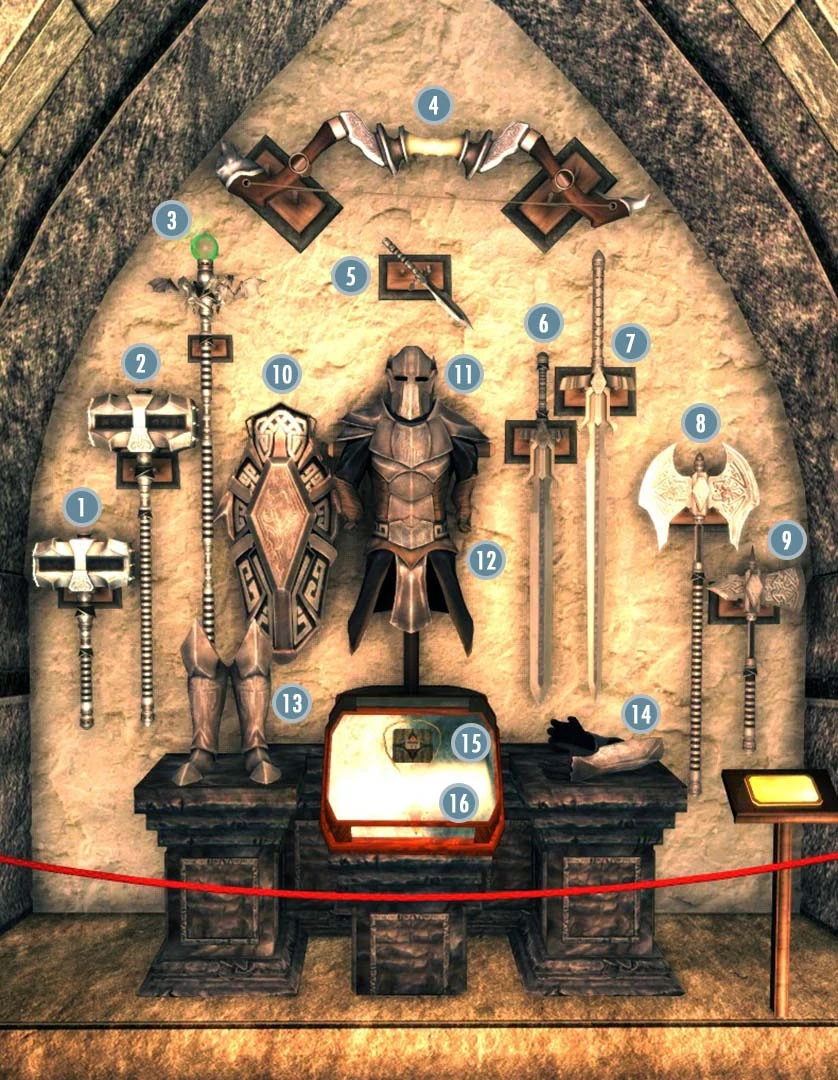
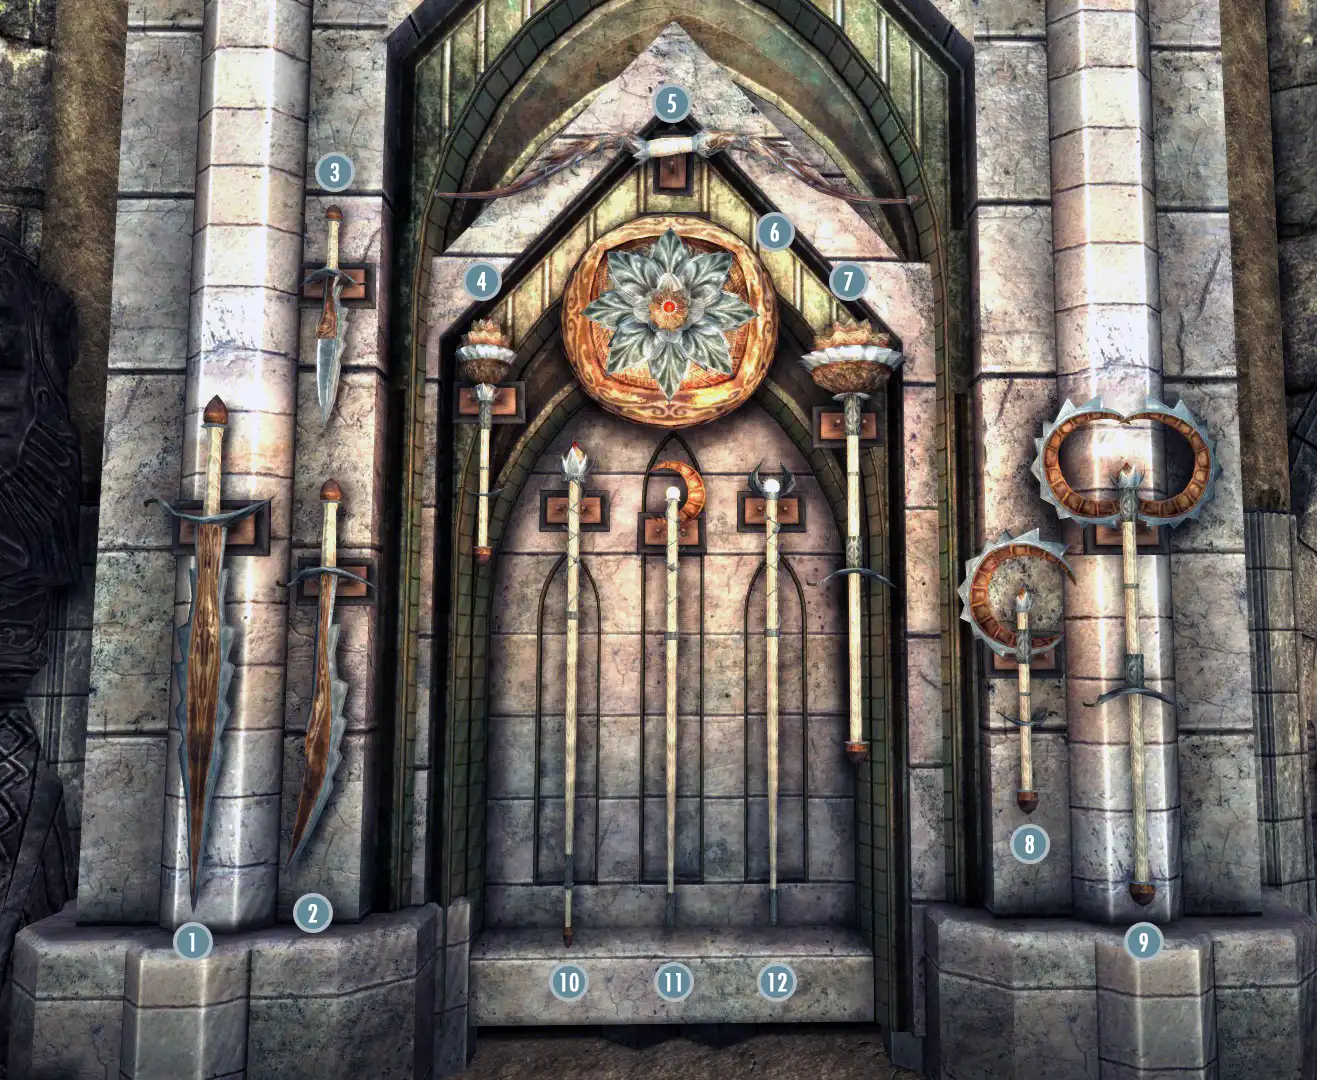
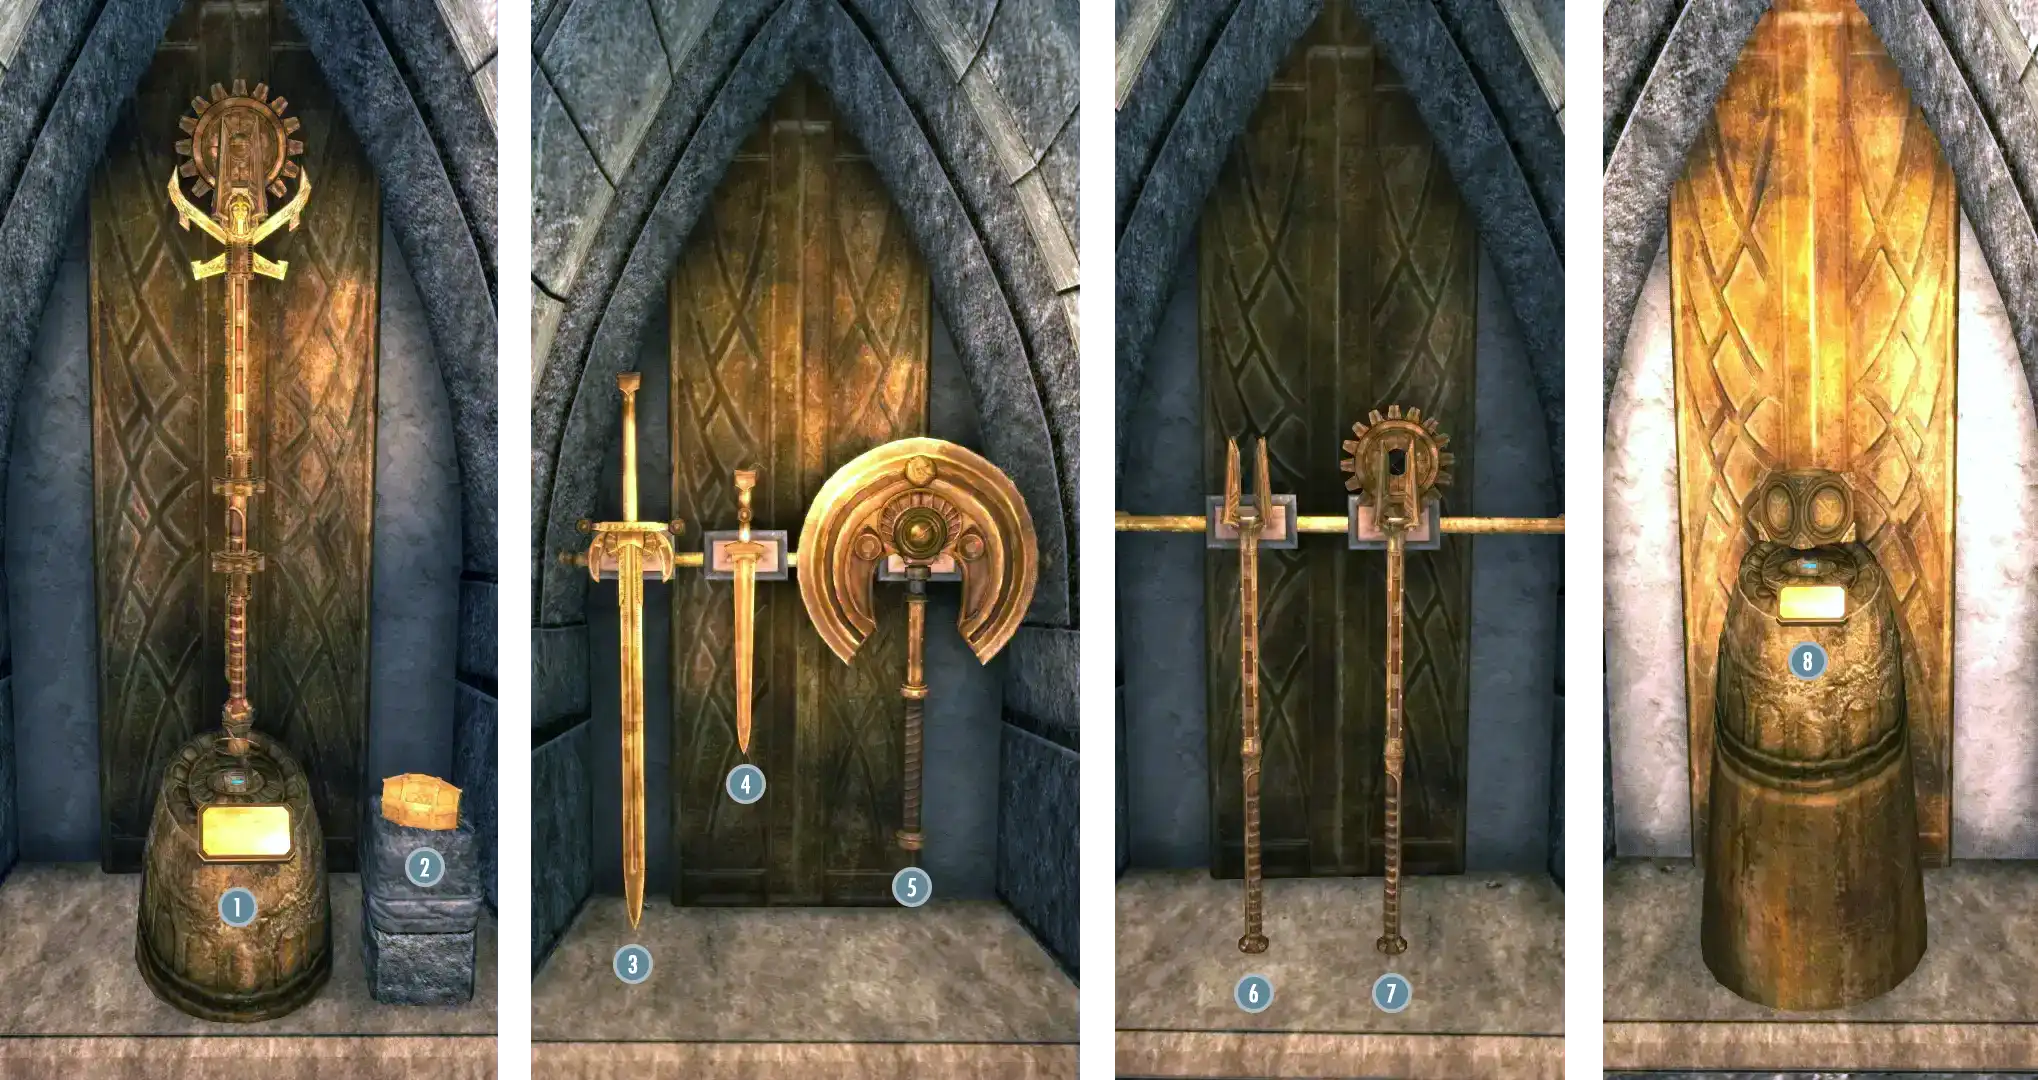
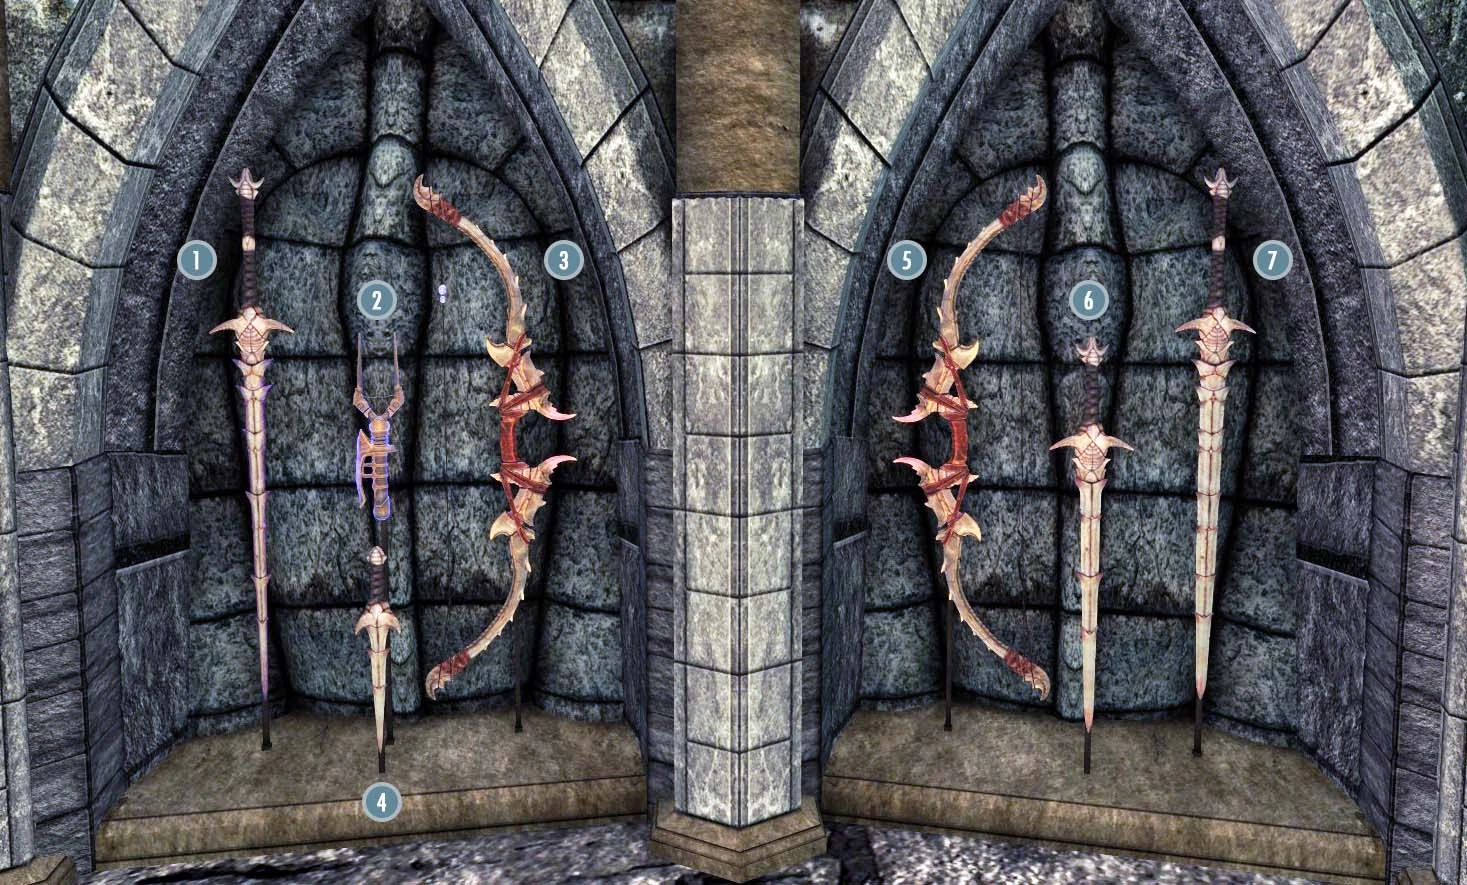
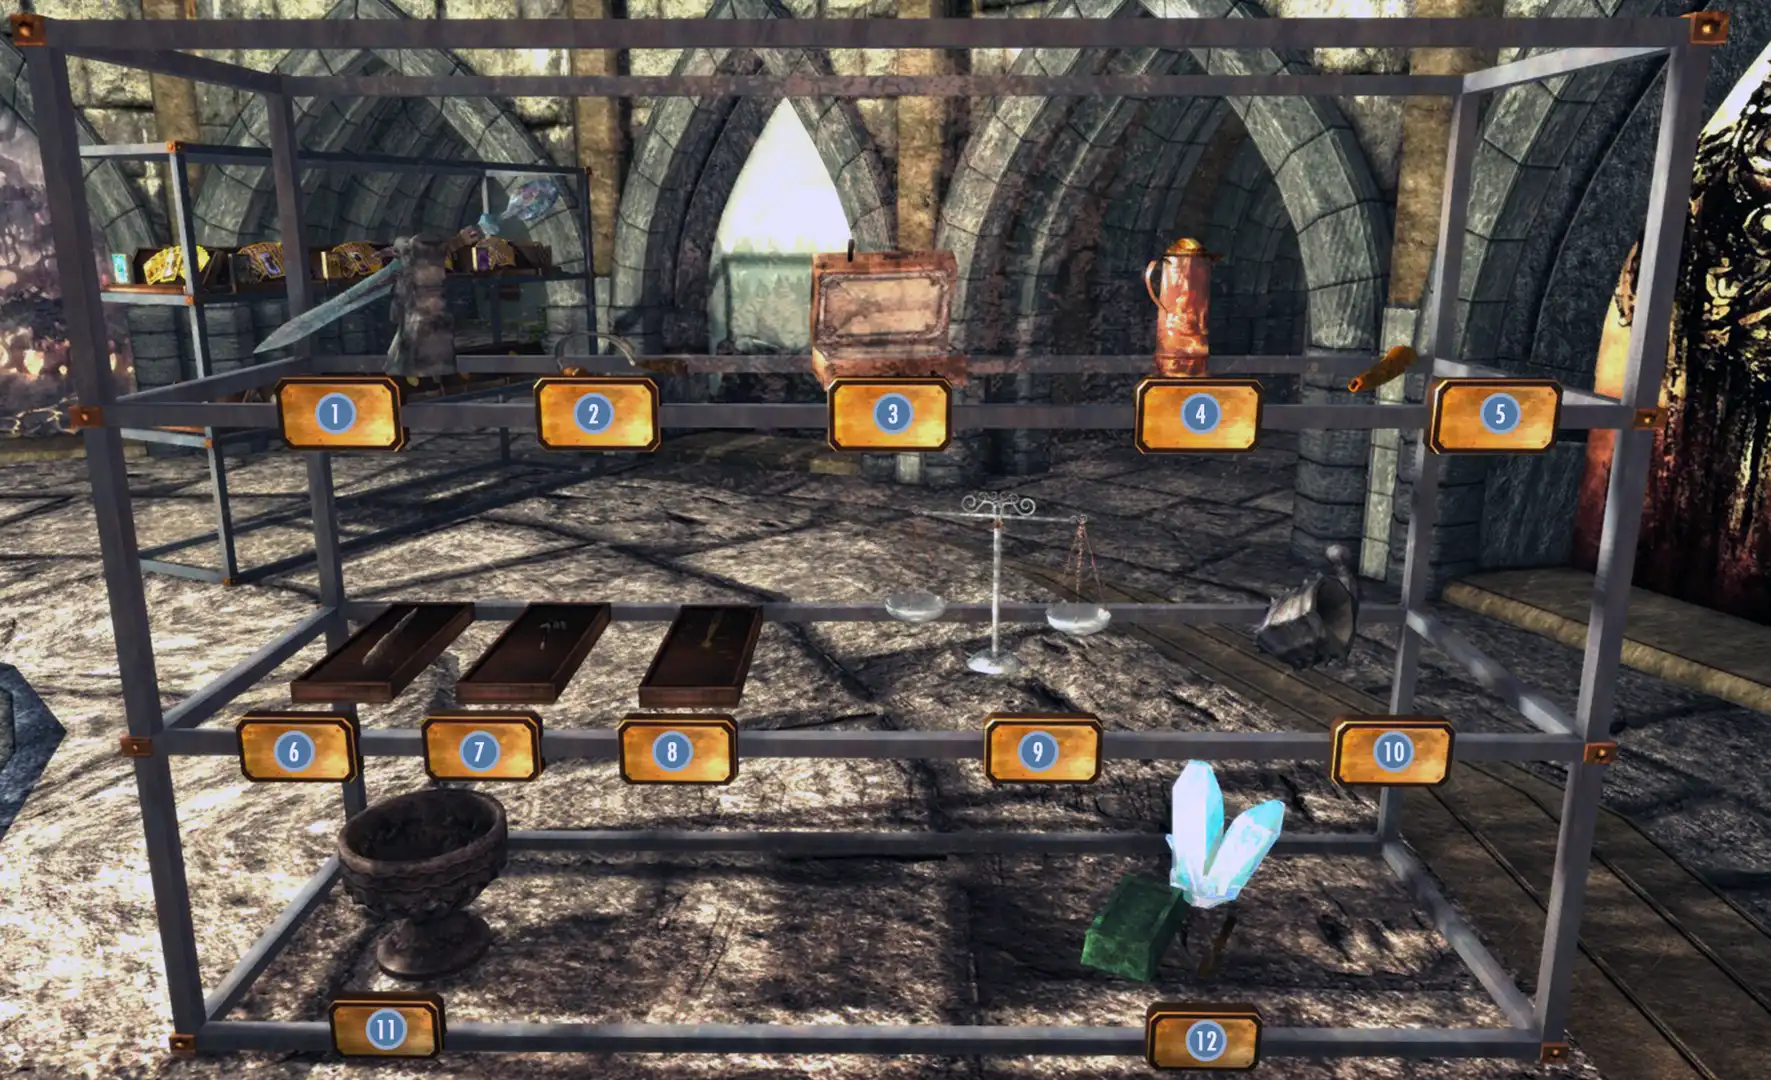
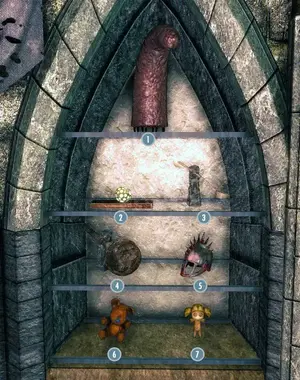
Main Floor - Left Side
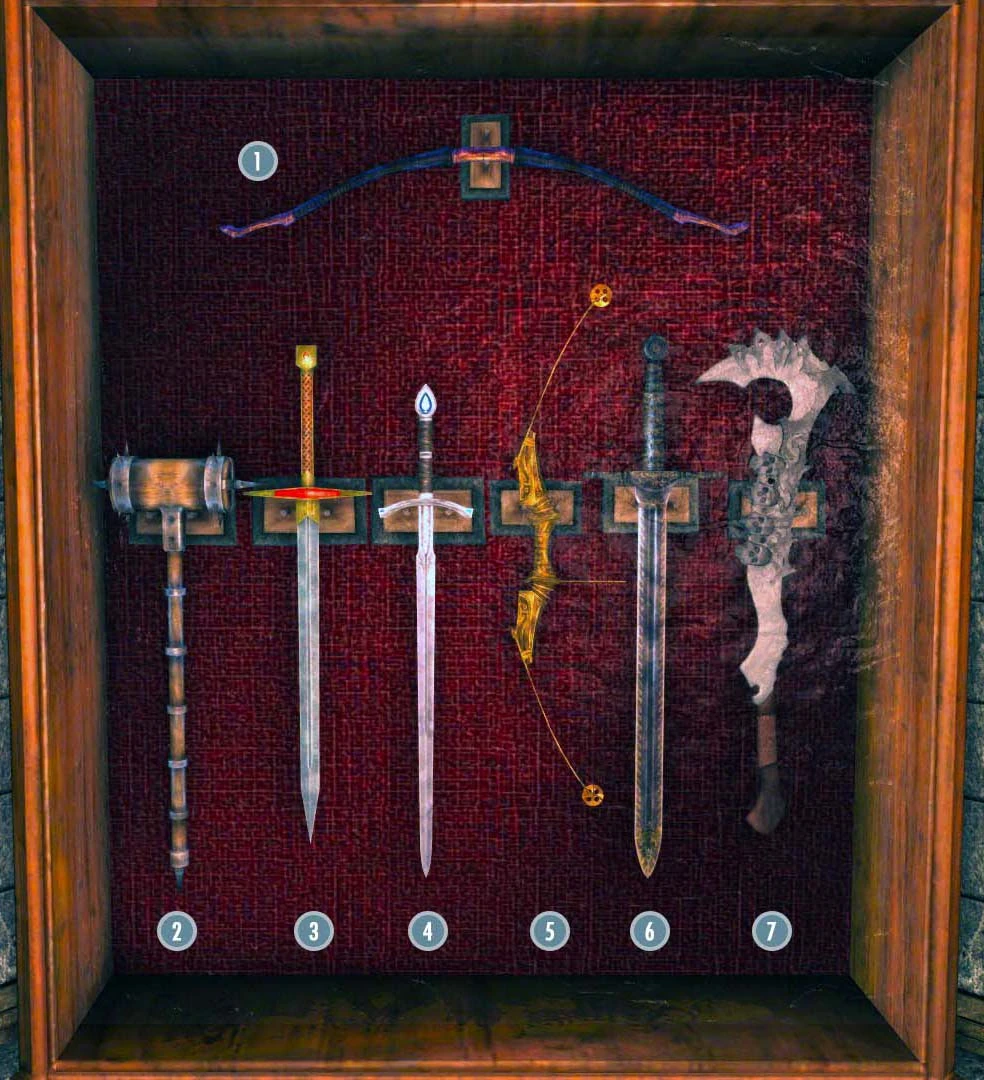
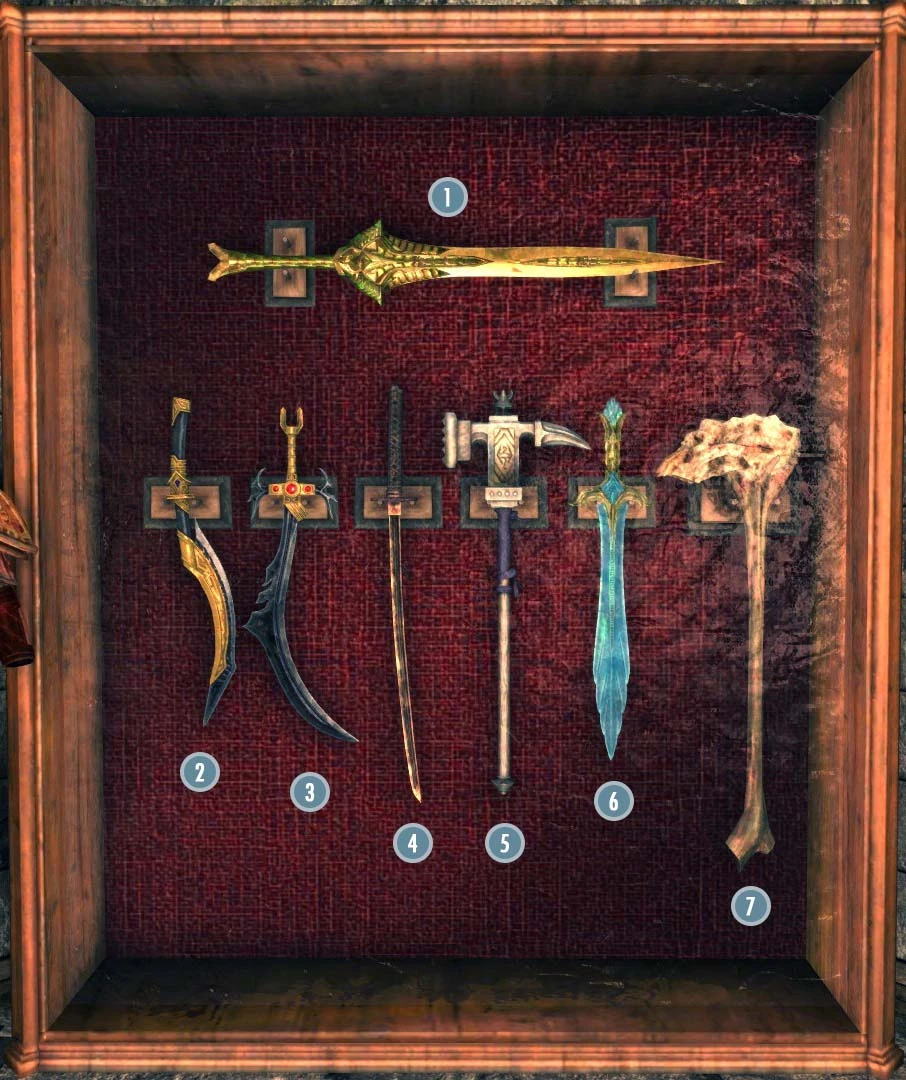
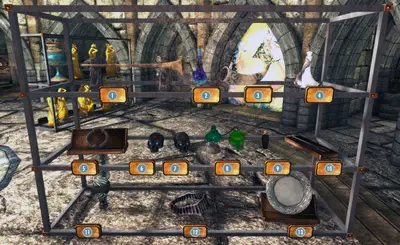
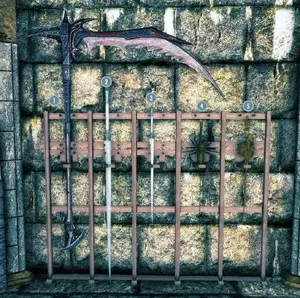
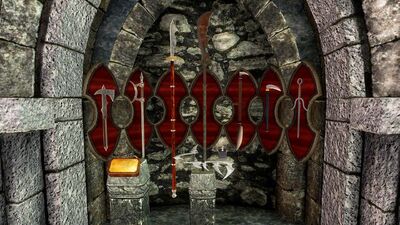
1st Weapons Display | |
|---|---|
| 1) Shadowhunt (requires Oblivion Artifact Pack) | |
| 2) Aegisbane | |
| 3) Chrysamere or Creation Club Version | |
| 4) Ice Blade of the Monarch or Artifacts - The Ice Blade of the Monarch Version | |
| 5) Zephyr | |
| 6) Honorblade of Chorrol or Oblivion Artifact Pack Version | |
| 7) Reaper's Bane | |

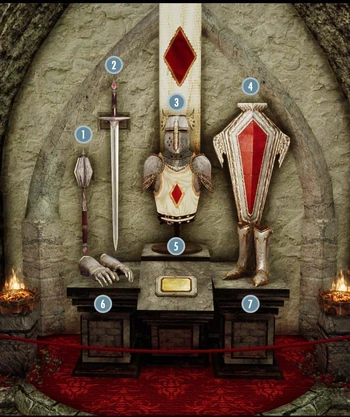
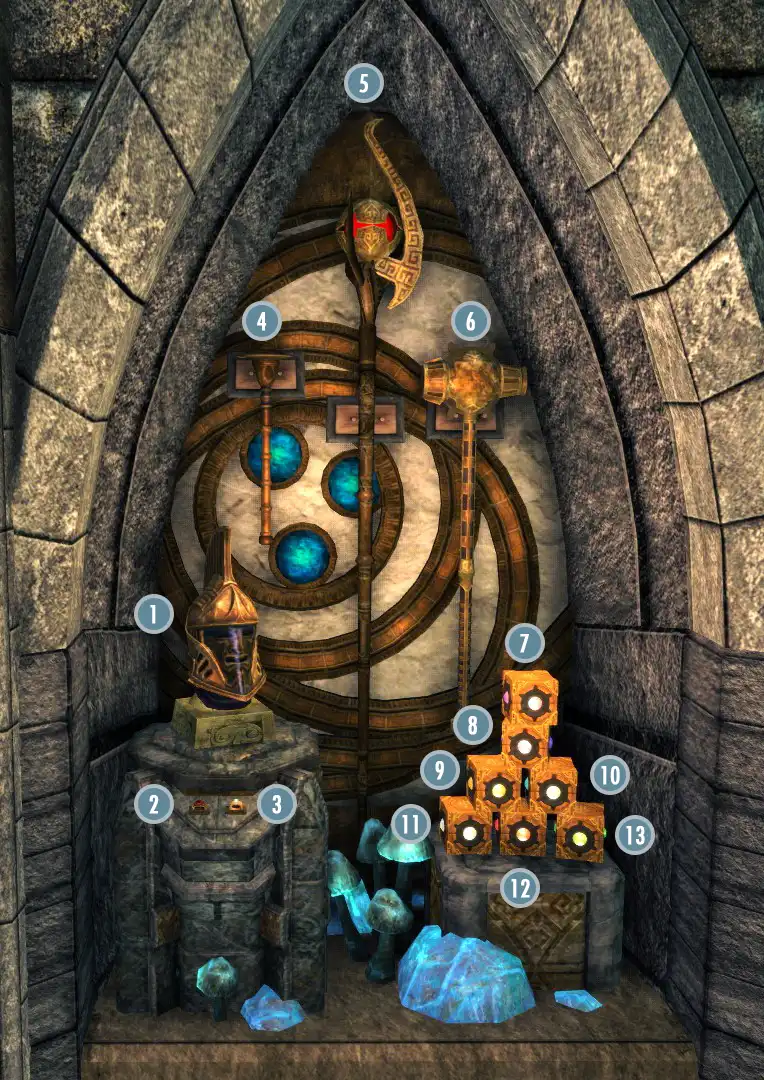
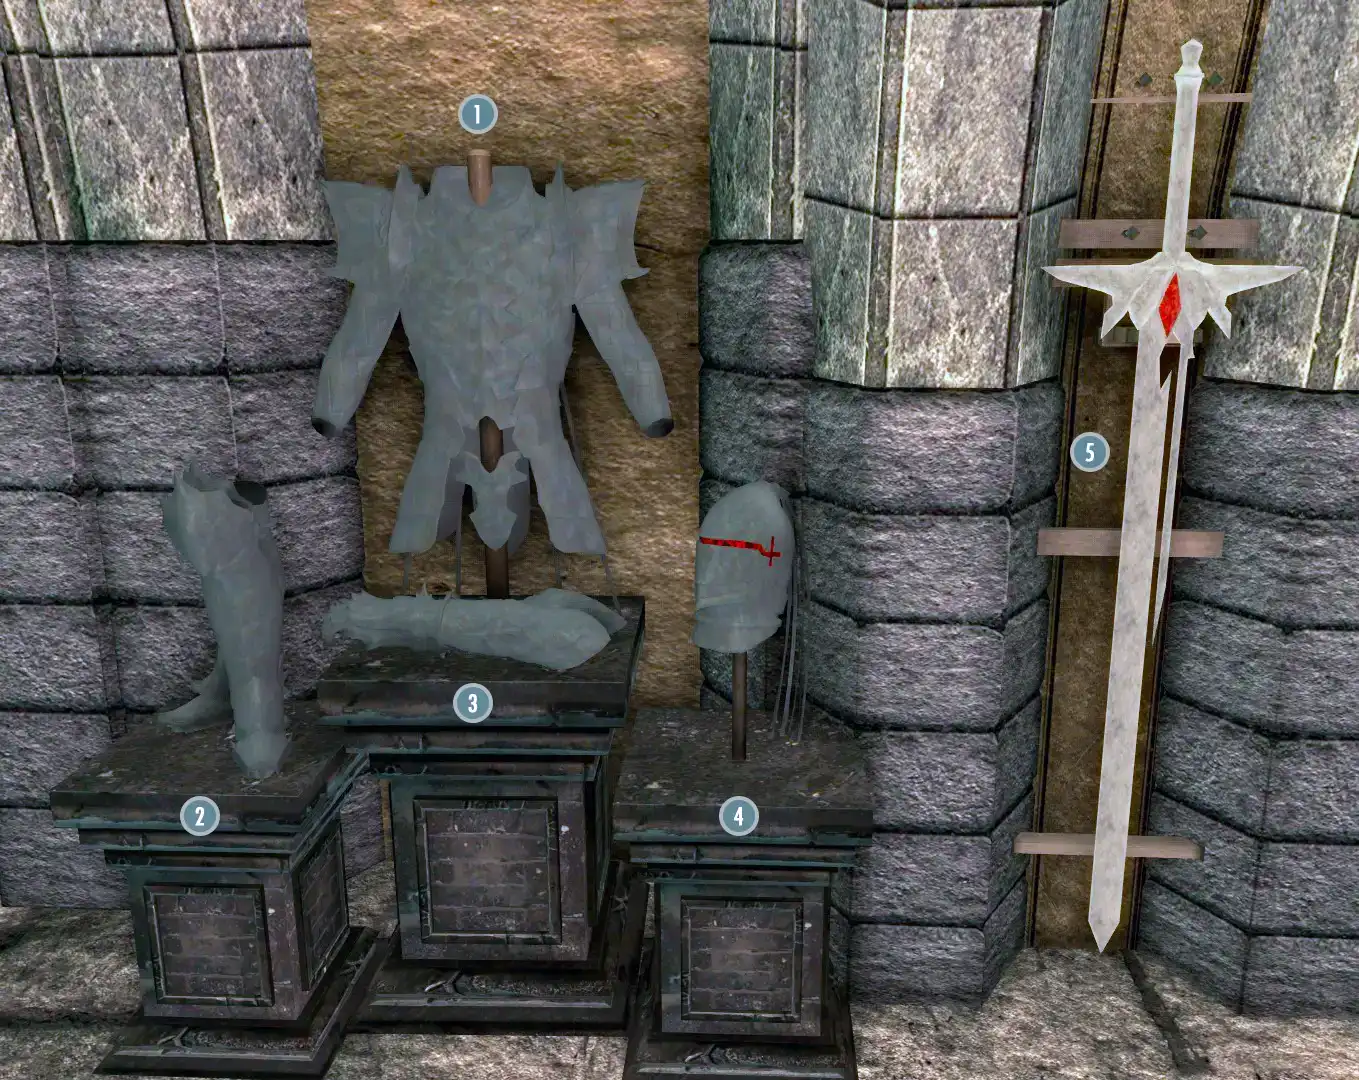
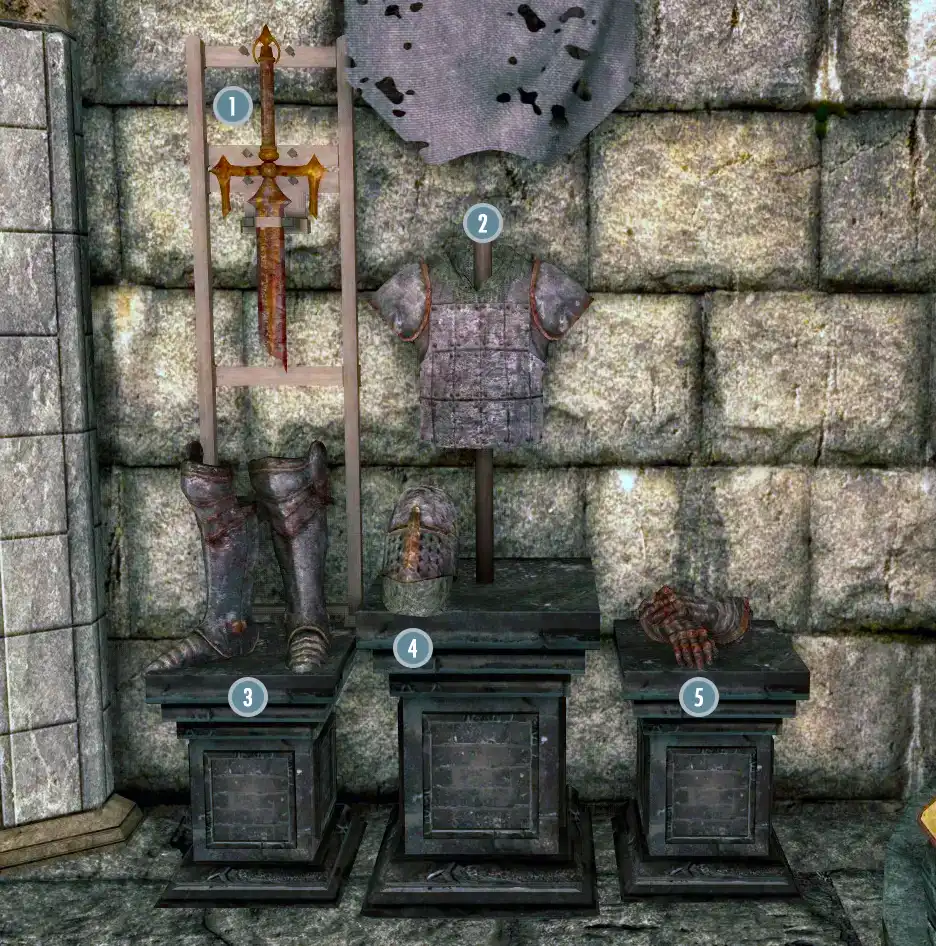
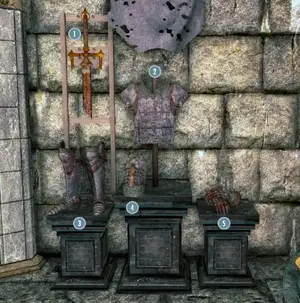
Relics of Ysgramor Display | |
|---|---|
| 1) Shield of Ysgramor | |
| 2) Ysgramor's Cloak | |
| 3) Ysgramor's Boots | |
| 4) Ysgramor's Helmet | |
| 5) Ysgramor's Armor | |
| 6) Ysgramor's Gauntlets | |
| 7) Wuuthrad | |

2nd Weapons Display | |
|---|---|
| 1) Shadowsting (requires Immersive Weapons) | |
| 2) Battleaxe of Hatred (requires Oblivion Artifact Pack) | |
| 3) Firiniel's End | |
| 4) Honed Ancient Nord Greatsword of Scorching | |
| 5) Hrothmund's Axe | |
| 6) Steel Battleaxe of Fiery Souls | |
| 7) Cyrus' Saber or Creation Club Version | |
| 8) Sixth House Bell Hammer | |

3rd Weapons Display | |
|---|---|
| 1) Eleidon's Ward | |
| 2) Bipolar Blade | |
| 3) Debaser | |
| 4) Mace of Aevar Stone-Singer | |
| 5) Ghostblade | |
| 6) Bloodskal Blade | |
| 7) Dragonbane | |

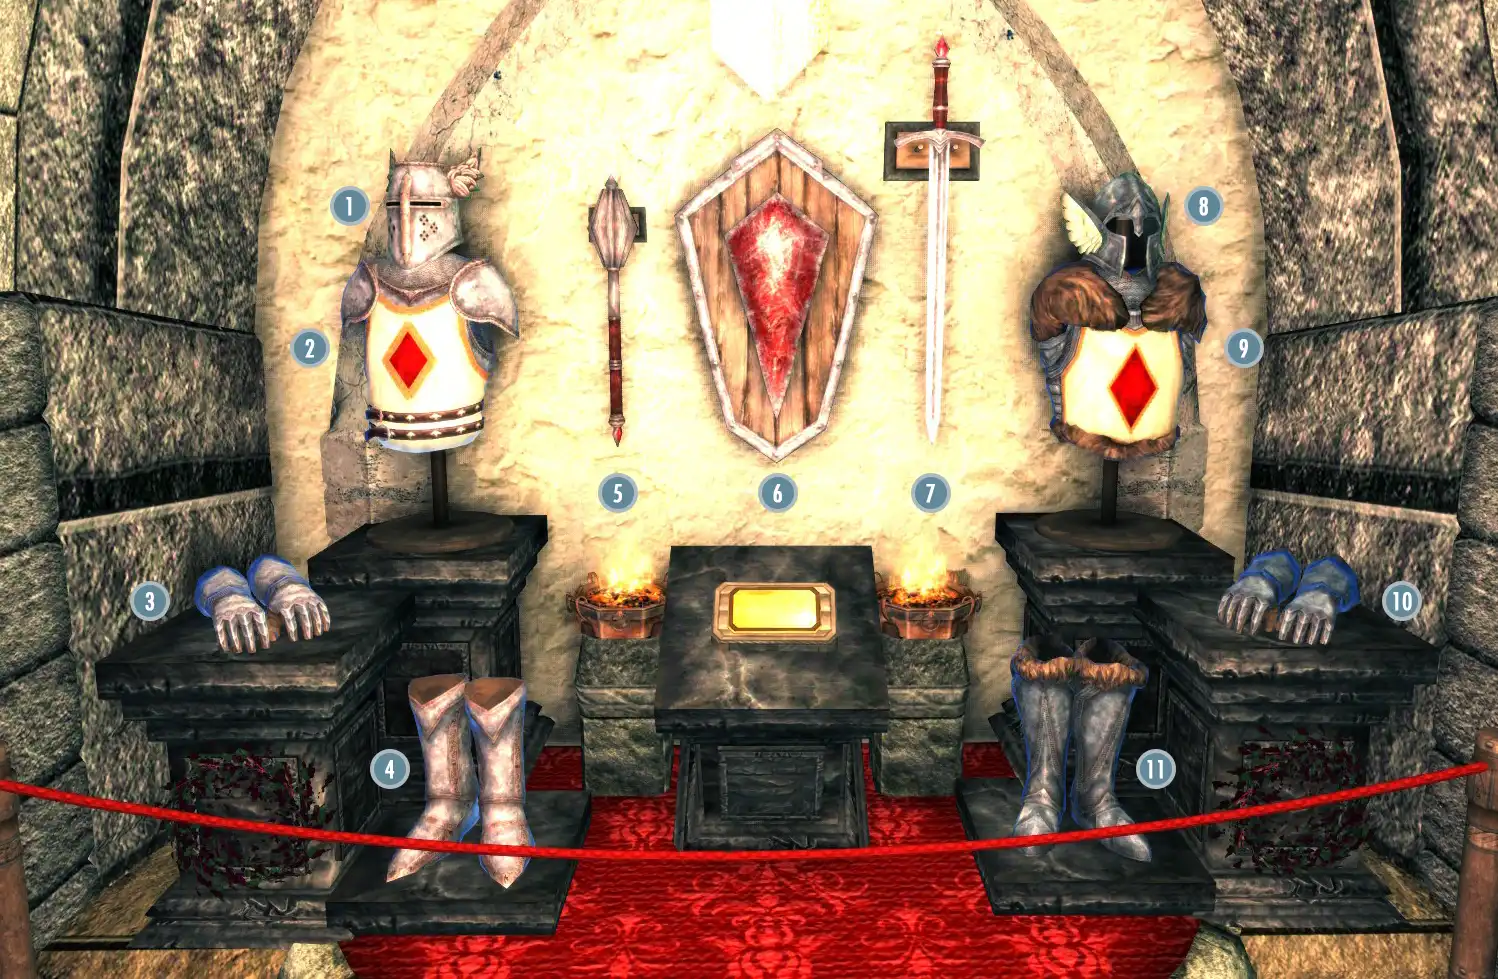
Armor Display | |
|---|---|
| Left Oblivion Artifacts | |
| 1) Birthright of Astalon (requires Oblivion Artifact Pack) | 2) Aegis of the Apocalypse (requires Oblivion Artifact Pack) |
| Deathbrand Armor | |
| 3) Bloodscythe | 4) Soulrender |
| 5) Deathbrand Helm | 6) Deathbrand Gauntlets |
| 7) Deathbrand Armor | 8) Deathbrand Boots |
| Old Gods Armor | |
| 9) Helmet of the Old Gods | 10) Armor of the Old Gods |
| 11) Gauntlets of the Old Gods | 12) Boots of the Old Gods |
| Dragonbone Cuirass & Lord's Mail | |
| 13) Dragonbone Cuirass or Creation Club Version |
14) Lord's Mail or Creation Club Version |
| Alvante's Armor | |
| 15) Alvante's Armor (requires Oblivion Artifact Pack) | 16) Alvante's Hood (requires Oblivion Artifact Pack) |
| 17) Alvante's Gloves (requires Oblivion Artifact Pack) | 18) Alvante's Boots (requires Oblivion Artifact Pack) |
| Right Oblivion Artifacts | |
| 19) Dondoran's Juggernaut (requires Oblivion Artifact Pack) | |


4th Weapons Display | |
|---|---|
| 1) Sinweaver (requires Oblivion Artifact Pack) | |
| 2) Hopesfire or Creation Club Version | |
| 3) Trueflame or Creation Club Version | |
| 4) Harkon's Sword | |
| 5) Champion's Cudgel | |
| 6) Chillrend | |
| 7) Trollsbane | |

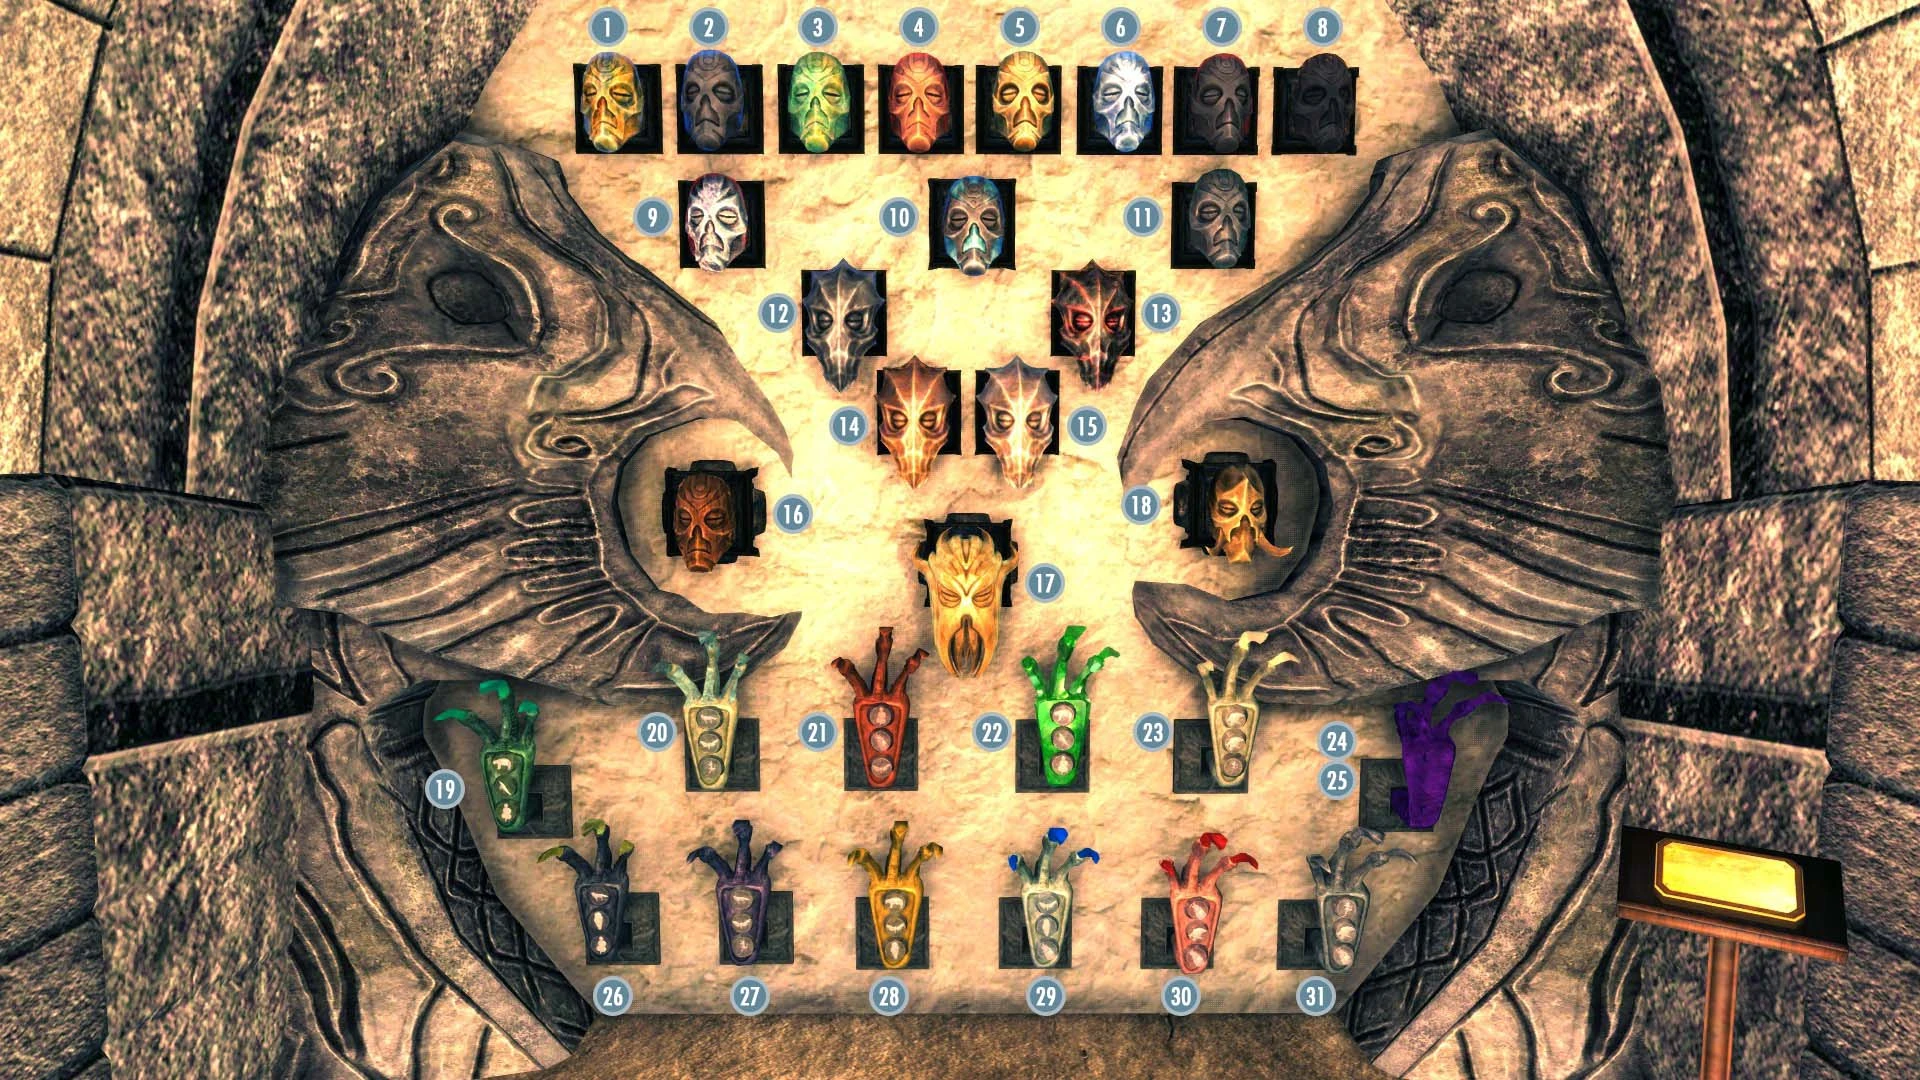
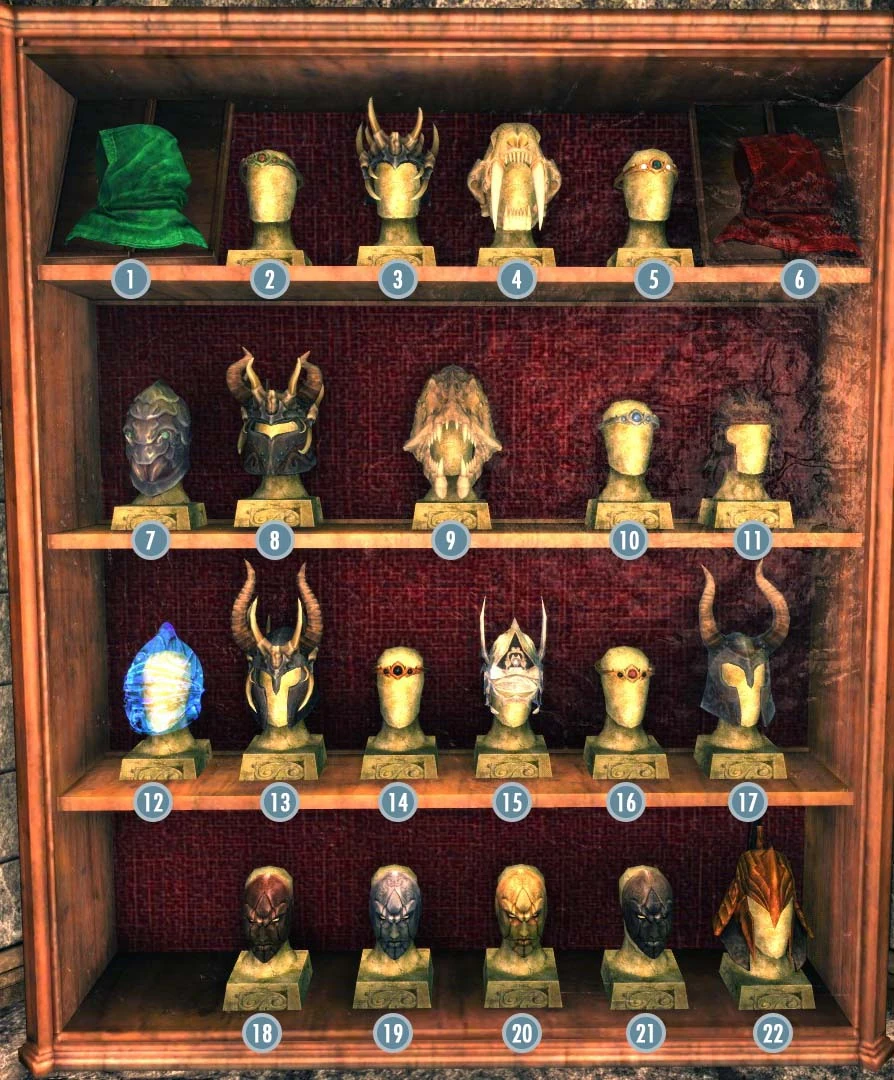
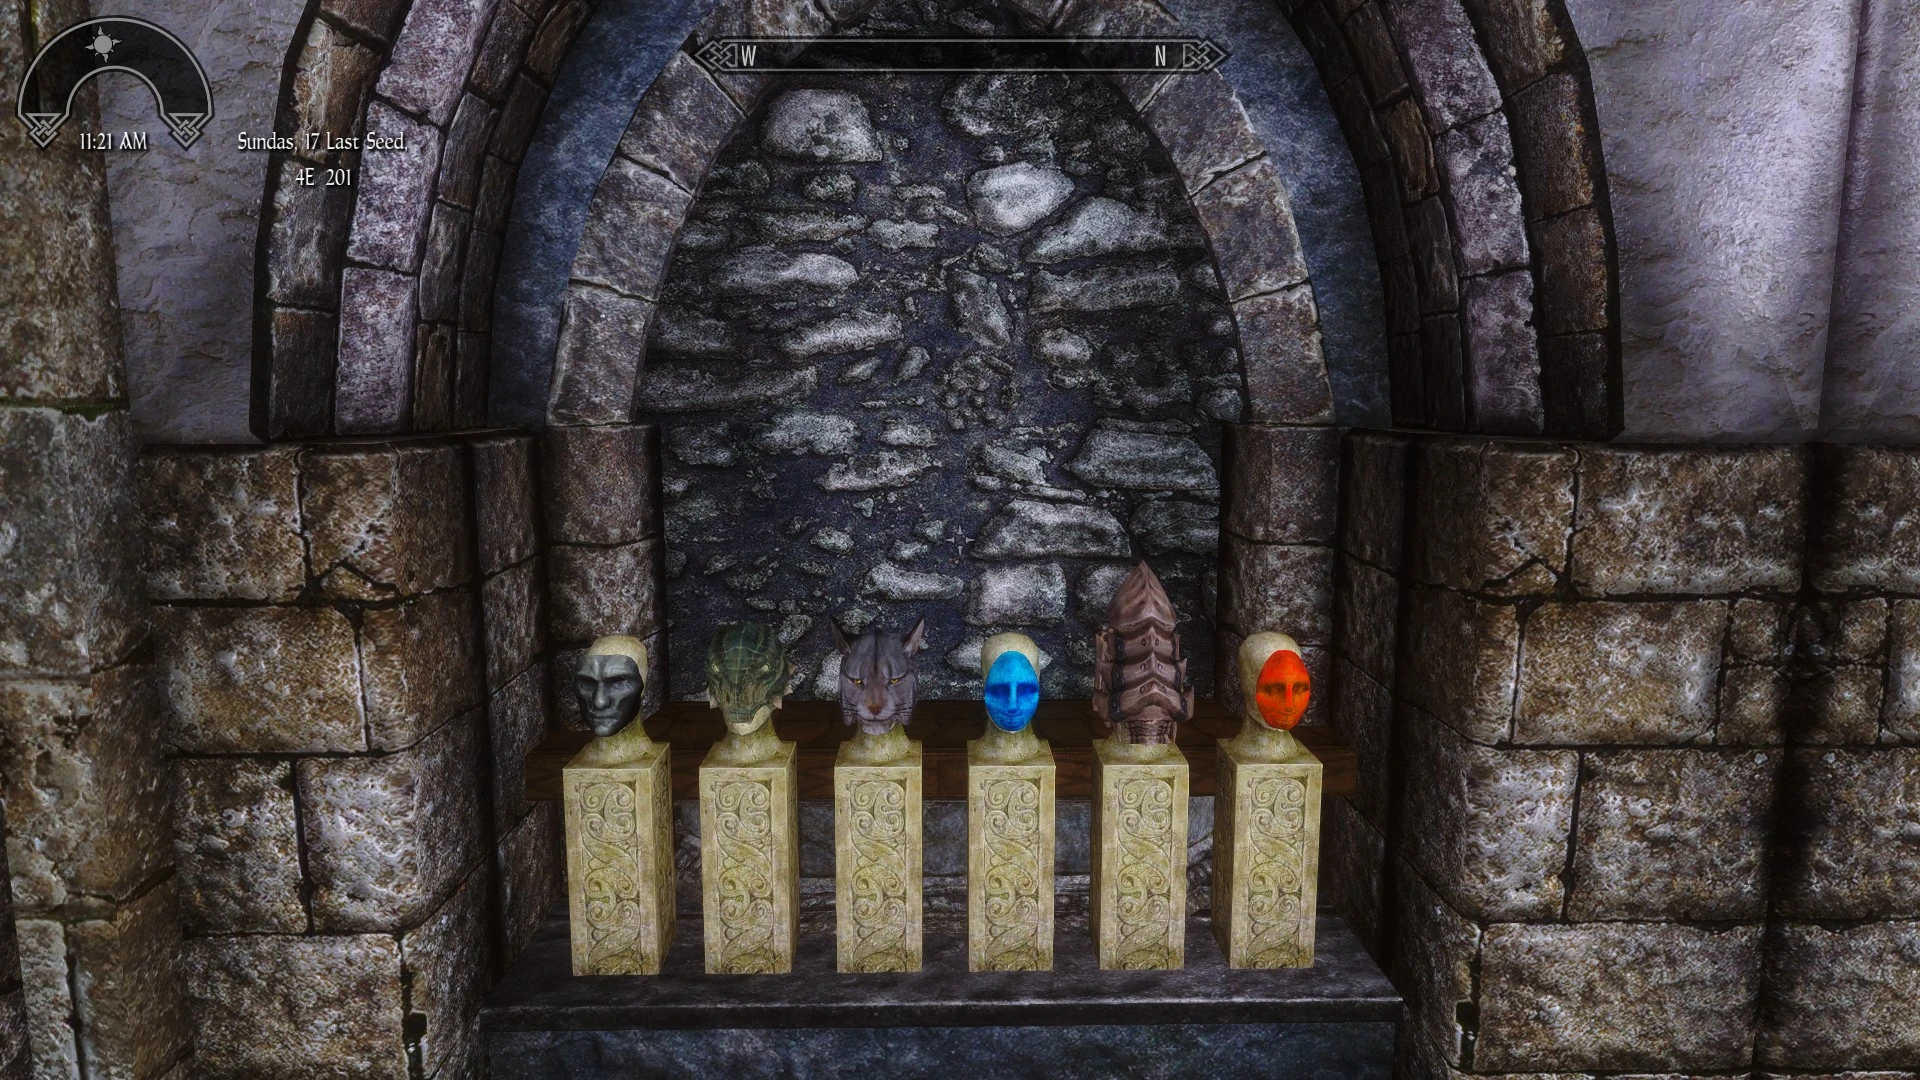
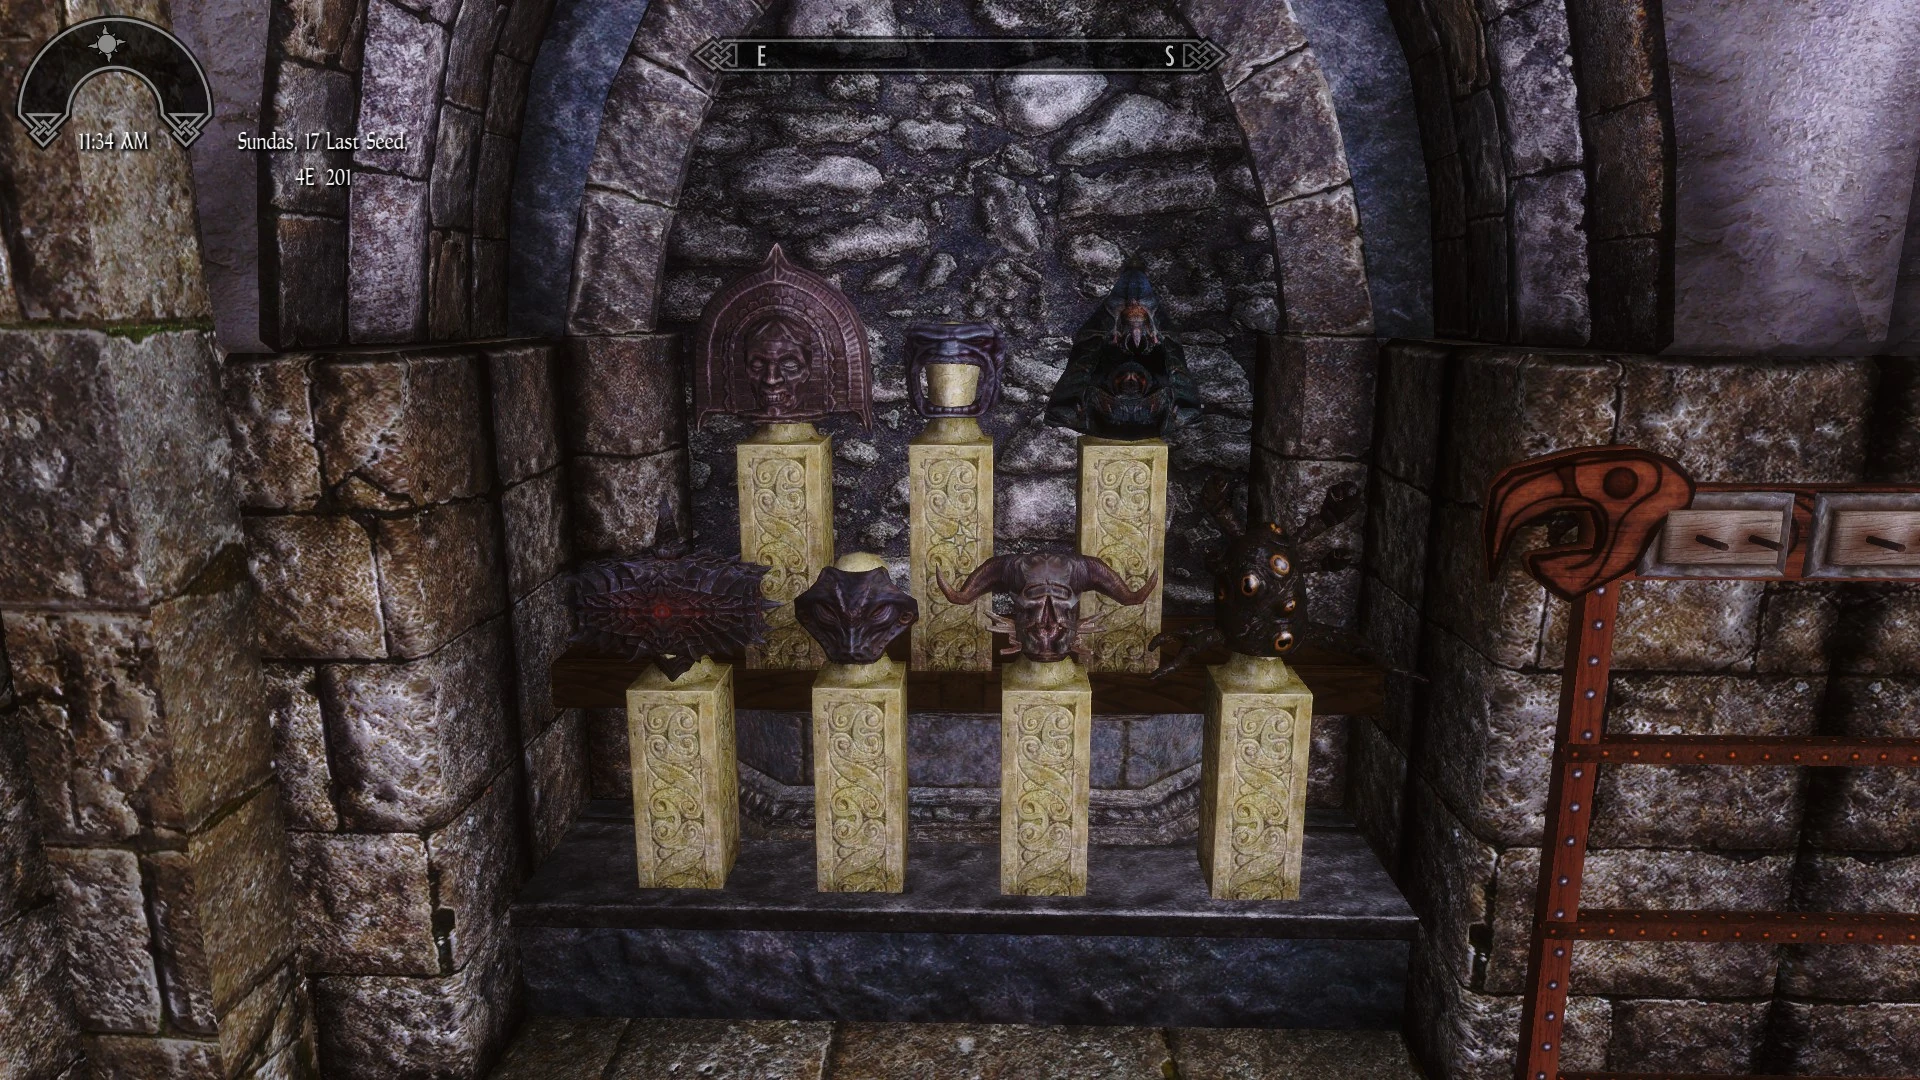
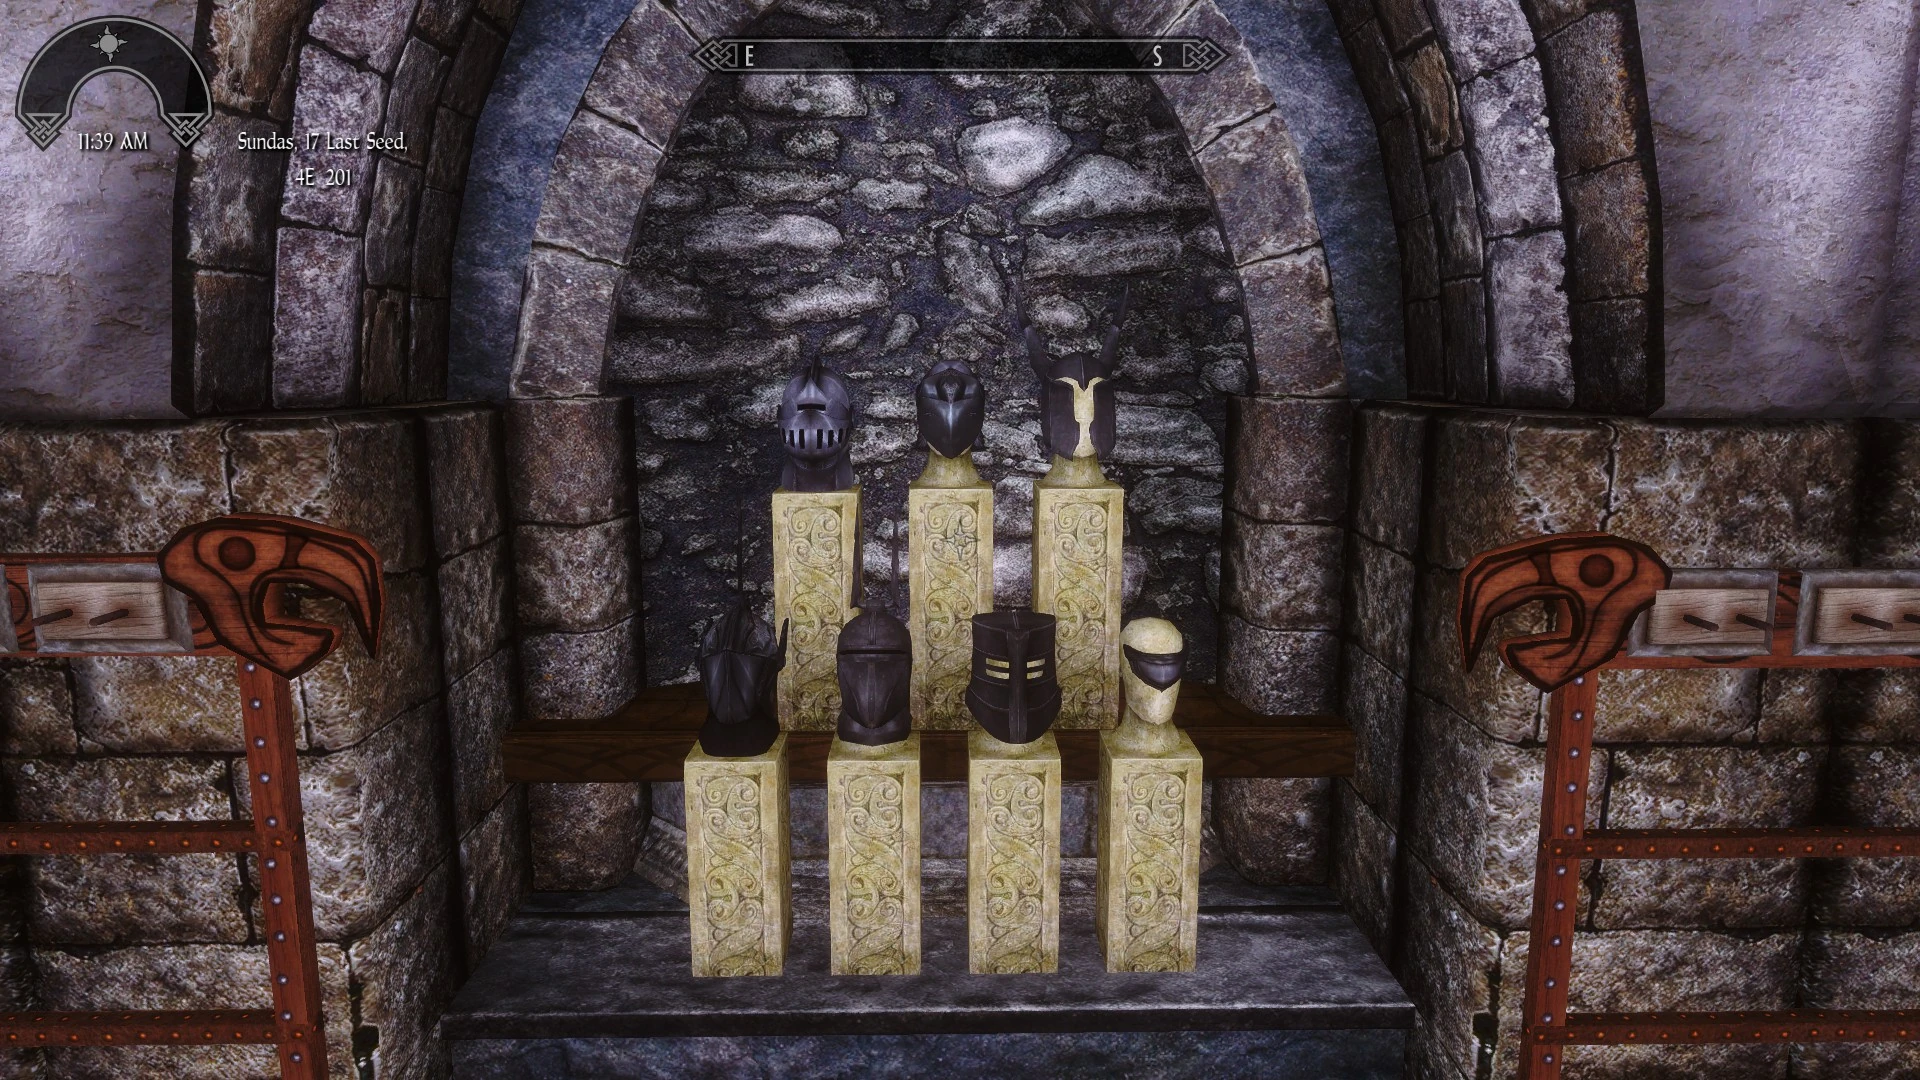
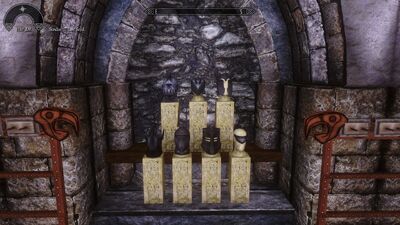
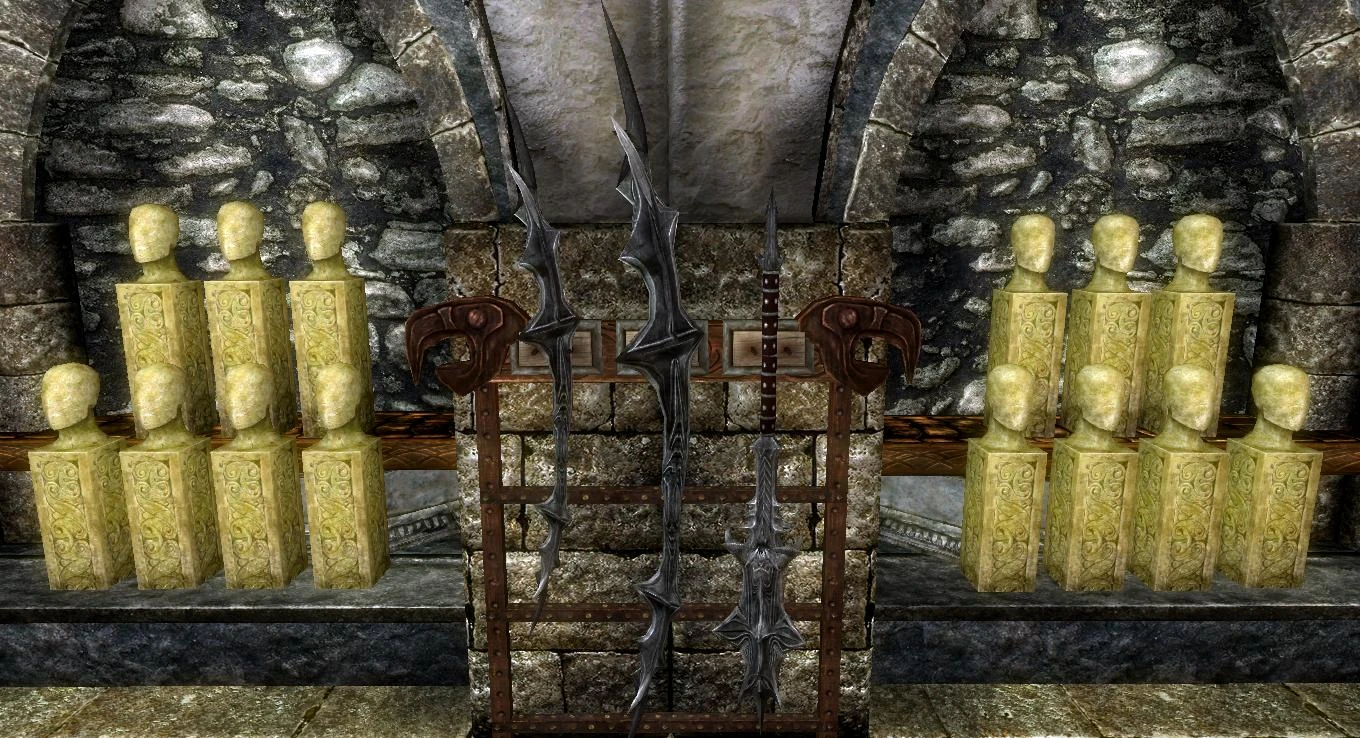
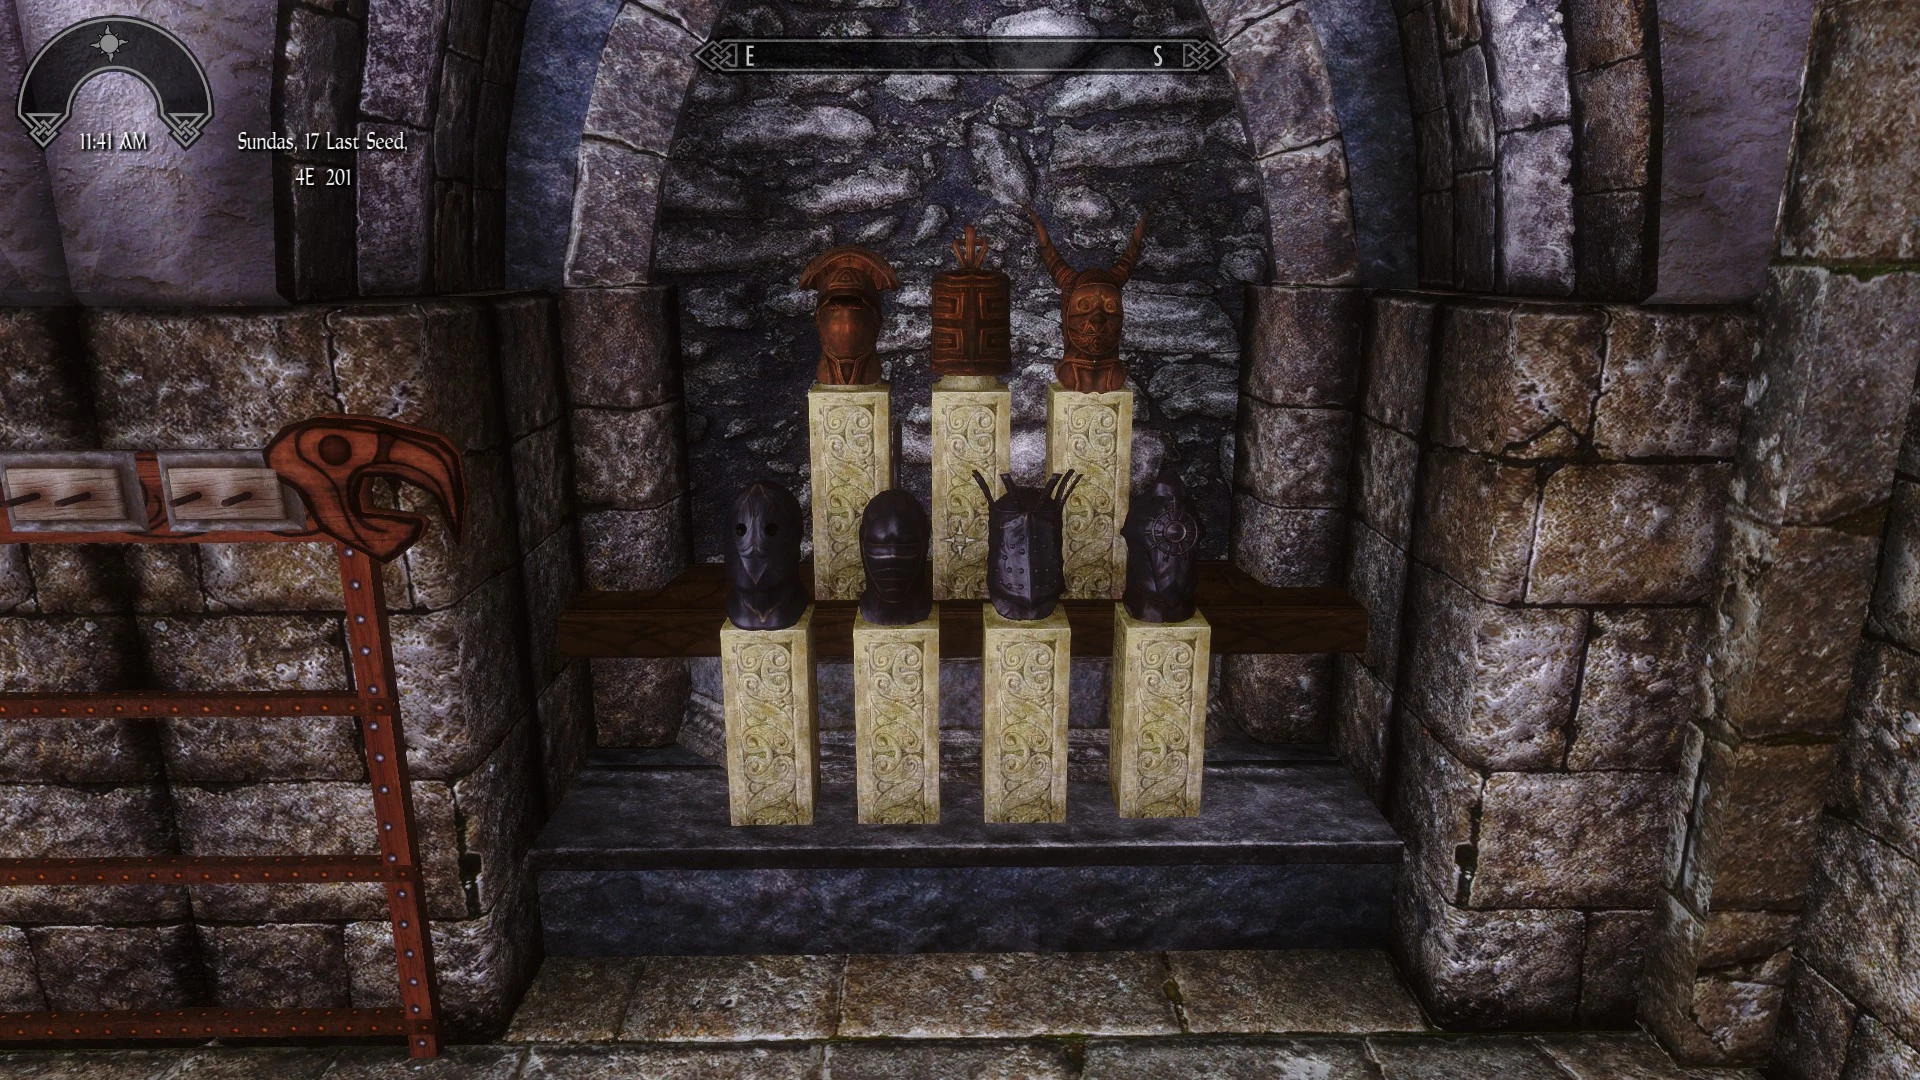
Main Floor - Dragon Priest Masks and Claws Display
Dragon Priest Masks and Claws Display | |||
|---|---|---|---|
| Dragon Priest Masks 1st Row | |||
| 1) Otar | 2) Vokun | 3) Rahgot | 4) Volsung |
| 5) Krosis | 6) Morokei | 7) Hevnoraak | 8) Nahkriin |
| 2nd Row | |||
| 9) Korthor | 10) Vahlok | 11) Vosis | |
| 3rd Row | |||
| 12) Zahkriisos | 13) Haldriin | 14) Ahzidal | 15) Dukaan |
| 4th Row | |||
| 16) Wooden Mask | 17) Miraak | 18) Konahrik | |
| Dragon Claws 1st Row | |||
| 19) Emerald Dragon Claw | 20) Diamond Dragon Claw | 21) Coral Dragon Claw | |
| 22) Jade Claw | 23) Ivory Dragon Claw | 24) Amethyst Claw, Left Half | 25) Amethyst Claw, Right Half |
| 2nd Row | |||
| 26) Glass Dragon Claw | 27) Ebony Dragon Claw | 28) Golden Claw | |
| 29) Sapphire Dragon Claw | 30) Ruby Dragon Claw | 31) Iron Dragon Claw | |
Main Floor - Right Side
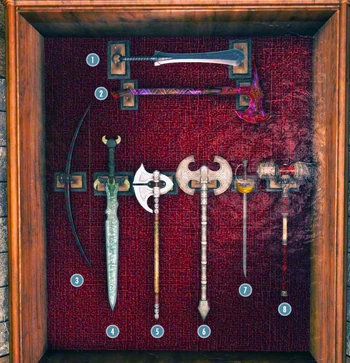
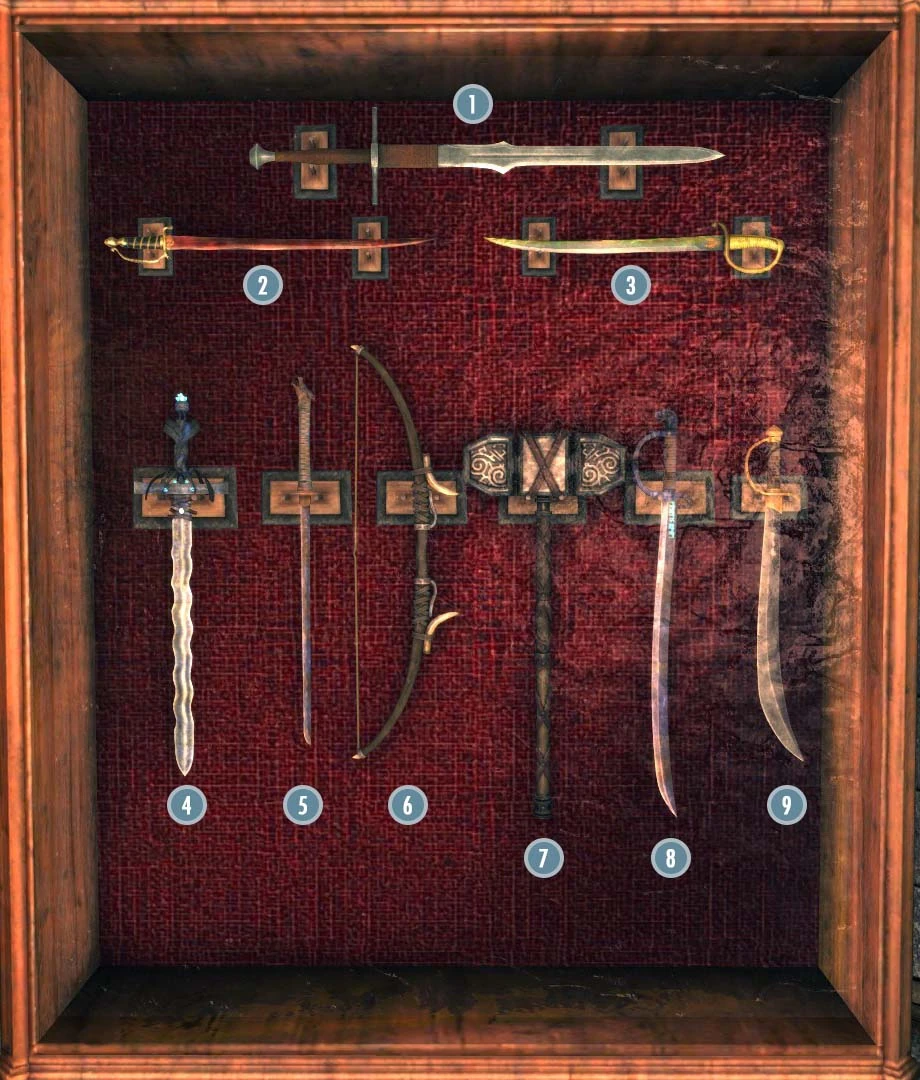
5th Weapons Display | |
|---|---|
| 1) Justice (requires Immersive Weapons) | |
| 2) Redwave (requires Oblivion Artifact Pack) | |
| 3) Captain Kordan's Saber (requires Oblivion Artifact Pack) | |
| 4) The Pale Blade | |
| 5) Bolar's Oathblade | |
| 6) Froki's Bow | |
| 7) The Longhammer | |
| 8) Red Eagle's Fury or Red Eagle's Bane | |
| 9) Windshear | |

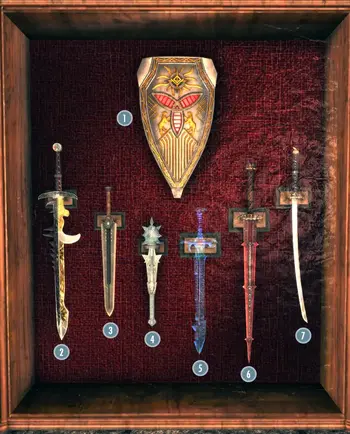
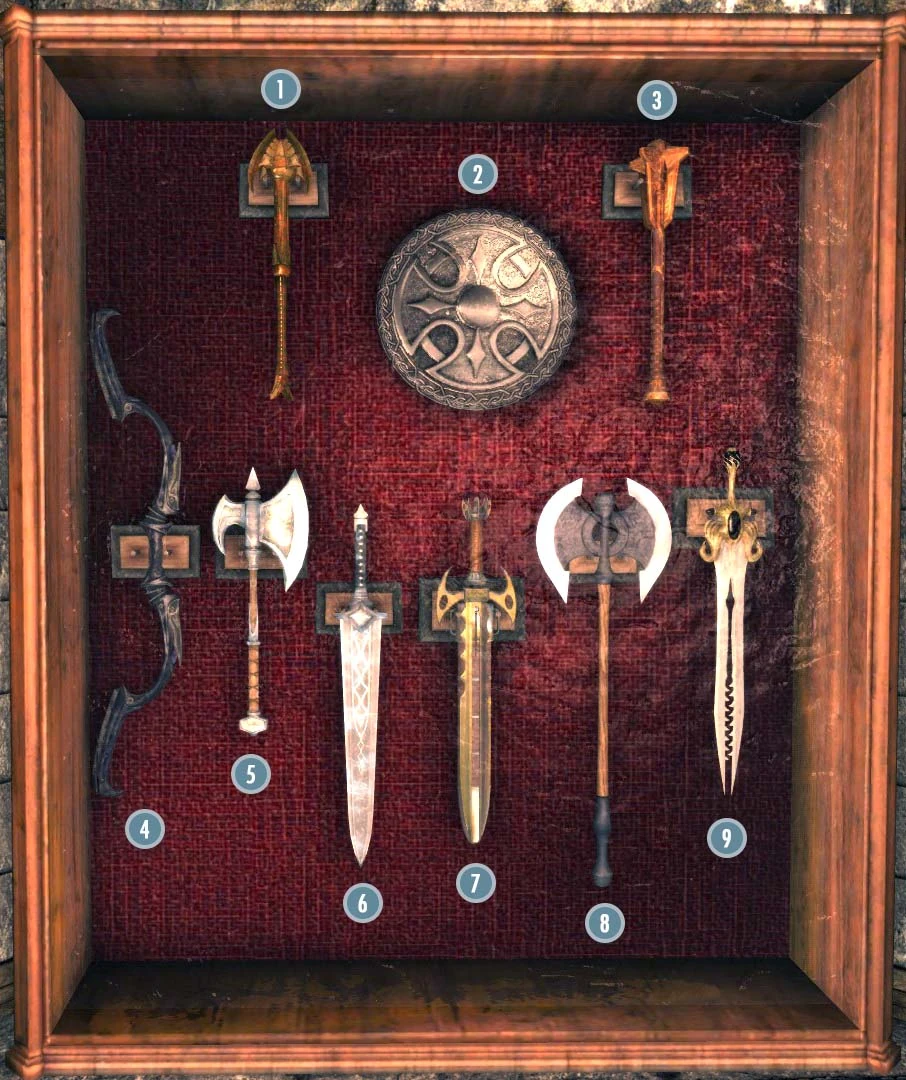
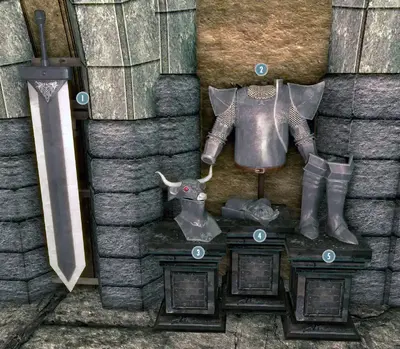
Crusader Relics Display | |
|---|---|
| 1) Mace of the Crusader | |
| 2) Sword of the Crusader | |
| 3) Helm of the Crusader | |
| 4) Shield of the Crusader | |
| 5) Armor of the Crusader | |
| 6) Gauntlets of the Crusader | |
| 7) Boots of the Crusader | |

Crusader Relics CC Version DisplayRequires Divine Crusader CC | |
|---|---|
| Heavy (standard) armor set | |
| 1) Helm of the Crusader | 2) Cuirass of the Crusader |
| 3) Gauntlets of the Crusader | 4) Boots of the Crusader |
| Wall Display | |
| 5) Mace of the Crusader | 6) Shield of the Crusader or Fastened Shield of the Crusader or Reforged Shield of the Crusader or Fastened Reforged Shield of the Crusader |
| 7) Sword of the Crusader | |
| Light (reforged) armor set | |
| 8) Reforged Helm of the Crusader | 9) Reforged Cuirass of the Crusader |
| 10) Reforged Gauntlets of the Crusader | 11) Reforged Boots of the Crusader |

6th Weapons Display | |
|---|---|
| 1) Gron-Tosh's Fist (requires Immersive Weapons) | |
| 2) Targe of the Blooded | |
| 3) Gildergreen Aegis (requires Immersive Armors) | |
| 4) Grimsever | |
| 5) Cleaver of St. Felms or Creation Club Version | |
| 6) Thornblade | |
| 7) Skullcrusher or Creation Club Version | |
| 8) Gravedigger | |
| 9) Stendarr's Hammer or Creation Club Version | |

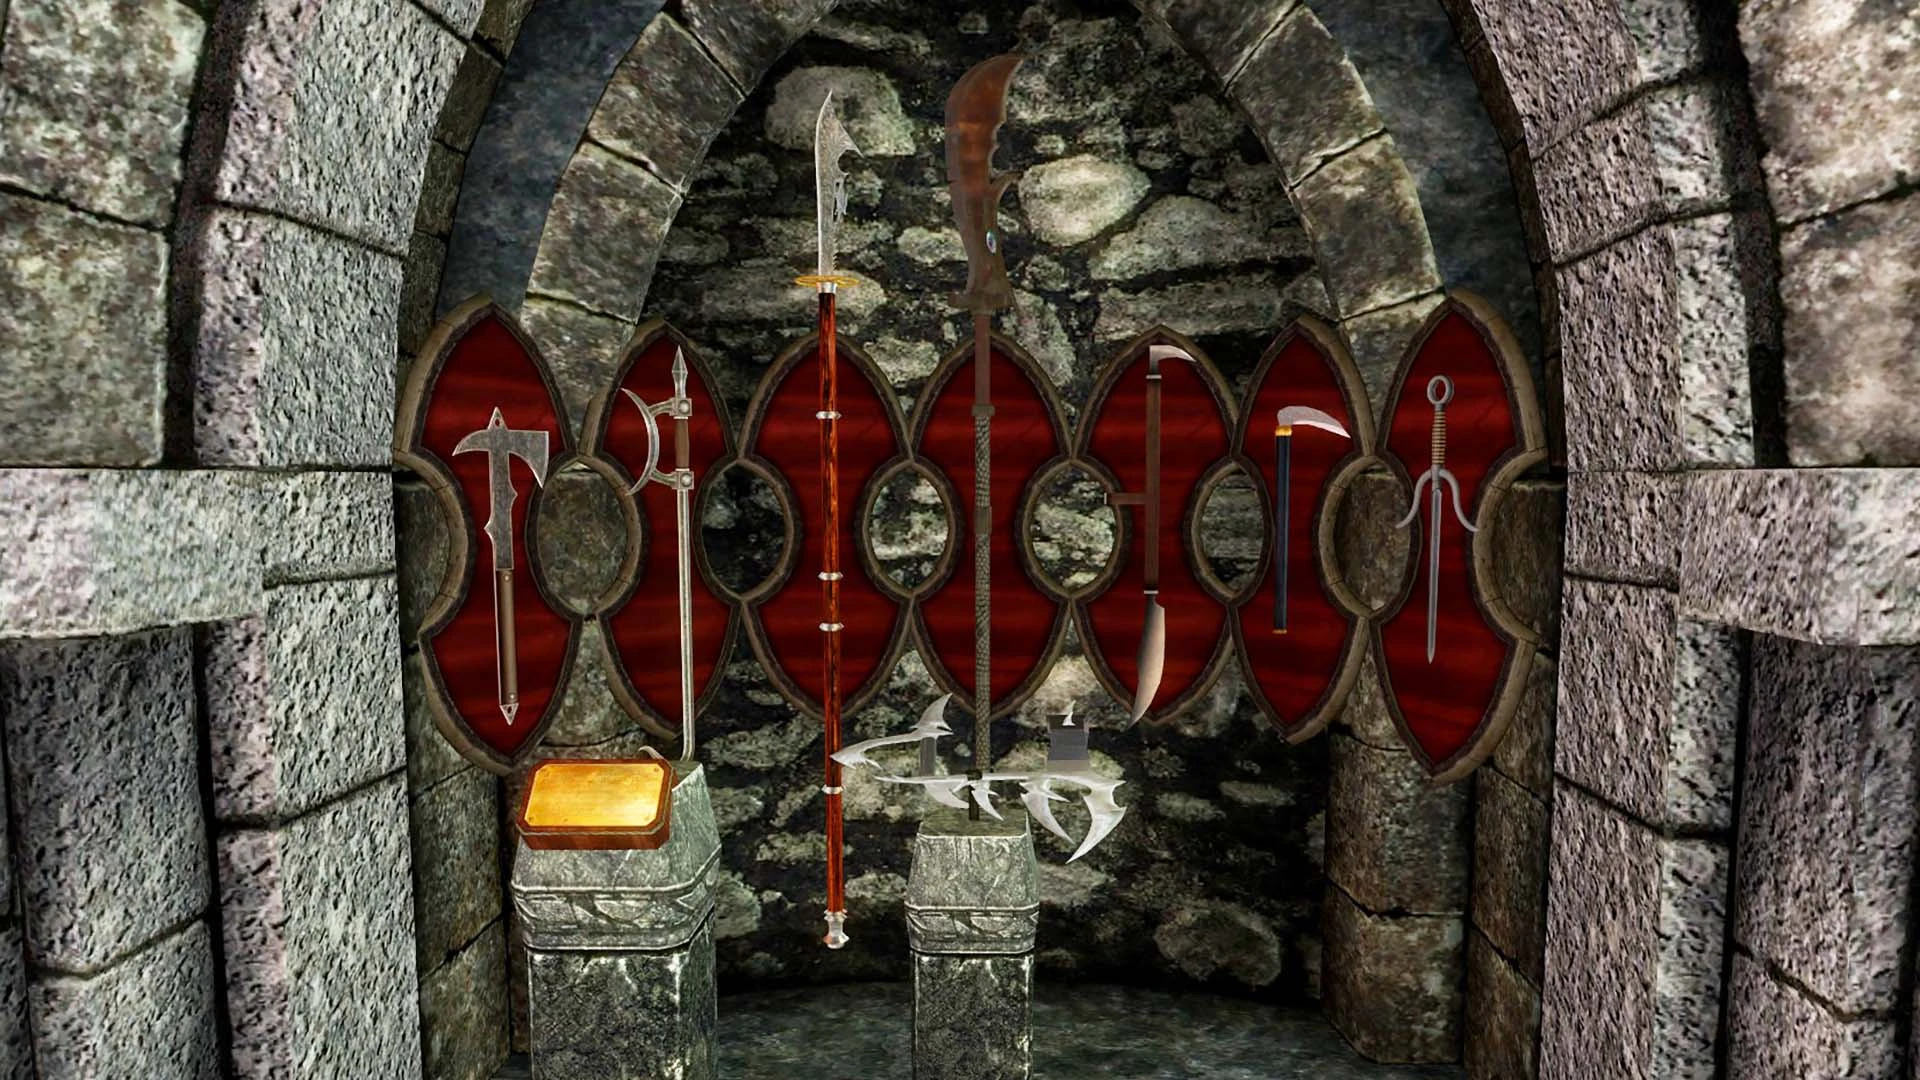
7th Weapons Display | ||
|---|---|---|
| 1) Akaviri Sunderblade (requires Oblivion Artifact Pack) | ||
| 2) Blackwater Blade (requires Oblivion Artifact Pack) or Creation Club Version | ||
| 3) Thrassian Plaguesword | ||
| 4) Briarheart Geis | ||
| 5) Bow of the Hunt | ||
| 6) Stormfang | ||
| 7) Glass Bow of the Stag Prince | ||
| 8) Horksbane | ||

Ancient Nordic Display | ||
|---|---|---|
| Ahzidal displays | ||
| 1) Ahzidal's Helm of Vision | 2) Ahzidal's Armor of Retribution | |
| 3) Ahzidal's Gauntlets of Warding | 4) Ahzidal's Boots of Waterwalking | |
| 5) Ahzidal's Ring of Arcana | 6) Ahzidal's Ring of Necromancy | |
| Gauldur displays | ||
| 7) Gauldur Blackbow | 8) Staff of Jyrik Gauldurson | |
| 9) Gauldur Blackblade | 10) The Gauldur Amulet | |
| 11) Enchanted Rings x3 | 12) Saarthal Amulet | |
8th Weapons Display | |
|---|---|
| 1) Calliben's Grim Retort (requires Oblivion Artifact Pack) | |
| 2) Herebane's Fortress | |
| 3) Rockshatter (requires Oblivion Artifact Pack) | |
| 4) Dwarven Black Bow of Fate | |
| 5) Okin | |
| 6) Eduj | |
| 7) Herebane's Courage | |
| 8) Companion's Battle Axe | |
| 9) Dawnfang/Duskfang or Creation Club Version | |

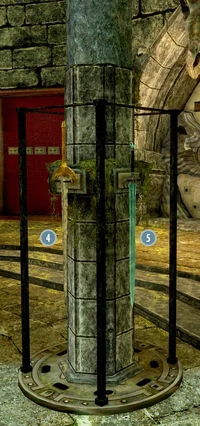
Main Floor - Pillar
Skyrim Sewers displayRequires Skyrim Sewers 4 | |
|---|---|
| 1) Steel Dragon Claw | 4) Blade of the Rourken |
| 2) Mournbringer | 5) Shardslayer |
| 3) Honorblade of Whiterun | |


Wintersun Display
Requires Wintersun - Faiths of Skyrim
The displays will activate once the player has received the blessing from the shrine. The shrines for Boethiah, Azura and Mephala are found in the Daedric Exhibit Hall.
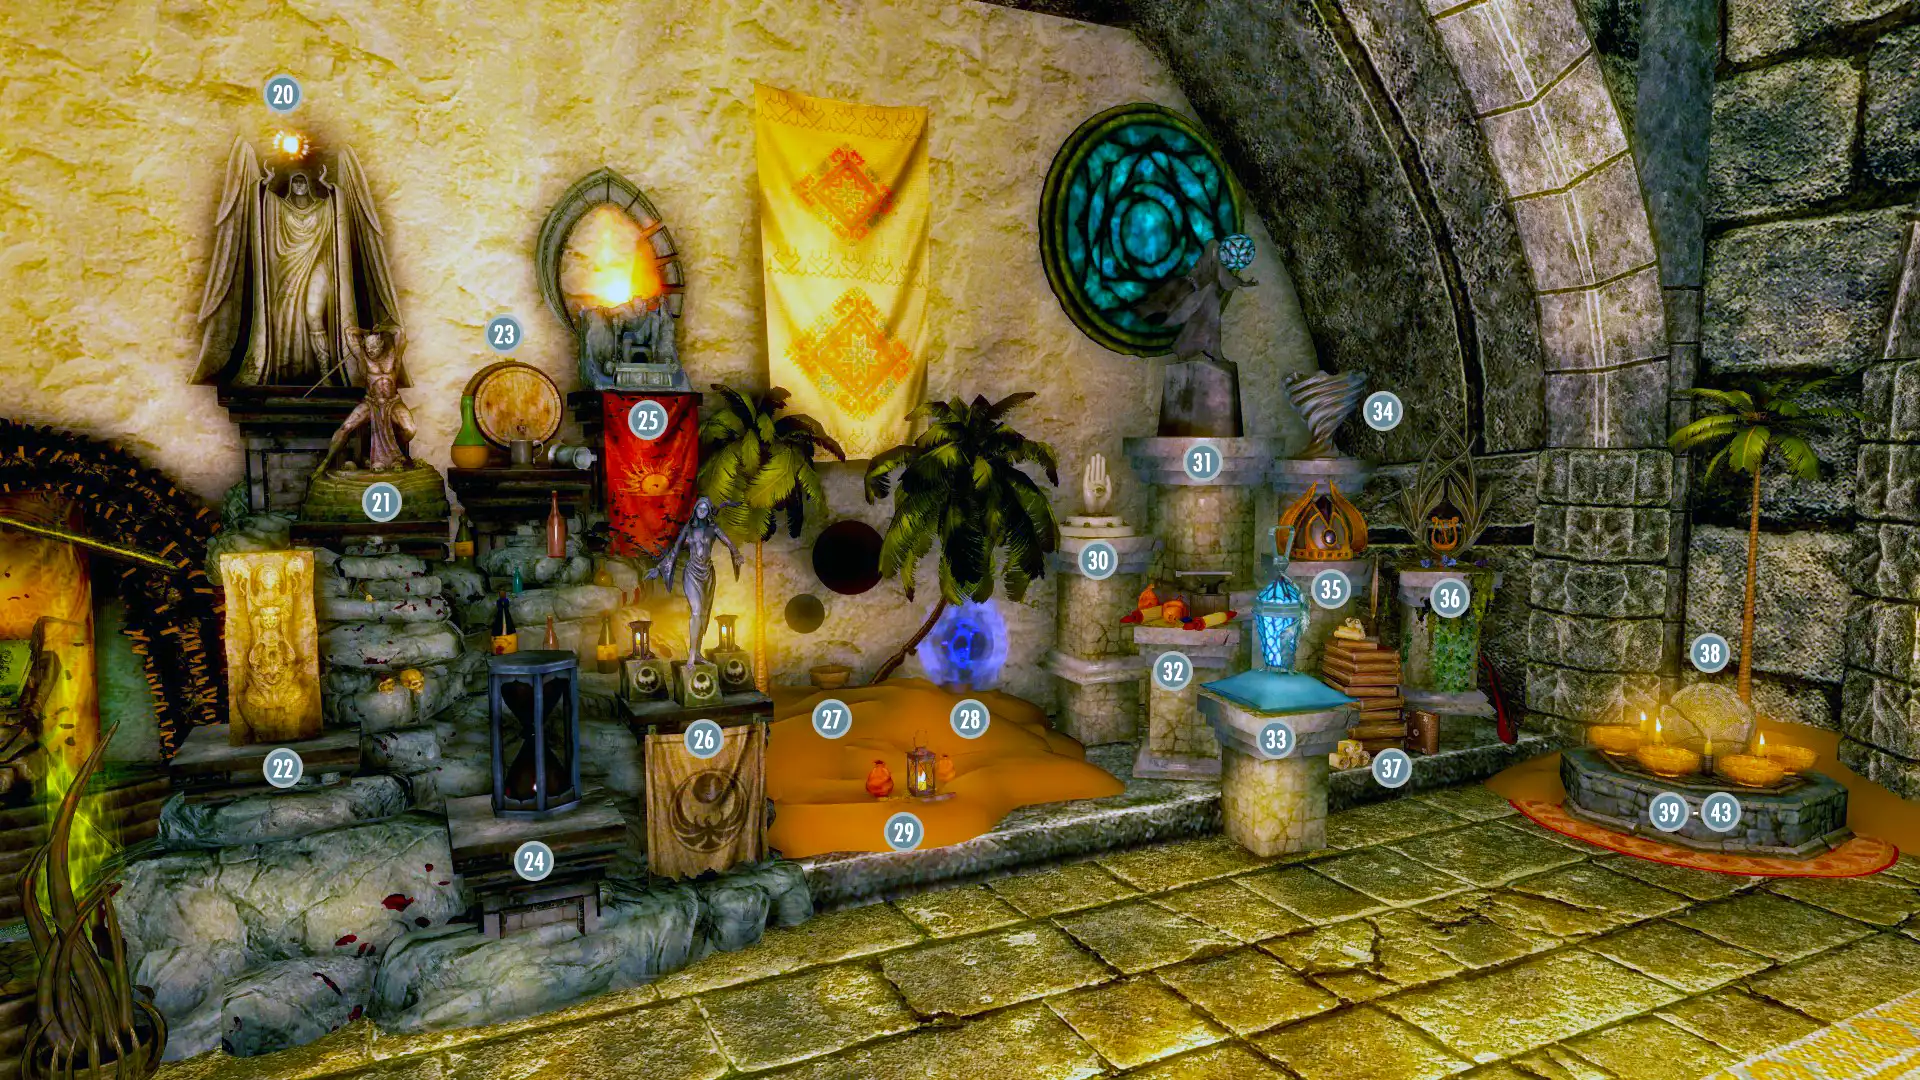

Culture and Arts Section
The displays will activate once the player has visited or cleared the locations.


Giants
- Giants of Sleeping Tree Camp
- Giants of Cradlecrush Rock
- Giants of Talking Stone Camp
- Giants of Blizzard Rest
- Giants of Stonehill Bluff
- Giants of Guldun Rock
- Giants of Bleakwind Basin
Forsworn
- Forsworn of Hag Rock Redoubt
- Forsworn of Lost Valley Redoubt
- Forsworn of Karthspire Camp
- The Witches of Glenmoril Coven
Rieklings
- Rieklings of Moesring Pass
- Rieklings of Thirsk Mead Hall
- Rieklings of Northern Solstheim
- Rieklings of Frossel
- Rieklings of Karstaag Ruins
- Rieklings of Bristleback Cave
- Rieklings of Glacial Cave
- Rieklings of Benkongerike
Falmer
- Falmer of Frostflow Lighthouse
- Falmer of Sightless Pit
- Falmer of Chillwind Depths
- Falmer of Duskglow Crevice
- Falmer of Gloomreach
- Falmer of Lost Echo Cave
- Falmer of Darkwater Cavern
- Falmer of Stillborn Cave
- Falmer of Liar's Retreat
- Falmer of Shimmermist Cave
Upper Gallery
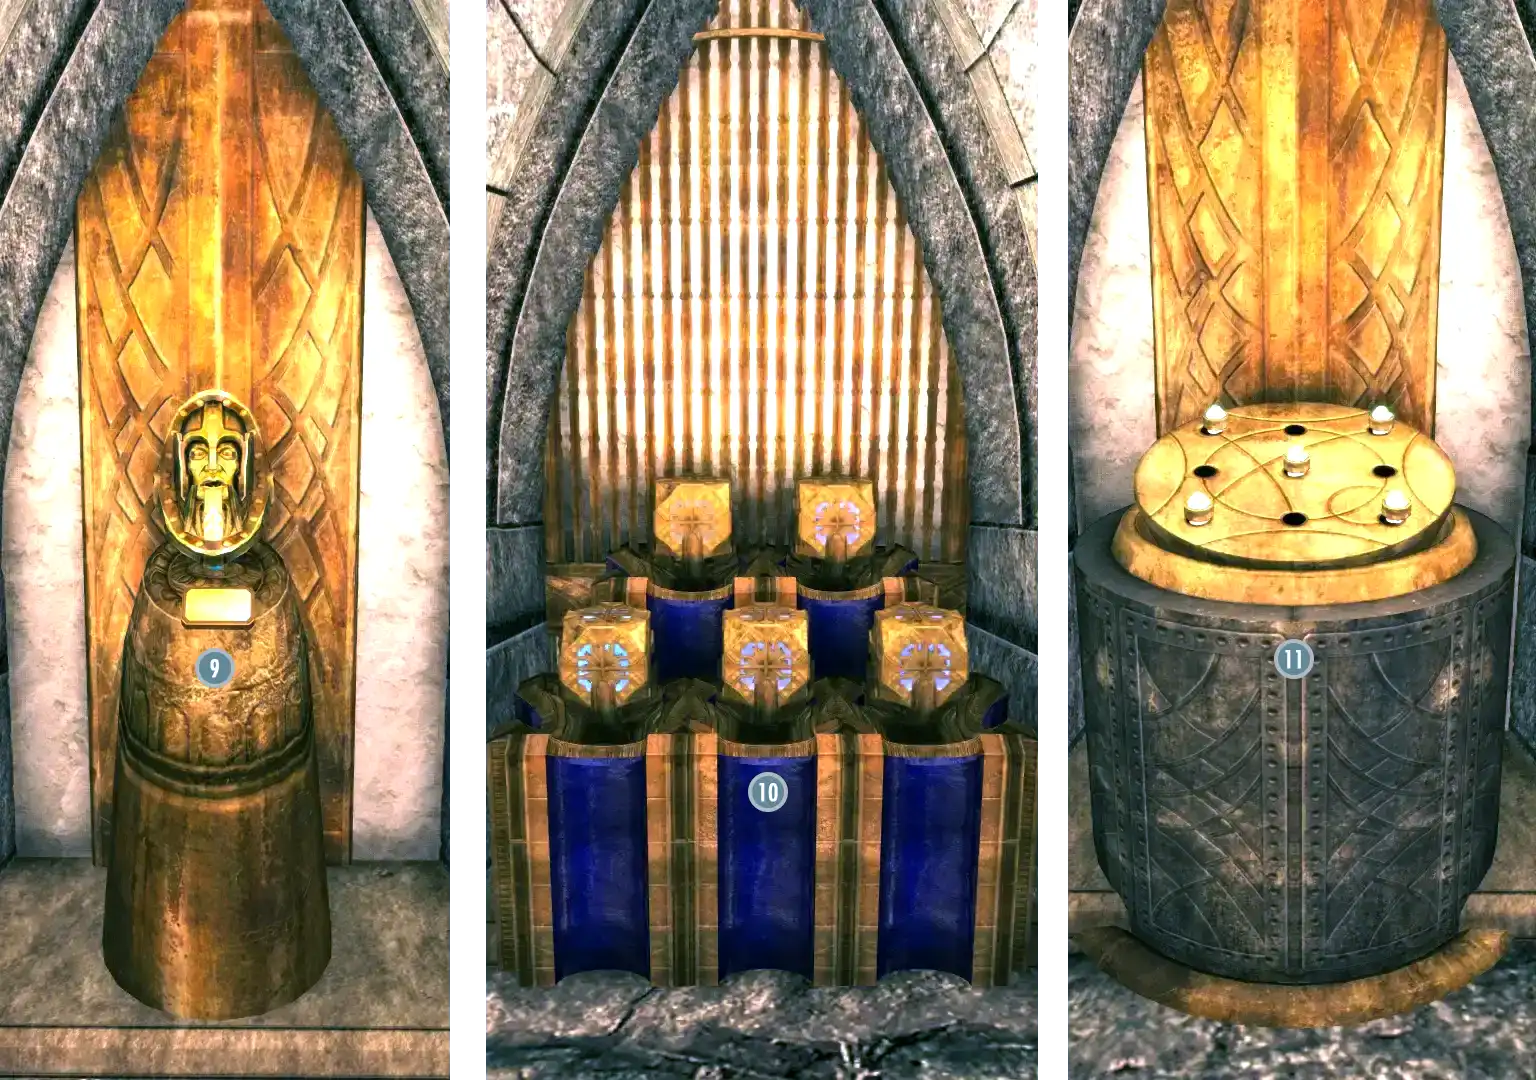
The upper part of the Hall of Heroes contains a circle of displays. There is a door to the exterior of the Museum, connecting to the Safehouse. There is also a hallway, where 46 Paintings can be placed. After the Immersive College of Winterhold questline has been completed, three statues from Old Winterhold appear in this hall. This Hall has a door to the third floor of the Library, the Dragonborn Hall, the Gallery of Natural Science and the Planetarium.
Displays
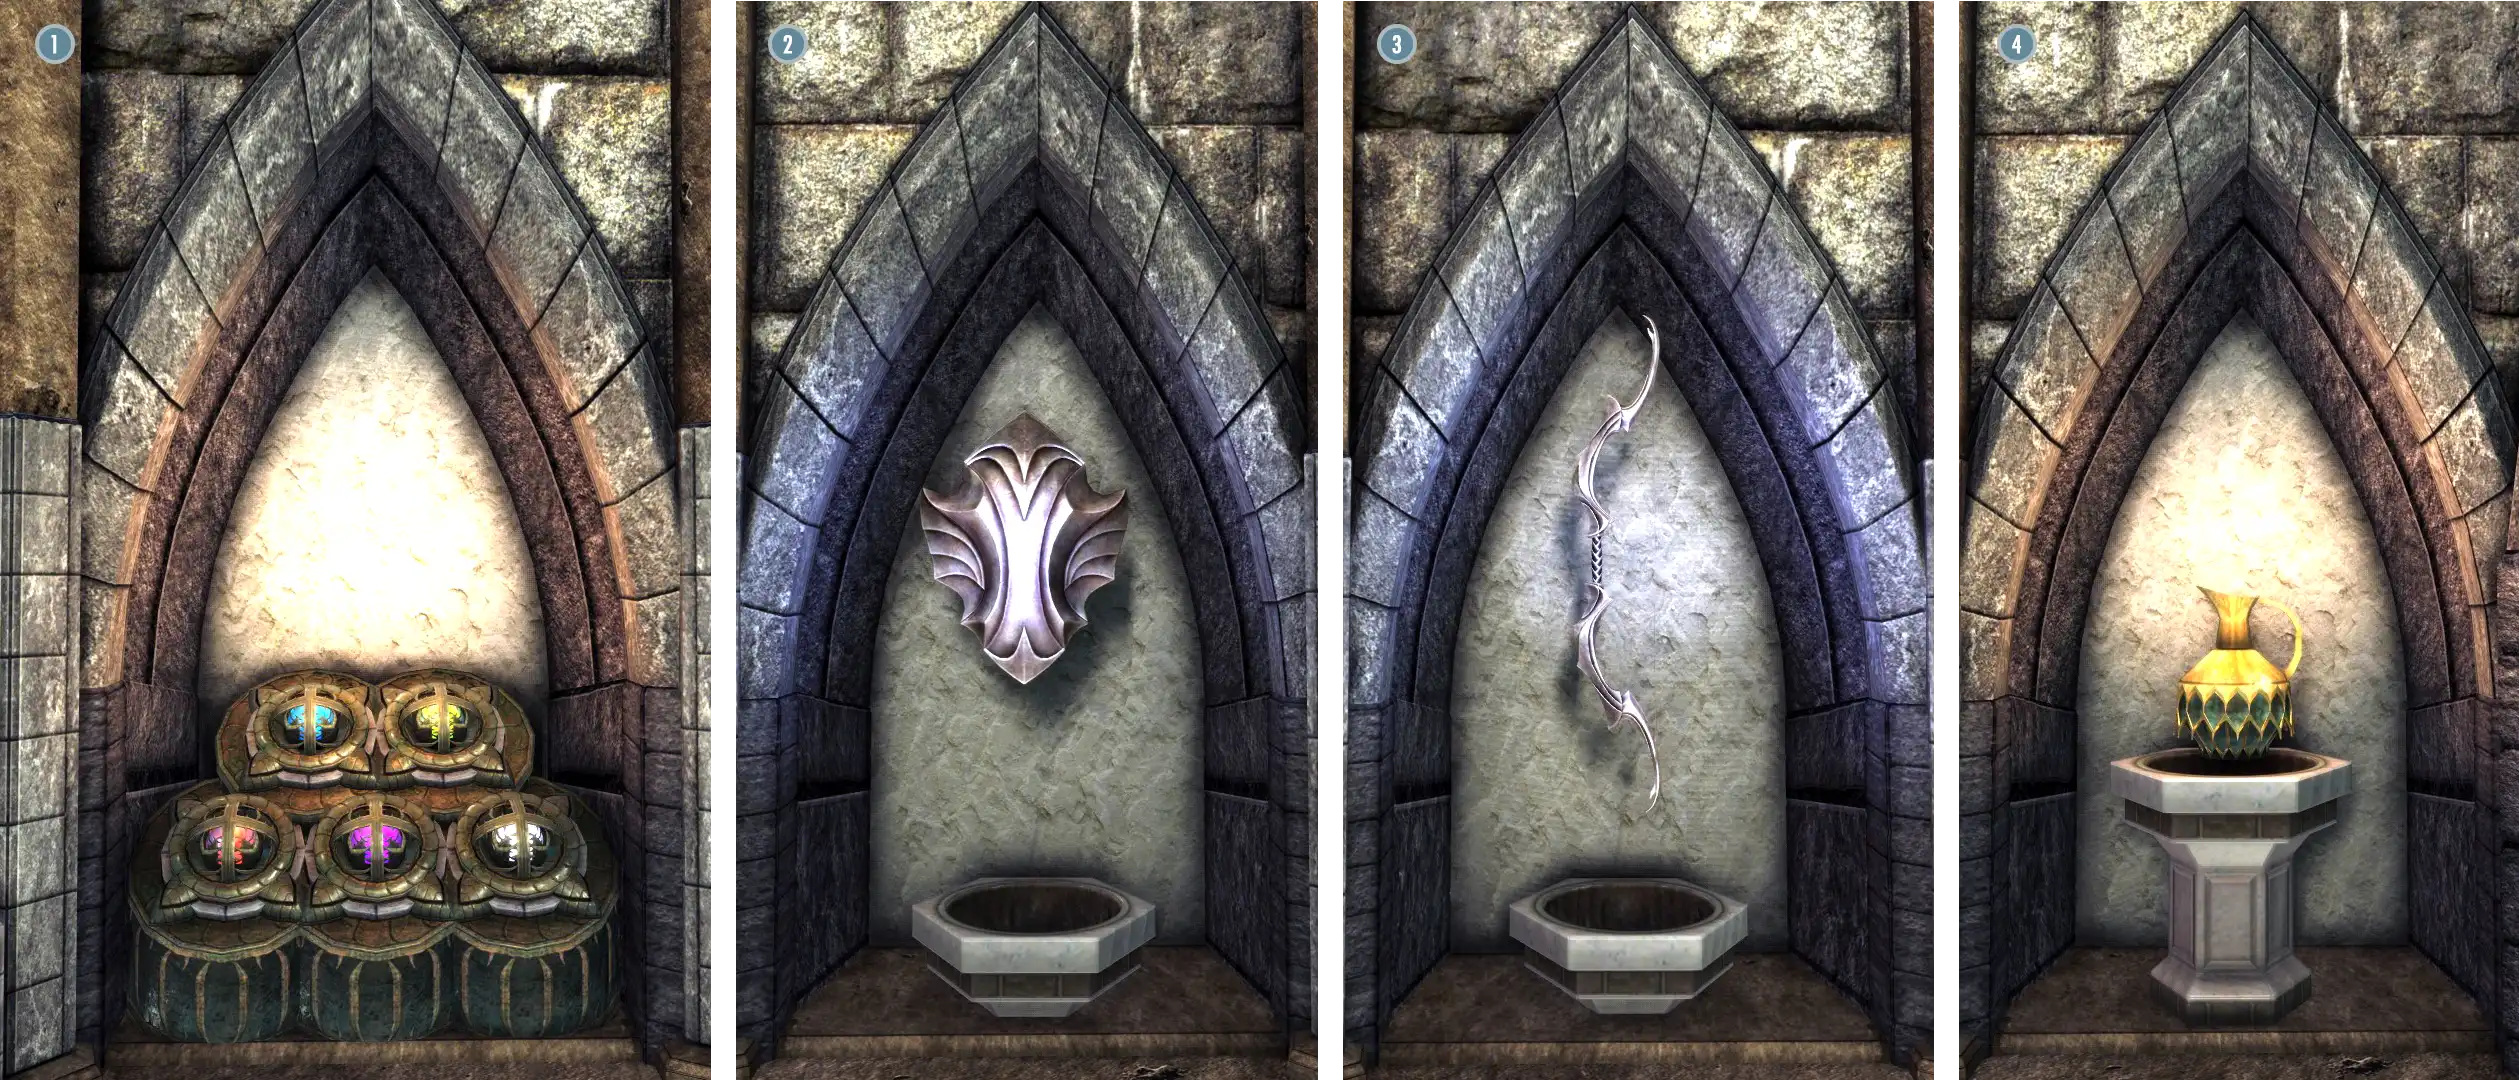
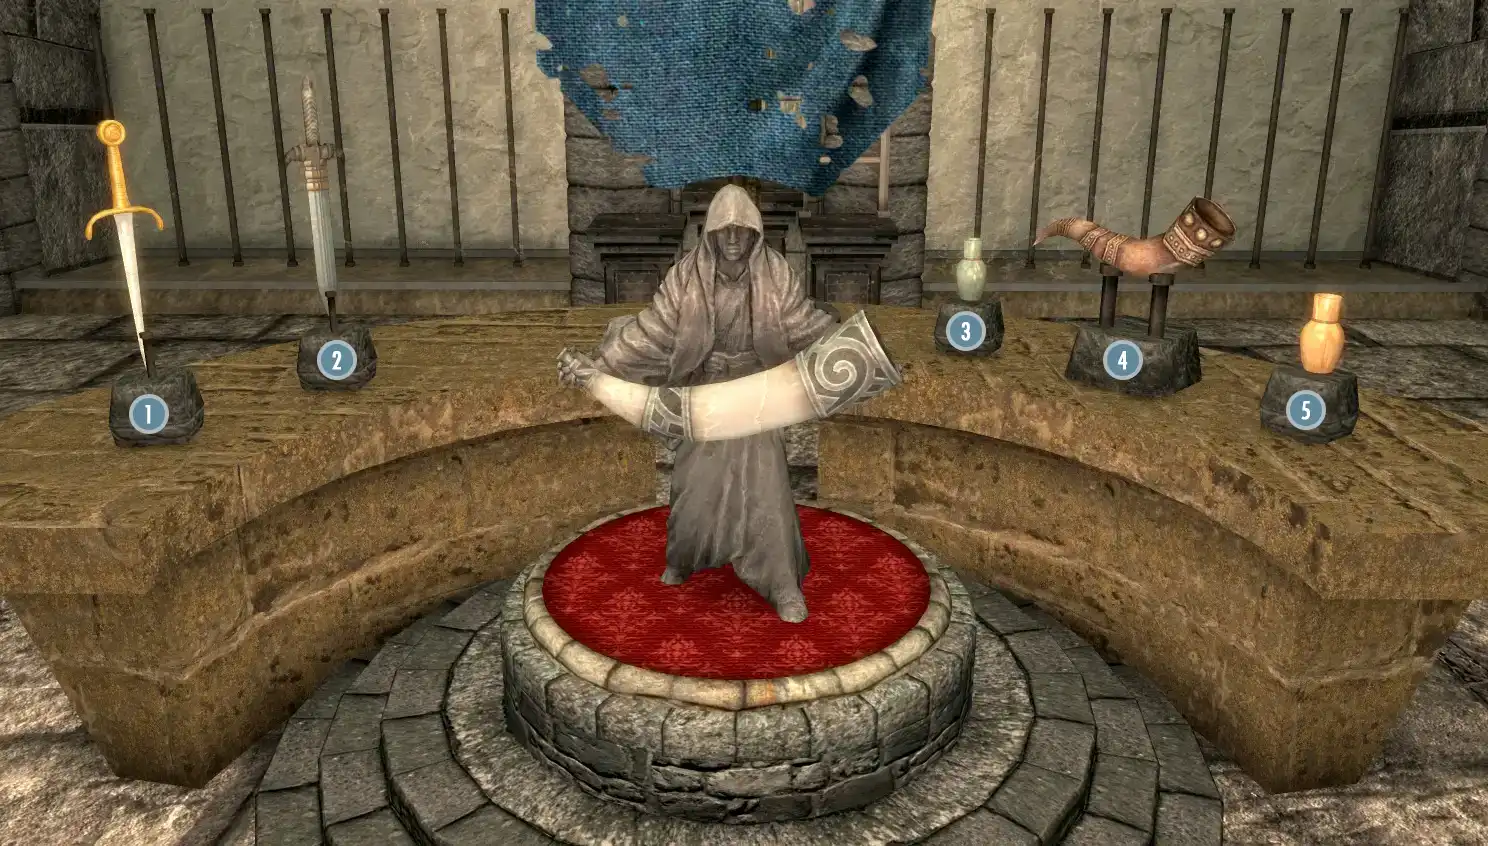
Elder Scroll Display | |
|---|---|
| 1) Elder Scroll (Blood) | |
| 2) Elder Scroll (Dragon) | |
| 3) Elder Scroll (Sun) | |

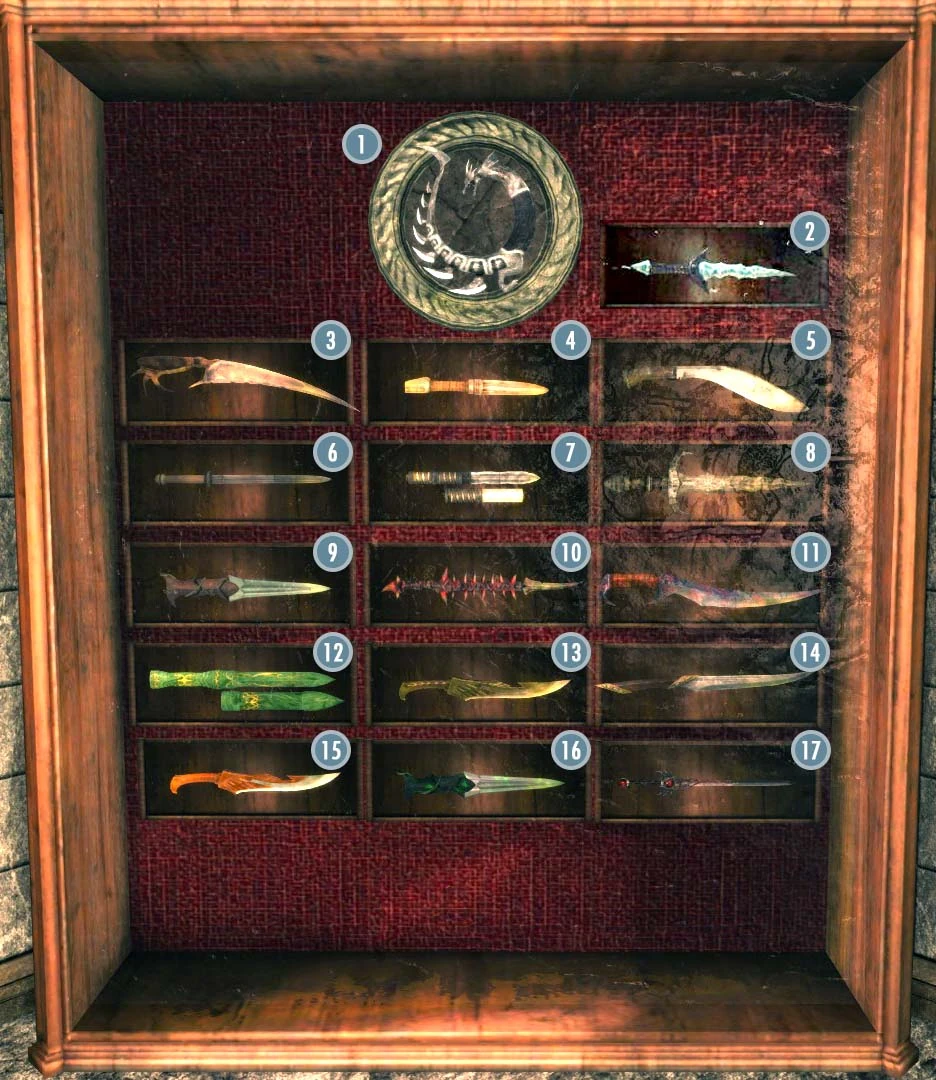
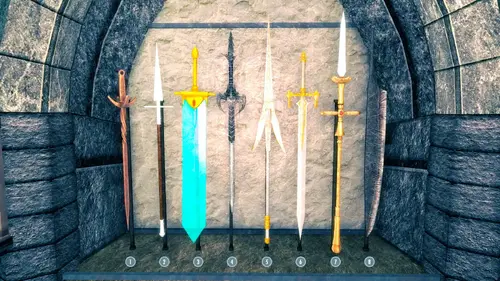
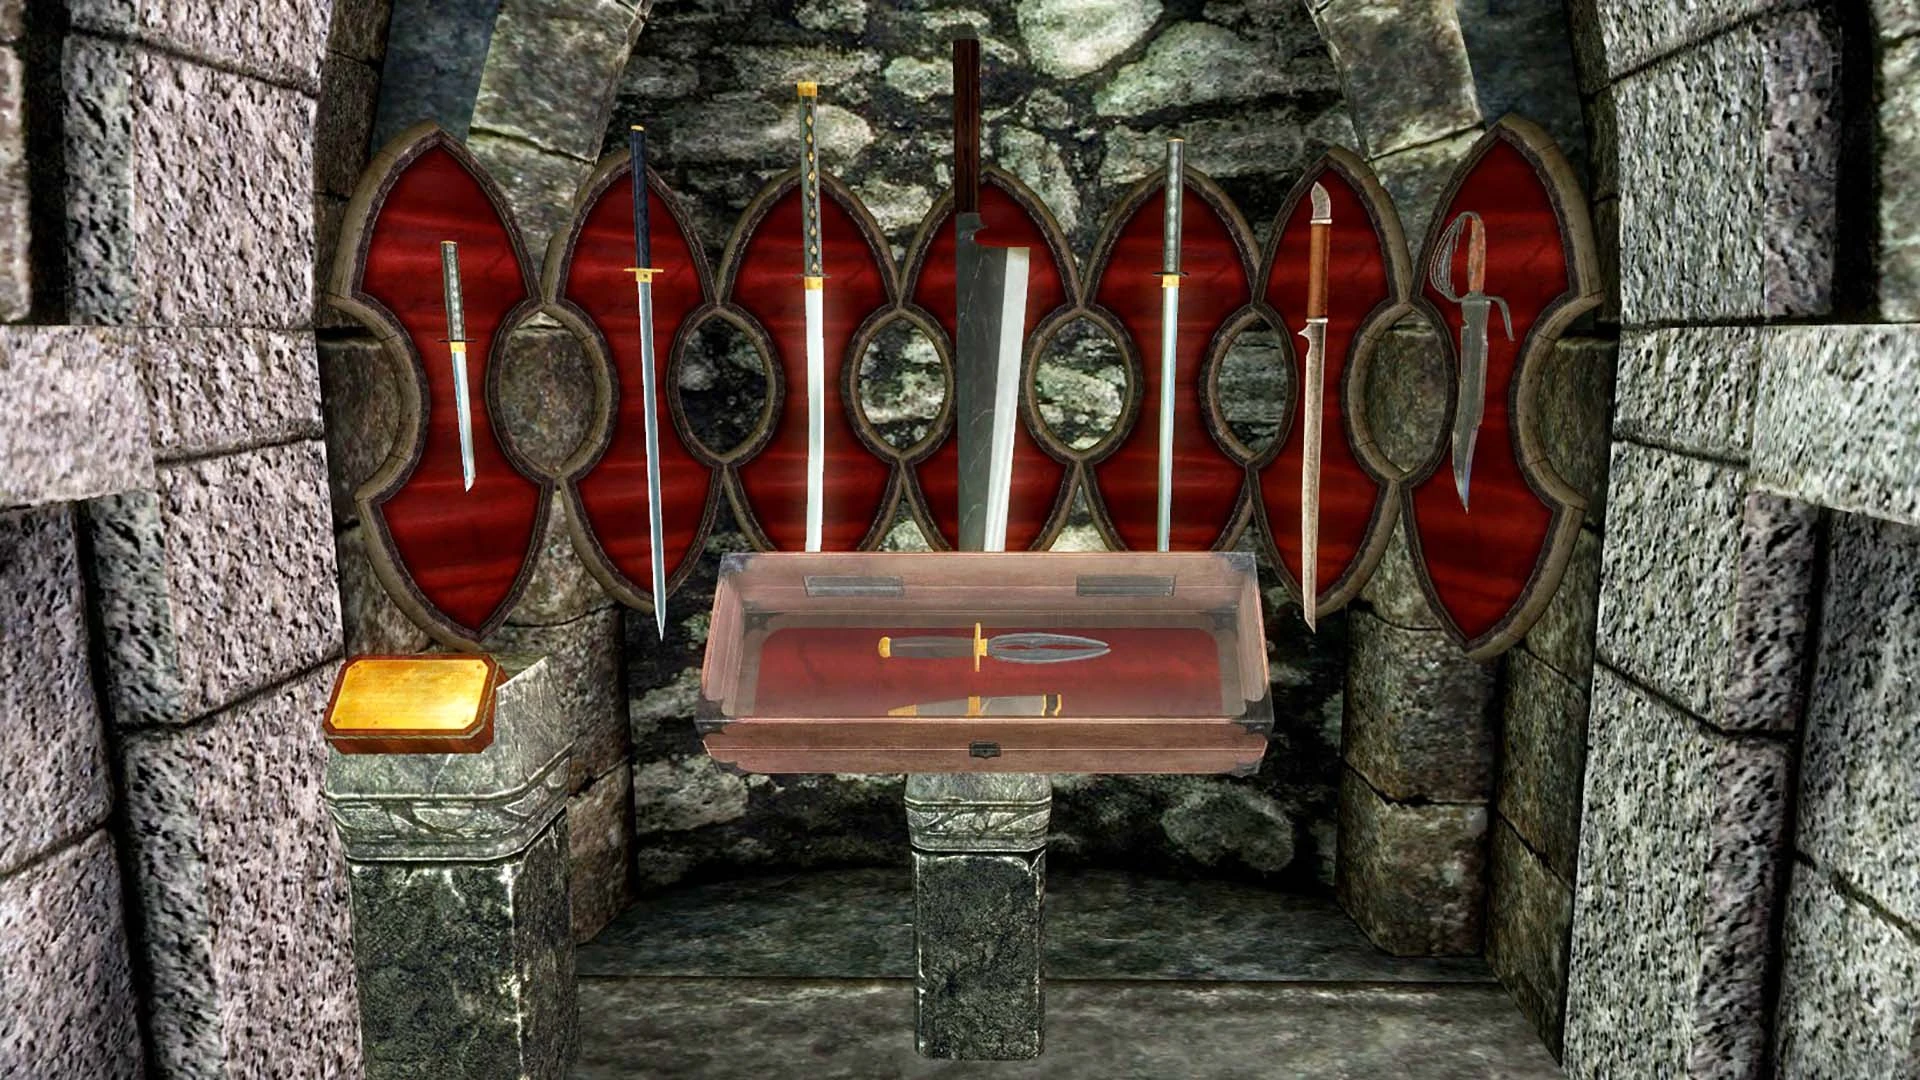
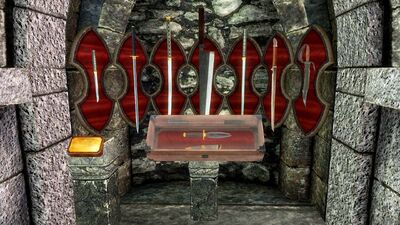
Daggers Display | |||
|---|---|---|---|
| 1) Drakensang (requires Relic Hunter- Guildmaster Start SE) | 2) Krahvalok (requires Artifacts - The Ice Blade of the Monarch) | ||
| 3) Nettlebane | 4) Fang of Haynekhtnamet or Creation Club Version |
5) Blade of Sacrifice | |
| 6) Valdr's Lucky Dagger | 7) Kahvozein's Fang | 8) Necromancer's Dagger | |
| 9) Rundi's Dagger | 10) Bloodthorn | 11) Blade of Woe | |
| 12) Dagger of Symmachus | 13) Borvir's Dagger | 14) Lyrisius' Dagger (requires Artifacts - The Tournament of the Ten Bloods SE) | |
| 15) Witsplinter (requires Oblivion Artifact Pack) | 16) Sufferthorn (requires Oblivion Artifact Pack) | 17) Dagger of Discipline (requires Oblivion Artifact Pack) | |

Visage Display | ||
|---|---|---|
|
The Visage Display will be hidden behind a "Coming Soon" banner until the Shattered Legacy questline has been completed. | ||
| Ancient Tongues weapons | ||
| 1) Hammer of Ancient Tongues | 6) Sword of Ancient Tongues | |
| 2) Warhammer of Ancient Tongues | 7) Greatsword of Ancient Tongues | |
| 3) Staff of Ancient Tongues | 8) Battleaxe of Ancient Tongues | |
| 4) Bow of Ancient Tongues | 9) Axe of Ancient Tongues | |
| 5) Fang of Ancient Tongues | ||
| Visage armor set | ||
| 10) Shield of Reman Cyrodiil | 14) Qahnaarin's Grasp | |
| 11) Helm of Tiber Septim | 15) Ring of Zurin Arctus | |
| 12) Armor of Morihaus | 16) Amulet of Kings | |
| 13) Treads of Wulfharth | ||

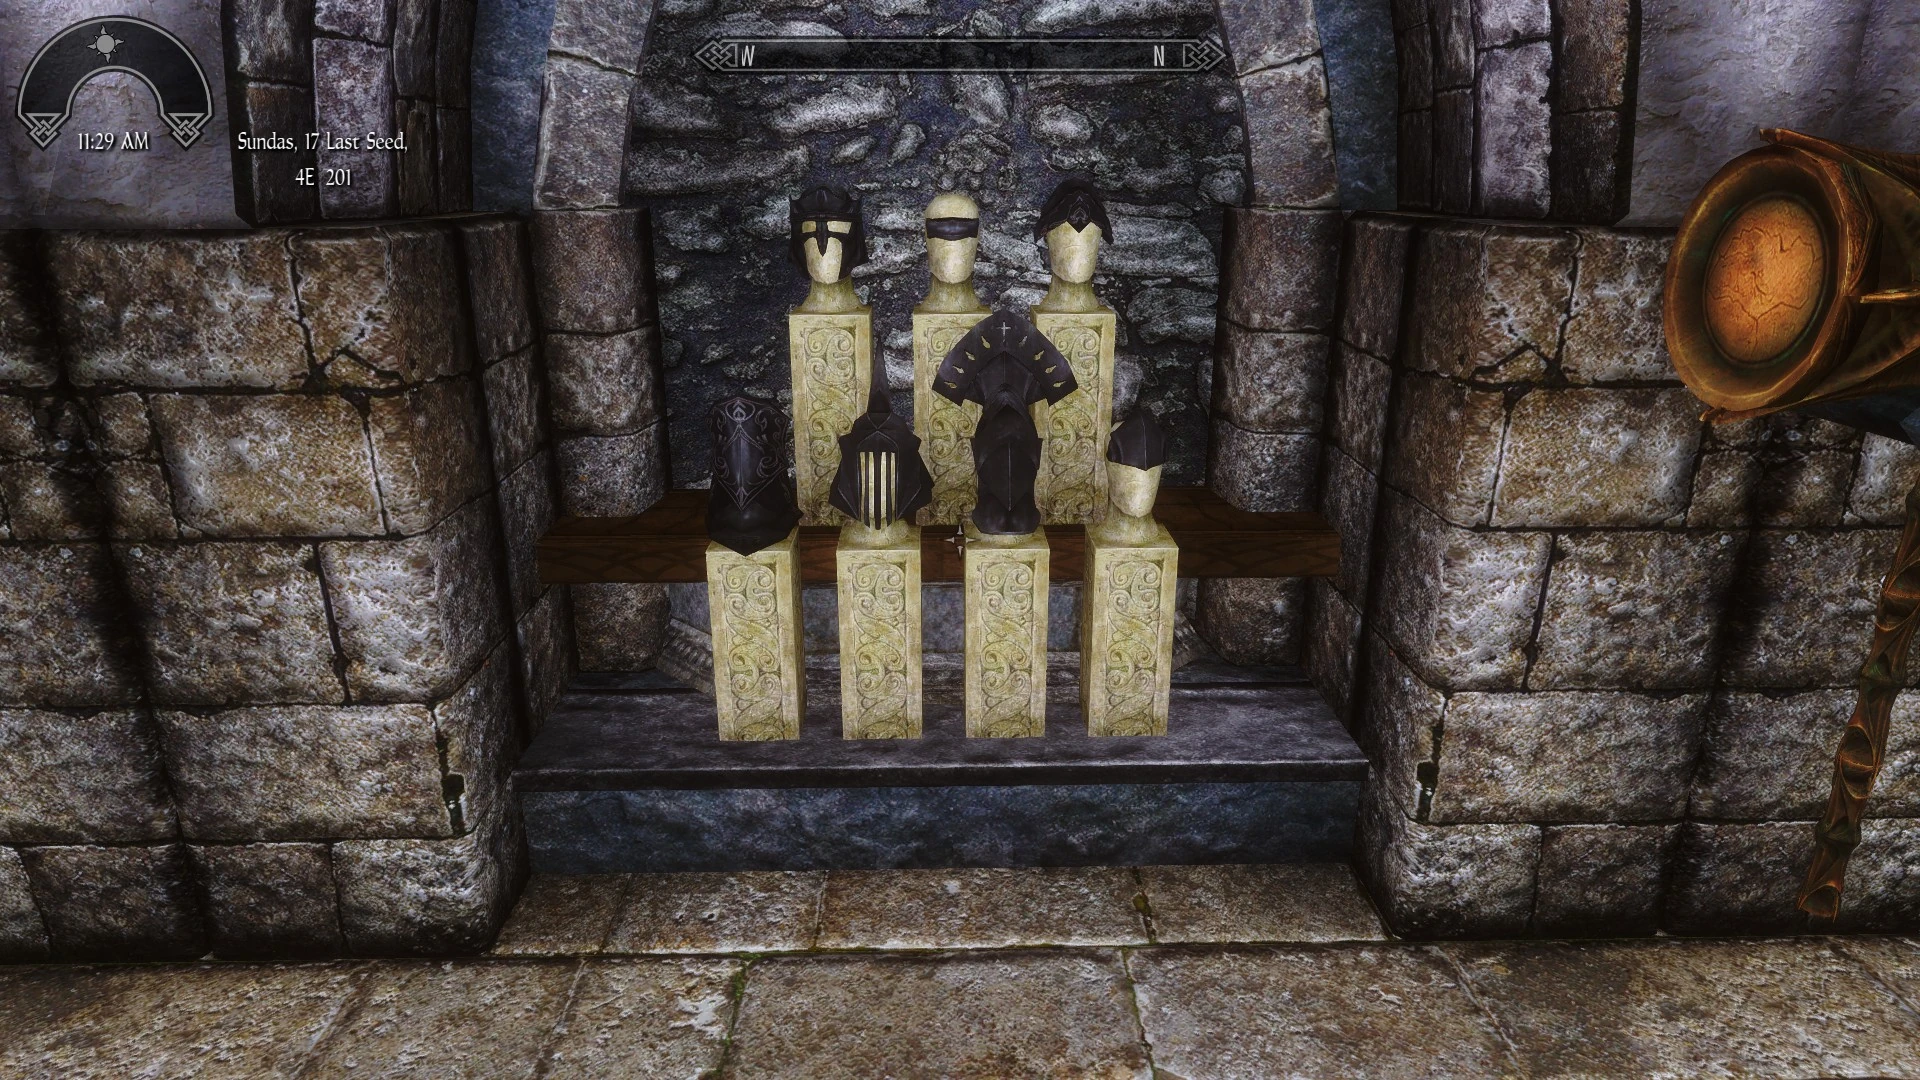
Headwear Display | ||
|---|---|---|
| 1st row | ||
| 1) Cowl of the Druid (requires Oblivion Artifact Pack) | 2) Circlet of Verdure (requires Oblivion Artifact Pack) | |
| 3) Jagged Crown | 4) Helm of Oreyn Bearclaw or Creation Club Version | |
| 5) Circlet of Omnipotence (requires Oblivion Artifact Pack) | 6) Veil of the Seer (requires Oblivion Artifact Pack) | |
| 2nd row | ||
| 7) Shellbug Helmet | 8) Barhnul | |
| 9) Bloodworm Helm or Creation Club Version |
10) Mage's Circlet | |
| 11) Noster's Helmet | ||
| 3rd row | ||
| 12) The Ghost Helm | 13) Ancient Helmet of the Unburned | |
| 14) Circlet of Waterbreathing | 15) Adamantium Helm of Tohan | |
| 16) Diadem of the Savant | 17) Helm of Yngol | |
| 4th row | ||
| 18) Tribunal Mask Bronze (requires Immersive Armors) | 19) Tribunal Mask Silver (requires Immersive Armors) | |
| 20) Tribunal Mask Gold (requires Immersive Armors) | 21) Tribunal Mask Ebony (requires Immersive Armors) | |
| 22) Helm of Ferocity (requires Oblivion Artifact Pack) | ||

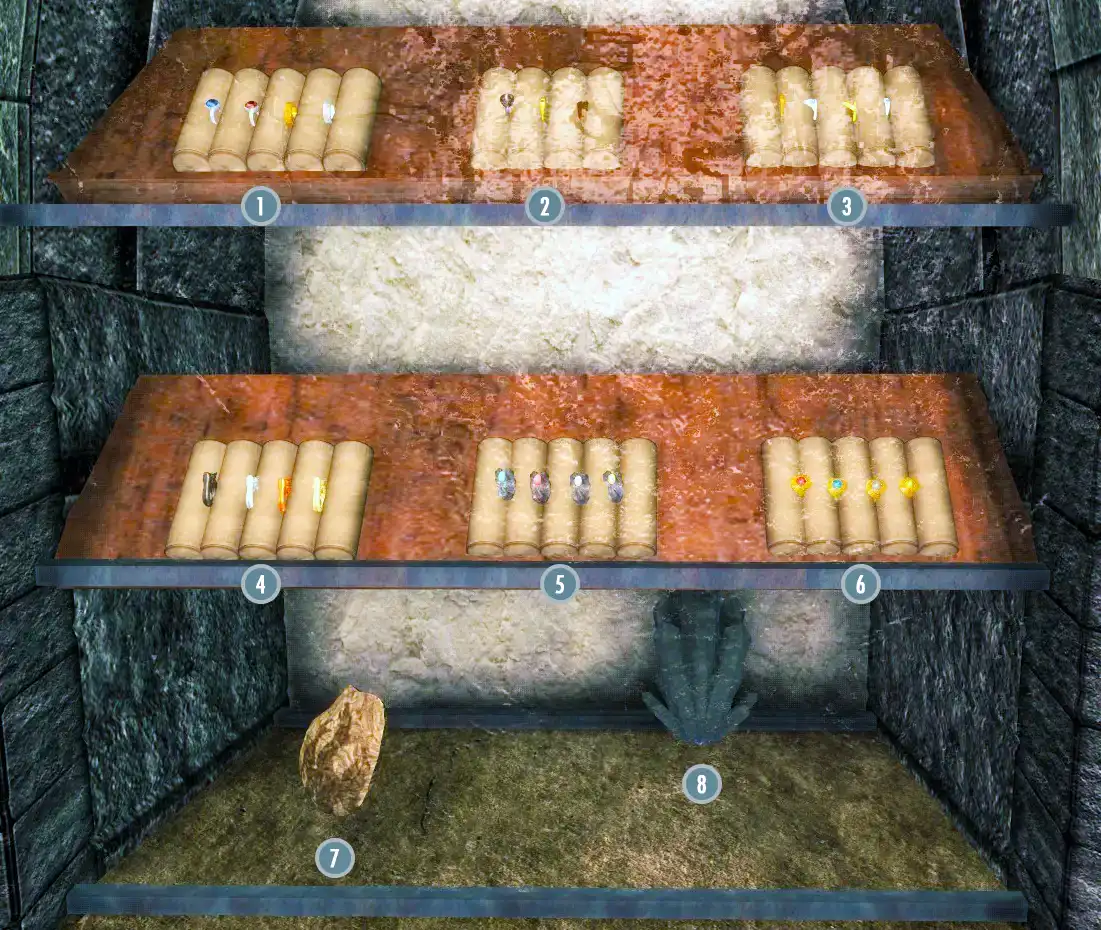
Jewelry Cabinet
This cabinet contains jewelry from Skyrim, Legacy of the Dragonborn SSE and a few other mods. See Jewelry Display.
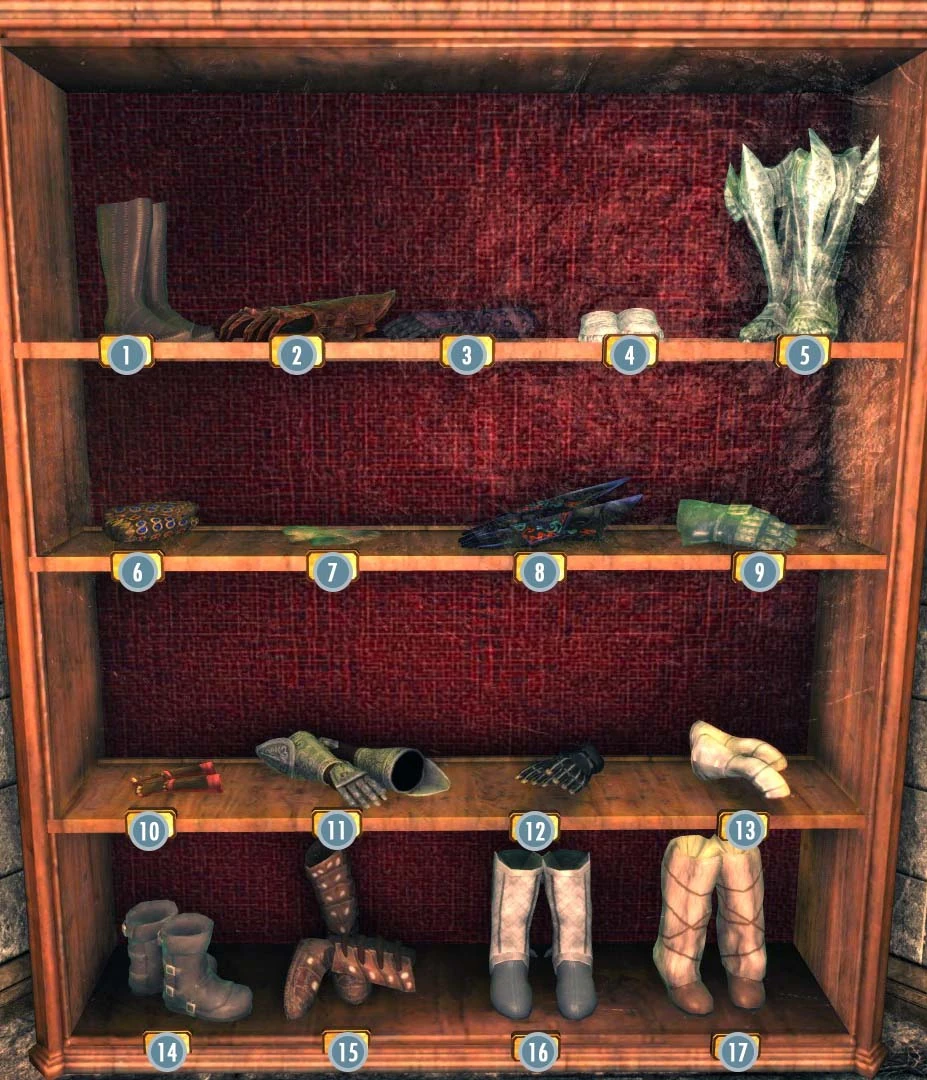
Boots & Gloves Display | ||
|---|---|---|
| 1st row | ||
| 1) Running Man's Folly | 2) Rasheda's Special (requires Oblivion Artifact Pack) | |
| 3) Hands of Midnight (requires Oblivion Artifact Pack) | 4) Boots of the Swift Merchant (requires Oblivion Artifact Pack) | |
| 5) Quicksilver Boots (requires Oblivion Artifact Pack) | ||
| 2nd row | ||
| 6) Gilded Wristguards | 7) Tumblerbane Gloves | |
| 8) Hands of the Atronach | 9) The Forgemaster's Fingers | |
| 3rd row | ||
| 10) Gloves of the Pugilist | 11) Fists of Randagulf or Creation Club Version | |
| 12) Mystic Tuning Gloves | 13) Ironhand Gauntlets | |
| 4th row | ||
| 14) Movarth's Boots | 15) Boots of Blinding Speed or Creation Club Version | |
| 16) Boots of the Apostle | 17) Predator's Grace | |

Jewelry Cabinet Amulets of Skyrim
This cabinet contain all jewelry added by Amulets of Skyrim SSE. See Amulets of Skyrim Display.
1st Weapons Display | |
|---|---|
| 1) Dawnguard Rune Shield | |
| 2) Dawnguard Rune Hammer | |
| 3) Dawnguard Rune Axe | |
| 4) Wind of Ahaz | |
| 5) Drainspell Bow | |
| 6) Drainblood Battleaxe | |
| 7) Drainheart Sword | |

Lunar Weapons Display | |
|---|---|
| 1) Veloth's Judgement | |
| 2) Lunar Iron War Axe | |
| 3) Lunar Iron Sword | |
| 4) Lunar Iron Mace | |
| 5) Lunar Steel War Axe | |
| 6) Lunar Steel Sword | |
| 7) Lunar Steel Mace | |

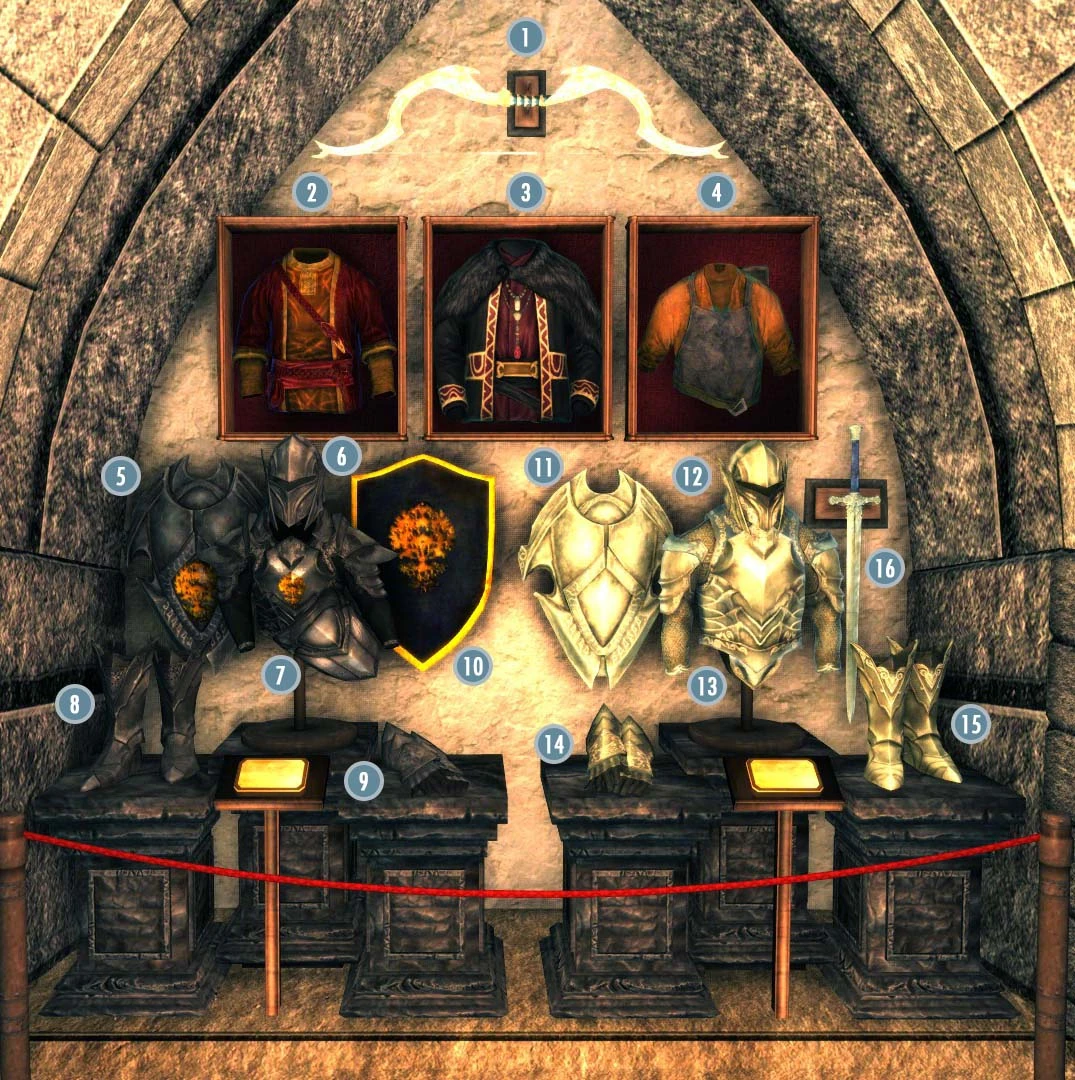
Oblivion Artifacts DisplayAll items require Oblivion Artifact Pack | ||
|---|---|---|
| Misc. Artifacts | ||
| 1) Frostwyrm | 2) Robe of Creativity | |
| 3) The Deceiver's Finery | 4) Apron of the Master Artisan | |
| Knight of Chorrol display | ||
| 5) Knight of Chorrol Shield | 6) Knight of Chorrol Helmet | |
| 7) Knight of Chorrol Armor | 8) Knight of Chorrol Boots | |
| 9) Knight of Chorrol Gauntlets | 10) Escutcheon of Chorrol | |
| Brusef Amelion display | ||
| 11) Brusef Amelion's Shield | 12) Brusef Amelion's Helmet | |
| 13) Brusef Amelion's Armor | 14) Brusef Amelion's Gauntlets | |
| 15) Brusef Amelion's Boots | 16) Brusef Amelion's Sword | |

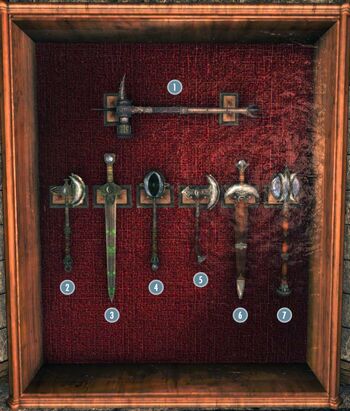
2nd Weapons Display | |
|---|---|
| 1) Tower of the Nine (Basic or Ultra) (requires Oblivion Artifact Pack) | |
| 2) Ash Rock War Axe | |
| 3) Ash Rock Battle Axe | |
| 4) Wintergale | |
| 5) Stormbrand | |
| 6) Bloodsbane | |
| 7) Ghorbash's Ancestral Axe | |

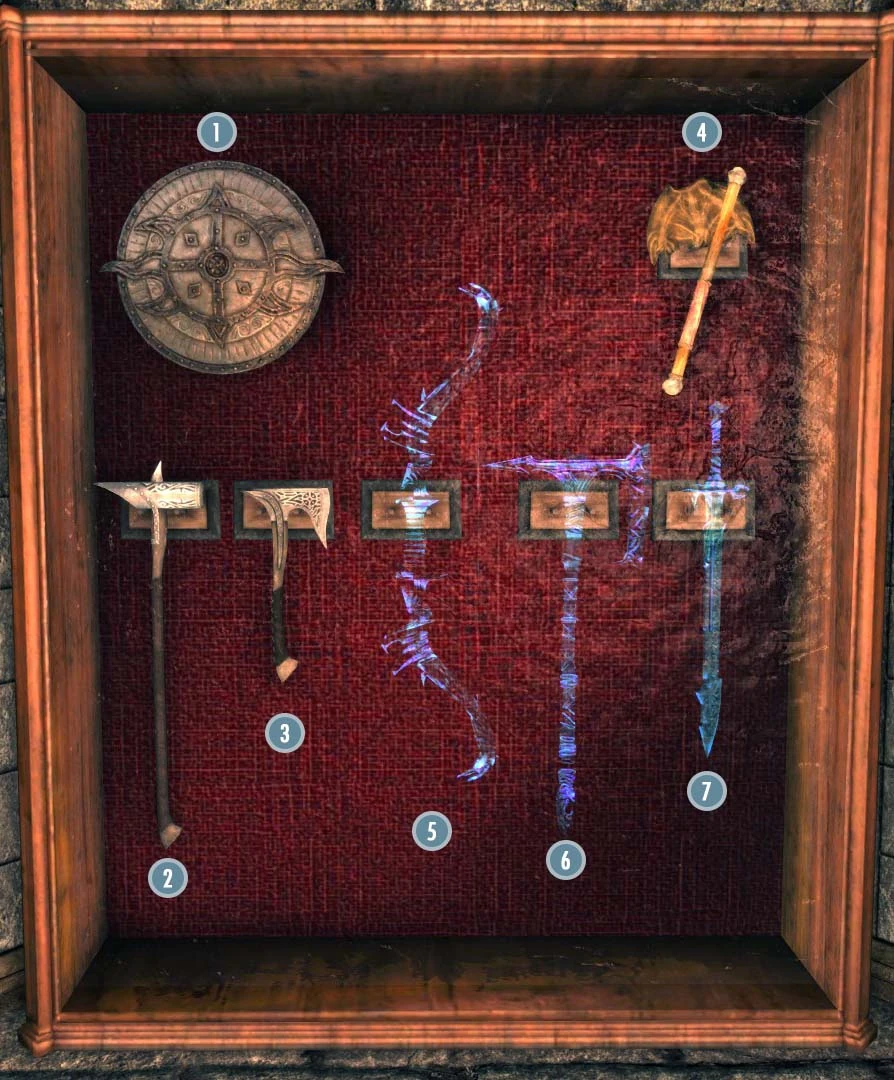
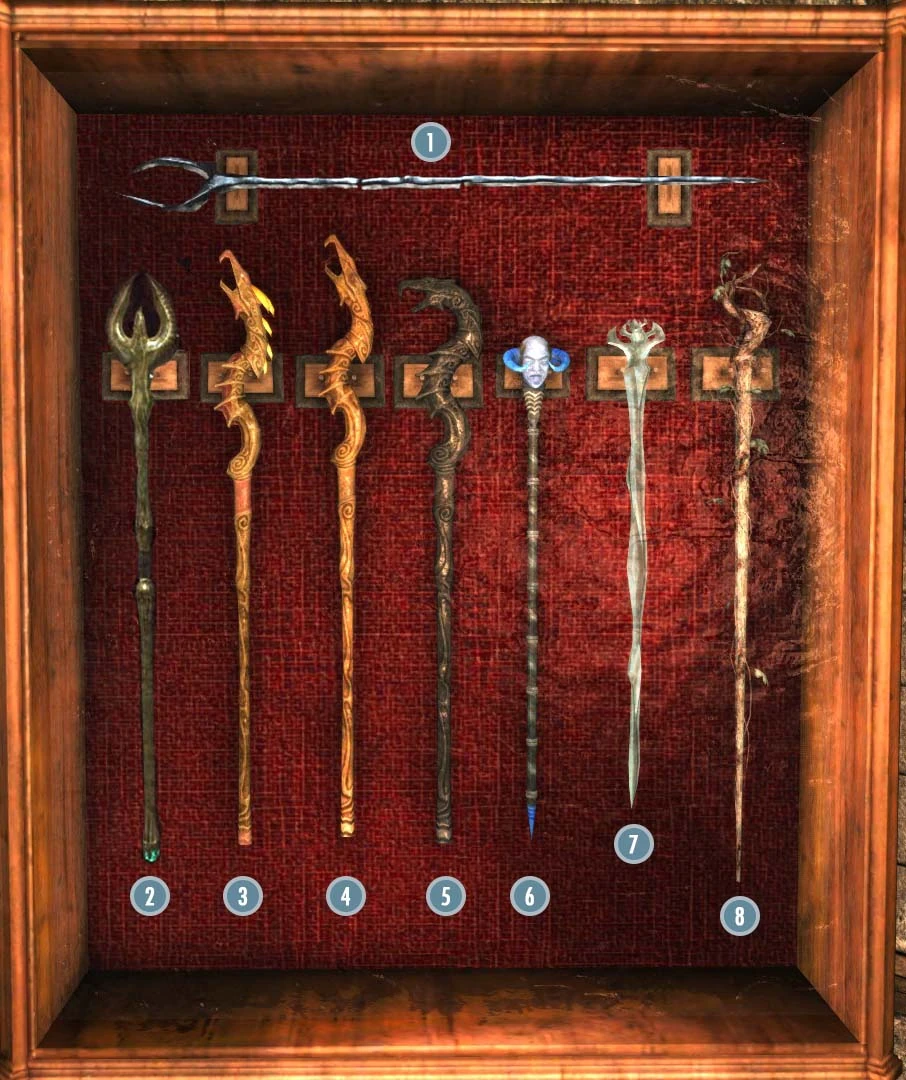
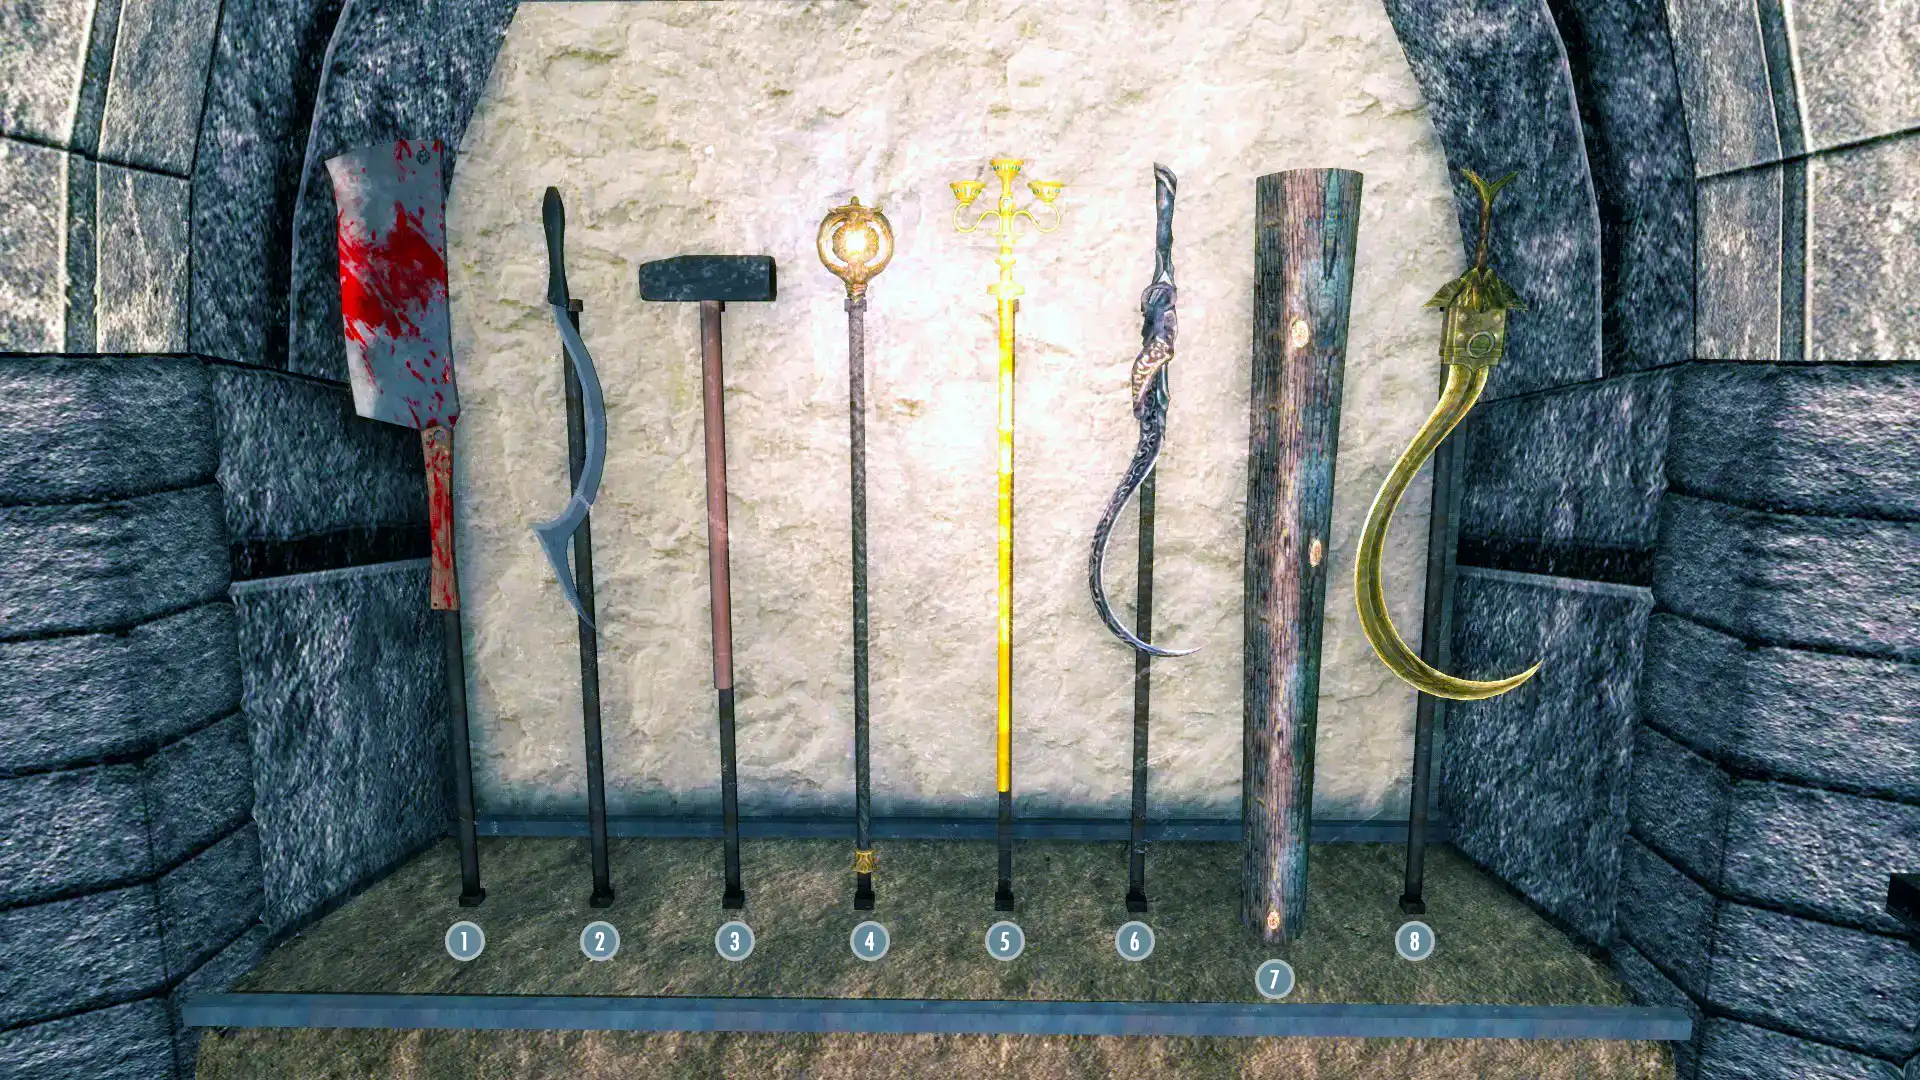
1st Staff Display | |
|---|---|
| 1) Staff of Worms (requires Gallows Hall CC) | |
| 2) Underking's Will | |
| 3) Gadnor's Staff of Charming | |
| 4) Staff of Ruunvald | |
| 5) Eye of Melka | |
| 6) Staff of Hag's Wrath | |
| 7) Halldir's Staff | |
| 8) Sild's Staff | |


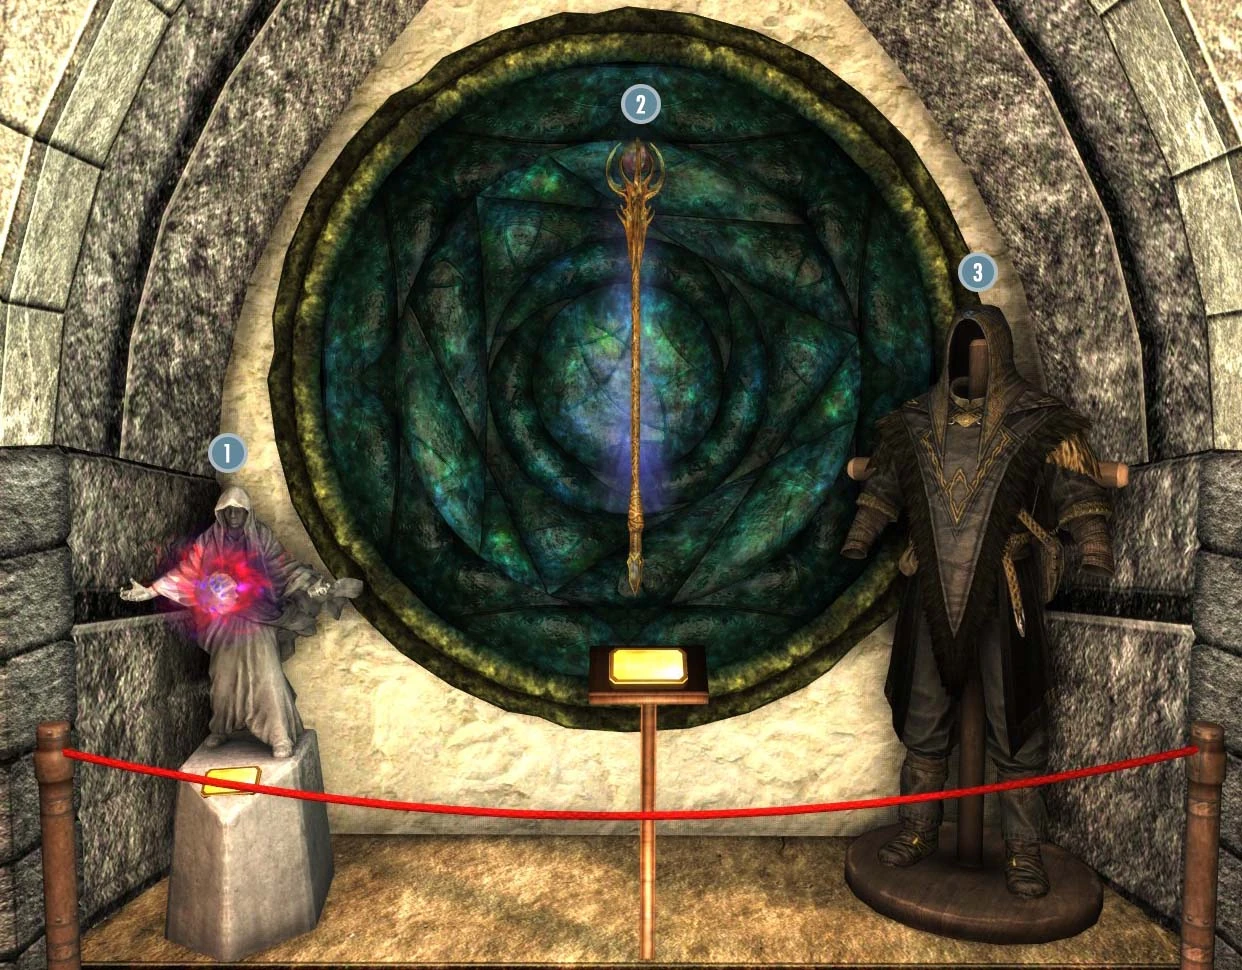
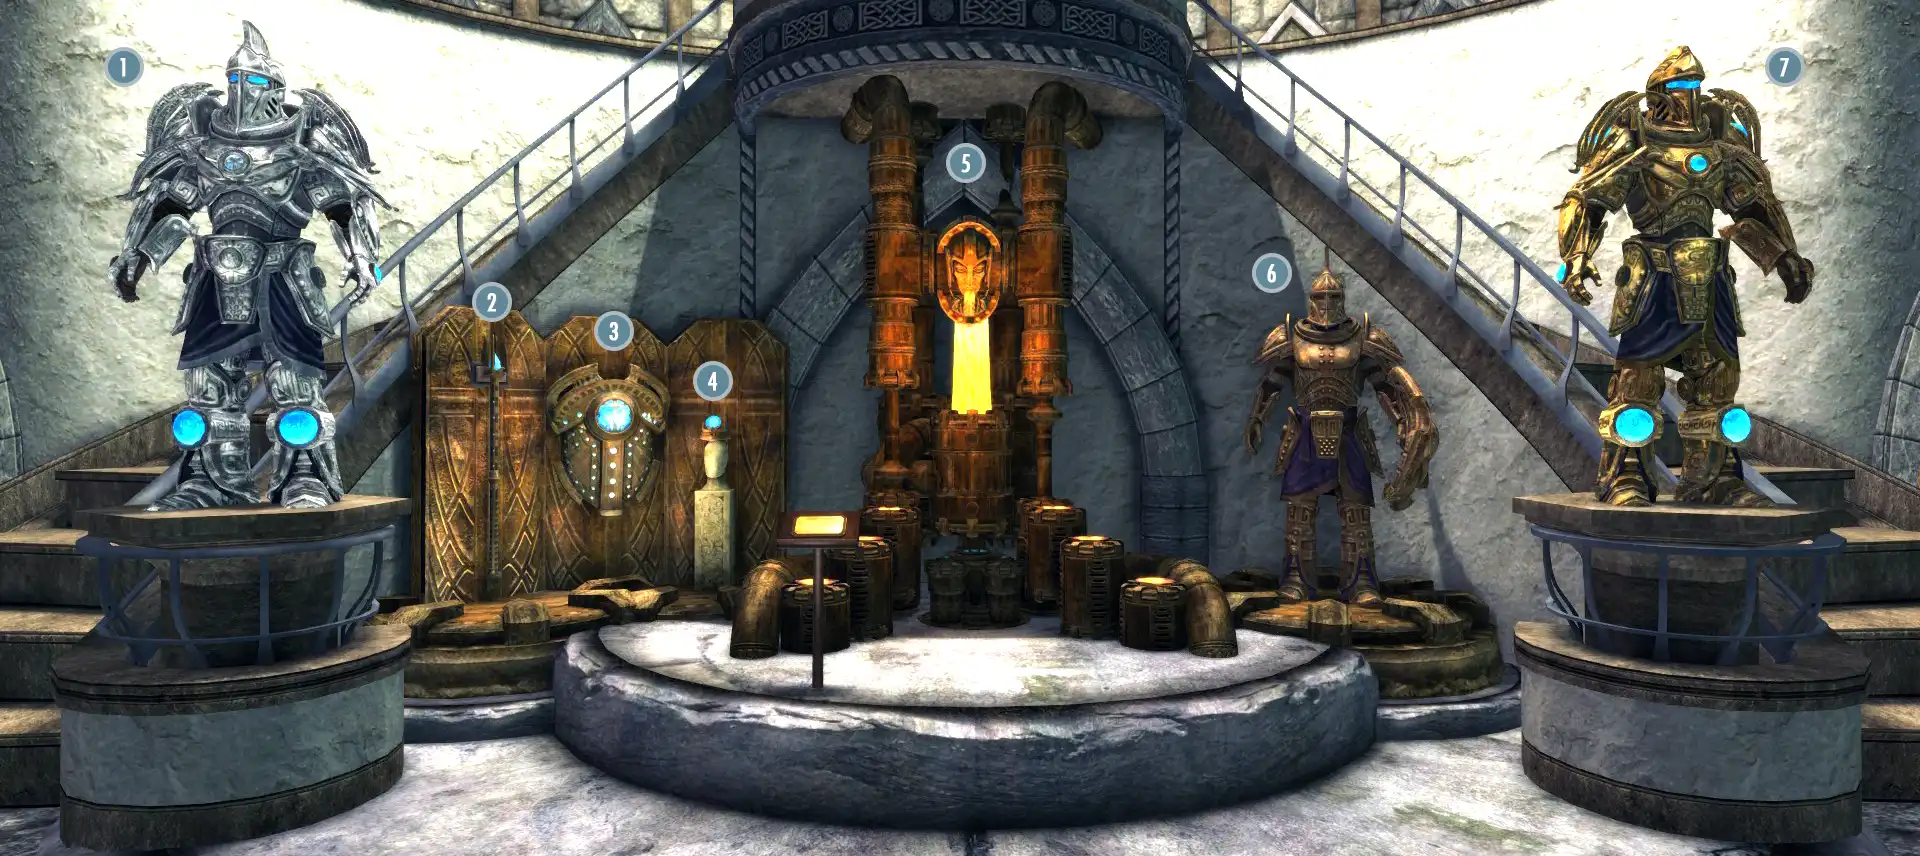
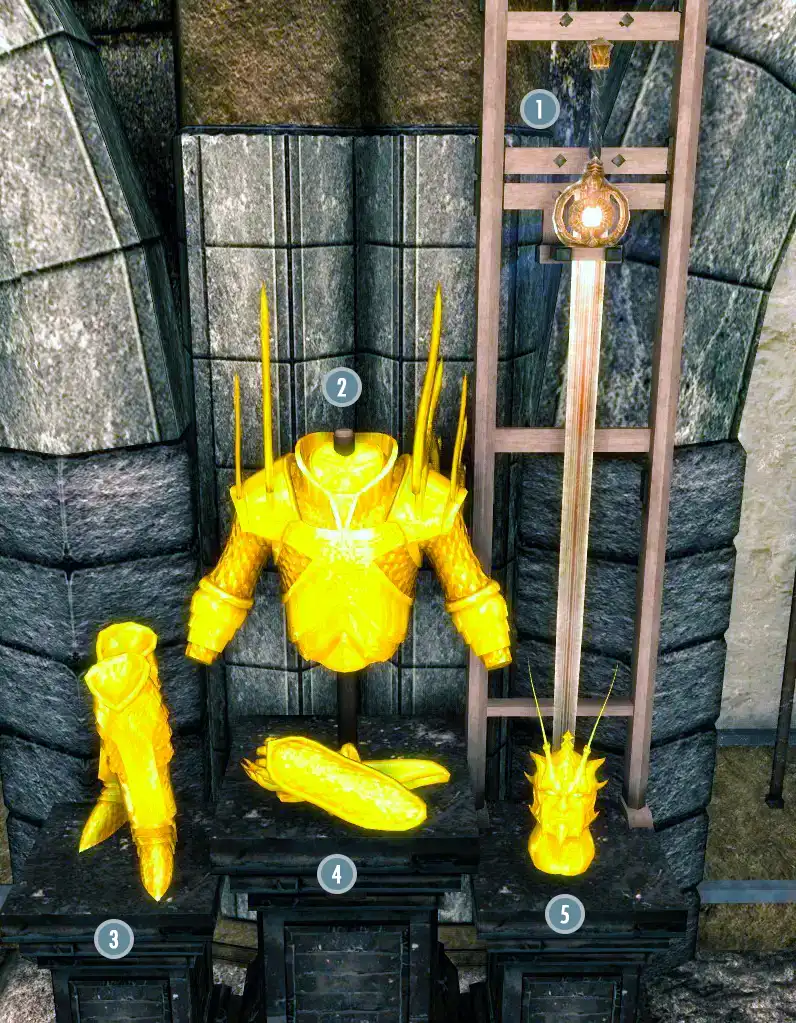
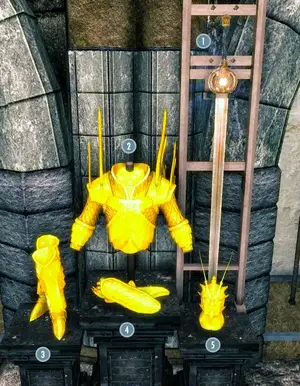
College of Winterhold Display | ||
|---|---|---|
| 1) Shalidor's Stone | 2) Staff of Magnus | 3) Archmage's Robes |

2nd Staff Display | |
|---|---|
| 1) Apotheosis (requires Artifacts - The Ice Blade of the Monarch) | |
| 2) Ayleid Staff of Chain Lightning (requires The Tools of Kagrenac) | |
| 3) Hevnoraak's Staff | |
| 4) Dragon Priest Staff (Wall of Fire) | |
| 5) Dragon Priest Staff (Wall of Lightning) | |
| 6) Staff of Hasedoki or Creation Club Version | |
| 7) Hrormir's Icestaff | |
| 8) Staff of Indarys | |

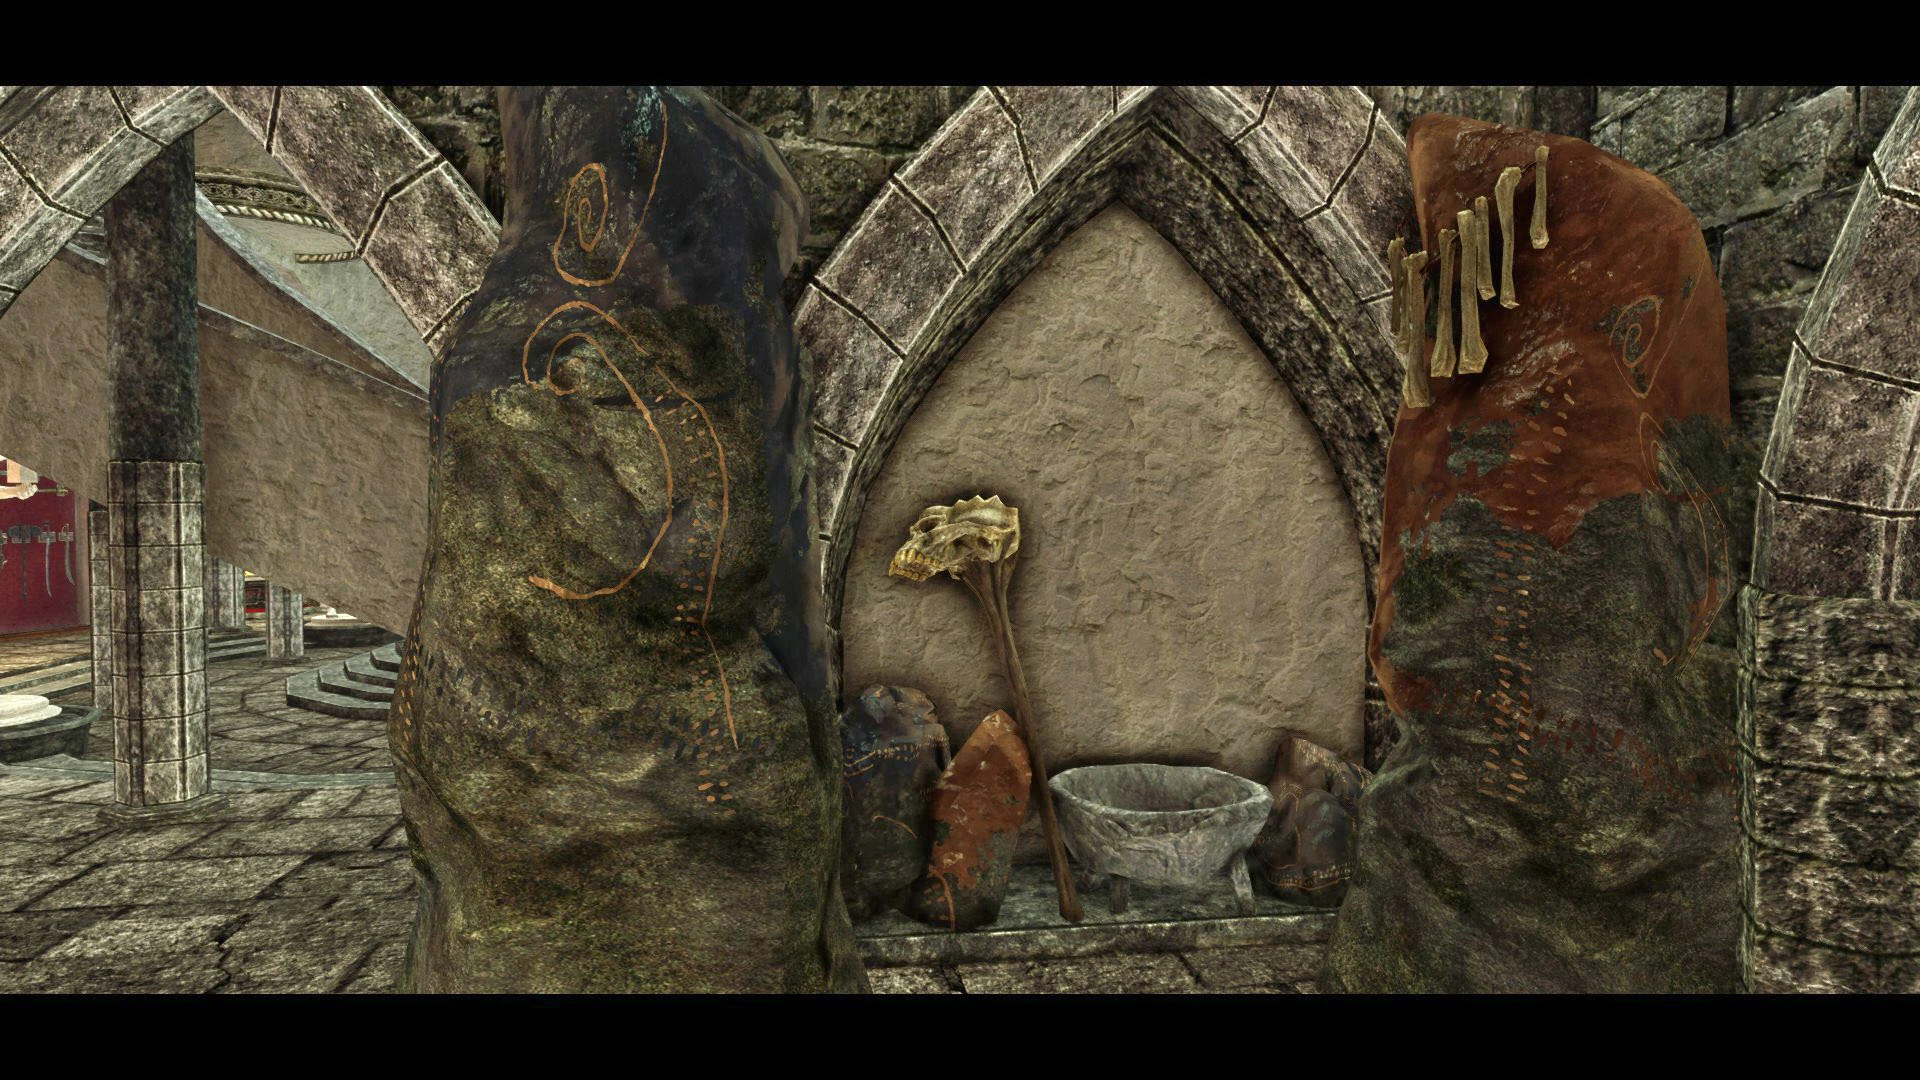
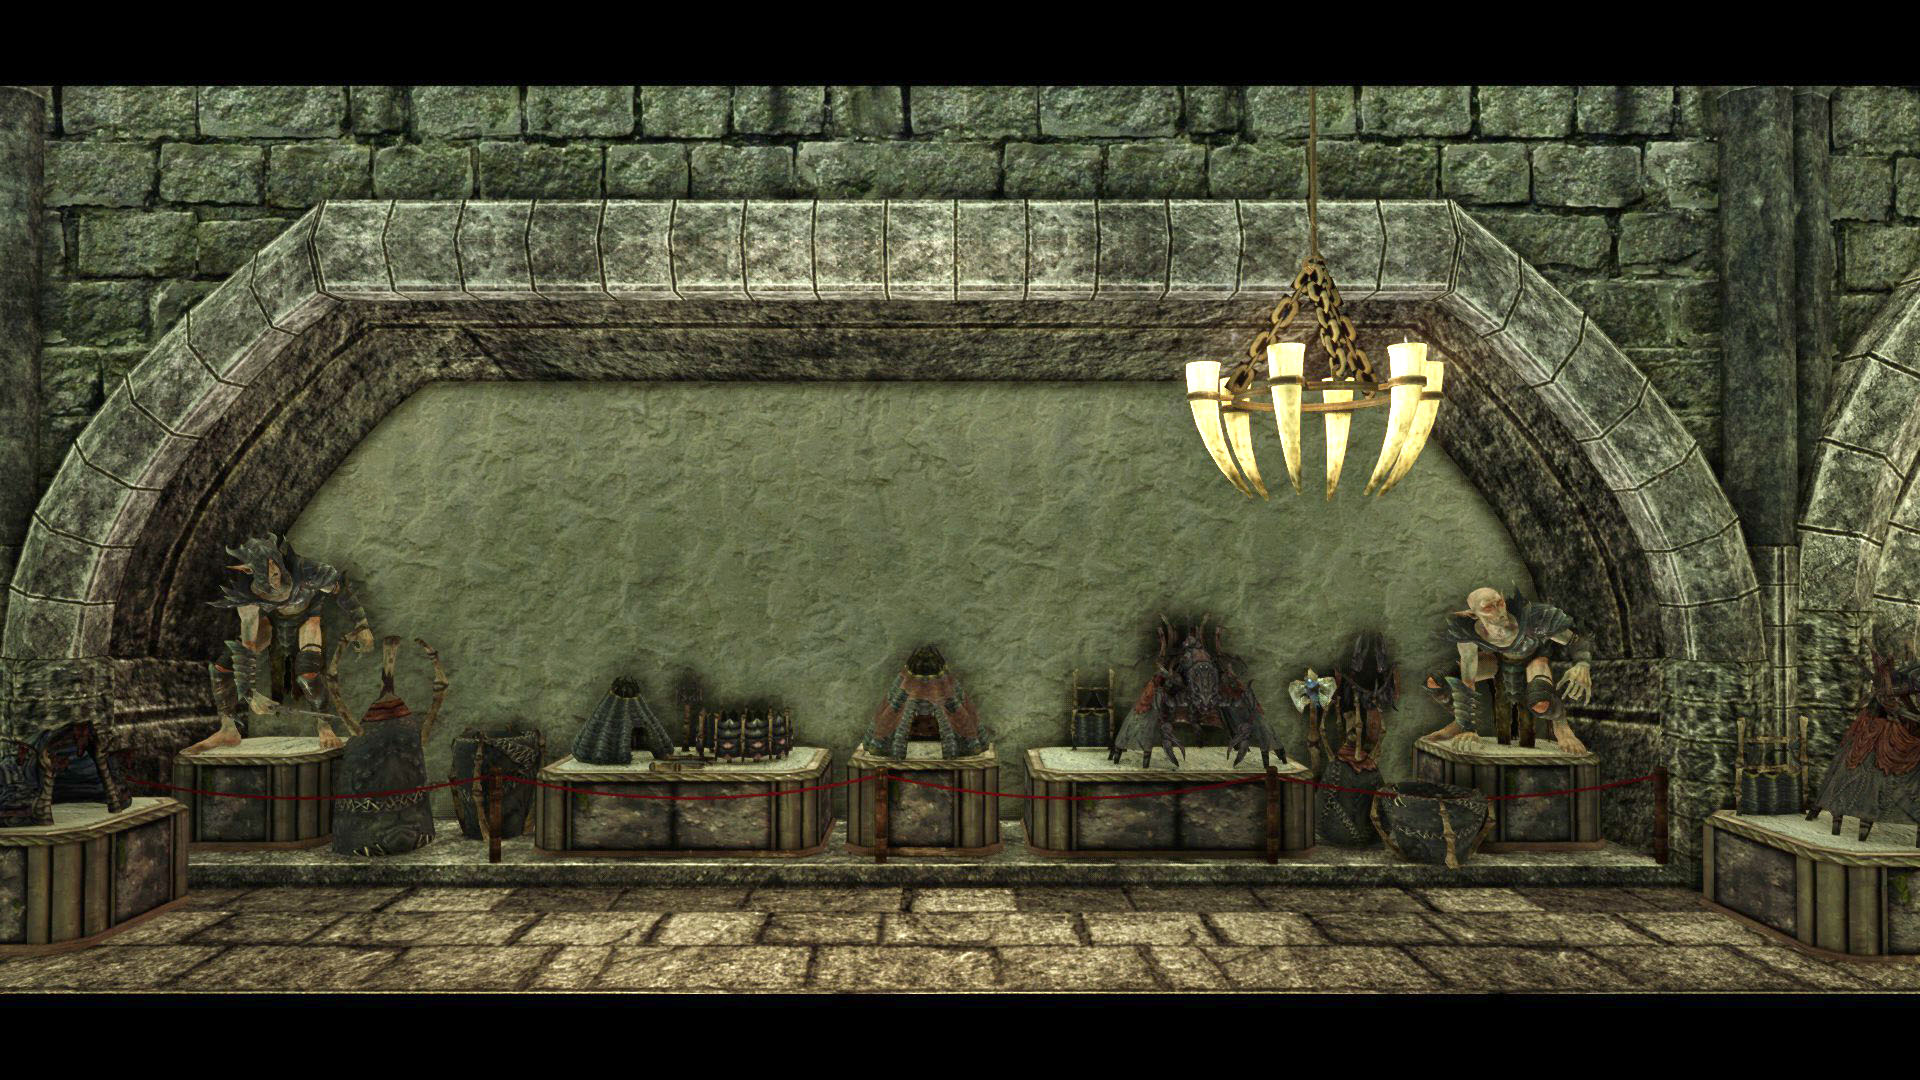
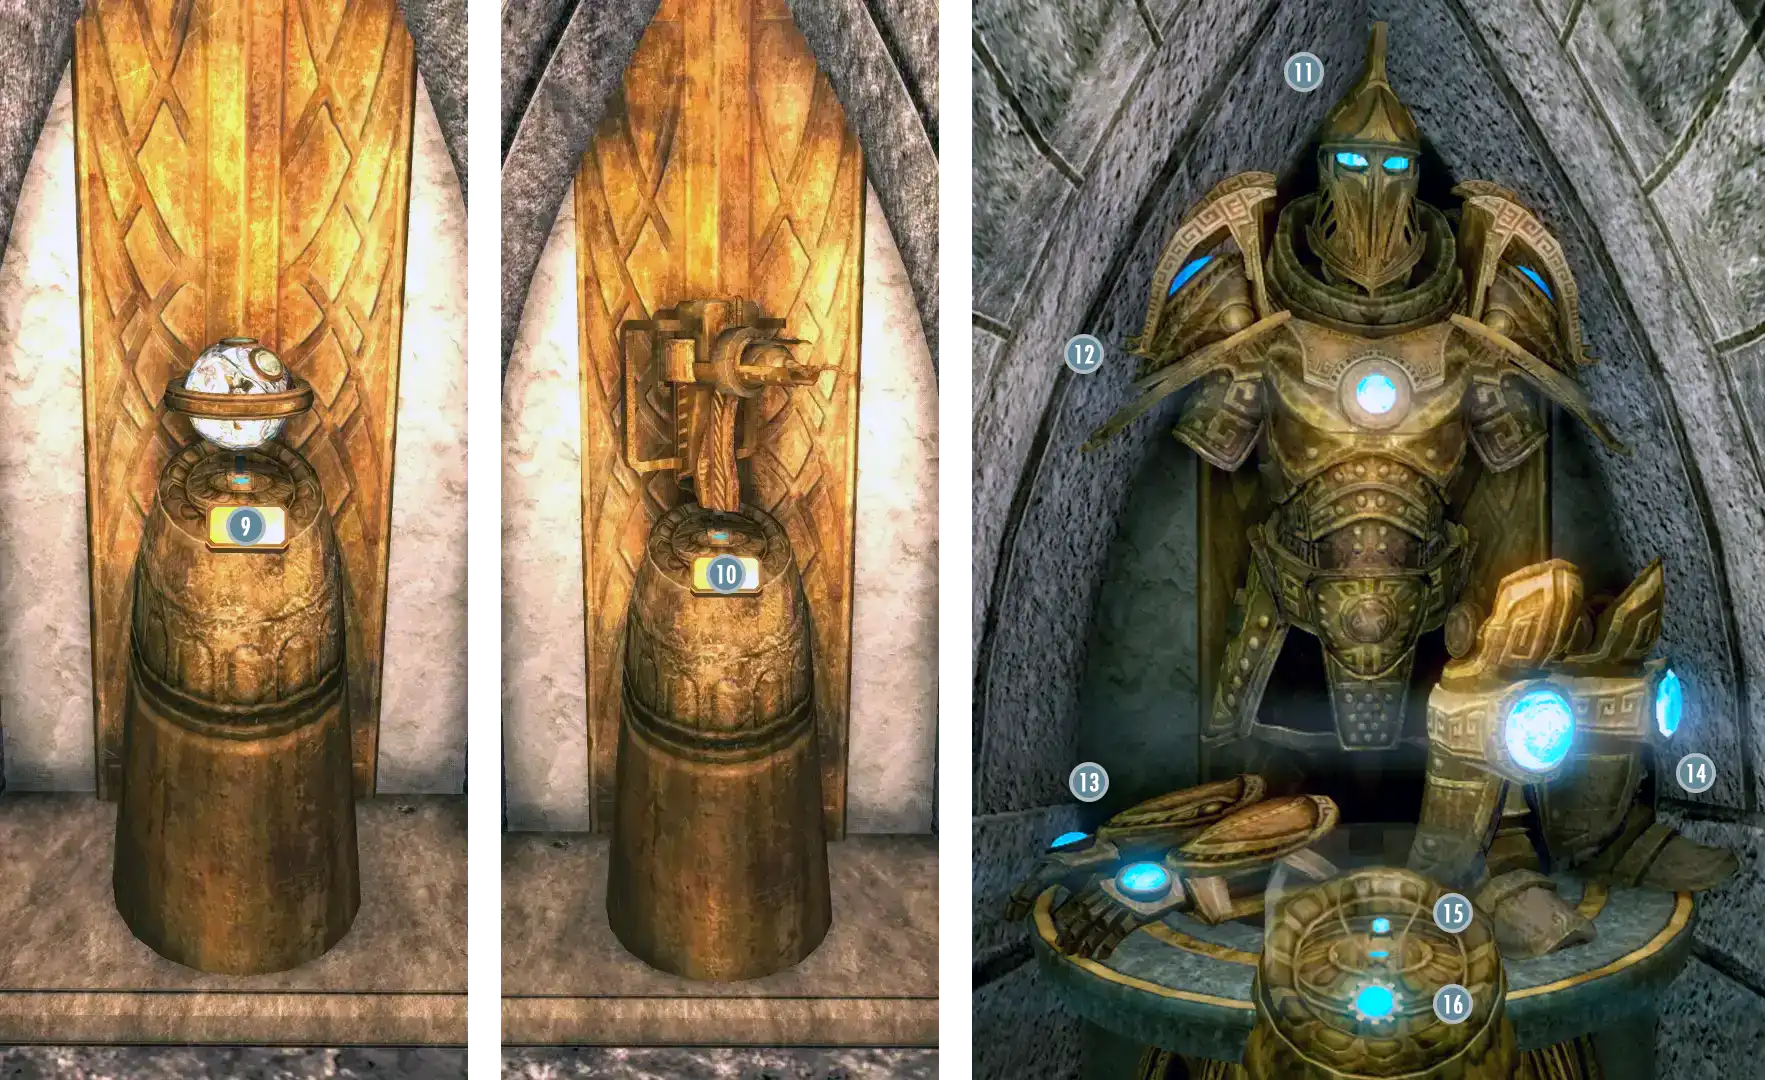
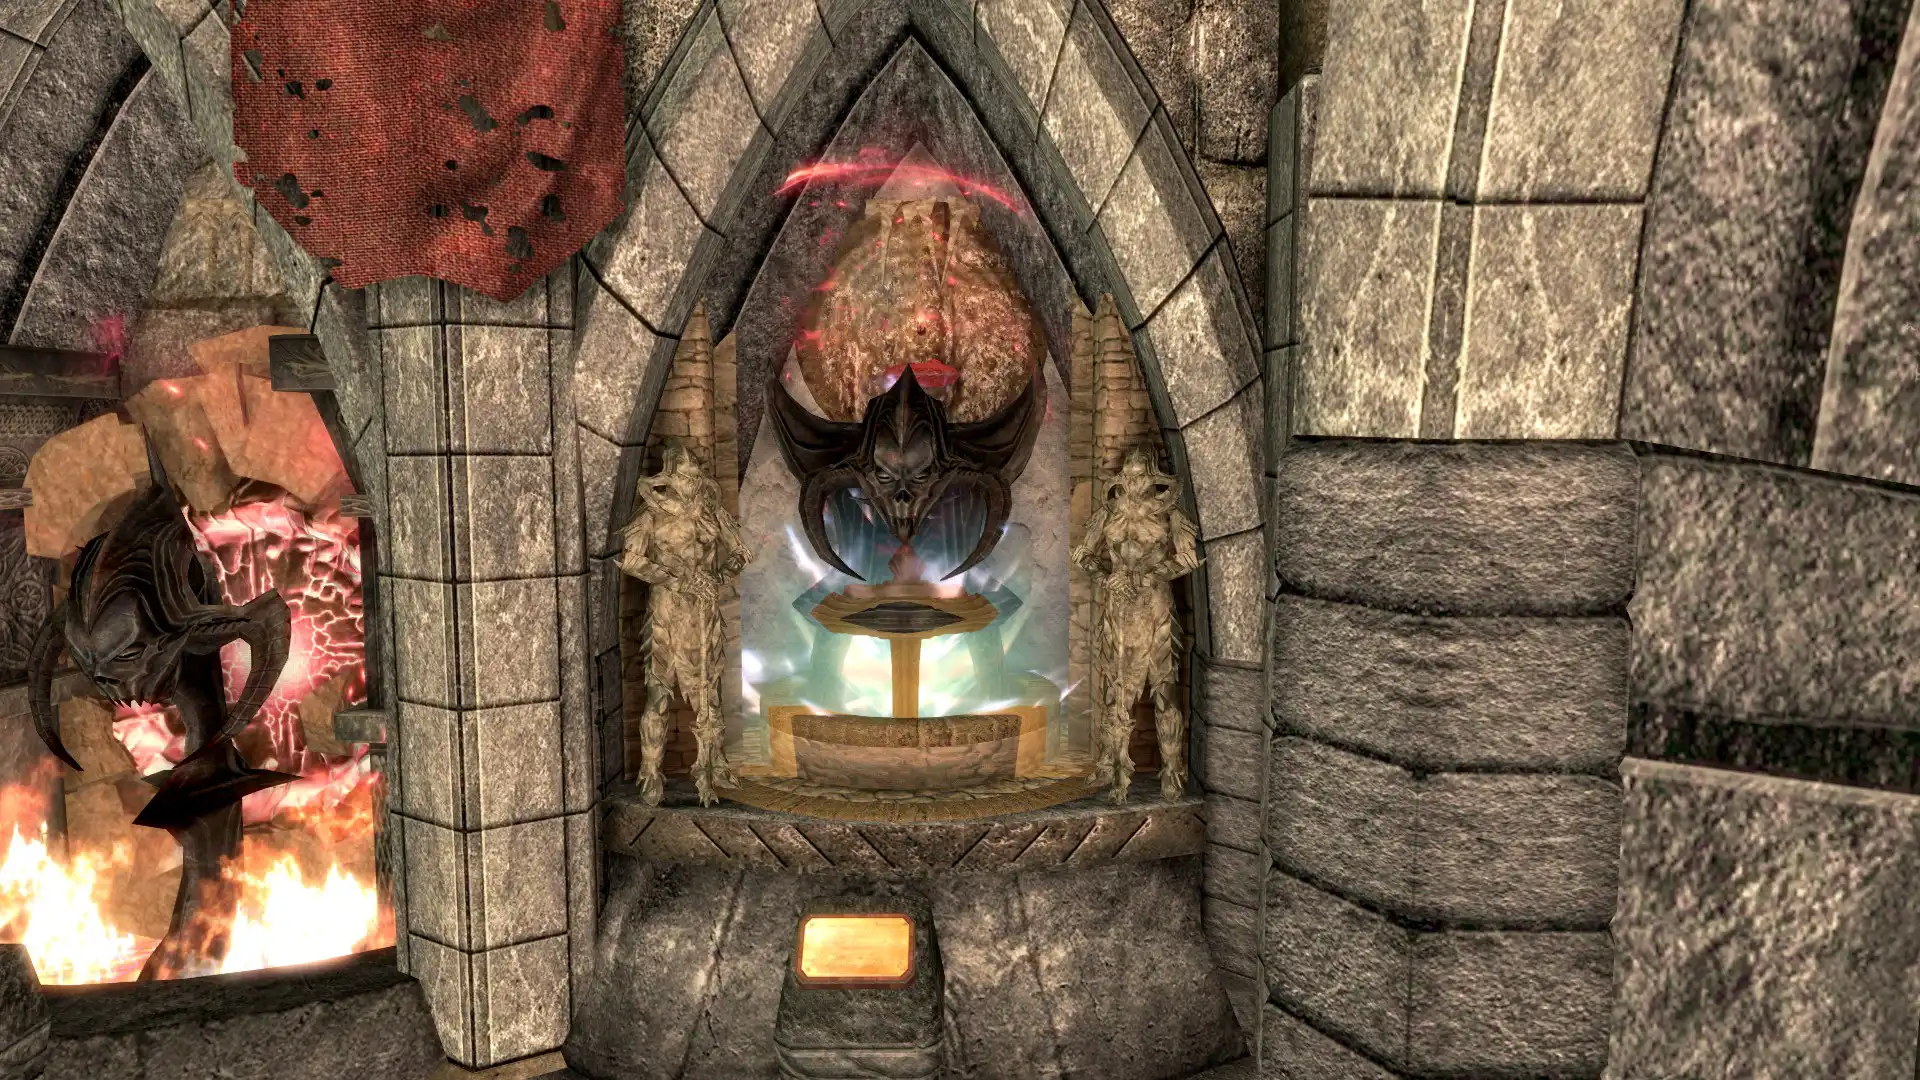
Daedric Exhibit Hall
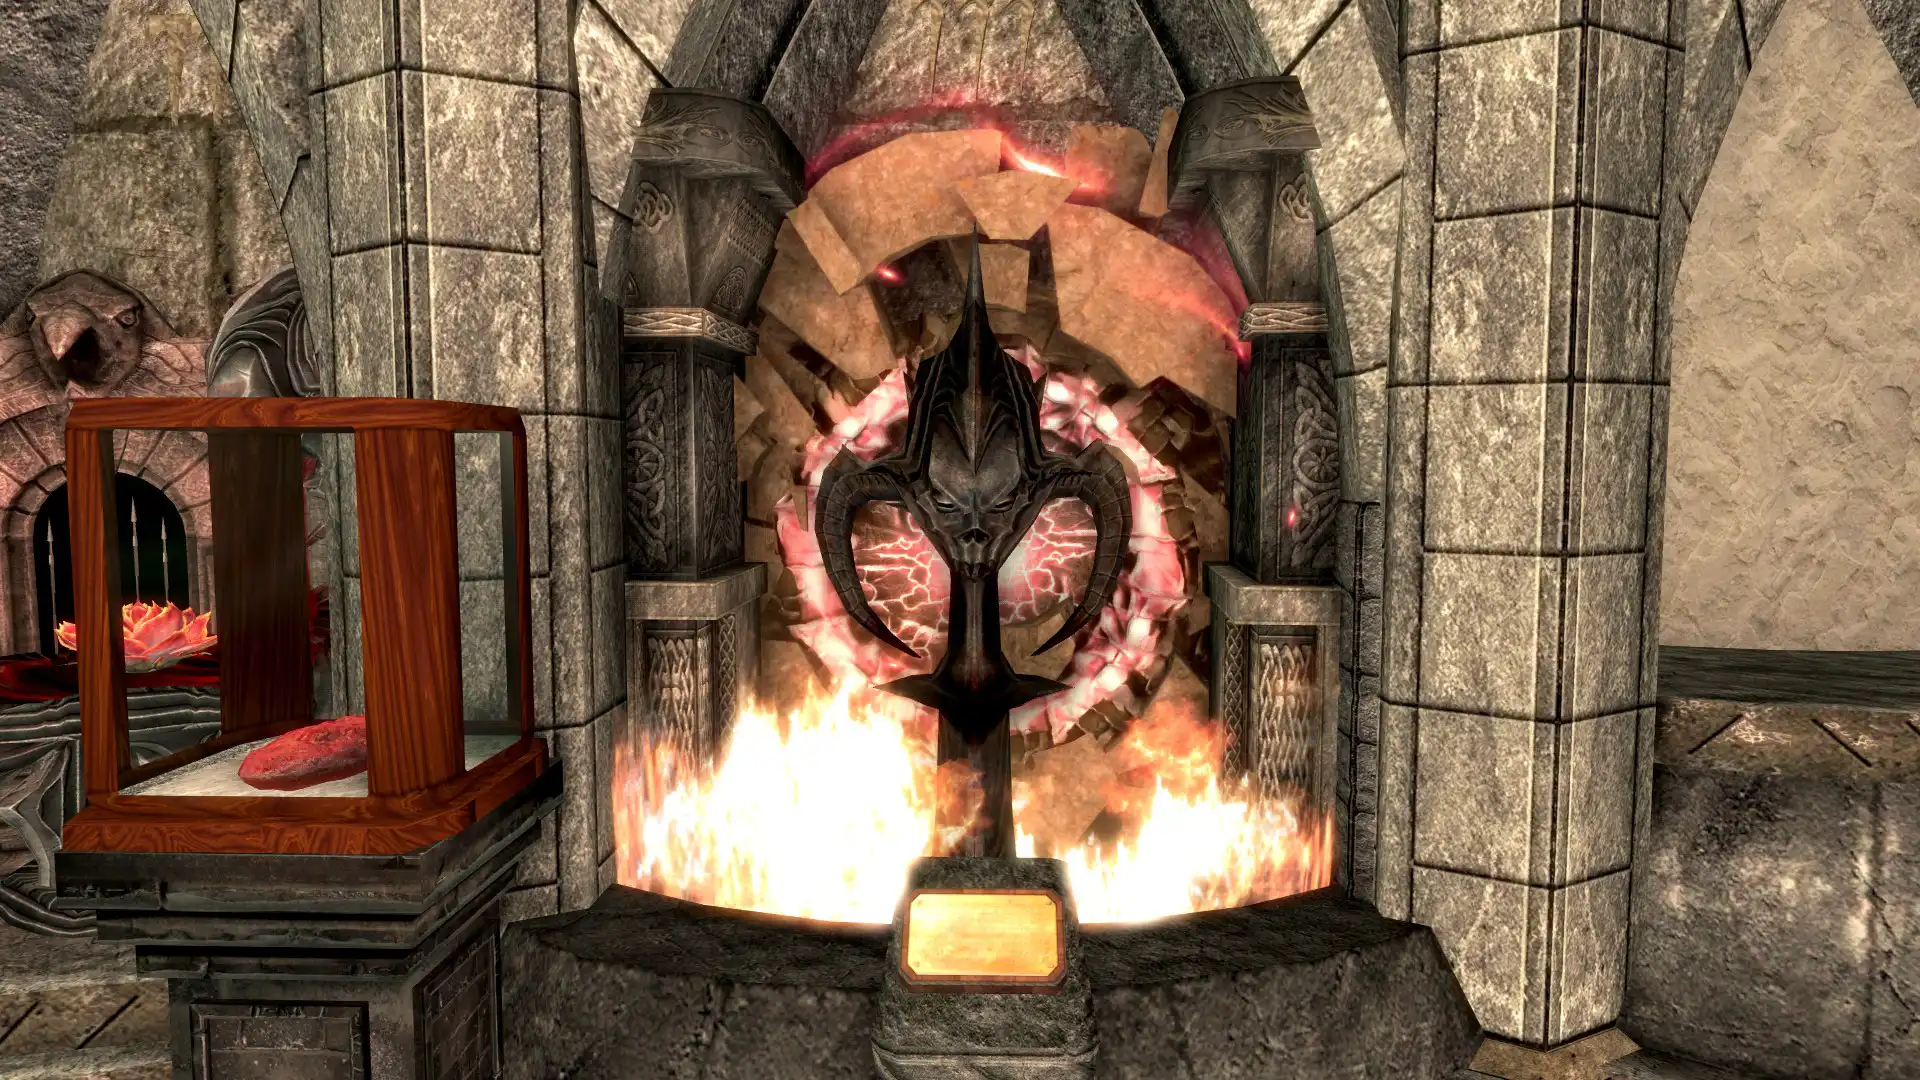
Mehrunes Dagon Static Display: Enables after finishing the quest 'Pieces of the Past'.
Hall of Lost Empires
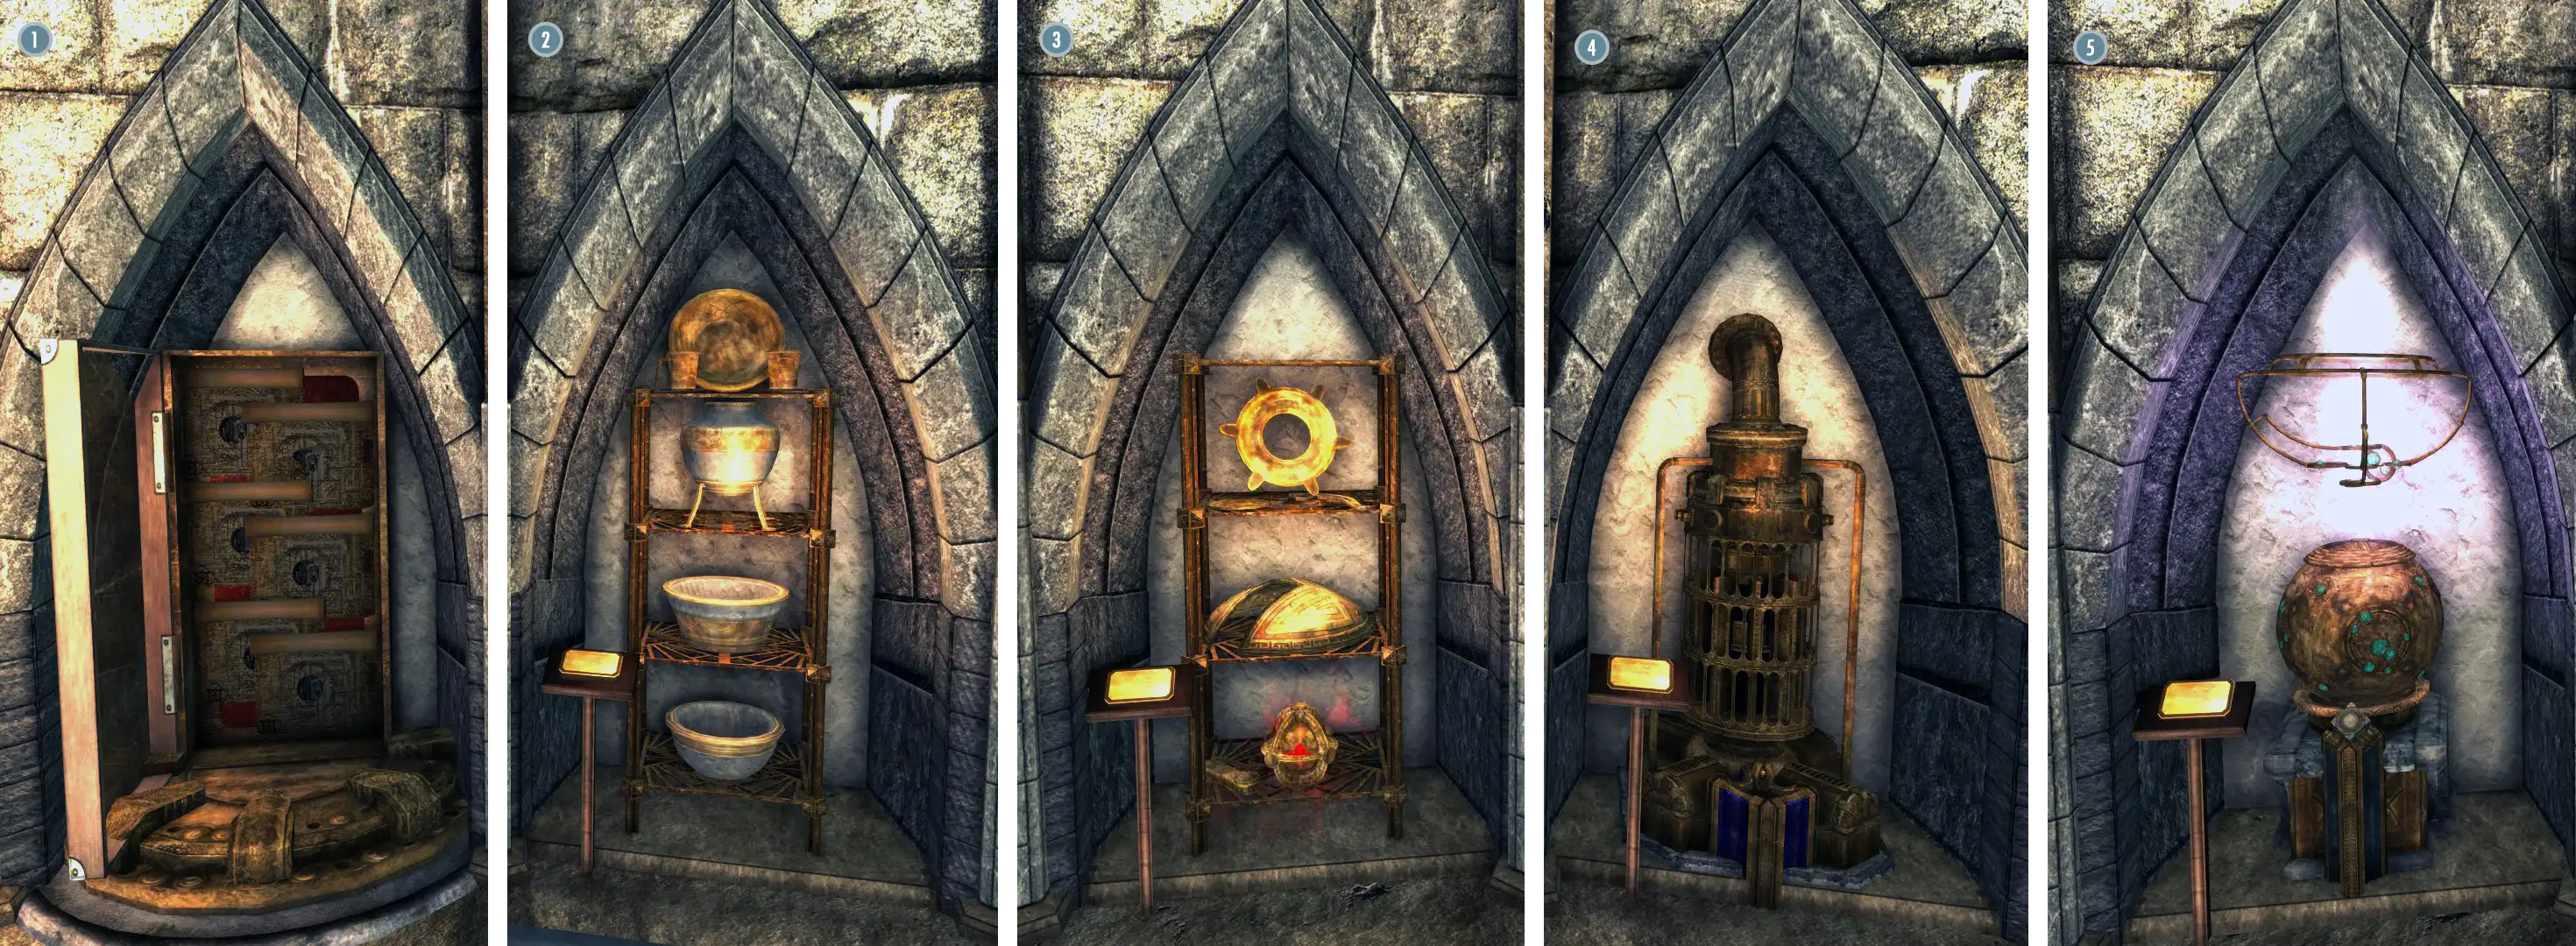
The second room to the left in the East Exhibit Halls, The Hall of Lost Empires, houses displays that are associated with the Ancient Nords, the Dwemer and the Falmer. If you have any of the following mods installed, extra displays for the mod items will be added on the bottom floor:
- Aetherium Armor and Weapons Compilation
- Dwemer Spectres
- Kthonia's Unique Weapon Pack
- The Tools of Kagrenac
- The Wheels of Lull - Unwound Edition.
Below is a list of items that can be displayed in this room, starting from the left of the door.
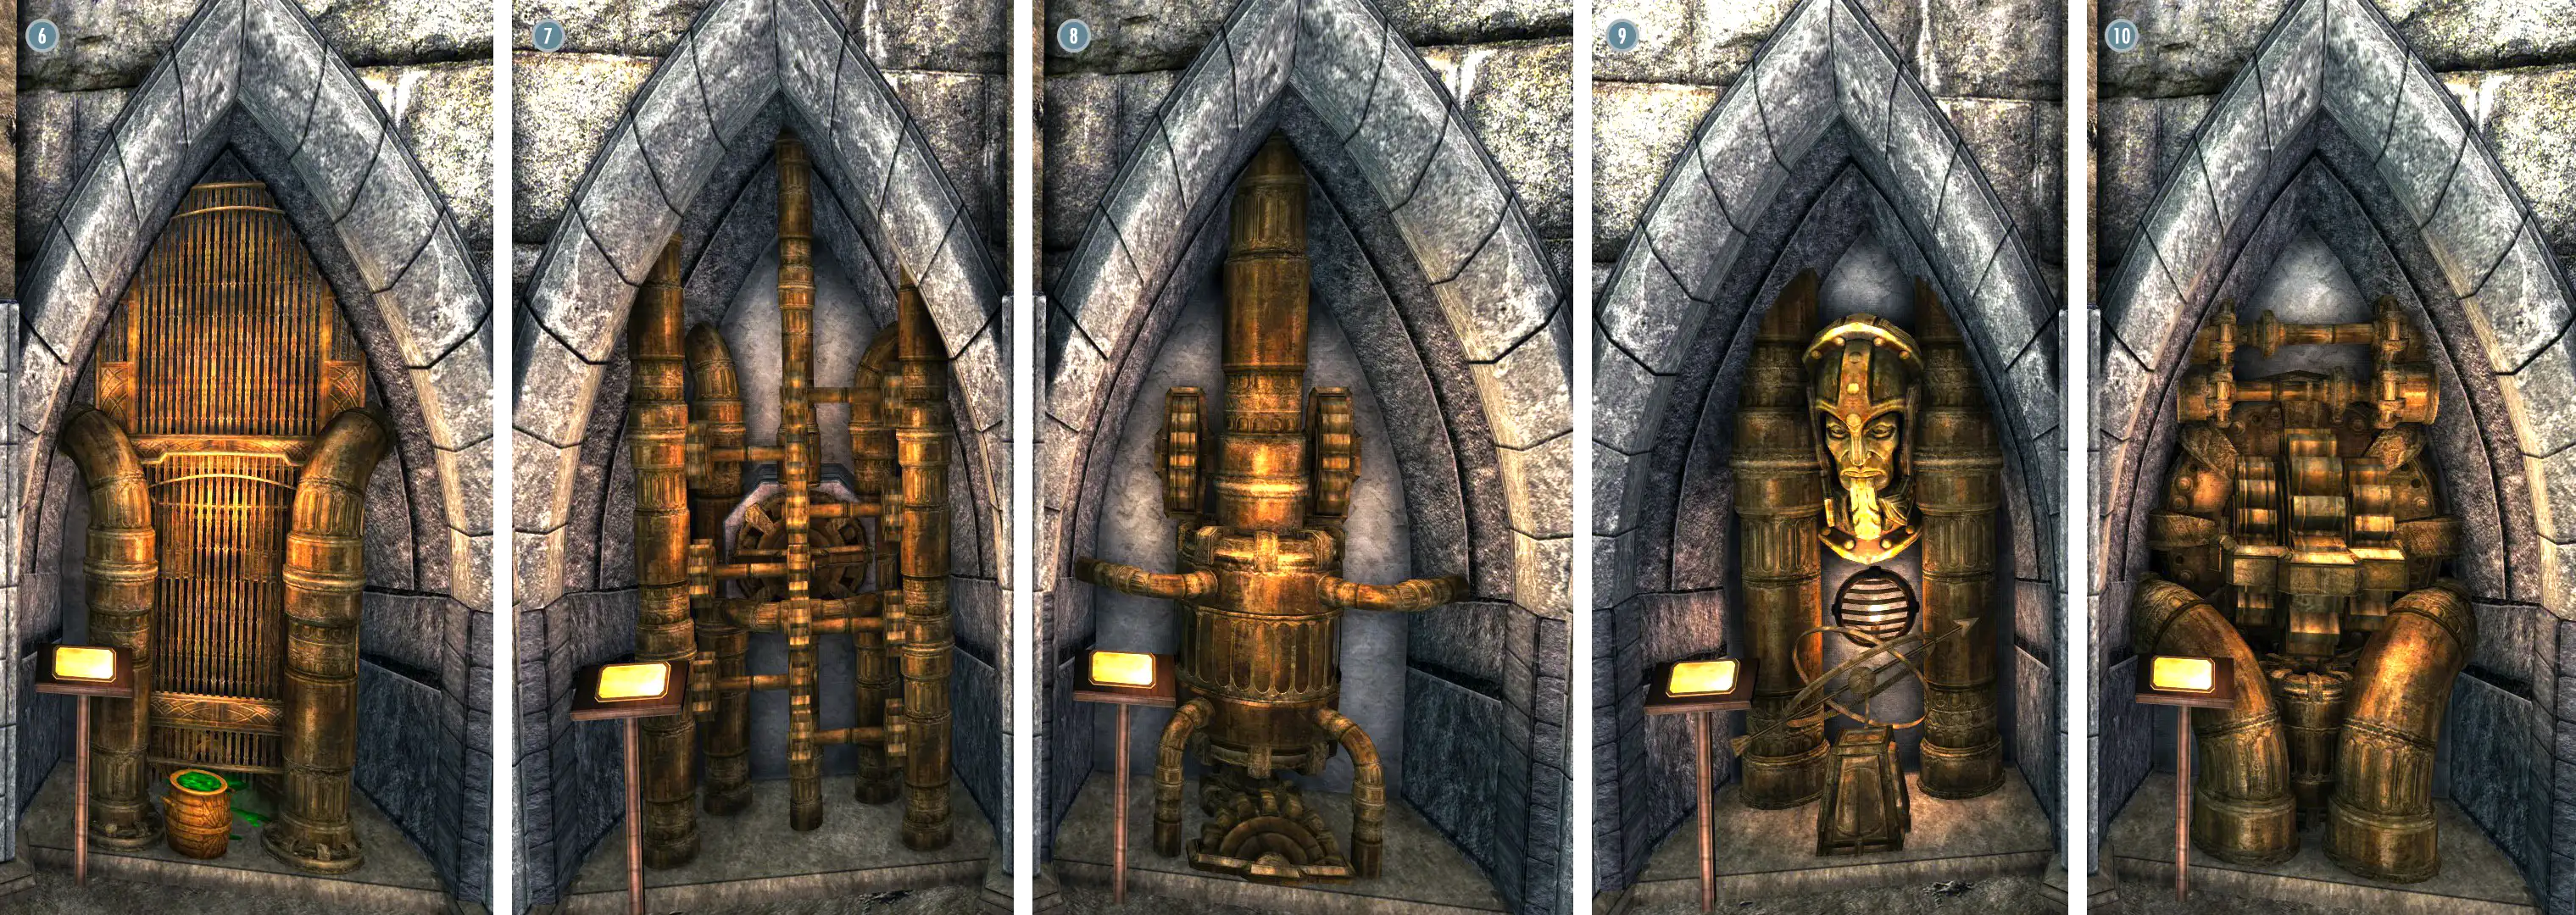
Balcony
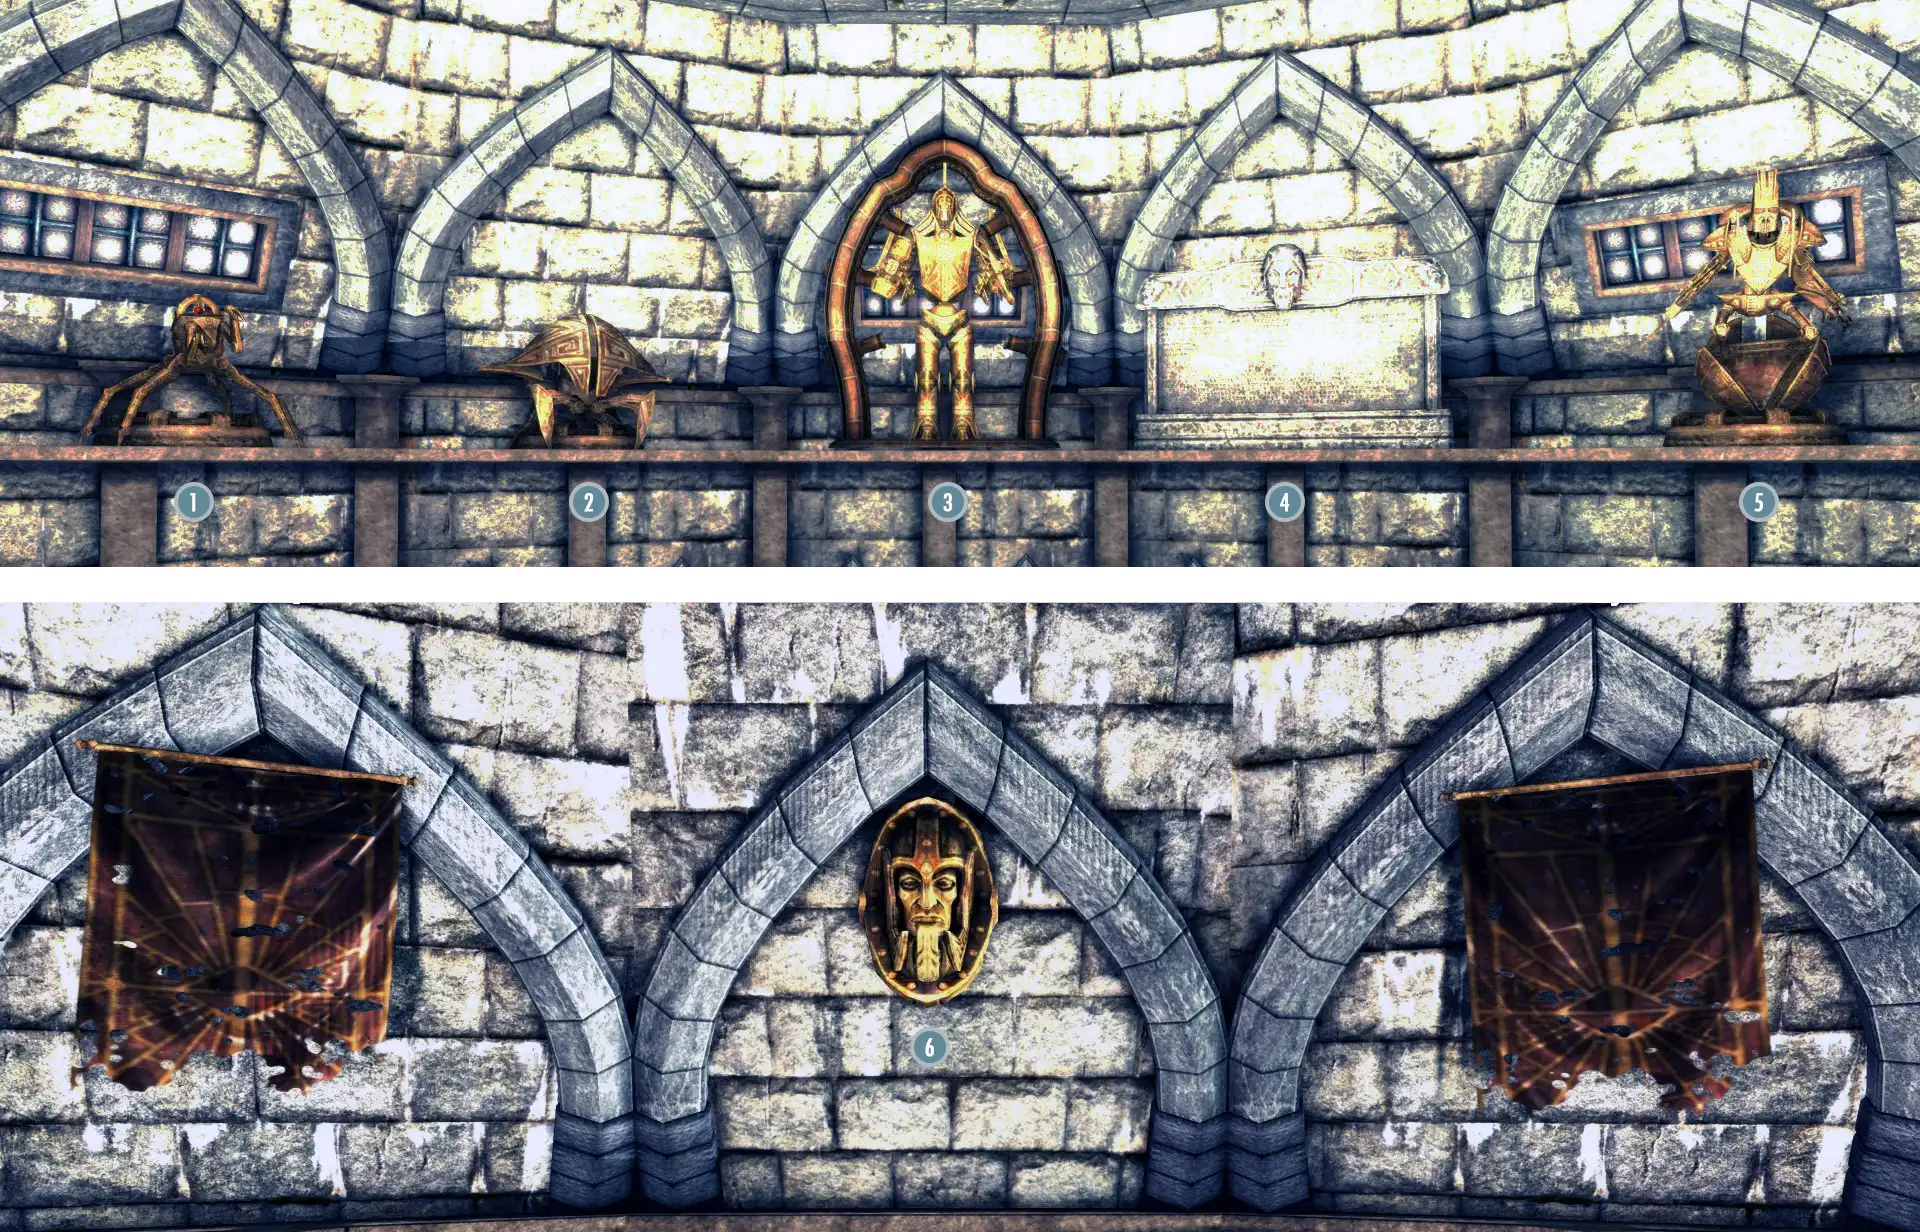
AutomatonsStatic displays which will activate when the respective locations are discovered. |
|---|
| 1) Dwarven Spider (from Nchuand-Zel) |
| 2) Dwarven Ballista (from Fahlbtharz) |
| 3) Dwarven Centurion (from Raldbthar) |
| 4) Falmer Rosetta Stone (from Calcelmo's Laboratory) |
| 5) Dwarven Sphere (from Avanchnzel) |
| 6) Centurion Bust and Banners (from Arkngthamz) |
Upper level displays
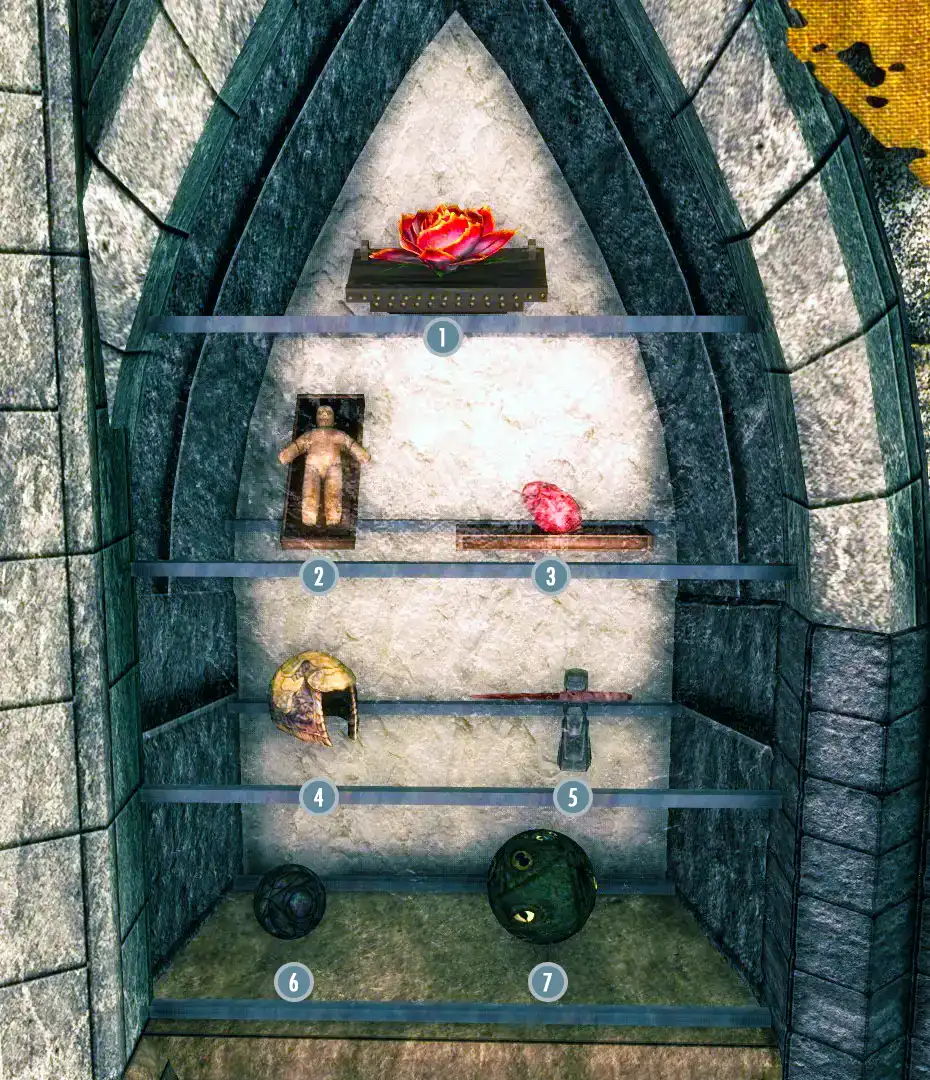
Snow Elf Display |
|---|
| 1) Shrine of Auriel (from the Inner Sanctum) |
| 2) Spear of the Snow Prince |
| 3) The Snow Prince of Jolgeirr Barrow (from Jolgeirr Barrow) |
| 4) Statue of Auriel (from the Inner Sanctum courtyard) |
| 5) Snow Elf Statue (from Irkngthand) |
| 6) Ancient Falmer Tablet rubbings (completion of Hard Answers) |


Ayleid Stones(All items require The Tools of Kagrenac) | |
|---|---|
| 1) Bal am as Aedra (charged replica)
2) Bal am as Aedra (empty) | |

Dwemer Displays | |
|---|---|
| 1) Crossbow and Bolts Schematics | 4) Control Pedestal and Boiler from Nchardak |
| 2) Urns and Dishes from Mzulft | 5) Replica of the Orrery in the Tower of Mzark |
| 3) Automaton scrap from Mzinchaleft | |
| 6) Pipes and Putrescence from Bthardamz | 9) Armillary replica from Bthalft |
| 7) Gears from Irkngthand | 10) Gear Mechanism from Alftand |
| 8) Boiler from the Ruins of Rkund | |


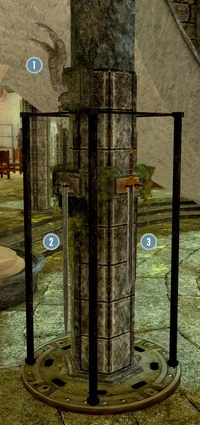
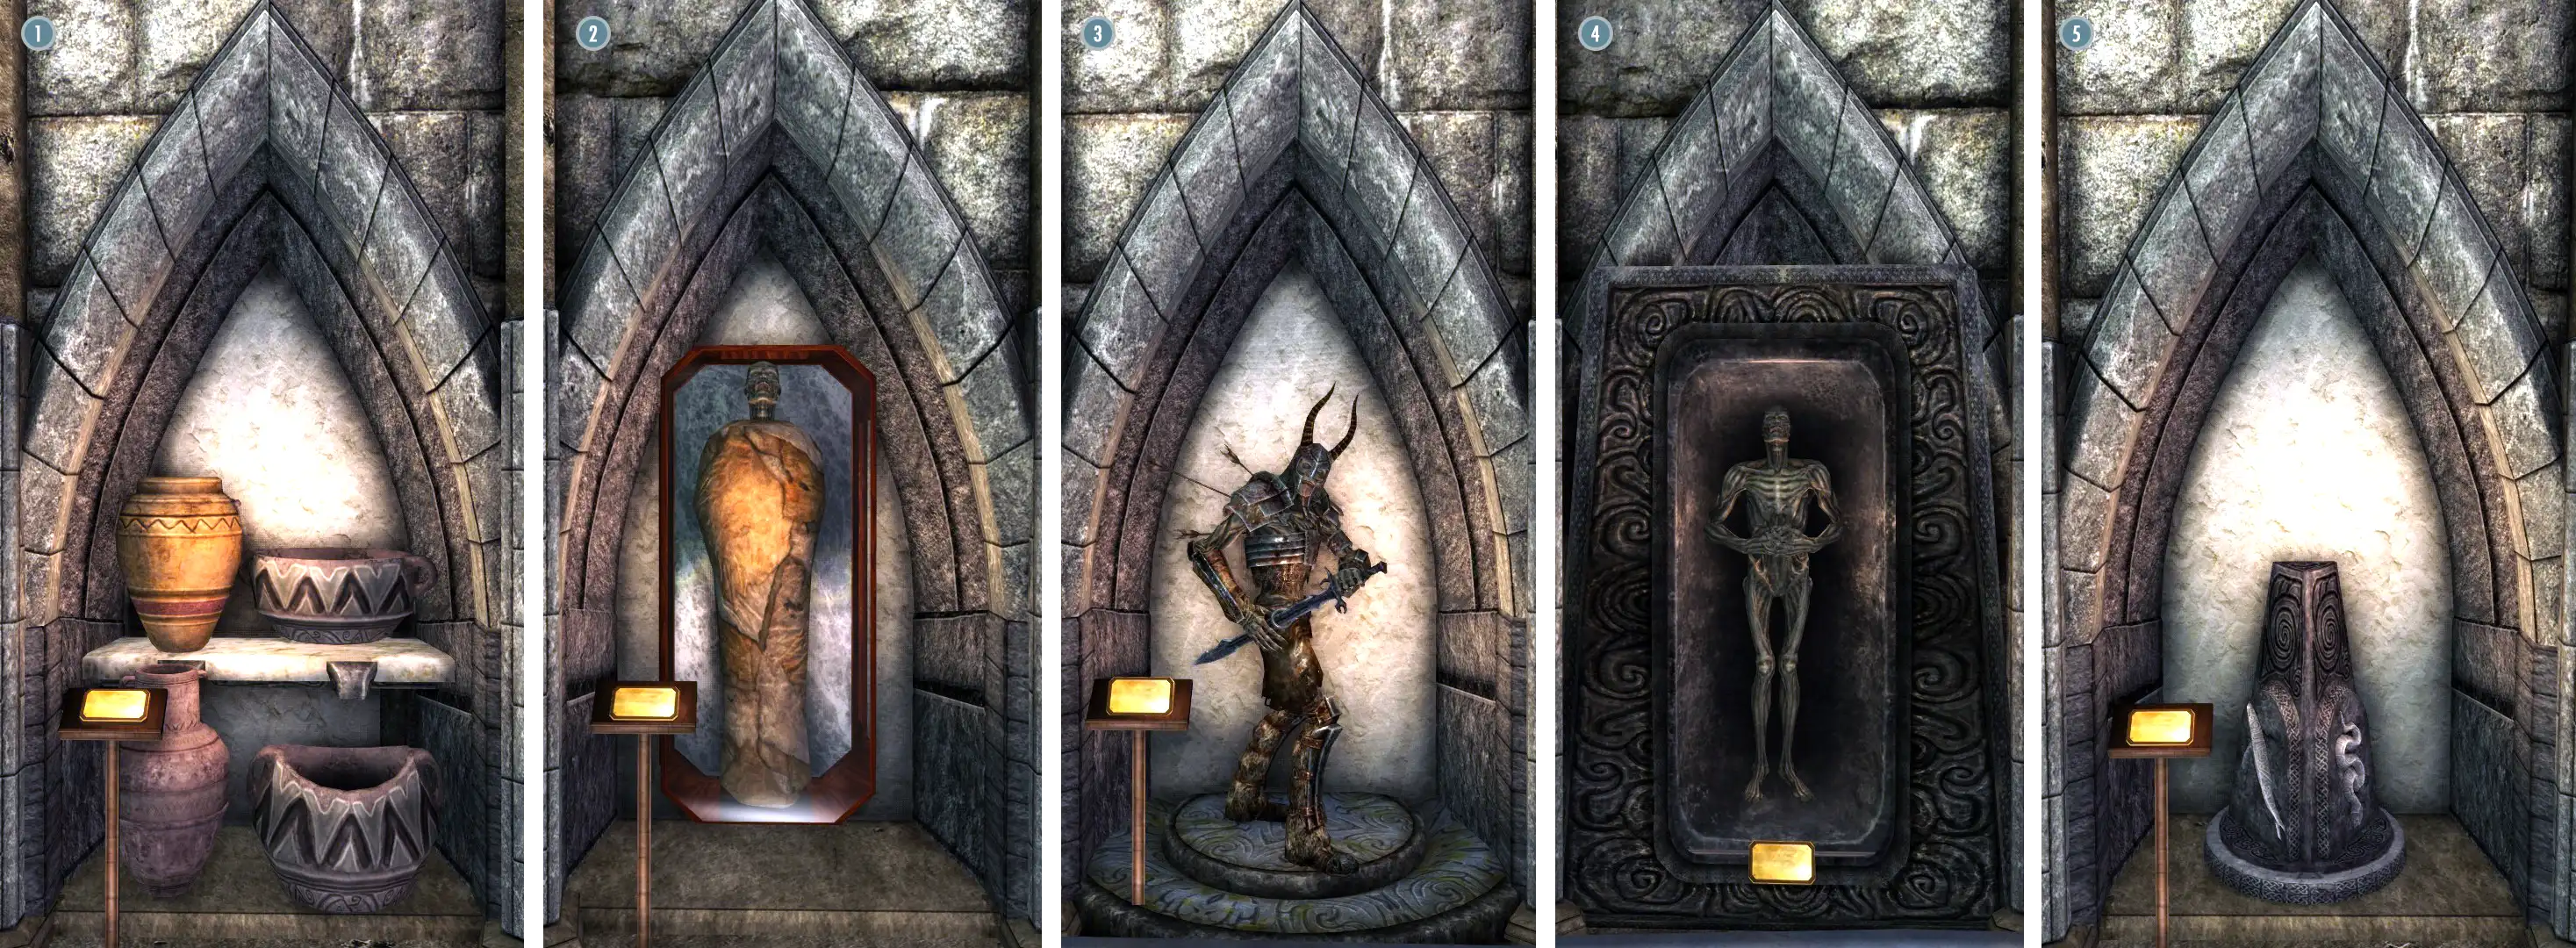
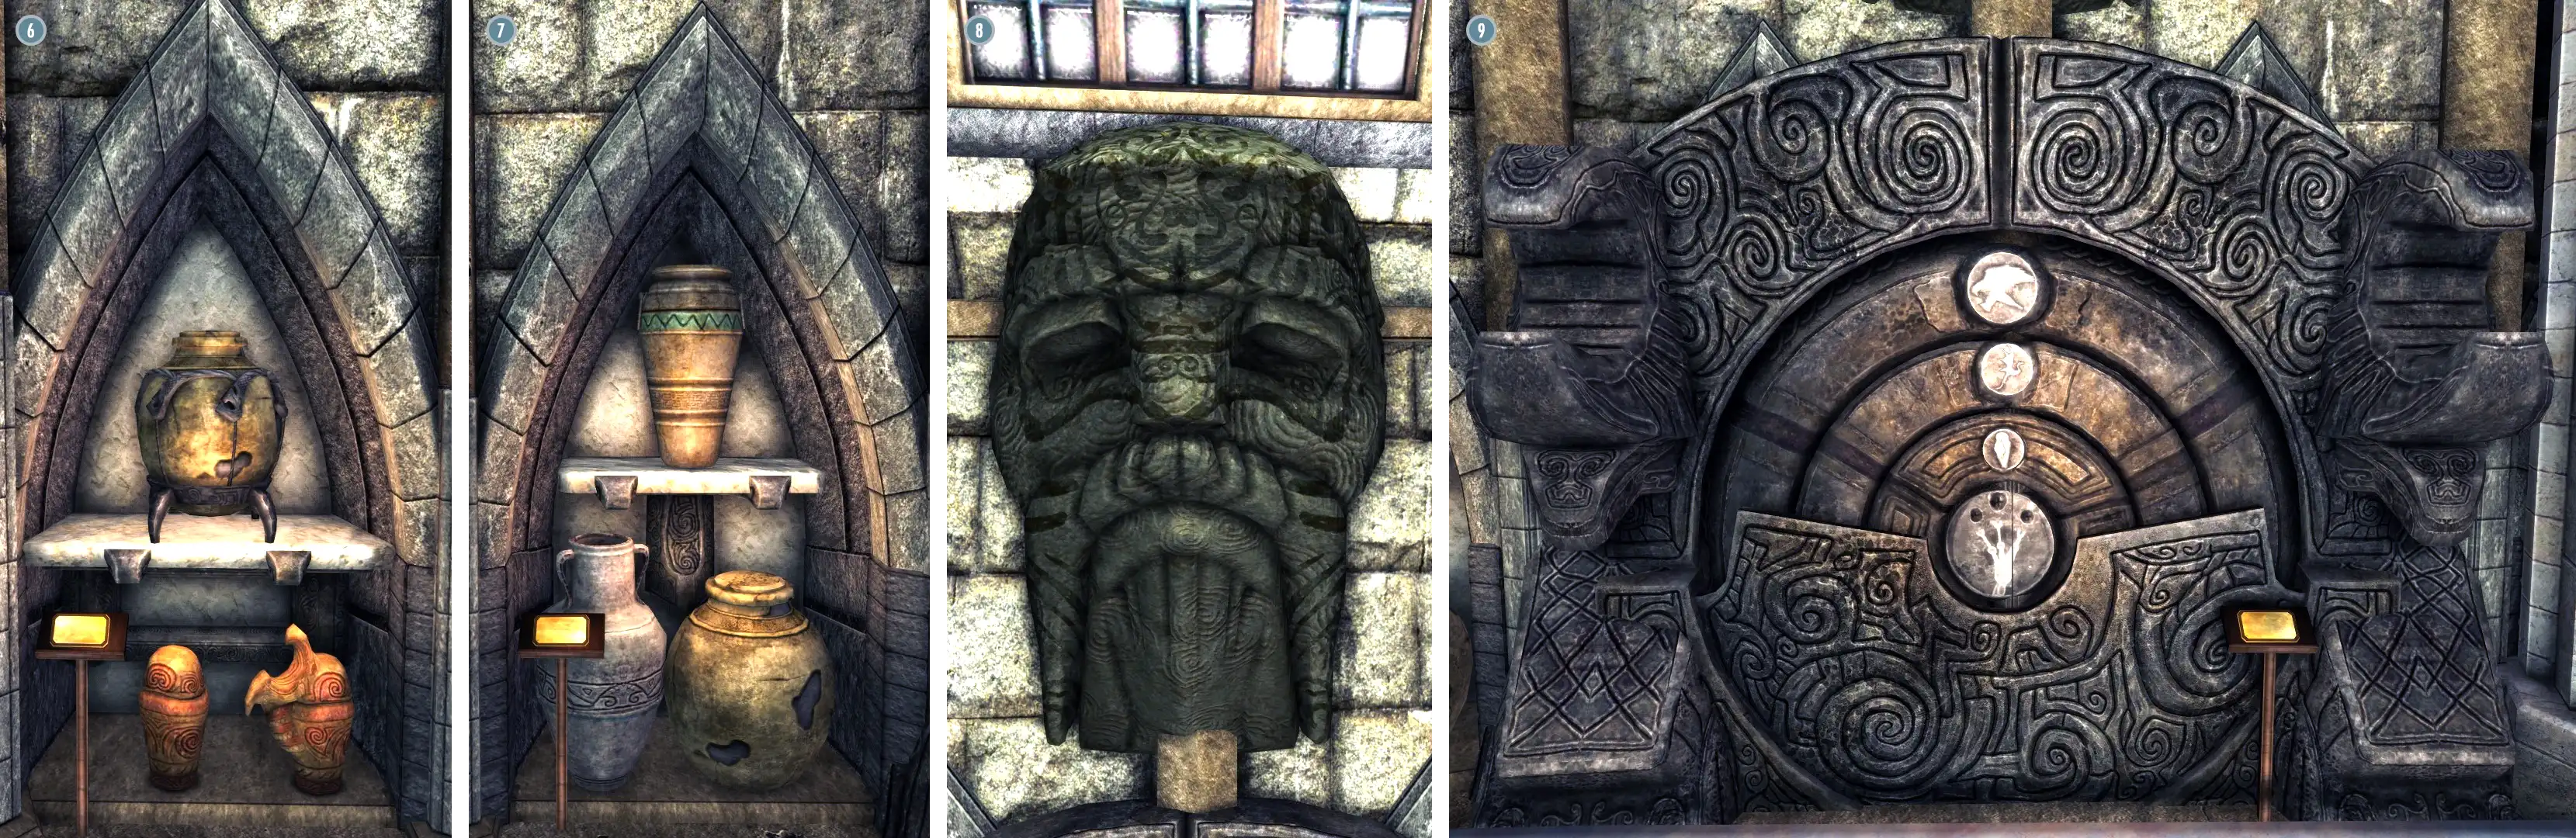
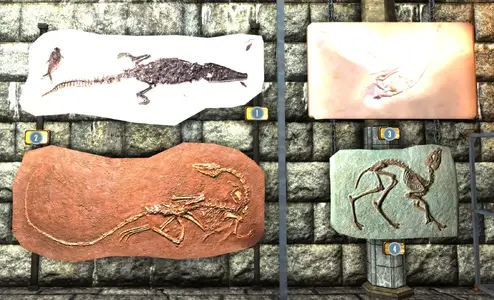
Ancient Nord Displays | |
|---|---|
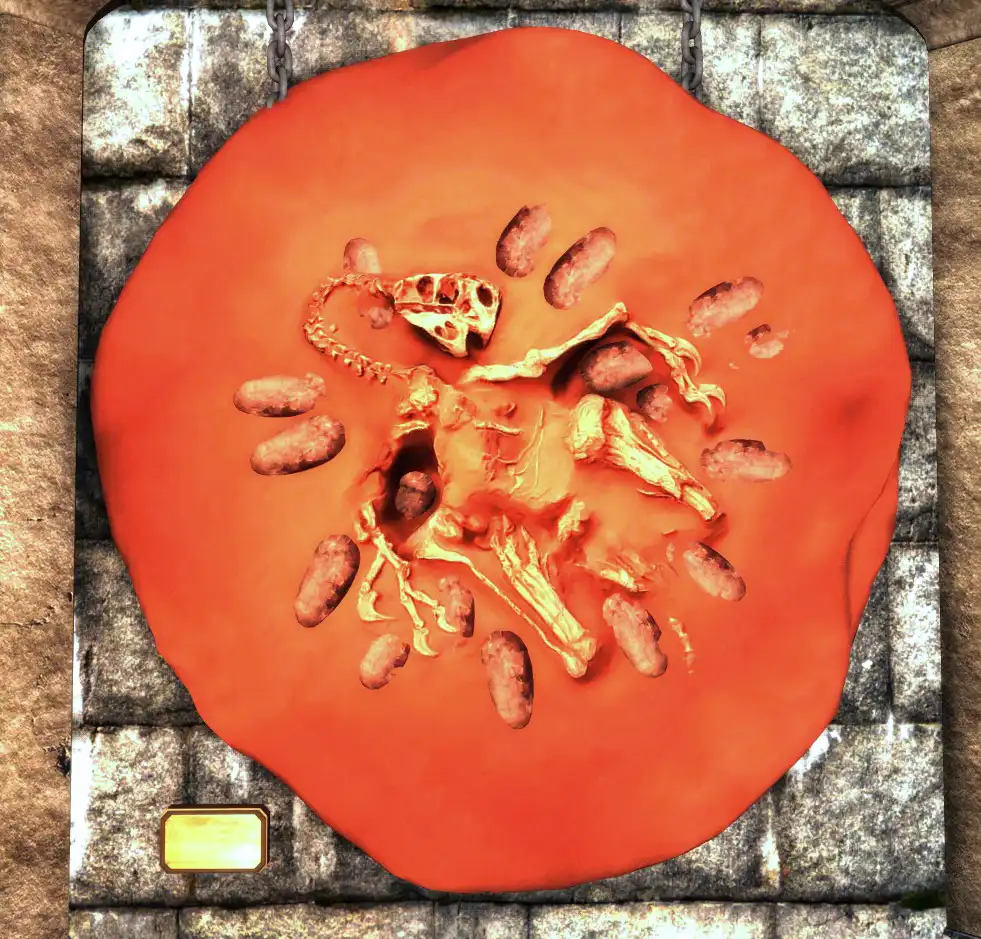
| 1) Earthenware from Shroud Hearth Barrow | 4) Draugr Sarcophagus from Ysgramor's Tomb |
| 2) Wrapped Draugr from Forelhost | 5) Nordic Puzzle Pillar from Saarthal |
| 3) Draugr Deathlord from Dead Mens Respite | |
| 6) Nordic Burial Urns from Ustengrav | 8) Relief from Angarvunde |
| 7) Clay Pots from Volskygge | 9) Nordic Puzzle Lock and pillars from Korvanjund |

Snow Elf Relics | |
|---|---|
| 1) Harmonic Touchstone | 2) Phynaster's Cup |

Snow Elf Weapons Display | ||
|---|---|---|
| 1) Glacial Spire | 5) Snowfall | 9) Rising Dawn |
| 2) Winter Storm | 6) Sunblessed | 10) Staff of the Snow Prince |
| 3) Wraith's Bite | 7) Black Ice | 11) Staff of the Sky Prince |
| 4) Trinimac's Might | 8) Frostwarden | 12) Staff of the Sun Prince |

Lost Vale Relics | |
|---|---|
| 1) Paragon Display (Ruby, Sapphire, Amethyst, Emerald, Diamond) | 3) Auriel's Bow |
| 2) Auriel's Shield | 4) Initiate's Ewer |
Lower Level Displays
Central Display | ||
|---|---|---|
| 1) Aetherial Armor display (Steel versions, requires Aetherium Armor and Weapons Compilation) | ||
| 2) Aetherial Staff | 3) Aetherial Shield | 4) Aetherial Crown |
| 5) The Aetherium Forge (static display, activates after completing 'Lost to the Ages') | ||
| 6) "Dwemer Exhibit" mannequin (generic, intended to display Dwarven Armor) | ||
| 7) Aetherium Armor display (Dwarven versions, requires Aetherium Armor and Weapons Compilation) | ||

Bottom Left Display | |
|---|---|
| |
| 1) The Tonal Staff of Karagas | 5) Dwemer Pneuma-Trap |
| 2) Gem Socket Tool Kit | 6) Spider Control Rod |
| 3) Stormforge | 7) Shismhaz's Conductor |
| 4) Mhaznier | 8) Blank Lexicon (replica) |
| |
| 9) Visage of Mzund | 11) Kagrumez Resonance Gem (x5) |
| 10) Control Cubes (x5) | |
Tools of Kagrenac Display | ||
|---|---|---|
| ||
| 1) Sunder or Tools of Kagrenac Version or Creation Club Version |
2) Wraithguard or Tools of Kagrenac Version or Creation Club Version |
3) Keening or Tools of Kagrenac Version |
Bottom Right Display | |
|---|---|
| |
| 1) Attunement Sphere | 5) Aetherium Cube |
| 2) Planetary Cube | 6) Constellation Cube |
| 3) Sky Cube | 7) Dwemer Puzzle Cube |
| 4) Storm Cube | 8) Essence Extractor |
| |
| 9) Focusing Crystal (replica) | 10) Ash Extractor (replica) |
| Tools of Kagrenac armor (requires The Tools of Kagrenac) | |
| 11) Aetherial Helmet | 14) Aetherial Boots |
| 12) Aetherial Armor | 15) Aetherial Ring |
| 13) Aetherial Gauntlets | 16) Aetherial Amulet |

Kthonia's Unique Weapon Pack Display(all items require Kthonia's Unique Weapon Pack) | |
|---|---|
| 1) Venomspite | 5) Chitin Bow |
| 2) Dwemer Lightning Fork | 6) Chitin Sword |
| 3) Chitin Bow (Beaded) | 7) Chitin Greatsword |
| 4) Chitin Dagger | |

Dwemer Spectres Display(all items require Dwemer Spectres) | ||
|---|---|---|
| 1) Helm of the Aethernaut | 7) Zel-mzbhain's Puzzle Cube | |
| 2) Boilerman's Siegering | 8) Commandant's Puzzle Cube | |
| 3) Ring of Kadakh Mezalf | 9) Fareye's Puzzle Cube | |
| 4) Clutterbane | 10) Mzark's Puzzle Cube | |
| 5) Ghartar-Zhir | 11) Bthund's Puzzle Cube | |
| 6) Nullsprocket | 12) Irgktchil's Puzzle Cube | |
| 13) Kadakh's Puzzle Cube | ||
Wheels of Lull Display
(all items require The Wheels of Lull - Unwound Edition)
Left Display | |
|---|---|
| 1) Clockwork Drill | |
| 2) Bells of Sotha Ehn | |
| 3) Clockwork Mace | |
| 4) Rod of Ohm | |
| 5) Artophysical Manipulator | |
| 6) Goveri's Unwinder | |

Center Display | ||
|---|---|---|
|
"The Wheels of Lull" Quest Display | ||
| 1) Chronographer Helmet | 6) Mark of Seht | 11) Diving Helmet |
| 2) Chronographer Robes | 7) Sehtic Security Pack | 12) Diagnosing Staff |
| 3) Chronographer Gloves | 8) Microclock | 13) Defragmentation Tool |
| 4) Chronographer Boots | 9) The Idiot's Lantern | 14) Reboot Tool |
| 5) Magnusian Visor | 10) Bear Lifeforce | 15) Registry Cleaning Tool |
Right Display | |
|---|---|
| 1) Llavados' Accelerator | |
| 2) Combatative Harquebus | |
| 3) Standard Harquebus | |
| 4) Targetian Harquebus | |
| 5) Bombastic Harquebus | |
| 6) Lullian Harquebus | |
| 7) Rotational Harquebus | |
Back Wall Display | |
|---|---|
| 1) Clockwork Sword - White | |
| 2) Clockwork Sword - Orange | |
| 3) Clockwork Sword - Blue | |
| 4) Clockwork Sword - Yellow | |
| 5) Clockwork Sword - Green | |
| 6) Clockwork Sword - Purple | |
| 7) Clockwork Sword - Red | |
| 8) Memodermic Greatsword | |
| 9) Lullian Shield | |
| 10) Dwemeri Cutting Sphere | |

Aetherium Weapons and Armor Compilation Room (requires Aetherium Armor and Weapons Compilation)
All items must be crafted at the Aetherium Forge beneath the Ruins of Bthalft, which can only be accessed after combining all four Aetherium Shards into the Aetherium Crest. The following materials are needed:
- Aetherial Dagger: 1 Aetherium Ingot, 1 Steel Ingot, 1 Leather Strips, 1 Quicksilver Ingot, 1 Dwarven Metal Ingot.
- Aetherial Sword: 1 Aetherium Ingot, 1 Steel Ingot, 1 Leather Strips, 1 Quicksilver Ingot, 1 Dwarven Metal Ingot.
- Aetherial Greatsword: 1 Aetherium Ingot, 1 Steel Ingot, 1 Leather Strips, 1 Quicksilver Ingot, 2 Dwarven Metal Ingots.
- Aetherial War Axe: 1 Aetherium Ingot, 1 Steel Ingot, 1 Leather Strips, 1 Quicksilver Ingot, 2 Dwarven Metal Ingots.
- Aetherial Battleaxe: 1 Aetherium Ingot, 1 Steel Ingot, 1 Leather Strips, 1 Quicksilver Ingot, 3 Dwarven Metal Ingots.
- Aetherial Hammer: 1 Aetherium Ingot, 1 Steel Ingot, 1 Leather Strips, 1 Quicksilver Ingot, 1 Dwarven Metal Ingot.
- Aetherial Warhammer: 1 Aetherium Ingot, 1 Steel Ingot, 1 Leather Strips, 1 Quicksilver Ingot, 3 Dwarven Metal Ingots.
- Aetherial Bolt Launcher: 1 Aetherium Ingot, 1 Steel Ingot, 1 Leather Strips, 1 Quicksilver Ingot, 3 Dwarven Metal Ingots, 1 Centurion Dynamo Core.
- Aetherial Shield: 1 Aetherium Ingot, 4 Dwarven Metal Ingots, 2 Refined Malachite.
- Aetherium Circlet: 1 Aetherium Ingot, 2 Flawless Sapphires, 2 Dwarven Metal Ingots, 2 Gold Ingots.
- Aetherium Amulet: 1 Aetherium Ingot, 1 Quicksilver Ingot, 2 Dwarven Metal Ingots, 1 Centurion Dynamo Core.
- Aetherium Ring: 1 Aetherium Ingot, 1 Quicksilver Ingot, 2 Dwarven Metal Ingots.
- Aetherial Helmet: 1 Aetherium Ingot, 1 Steel Ingot, 2 Leather Strips, 2 Quicksilver Ingots, 2 Dwarven Metal Ingots.
- Aetherial Armor: 1 Aetherium Ingot, 1 Steel Ingot, 3 Leather Strips, 2 Quicksilver Ingots, 5 Dwarven Metal Ingots.
- Aetherial Gauntlets: 1 Aetherium Ingot, 1 Steel Ingot, 2 Leather Strips, 2 Quicksilver Ingots, 2 Dwarven Metal Ingots.
- Aetherial Boots: 1 Aetherium Ingot, 1 Steel Ingot, 2 Leather Strips, 2 Quicksilver Ingots, 2 Dwarven Metal Ingots.
- Aetherial Steel Helmet: 1 Aetherium Ingot, 3 Steel Ingots, 2 Leather Strips, 2 Quicksilver Ingots.
- Aetherial Steel Armor: 1 Aetherium Ingot, 6 Steel Ingots, 3 Leather Strips, 2 Quicksilver Ingots.
- Aetherial Steel Gauntlets: 1 Aetherium Ingot, 3 Steel Ingots, 2 Leather Strips, 2 Quicksilver Ingots.
- Aetherial Steel Boots: 1 Aetherium Ingot, 3 Steel Ingots, 2 Leather Strips, 2 Quicksilver Ingots.
- Aetherium Steel Amulet: 1 Aetherium Ingot, 1 Quicksilver Ingot, 2 Steel Ingots, 1 Centurion Dynamo Core.
- Aetherium Steel Ring: 1 Aetherium Ingot, 1 Quicksilver Ingot, 2 Steel Ingots.
- Aetherium Steel Shield: 1 Aetherium Ingot, 2 Steel Ingots, 1 Leather Strips, 2 Quicksilver Ingots.
- Aetherial Steel Bolt Launcher: 1 Aetherium Ingot, 4 Steel Ingots, 1 Leather Strips, 2 Quicksilver Ingots, 1 Centurion Dynamo Core.
- Aetherial Steel Warhammer: 1 Aetherium Ingot, 4 Steel Ingots, 1 Leather Strips, 1 Quicksilver Ingot.
- Aetherial Steel Hammer: 1 Aetherium Ingot, 2 Steel Ingots, 1 Leather Strips, 1 Quicksilver Ingot.
- Aetherial Steel Battleaxe: 1 Aetherium Ingot, 3 Steel Ingots, 1 Leather Strips, 2 Quicksilver Ingots.
- Aetherial Steel War Axe: 1 Aetherium Ingot, 2 Steel Ingots, 1 Leather Strips, 2 Quicksilver Ingots.
- Aetherial Steel Greatsword: 1 Aetherium Ingot, 3 Steel Ingots, 1 Leather Strips, 1 Quicksilver Ingot.
- Aetherial Steel Sword: 1 Aetherium Ingot, 2 Steel Ingots, 1 Leather Strips, 1 Quicksilver Ingot.
- Aetherial Steel Dagger: 1 Aetherium Ingot, 1 Steel Ingot, 1 Leather Strips, 2 Quicksilver Ingots.
Gallery of Natural Science
The Gallery of Natural Science is the part of the museum that covers the rich flora, fauna and minerals Skyrim has. Its entrance is in the Upper Gallery of the Hall of Heroes.
The Gallery of Natural Science features buildable static displays. There is also a Gemstone Display and a Tide Pool Display for seashells.
- If BadGremlin's Collection is installed, additional displays will be added to house Fishbowls and Fairy Cages.
- If Fossil Mining is installed, the Fossil Mining Room above the Natural Science Gallery becomes available for displaying the fossils. There will be a large stairwell leading to this room.
Below is a list of all displays in the Gallery, starting from the left of the entrance.
Supplies
  |
The Supplies cabinet is linked to all the supply chests in the Safehouse and provides an alternate way to get access to the supplies needed to build the displays. |
Entomology Exhibit
| The five bug jars from vanilla Skyrim can be placed on display here: |


Wolf and Deer Exhibit
| Display | Materials needed | |
|---|---|---|
| Deer | ||
| Wolf |
|


Sabre Cat and Bear Exhibit
| Display | Materials needed | |
|---|---|---|
| Bear | ||
| Sabre Cat |


Horker and Mudcrab Exhibit
| Display | Materials needed | |
|---|---|---|
| Mudcrab |
| |
| Horker |


Chaurus and Spider Exhibit
| Display | Materials needed | |
|---|---|---|
| Spider | ||
| Chaurus |


Farm Exhibit
| Display | Materials needed | |
|---|---|---|
| Chicken | ||
| Horse | ||
| Cow |
| |
| Dog |
|


Troll and Goat Exhibit
| Display | Materials needed | |
|---|---|---|
| Troll |
| |
| Goat |
|


Hagraven & Spriggan Exhibit
| Display | Materials needed | |
|---|---|---|
| Hagraven | ||
| Spriggan |


Dragon Exhibit
| Display | Materials needed | |
|---|---|---|
| 1) Vulthuryol | ||
| 2) Legendary Dragon | ||
| 3) Kreindeinvith | ||
| 4) Sahrotaar | ||
| 5) Naaslaarum and Voslaarum |
||
| 6) Elder Dragon | ||
| 7) Izvenyah | ||
| 8) Odahviing | None, quest display that activates after completing 'The Fallen'. |


The Aquarium
Fish Shelves
| Left Shelf | |||
|---|---|---|---|
| 1) Betta - Red | 2) Betta - Blue | 3) Betta - Green | 4) Abeclongfin |
| 5) Cyrospade | 6) Jellyfish | 7) Fishbowl 3 | 8) Fishbowl 2 |
| Right Shelf | |||
| 9) Riverbetty | 10) Histcarp | 11) Silverperch | 12) Guppy |
| 13) Diver | 14) Fishbowl 4 | 15) Fishbowl 5 | 16) Fishbowl 1 |


Flora Exhibit
This display is a interactive representation of the flora that can be found in Skyrim. It works with a regular fertile soil system like the Hearthfire DLC provides. It features a display of the Gildergreen, when the quest The Blessings of Nature has been completed. Additionally, this display is home to the fairies from BadGremlin's Collection, if the mod is installed. When a cage is placed, the fairy will leave it and will be seen in the display.


Fairy Shelves | |||||
|---|---|---|---|---|---|
| 1) Fairy 01 | 2) Fairy 02 | 3) Fairy 03 | 4) Goth Fairy | 5) Zelda's Fairy | 6) Tinker Fairy |
| 7) Fairy 04 | 8) Fairy 05 | 9) Fairy 06 | 10) Great Fairy | 11) Fairy 11 | 12) Fairy 12 |
| 13) Fairy 07 | 14) Fairy 08 | 15) Fairy 09 | 16) Fairy 13 | 17) Fairy 14 | 18) Fairy 15 |
| 19) Rotting Fairy | 20) Dead Fairy | 21) Fairy 10 | 22) Hag Fairy | ||
Mammoth and Giant Exhibit
| Display | Materials needed | |
|---|---|---|
| Mammoth |


Tide Pool Display


Displays the seashells that spawn randomly along The Sea of Ghosts in the northern-most part of Skyrim and on the shores of Solstheim.
List of seashells:
| Conch | |||
|---|---|---|---|
| Conch - Blue | Conch - Green | Conch - Orange | Conch - Red |
| Conch - Spotted | Conch - Striped | Conch - Weathered | Conch - White |
| Coral | ||||
|---|---|---|---|---|
| Coral - Blue | Coral - Gray | Coral - Green | Coral - Orange | Coral - Pink |
| Coral - Purple | Coral - Red | Coral - Slate | Coral - Spiked | Coral - Yellow |
| Large Shell | |||
|---|---|---|---|
| Large Shell - Beige | Large Shell - Blue | Large Shell - Gray | |
| Large Shell - Green | Large Shell - Purple | Large Shell - Red | |
| Old Clam | ||
|---|---|---|
| Old Clam - Large | Old Clam - Medium | Old Clam - Thin |
| Pansy Shell | ||
|---|---|---|
| Pansy Shell - Brown | Pansy Shell - Gray | Pansy Shell - Purple |
| Porceletta | |
|---|---|
| Porceletta - Spotted | Porceletta - Striped |
| Starfish | |||
|---|---|---|---|
| Starfish - Blue | Starfish - Gray | Starfish - Green | Starfish - Pink |
| Starfish - Purple | Starfish - Red | Starfish - Spotted | Starfish - Yellow |
| Other | |||
|---|---|---|---|
| Seabird Feathers | Sea Crystal | Small Mudcrab Chitin | Smooth Pearl |
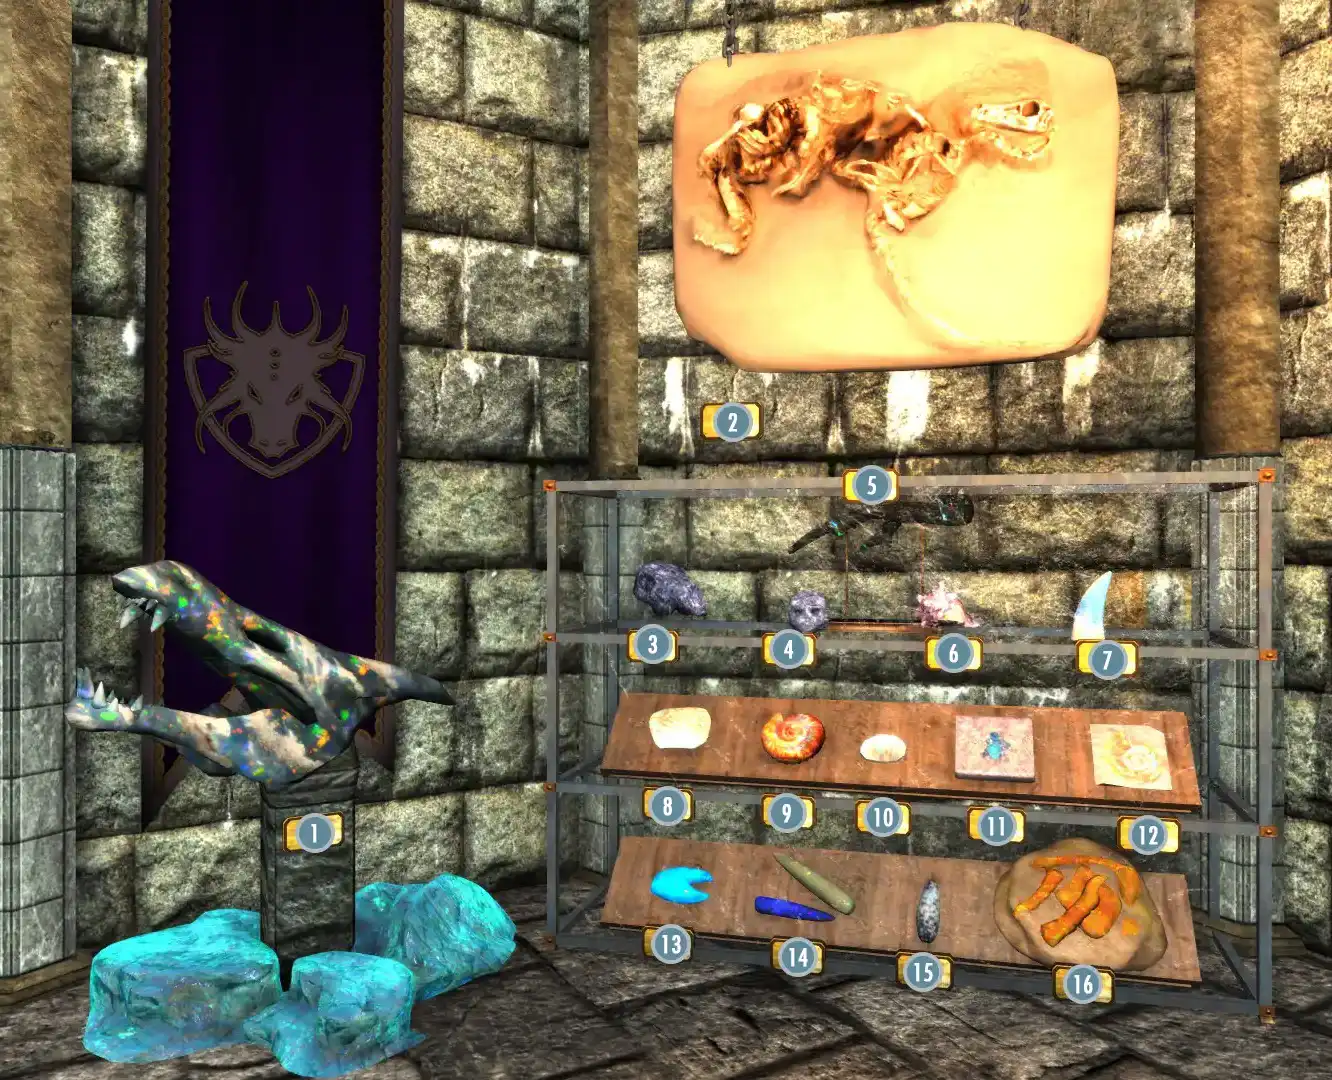
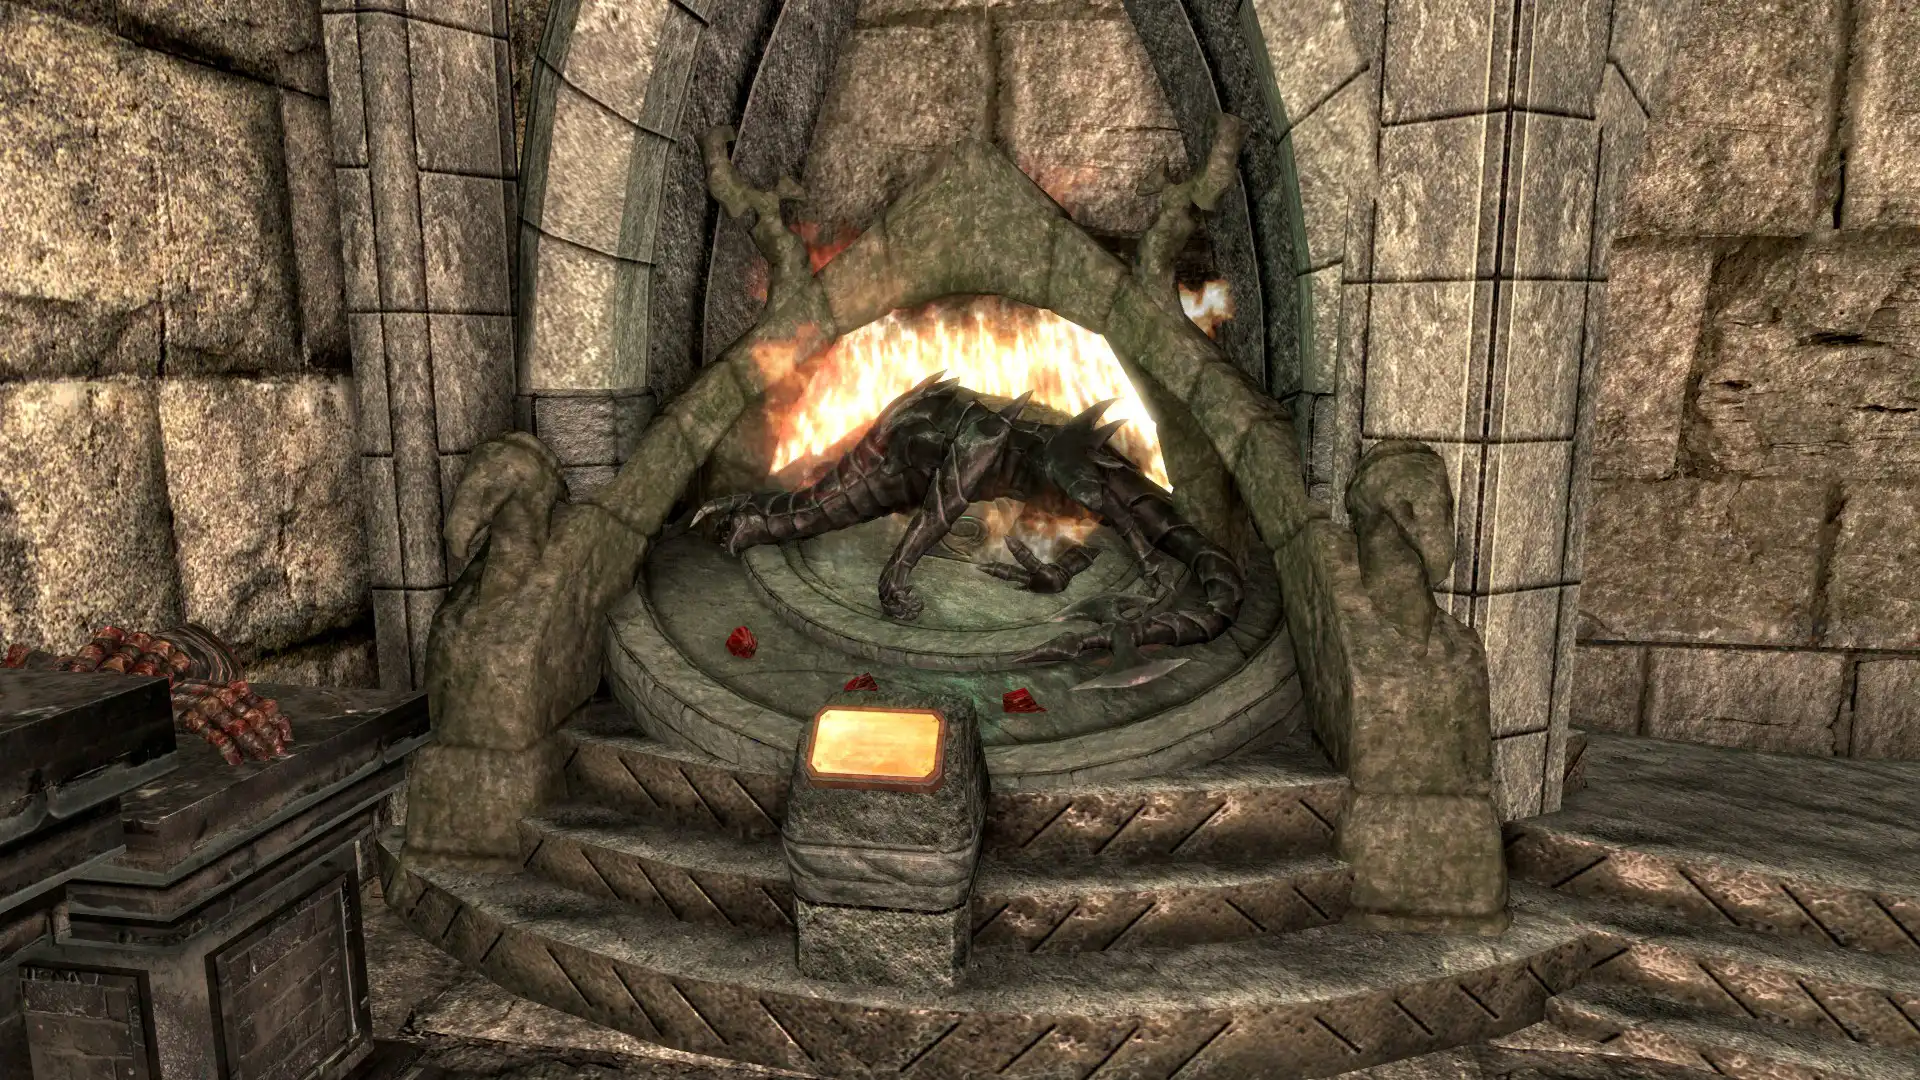
Skeletal Dragon Display

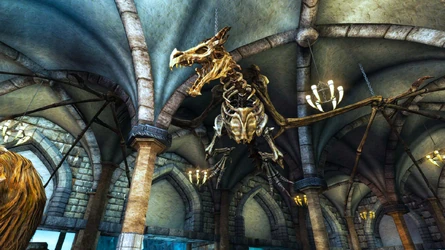
This is a replica display of the Skeletal Dragon encountered in Labyrinthian, it activates when the quest The Staff of Magnus has been completed.
Red Mountain Display


The Red Mountain display is the only display in the Gallery of Natural Science that is activated by default and doesn't need anything to do. It is just an enjoyable view with some information.
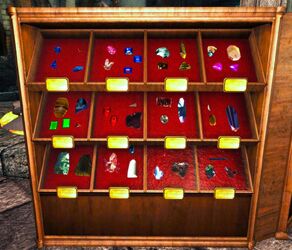
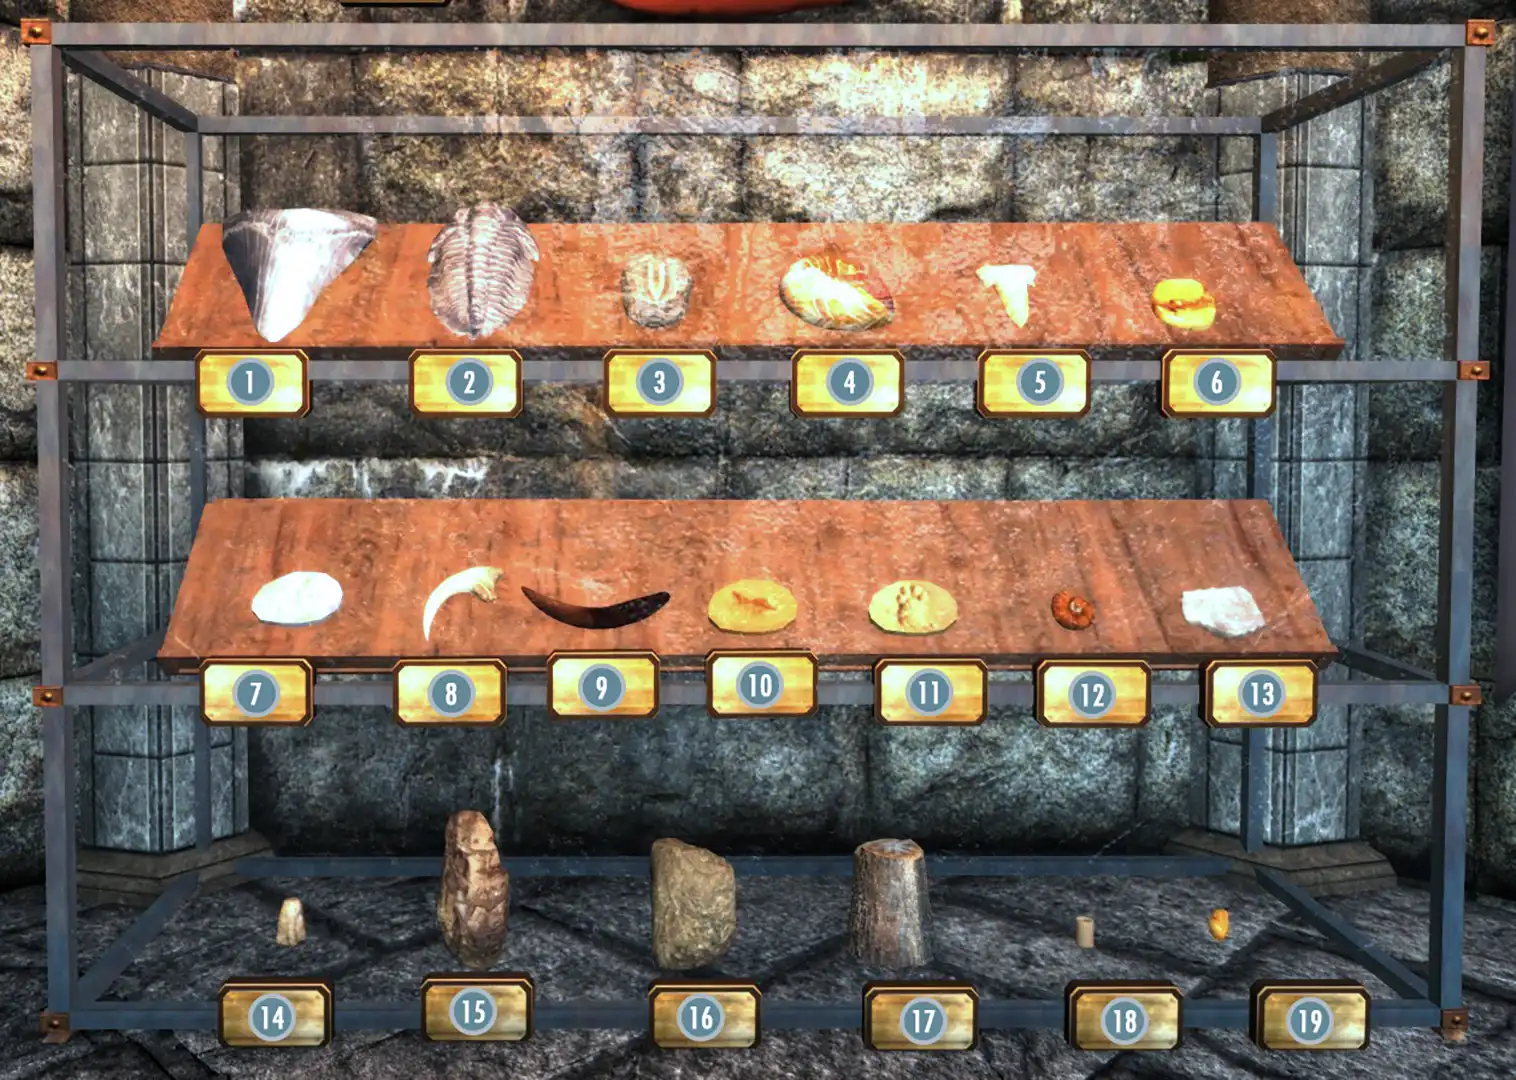
Gemstone Display


Three display cases for all obtainable gems. The gems can mainly be found randomly in loot containers and through mining. Most can also be found in a fixed location.


Fairy Shelves (requires BadGremlin's Captured Fairies)
- Fairy Cage 1: Fairy Cage 1
- Fairy Cage 2: Fairy Cage 2
- Fairy Cage 3: Fairy Cage 3
- Goth Fairy: The Sea Squall, docked in the harbor of Dawnstar, on the northern side of the deck.
- Zelda's Fairy: Fisherman's Island, an unmarked location in the southern part of Lake Ilinalta, near the boat.
- Tinker Fairy: Near Hela's Folly, on a barrel in Deekus' camp.
- Fairy Cage 4: Fairy Cage 4
- Fairy Cage 5: Fairy Cage 5
- Fairy Cage 6: Fairy Cage 6
- Great Fairy: Solitude Lighthouse, at the very top of the lighthouse, next to the stairs.
- Fairy Cage 17: Fairy Cage 17
- Fairy Cage 18: Fairy Cage 18
- Fairy Cage 7: Fairy Cage 7
- Fairy 08: Mara's Eye Pond, in the small boat docked at the island.
- Fairy Cage 9: Fairy Cage 9
- Fairy Cage 19: Fairy Cage 19
- Fairy Cage 20: Fairy Cage 20
- Fairy Cage 21: Fairy Cage 21
- Rotting Fairy: Riften Plankside outside Riften, on a small fisher boat under a bridge.
- Dead Fairy: The Silvermoon in Lake Ilinalta (unmarked location south of the Lady Stone), near the table in the former captain's quarters.
- Fairy Cage 12: Fairy Cage 12
- Hag Fairy: Outside Septimus Signus' Outpost, in a boat near the entrance.
Fish Shelves (requires BadGremlin's Something Fishy)
- Betta - Red: The White Hall in Dawnstar, on a dresser in a corner of the Jarl's quarters.
- Betta - Blue: Jarl's Longhouse in Winterhold, on a shelf in the left corner behind the throne.
- Betta - Green: Understone Keep in Markarth, on a stone pedestal in a curved side corridor in the Dwemer Museum.
- Abeclongfin: Understone Keep in Markarth, on a pedestal with other dwemer items at Calcelmo's excavation base.
- Cyrospade: Mistveil Keep in Riften, on the counter in Wylandriah's shop.
- Riverbetty: The White Hall in Dawnstar, on a shelf behind the counter in the war room with the alchemy shop.
- Histcarp: Dragonsreach in Whiterun, on the table near the alchemy lab in Farengar's quarters.
- Silverperch: Blue Palace in Solitude, on the top floor on a nightstand by the bed in Sybille's quarters.
- Guppy: Mistveil Keep in Riften, on a small table in the corridor behind the Jarl's throne.
- Diver: Treasury House in Markarth, on a pedestal between two bedrooms.
- Jellyfish: Blue Palace in Solitude, on the dresser to the right of the door leading to the kitchen.
- Fishbowl 3: Understone Keep in Markarth, to the left of the Jarl's throne.
- Fishbowl 2: Palace of the Kings in Windhelm, on a table at the back of the war room.
- Fishbowl 12: Highmoon Hall in Morthal, upper left bedroom, on the bookshelf to the left of the entrance.
- Fishbowl 15: Jarl's Longhouse in Falkreath, in the upper left bedroom, on the top shelf behind the door.
- Fishbowl 1: Dragonsreach Jarl's Quarters in Whiterun, on a shelf above the desk in the bedroom above the stairs in Proventus Avenicci's Chambers.
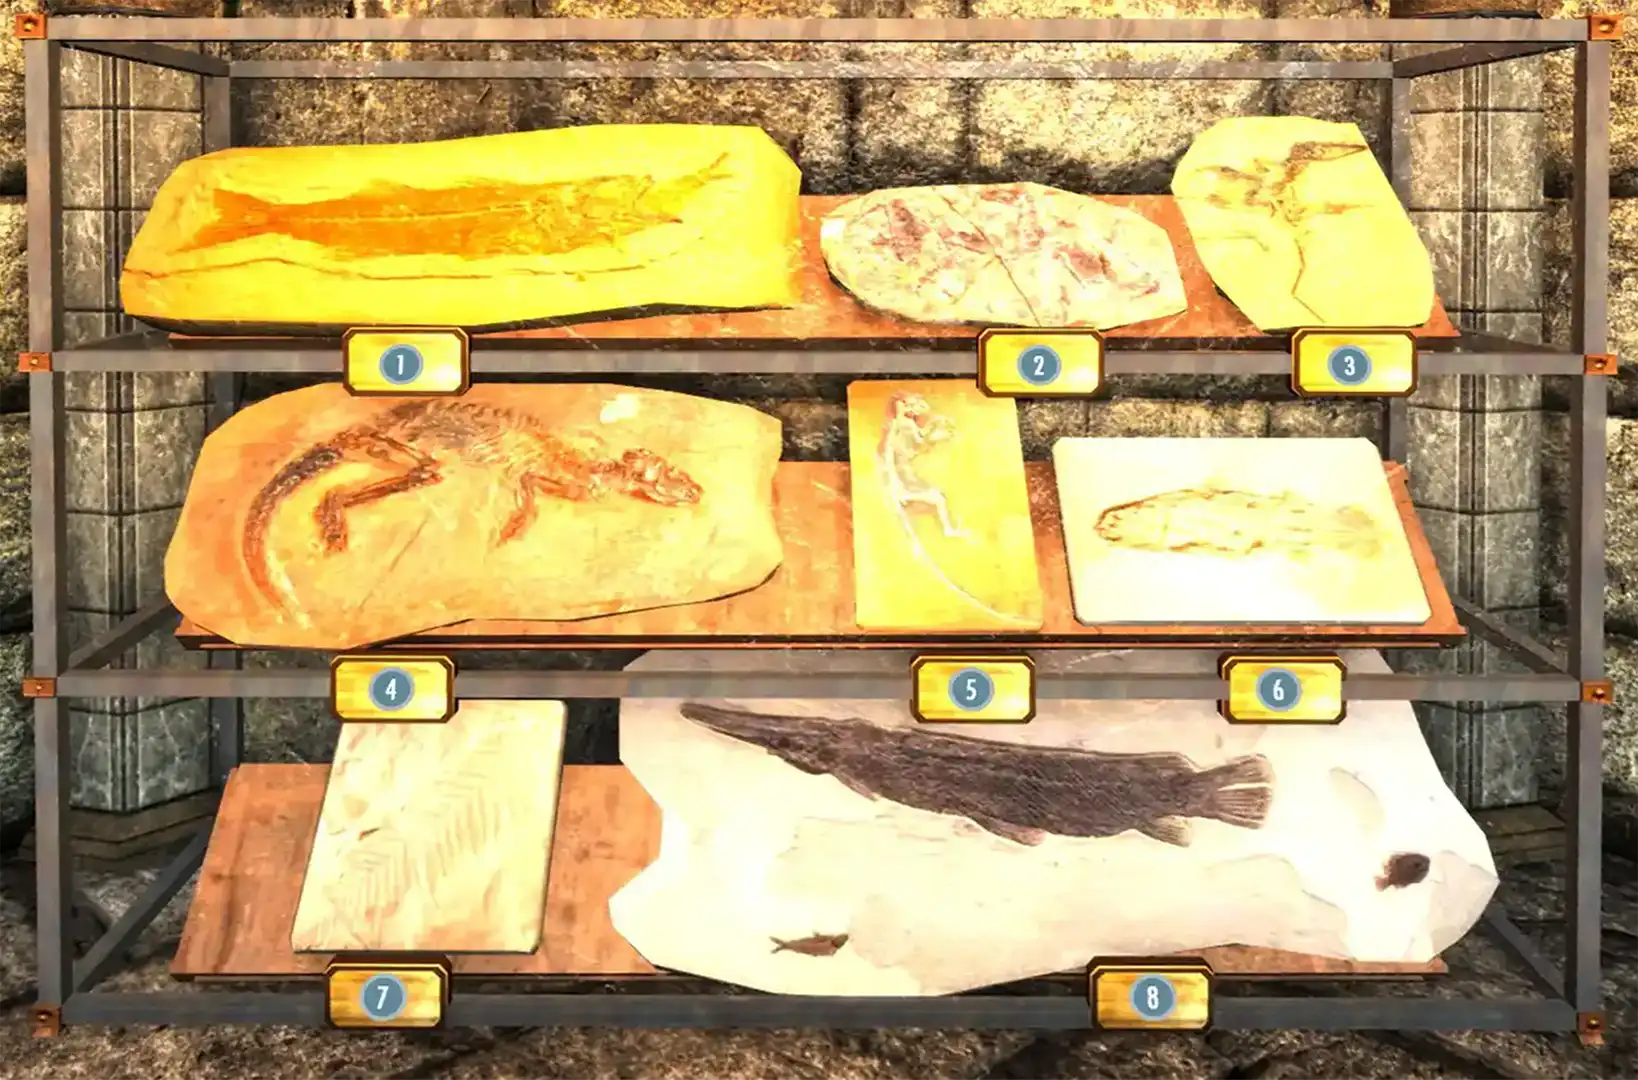
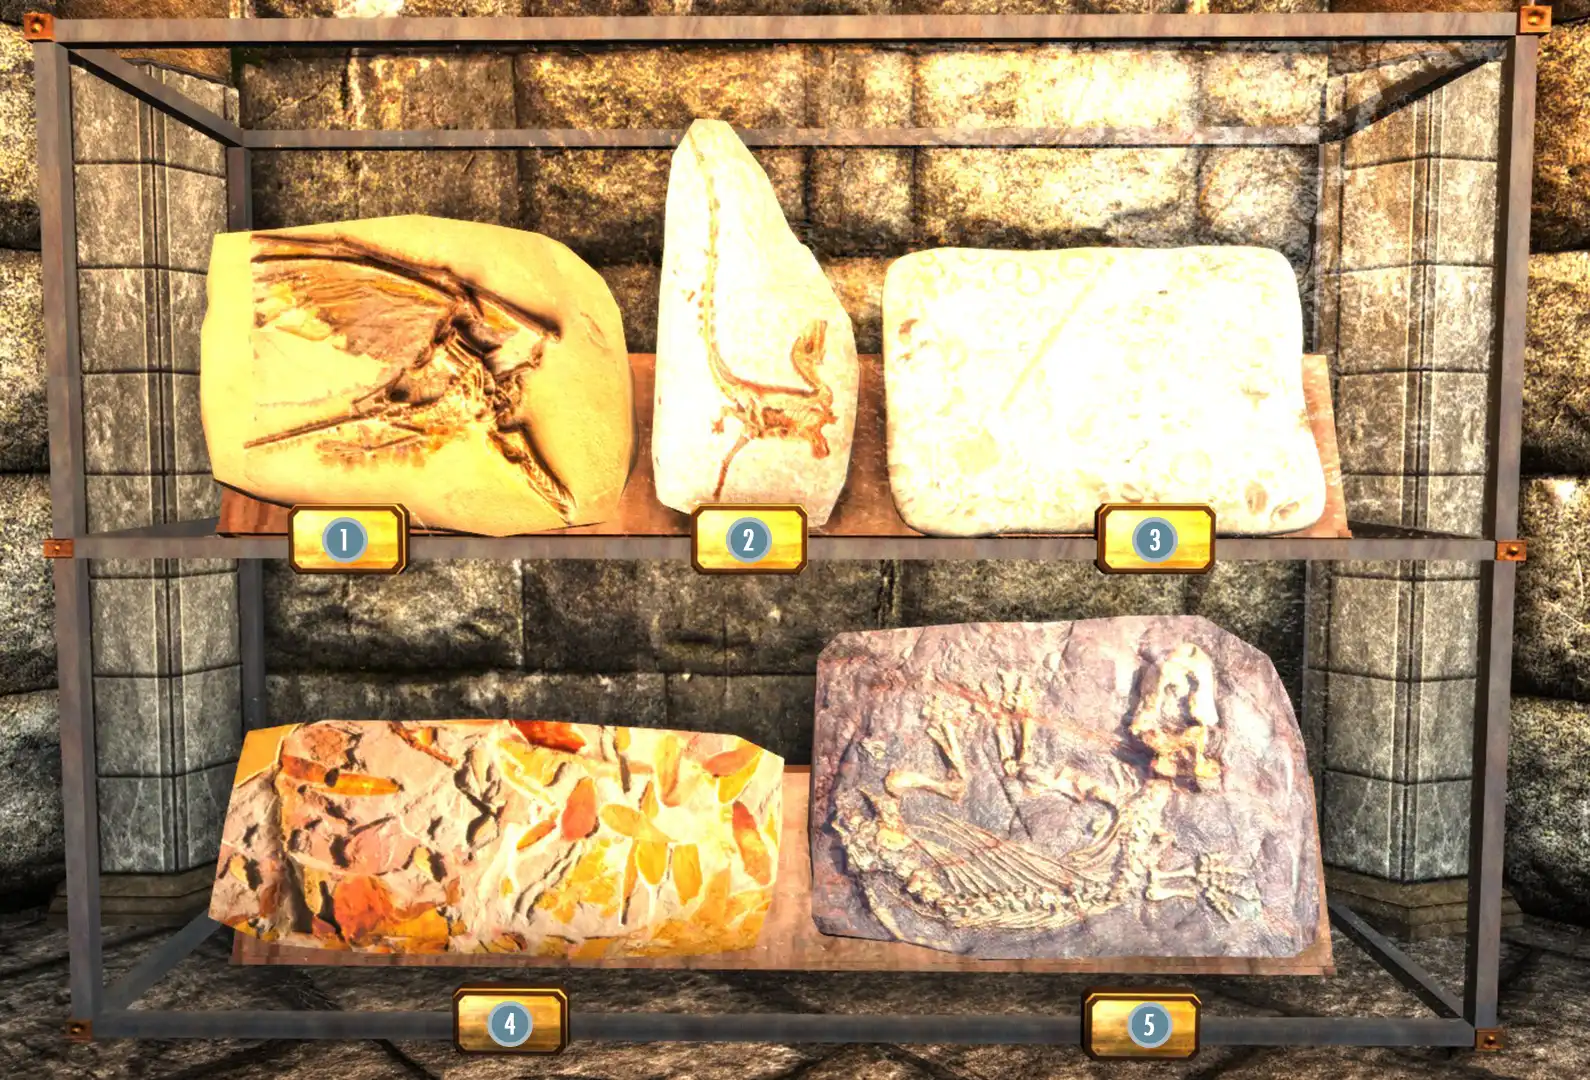
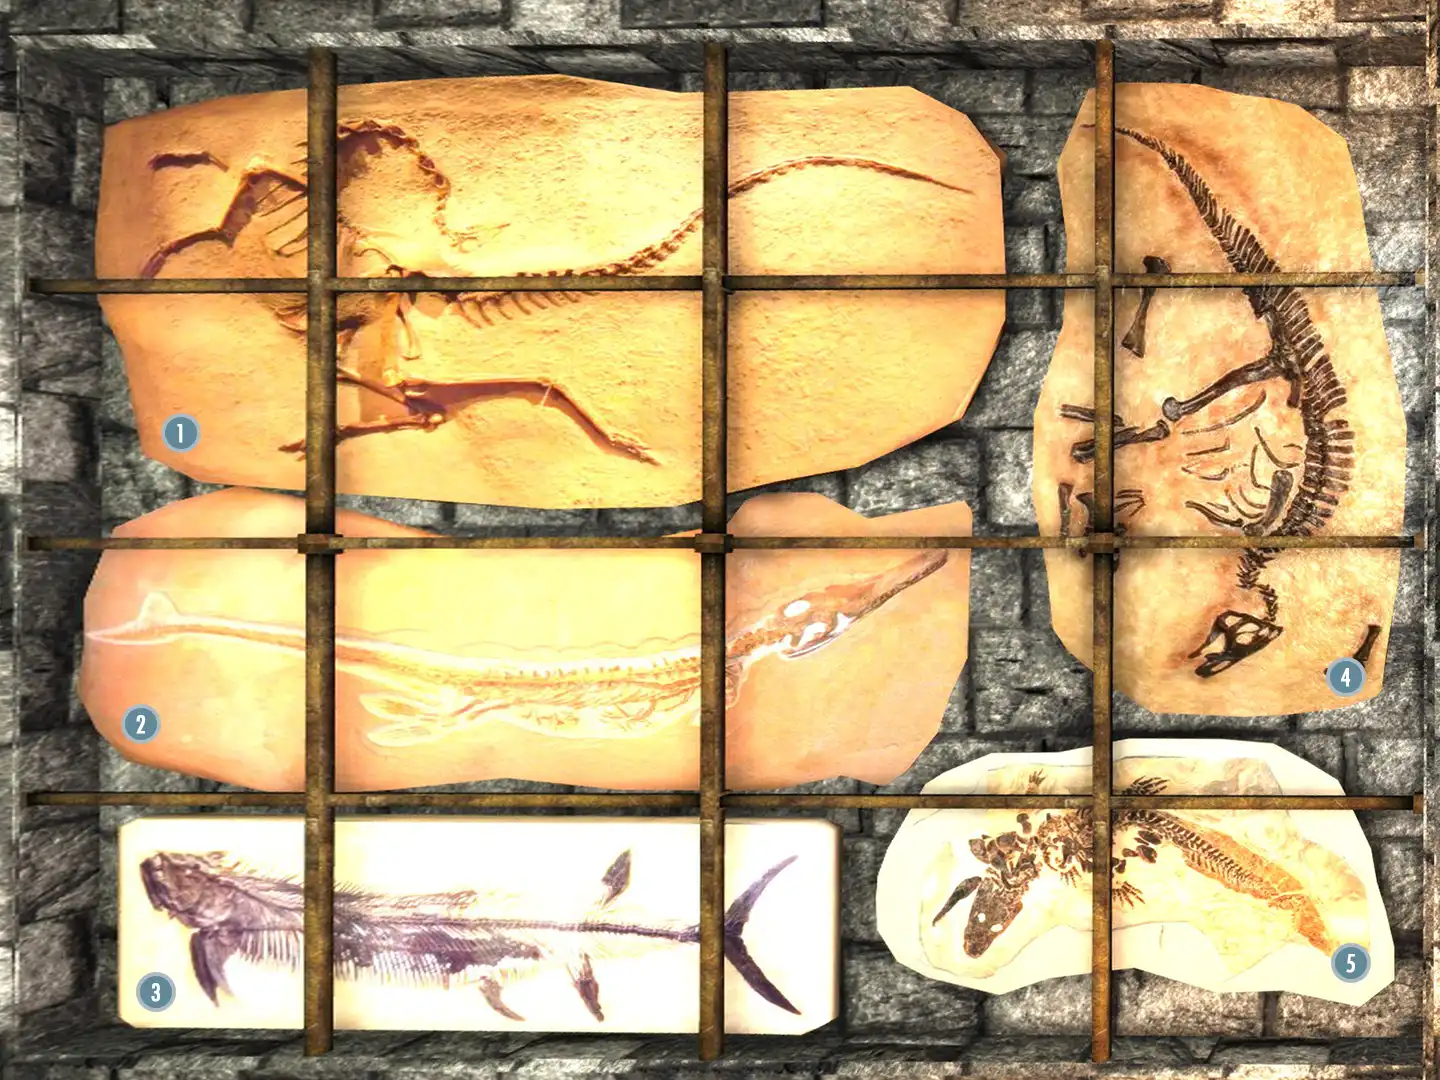
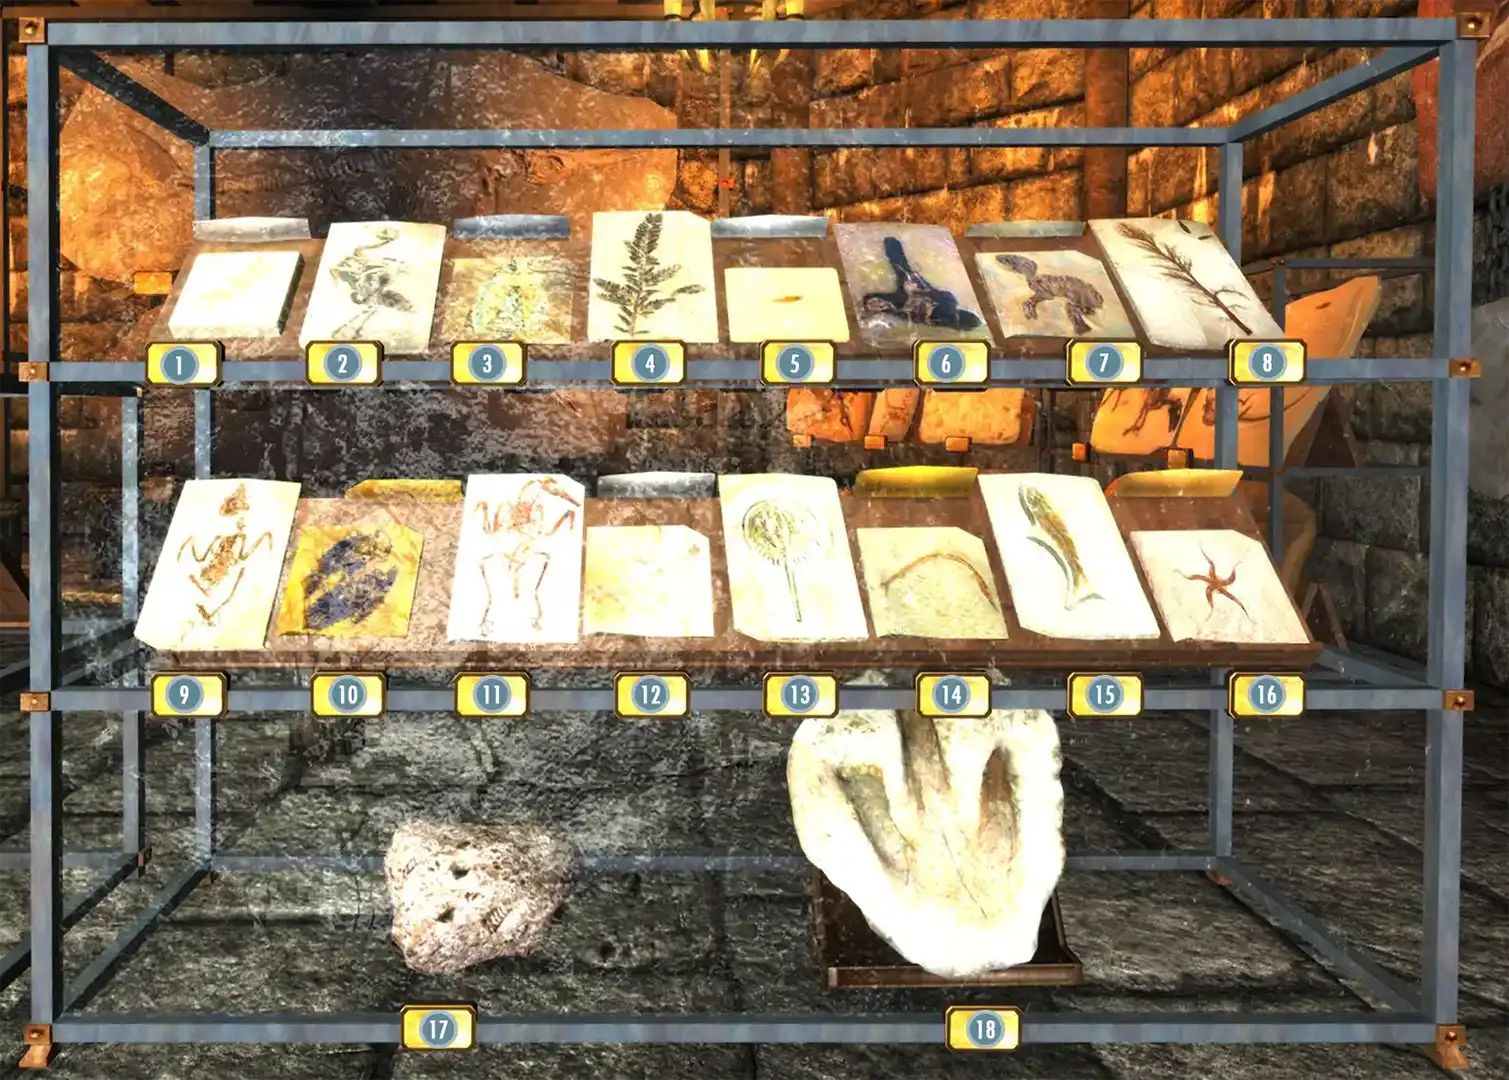
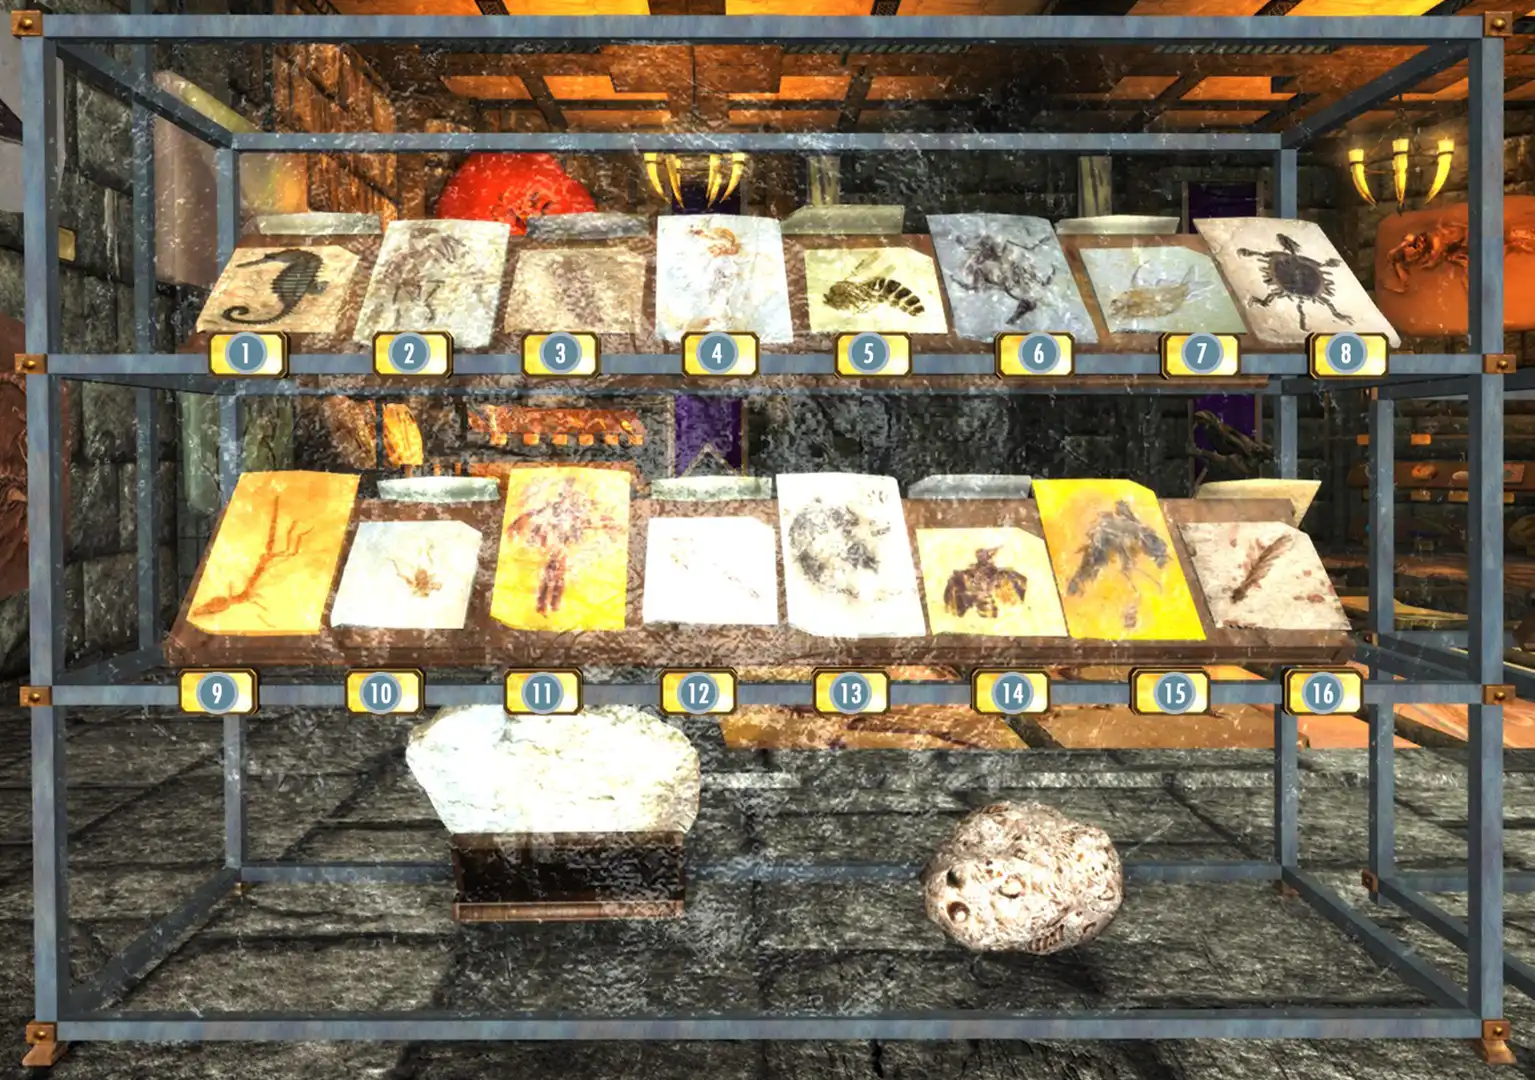
Fossil Mining Room (requires Fossil Mining)
If Fossil Mining and its Legacy of the Dragonborn Patches (Official) SE patch are installed, an extra room will be added above the Gallery of Natural Science to house the fossils found with this mod.
The fossils are divided into six different tiers, for more information see the Fossil Tiers section on the mod page.
Version 3 features a Fossil Digsite Camp owned by a new NPC, Darnette Lauven. She provides three ways to acquire more fossils. For more information, see the Fossil Digsite Camp section on the mod page.
The displays are listed as they are arranged in game, starting from the left of the entrance.
Wall Displays
South Corner Display | ||
| On the pedestal and above the display case | ||
|---|---|---|
| 1) Opalized Dragon Skull (Crystal Tier) |
2) Fighting Saurians Fossil (Tier Four) | |
| Display case - Top Row | ||
| 3) Crystallized Deer Skull (Crystal Tier) |
4) Crystallized Human Skull (Crystal Tier) |
5) Opalized Branch (Crystal Tier) |
| 6) Crystallized Shell (Crystal Tier) |
7) Crystallized Tooth (Crystal Tier) | |
| Middle Row | ||
| 8) Crystallized Scale Impression (Crystal Tier) |
9) Ammonite Fossil (Tier Two) |
10) Opalized Grass (Crystal Tier) |
| 11) Crystallized Beetle Fossil (Crystal Tier) |
12) Crystallized Ammonite Fossil (Crystal Tier) | |
| Bottom Row | ||
| 13) Opalized Mudcrab Claw (Crystal Tier) |
14) Opalized Ancient Squids (Crystal Tier) |
15) Agatized Pinecone (Crystal Tier) |
| 16) Opalized Dragon Bones (Crystal Tier) | ||

South-Western Wall Display - Left | |
|---|---|
| 1) Tyrant Lizard Fossil (Tier Four) |
3) Colossal Crocodile Fossil (Tier Three) |
| 2) Large Reptile Fossil (Tier Three) |
4) Bird-Hipped Saurian Fossil (Tier Three) |

South-Western Wall Display - Right | ||
|---|---|---|
| Wall display | ||
| 1) Large Cliffracer Fossil (Tier Three) |
2) Bipedal Mammal Fossil (Tier Three) |
3) Frilled Saurian Fossil (Tier Four) |
| Display case - Top Row | ||
| 4) Winged Saurian Fossil (Tier Four) |
5) Ancient Horse Fossil (Volcanic Tier) | |
| Bottom Row | ||
| 6) Small Feathered Saurian Fossil (Tier Three) |
7) Primitive Birds Fossils (Tier Three) |
8) Venomous Feathered Saurian Fossil (Tier Three) |

West Corner Display | ||||
|---|---|---|---|---|
| Top Row | ||||
| 1) Gulping Fish Fossil (Tier Three) |
2) Gliding Saurian Fossil (Tier Three) |
3) Small Primitive Cliffracer Fossil (Tier Three) | ||
| Middle Row | ||||
| 4) Primitive Hedgehog Fossil (Tier Two) |
5) Ancient Mammal Fossil (Tier Three) |
6) Fossilized Fish (Tier Three) | ||
| Bottom Row | ||||
| 7) Fern Fossil (Tier Two) |
8) Longfish Fossil (Tier Three) | |||

Back (NW) Wall Display |
|---|
| 1) Ancient Spearmouth Female (Tier Four) |
| 2) Ancient Spearmouth Male (Tier Three) |

North Corner Display | ||
|---|---|---|
| Top Row | ||
| 1) Darkwing Fossil (Tier Three) |
2) Feathered Saurian Fossil (Tier Three) |
3) Fossilized Sea Bed (Tier Two) |
| Bottom Row | ||
| 3)Fallen Leaves Fossil (Tier Three) |
5) Small Reptile Fossil (Tier Three) | |

North-Eastern Wall Display - Left | ||
|---|---|---|
| Display case - Top Row | Wall display | |
| 1) Drowned Ancient Horse Fossil (Volcanic Tier) |
2) Swimming Lizard Fossil (Tier Two) |
5) Ancient Lizard Fossil (Tier Four) |
| Bottom Row | 6) Incomplete Saurian Fossil (Tier Three) | |
| 3) Primitive Horse Fossil (Tier Three) |
4) Giant Dragonfly Fossil (Tier Three) | |

North-Eastern Wall Display - Center | |
|---|---|
| 1) River Crocodile Fossil (Tier Three) |
3) Ancient Cliffracer Fossil (Tier Four) |
| 2) Complete Saurian Fossil (Volcanic Tier) |
4) Primitive Deer Fossil (Tier Three) |

North-Eastern Wall Display - Right | ||
|---|---|---|
| Top Row | ||
| 1) Ancient Bird Fossil (Tier Three) |
2) Primitive Squirrel Fossil (Tier Three) |
3) Incomplete Fossil (Tier Two) |
| Bottom Row | ||
| 4) Carnivorous Mammal Fossil (Tier Three) |
5) Small Saurian Fossil (Tier Three) | |

East Corner Display | |||
|---|---|---|---|
| Wall display above the display case | |||
| Large Fossilized Clutch (Tier Four) | |||
| Display Case - Top Row | |||
| 1) Fossilized Tooth (Tier Three) |
2) Fossilized Trilobite (Tier Two) |
3) Embedded Small Trilobite Fossil (Tier Two) | |
| 4) Fossilized Nautilus (Tier Two) |
5) Fossilized Shark Tooth (Tier One) |
6) Amber-Trapped Saurian Tail (Tier Three) | |
| Middle Row | |||
| 7) Fossilized Bird Print (Tier One) |
8) Fossilized Claw (Tier Three) |
9) Primitive Sabretooth Fang (Tier Two) |
10) Moss Fossil (Tier Two) |
| 11) Small Fossilized Sabre Cat Print (Tier One) |
12) Ammonite Shell (Tier Two) |
13) Fossilized Eggshell (Tier One) | |
| Bottom Row | |||
| 14) Small Fossilized Coral (Tier One) |
15) Fossilized Egg (Tier Three) |
16) Fossilized Bone Fragment (Tier One) | |
| 17) Petrified Wood (Tier One) |
18) Small Fossilized Stem (Tier One) |
19) Amber (Tier Two) | |


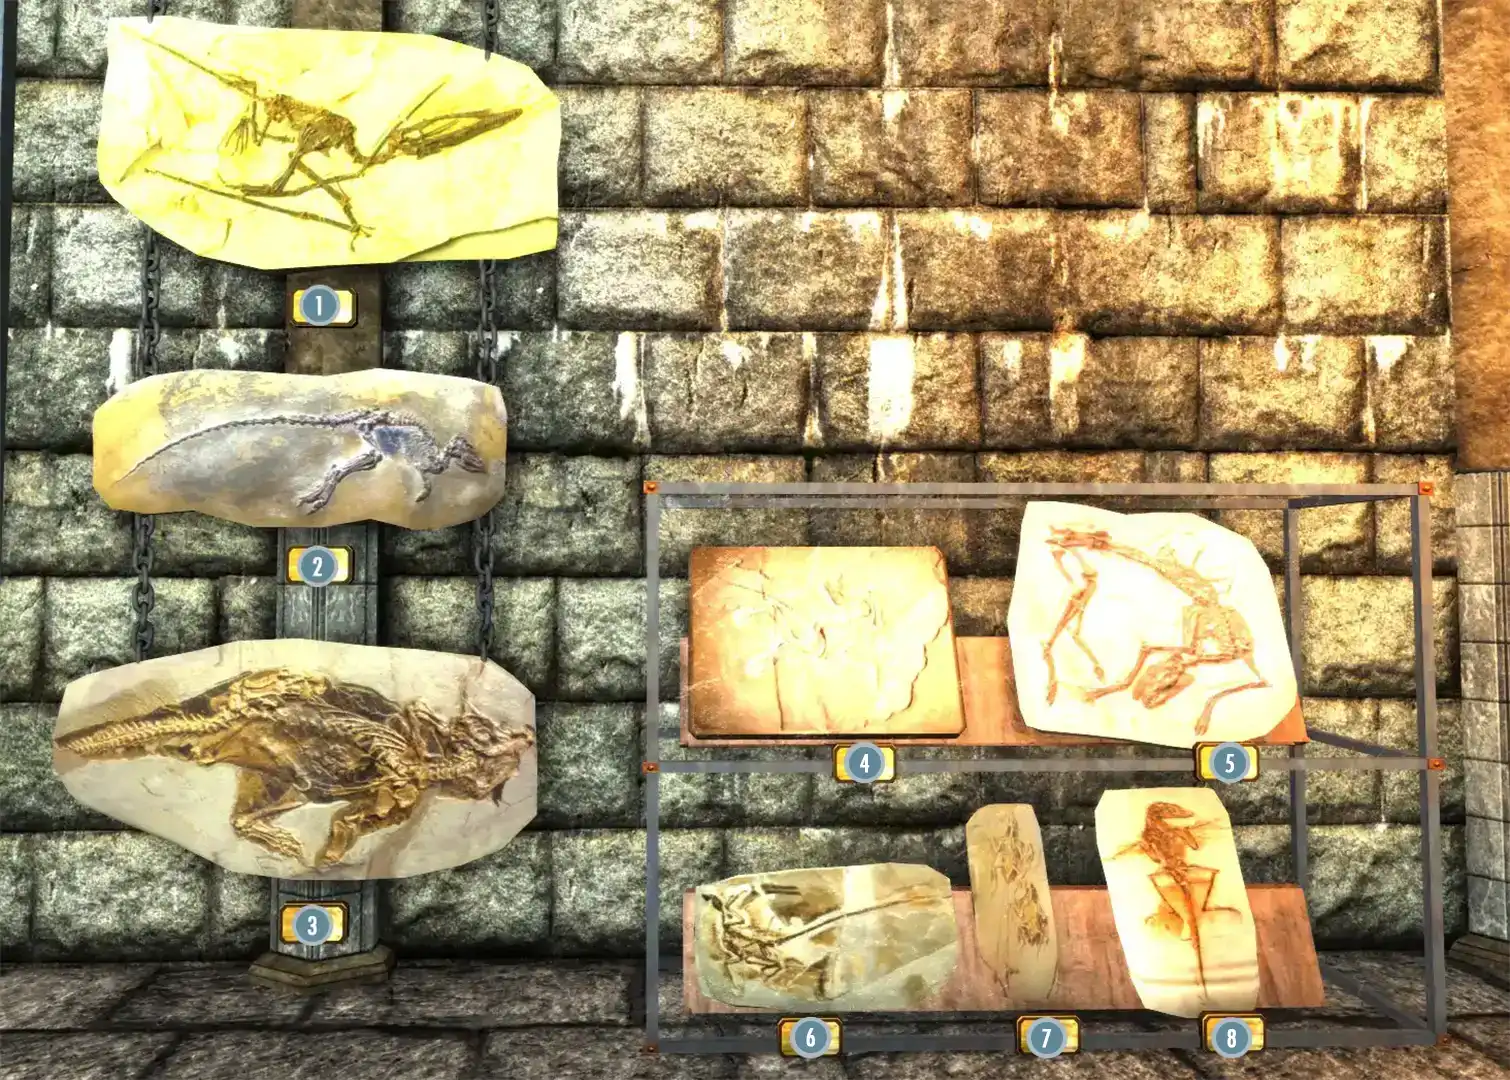
Center Displays
Floor Display | |
|---|---|
| 1) Large Beaked Saurian Fossil (Tier Four) | 4) Duck-Billed Saurian Fossil (Volcanic Tier) |
| 2) Sea Creature Fossil (Tier Three) | |
| 3) Ancient Carnivore Fossil (Tier Four) | 5) Primitive Amphibian Fossil (Tier Four) |


Display Case 2 | ||||
|---|---|---|---|---|
| Top Row | ||||
| 1) Fossilized Embryo (Tier Four) |
2) Druzy Gastropod (Tier Three) |
3) Damaged Saurian Tooth (Tier One) |
4) Coprolite (Tier One) |
5) Intact Fossilized Mammal Skull (Tier Three) |
| Bottom Row | ||||
| 6) Fossilized Herbivore Egg (Tier Three) |
7) Fossilized Jawbone (Tier Three) | |||


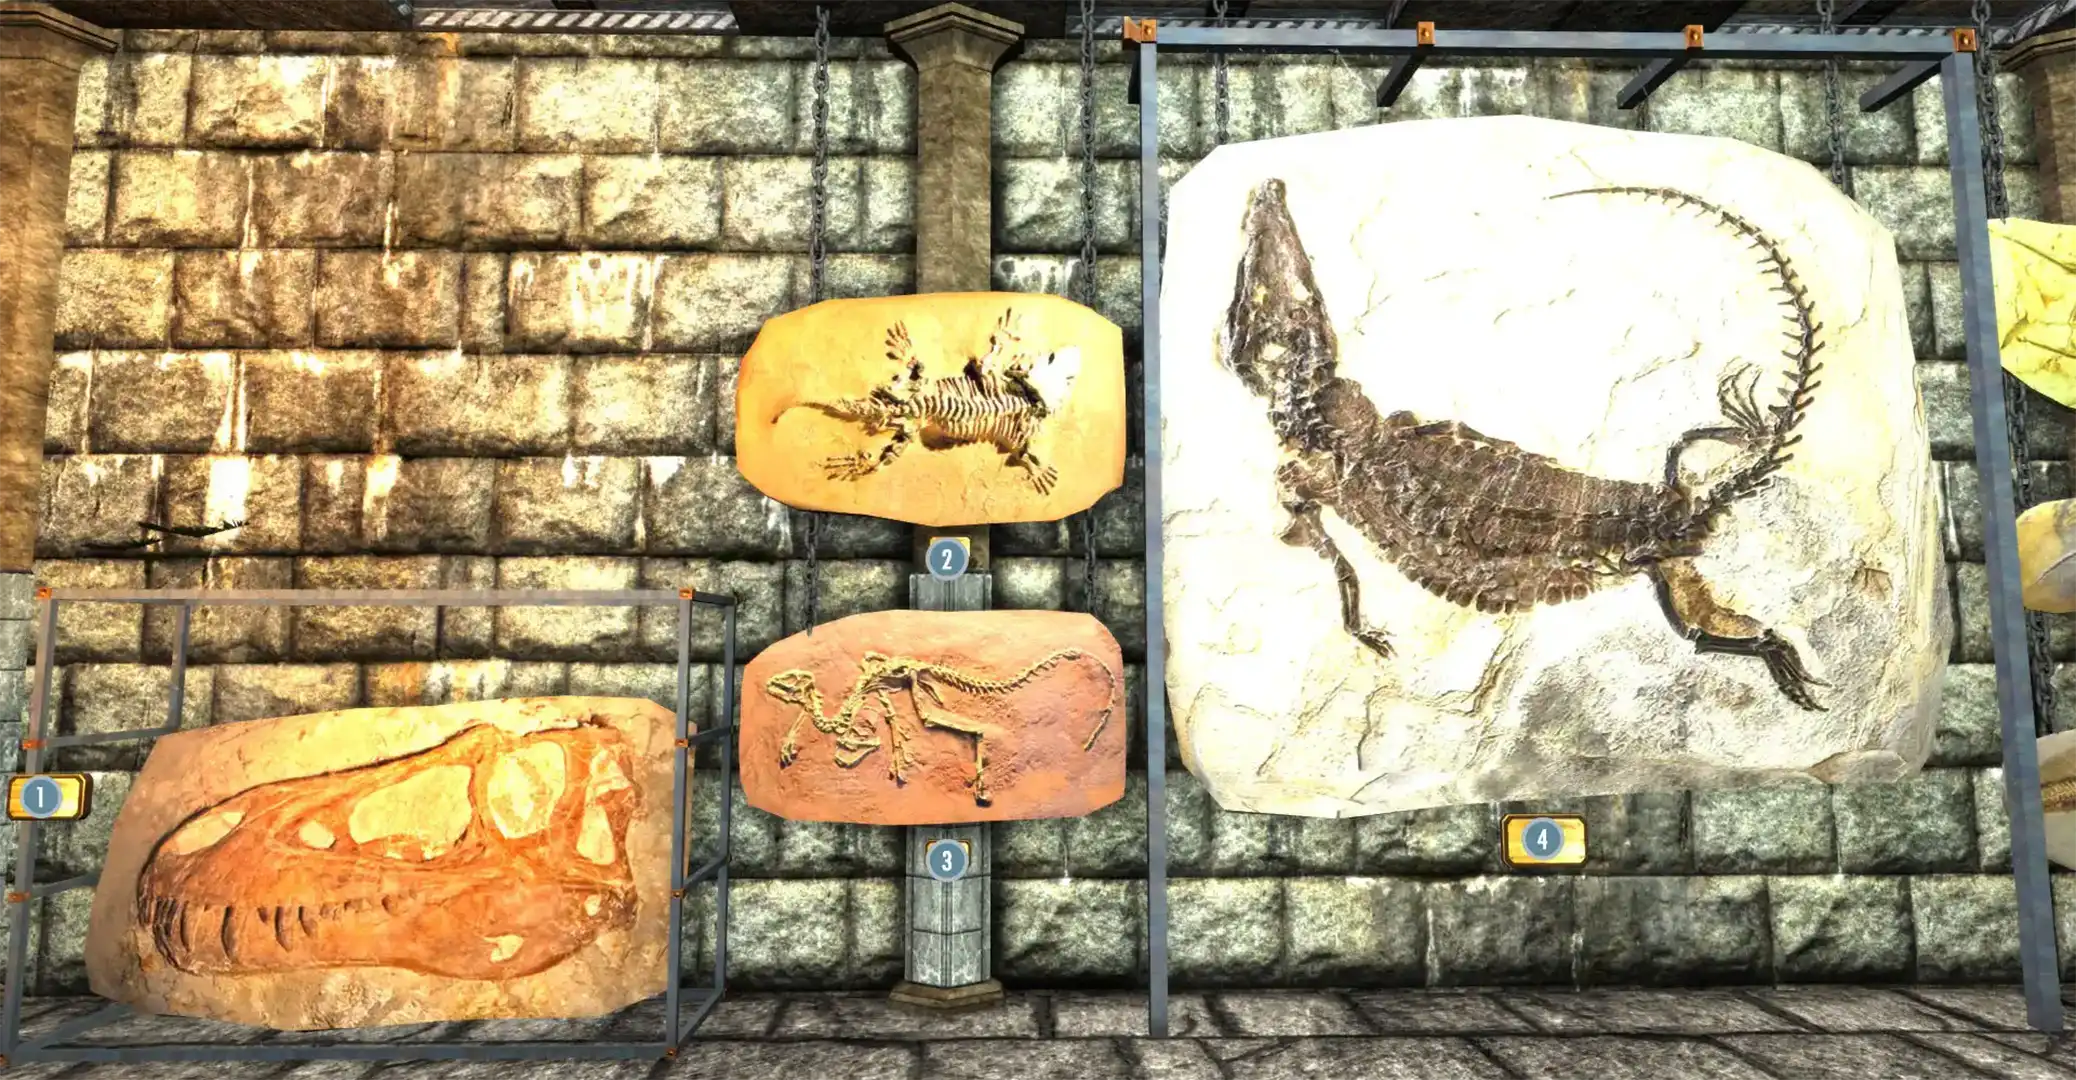
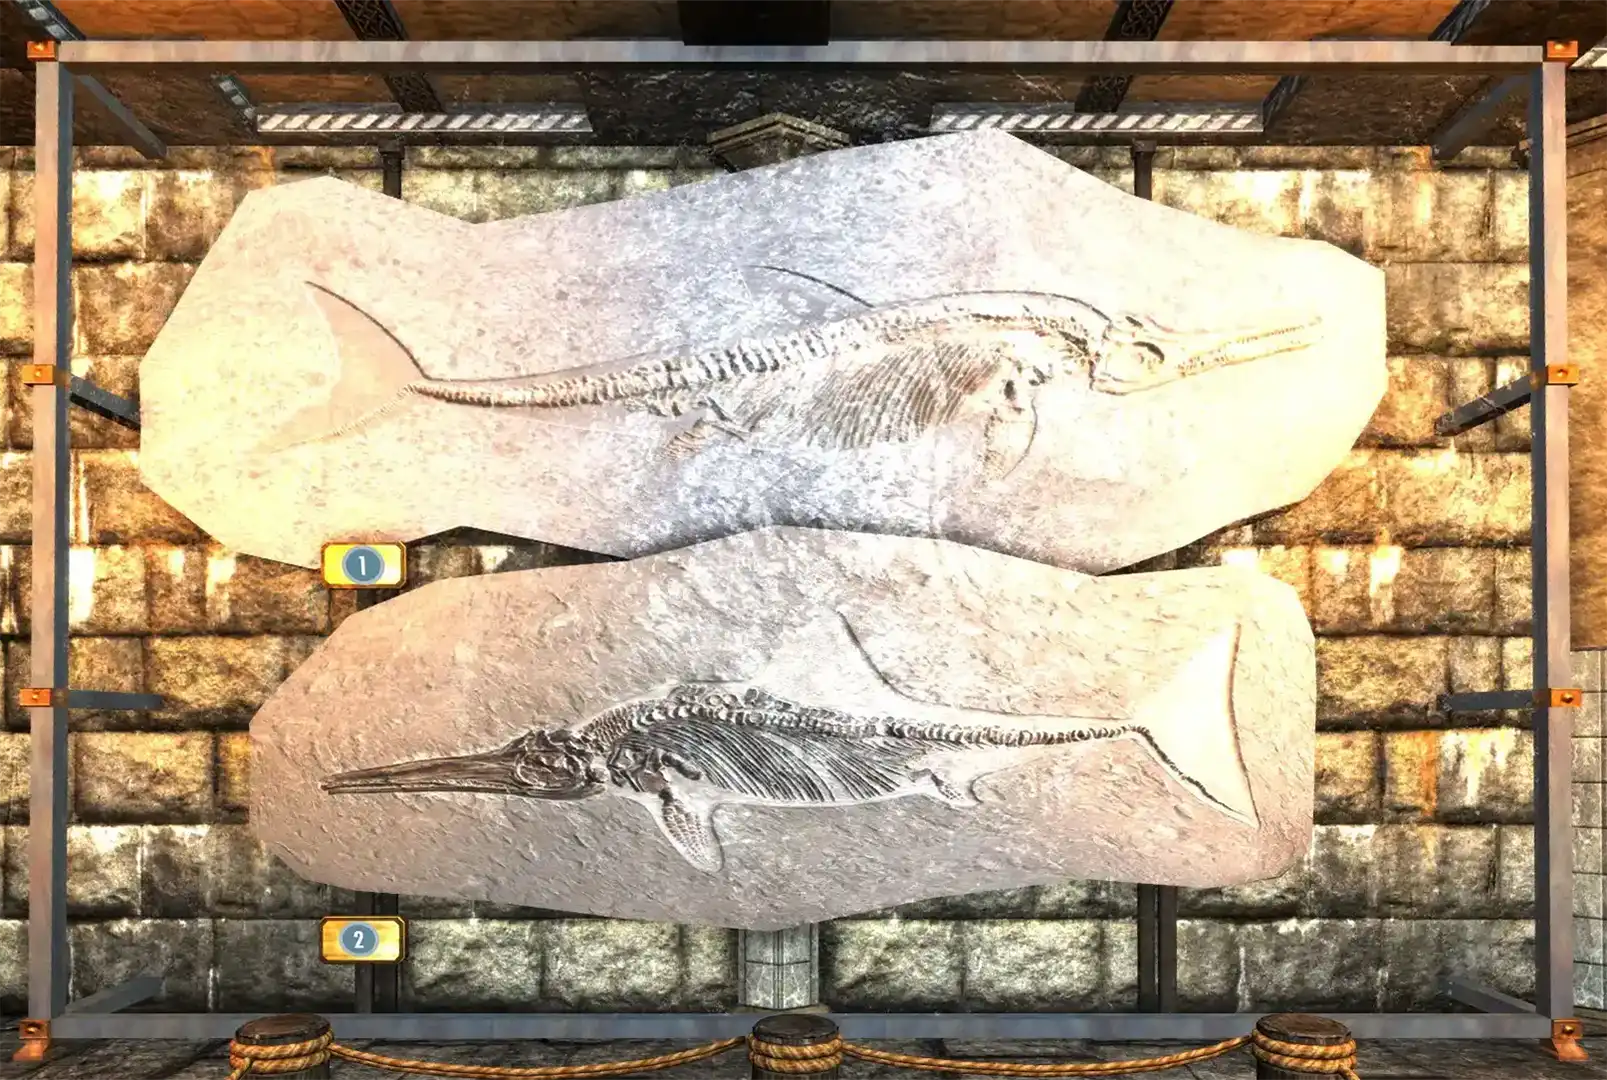
Fossilized Dragon Display |
|---|
| Fossilized Dragon Skeleton (Tier Three) |


Hall of Oddities
The Hall of Oddities is located in the East Exhibit Halls to the left of the lower level of the Hall of Heroes and features display cases for "odd" or special artifacts, weapons and shields. The display in the middle of the room is 'The Spoils of Adventure' and will show up after 300 displays in the gallery.
The Hall of Oddities features the following additional display rooms if you have the mods and their respective Legacy of the Dragonborn Patches (Official) SE patches loaded:
- Skyrim's Unique Drinks Room
- Great Jarhunt Room
- Interesting NPCs Room
- Skyrim's Unique Treasures Room
- Vigilant Room
- Wyrmstooth Room
Below is a list of all displays.
Wall Displays
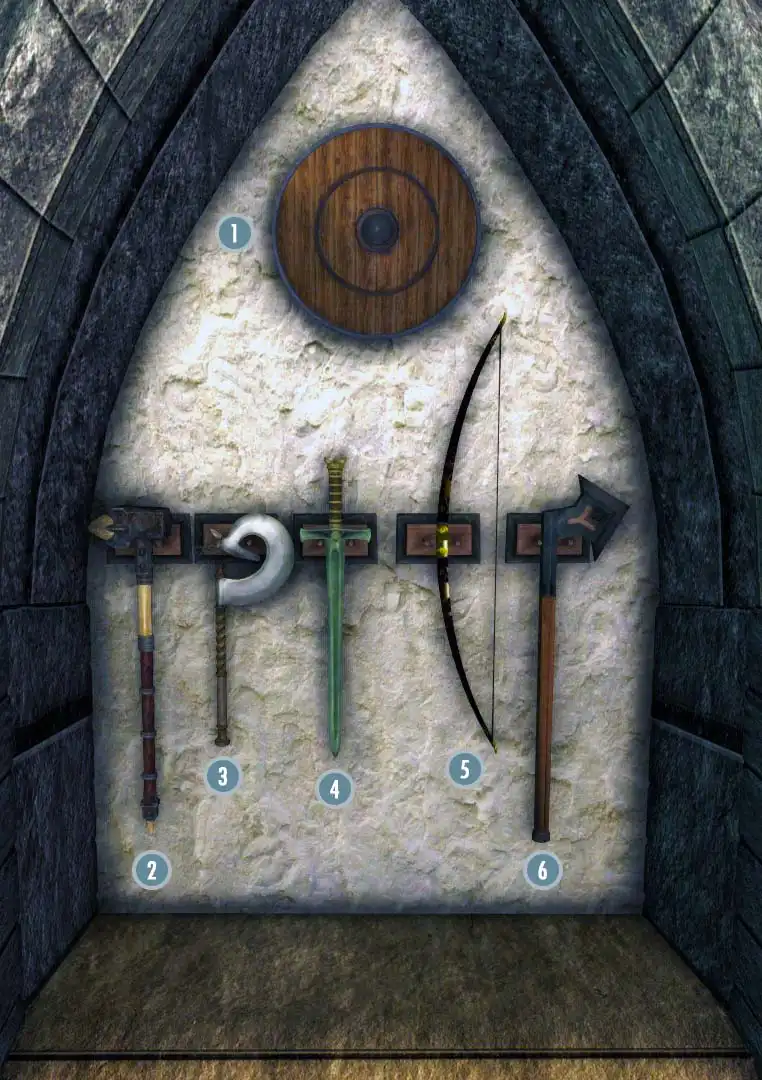
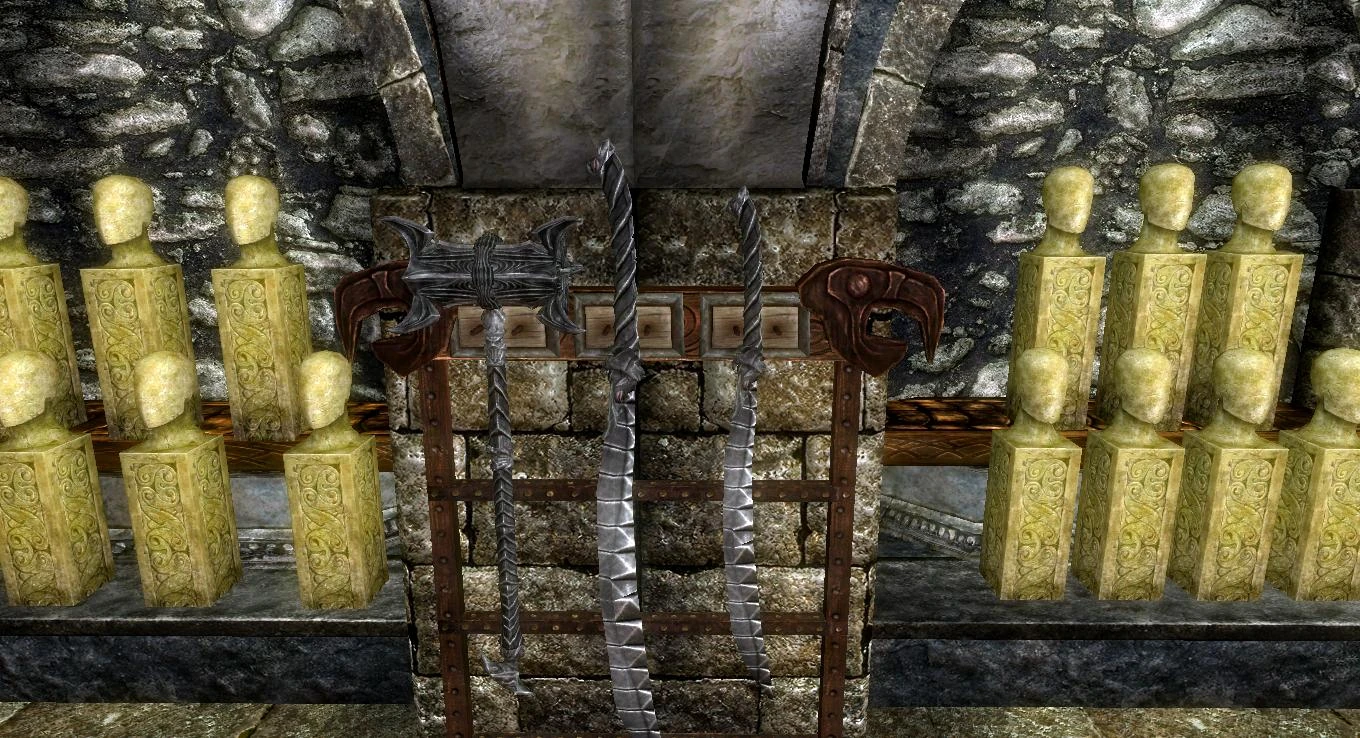
Left of Doorway | |
|---|---|
| 1) Roggi's Ancestral Shield (replica) | |
| 2) Shagrol's Warhammer (replica) | |
| 3) Poacher's Axe | |
| 4) Hjalti's Sword (replica) | |
| 5) Angi's Bow | |
| 6) The Woodsman's Friend | |

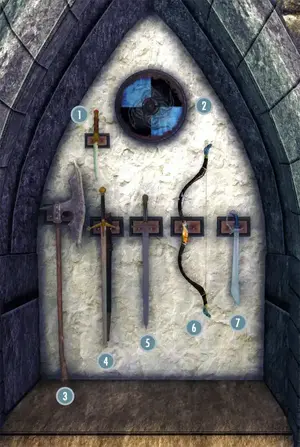
Right of Doorway | |
|---|---|
| 1) Alessandra's Dagger (replica) | |
| 2) Hrolfdir's Shield (replica) | |
| 3) Headsman's Axe | |
| 4) Balgruuf's Greatsword (replica) | |
| 5) Queen Freydis's Sword (replica) | |
| 6) Dravin's Bow (replica) | |
| 7) Amren's Family Sword (replica) | |

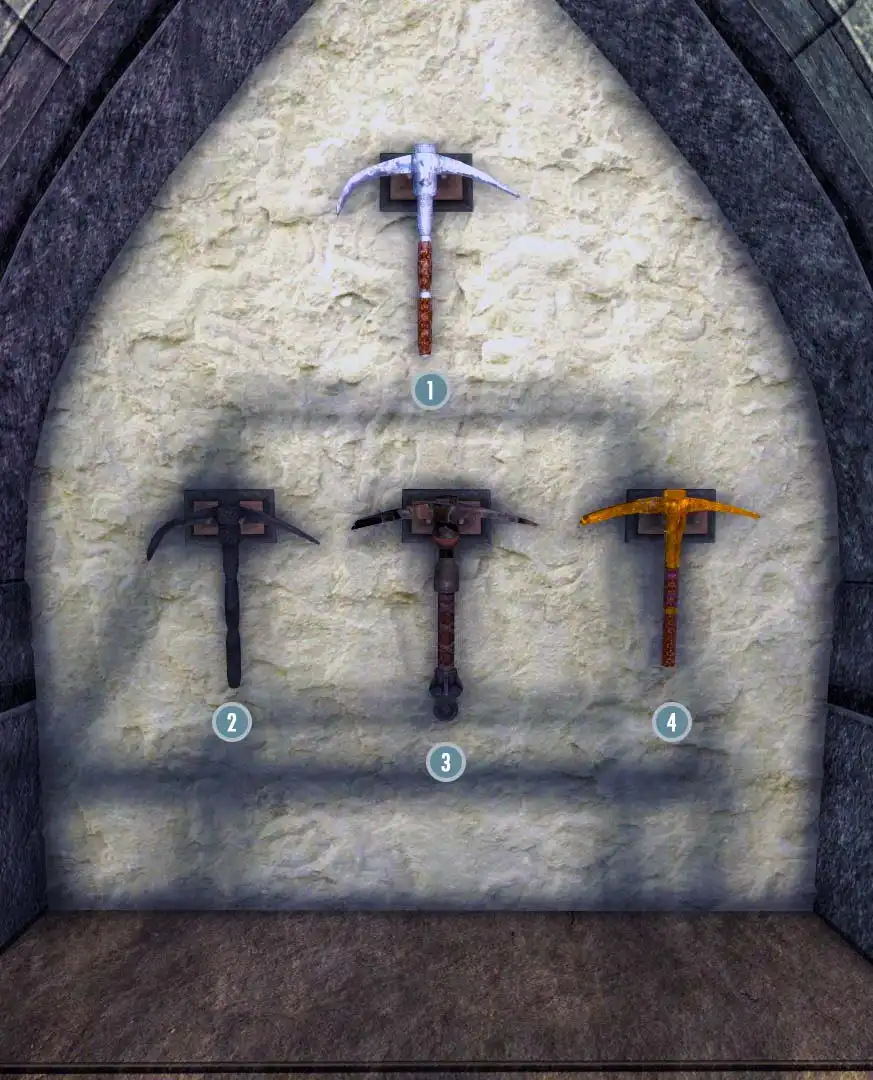
Pickaxes | |
|---|---|
| 1) Hoarfrost | 3) Rocksplinter |
| 2) Ancient Nordic Pickaxe | 4) Notched Pickaxe |

Glass Cases
Jade Case | ||
|---|---|---|
| Top Row | ||
| 1) Jade Priest | 3) Jade Museum Logo (requires The Curator's Companion) | |
| 2) Jade Skull | 4) Jade Palace | |
| Middle Row | ||
| 5) Jade Dragon 3 | 8) Jade Dragon 5 | |
| 6) Jade Dragon 4 | 9) Jade Dragon 1 | |
| 7) Jade Dragon 2 | ||
| Bottom Row | ||
| 10) Jade Warrior 1 | 12) Jade Warrior 2 | |
| 11) Jade Lady | 13) Jade Elder | |

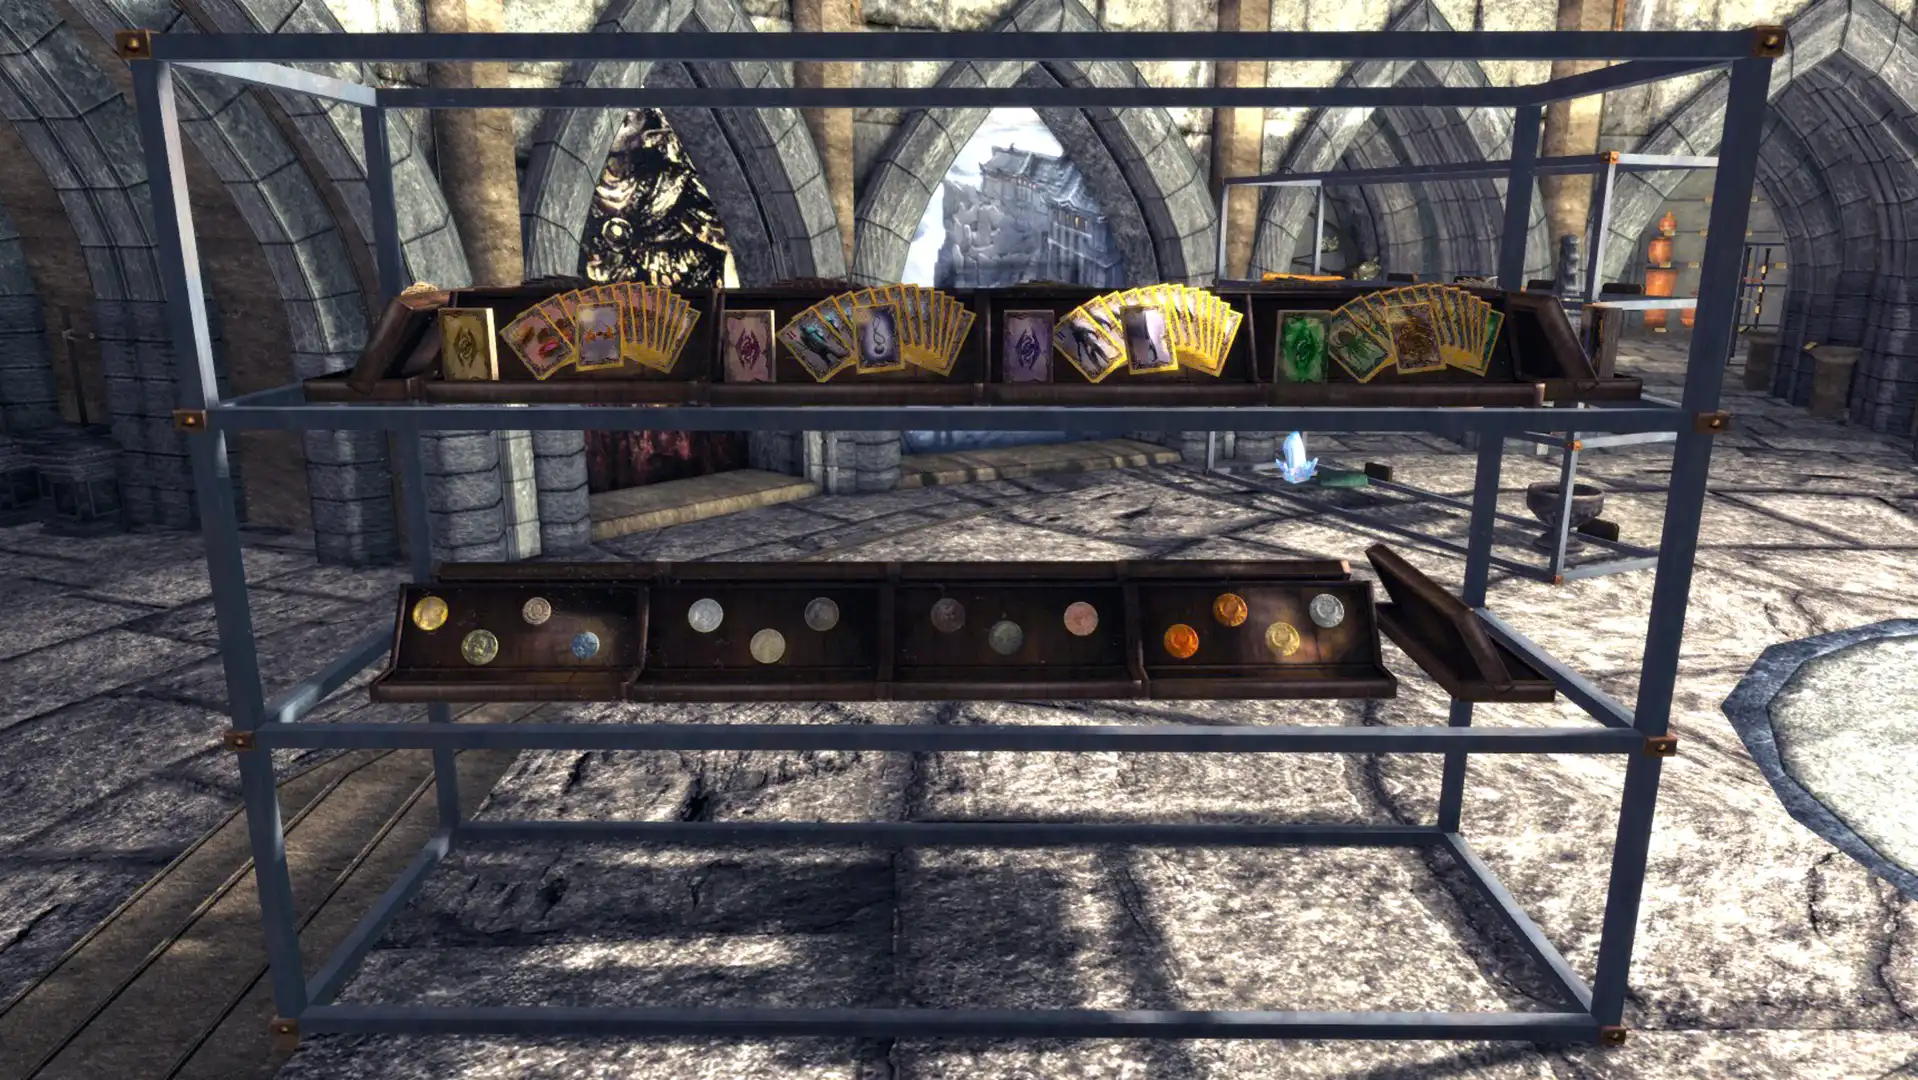
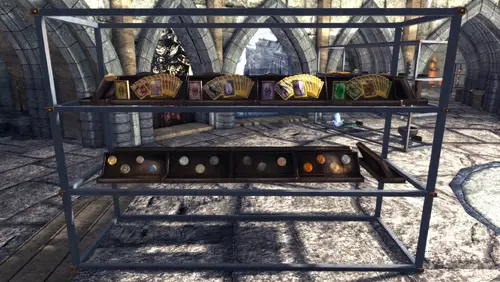
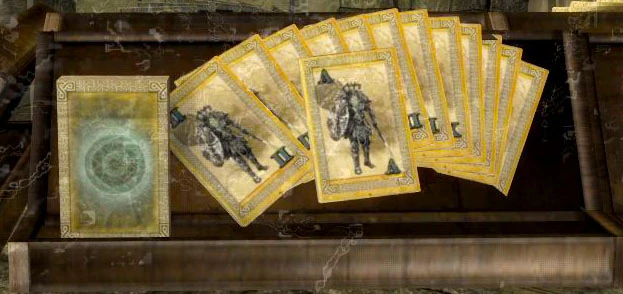
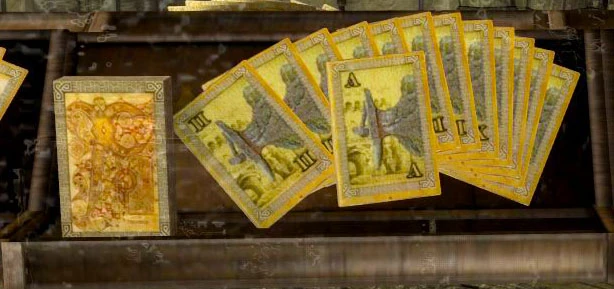
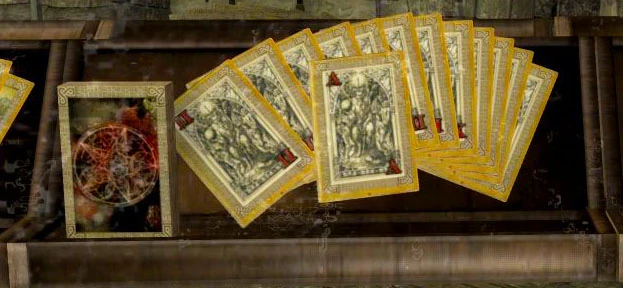
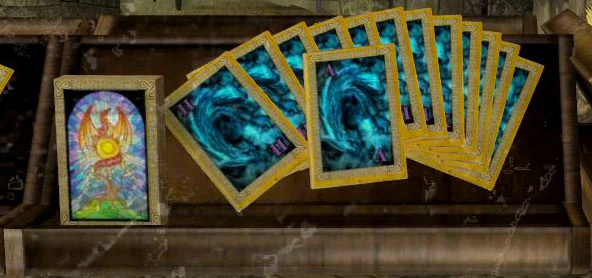
Fate Cards & Coins Case - Front
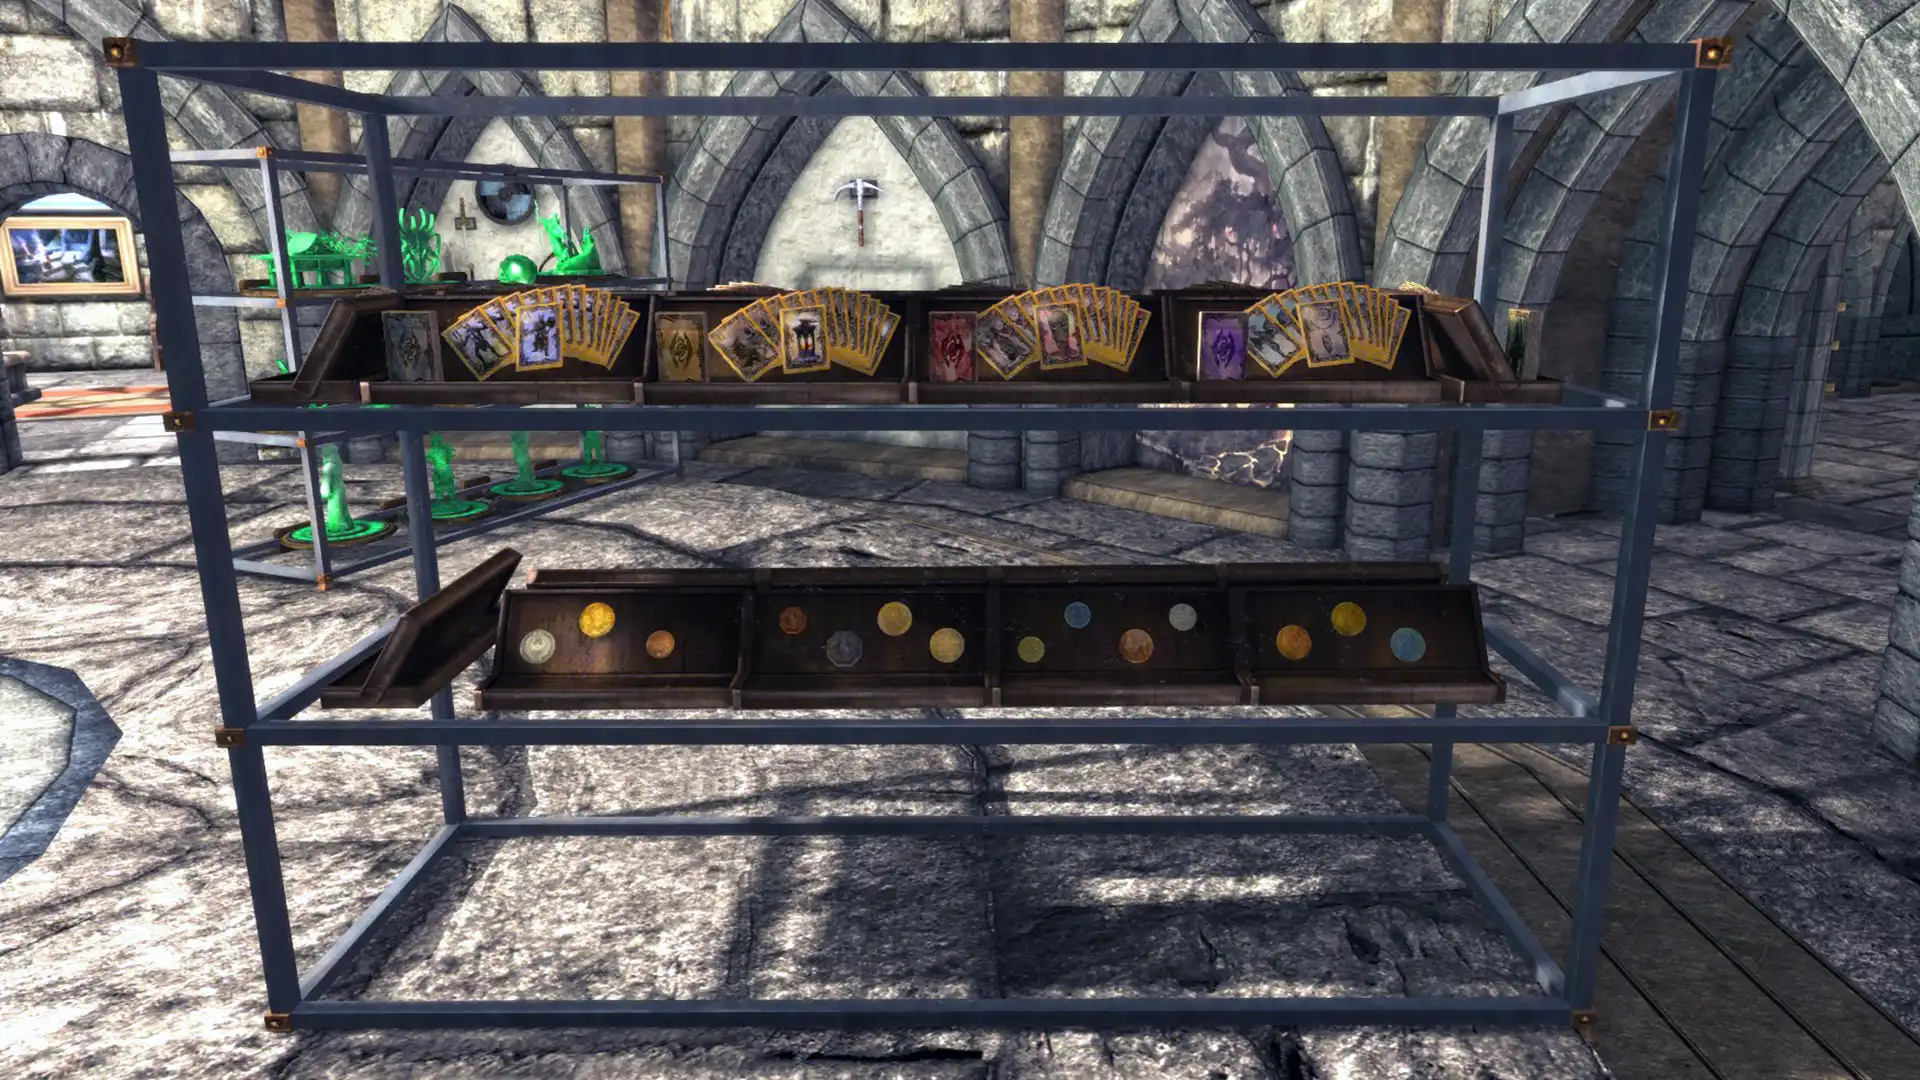

Fate Cards & Coins Case - Back
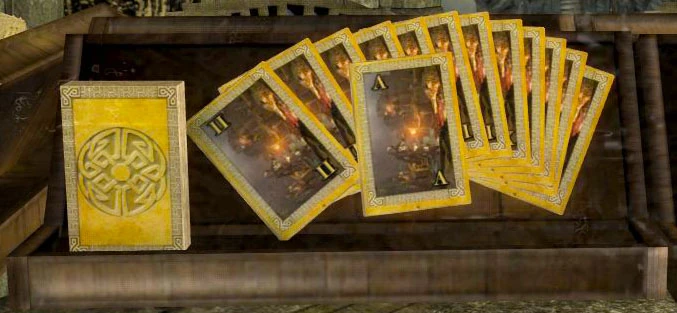
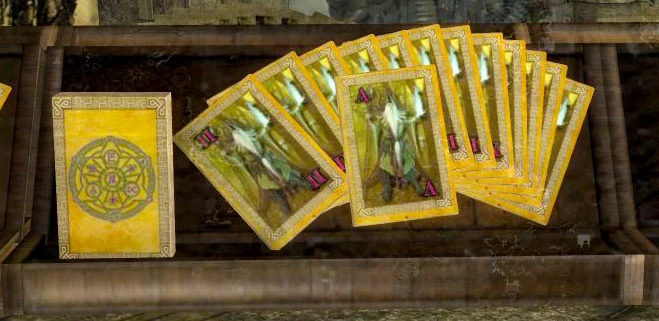
Fate Cards Deck Case | |
|---|---|
| Front | |
|
Deck of Fortune |
| Deck of Mystics | |
|
Deck of Shadows |
| Deck of Spiders | |
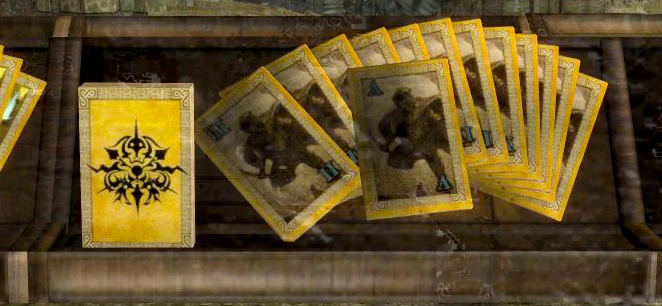
| Back | |
|
Deck of Arms |
| Deck of Builders | |
|
Deck of Demons |
| Deck of Draconians | |
| Sides | |
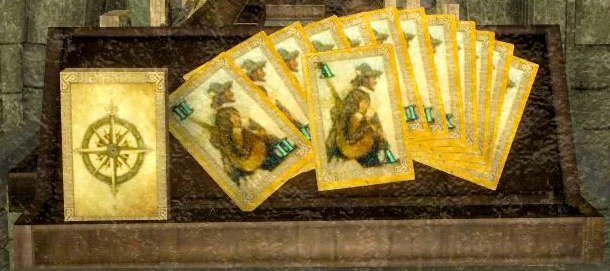 
|
Deck of Travelers |
| Deck of Walls | |
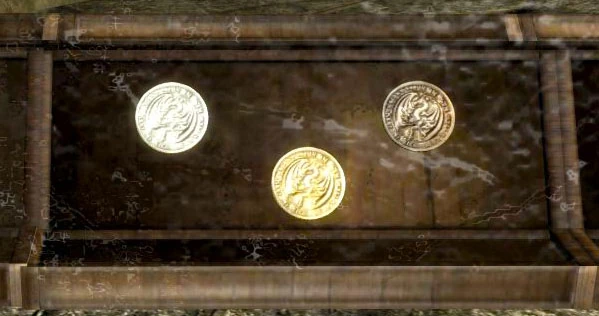
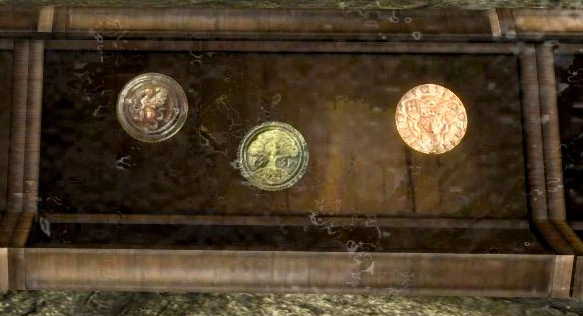
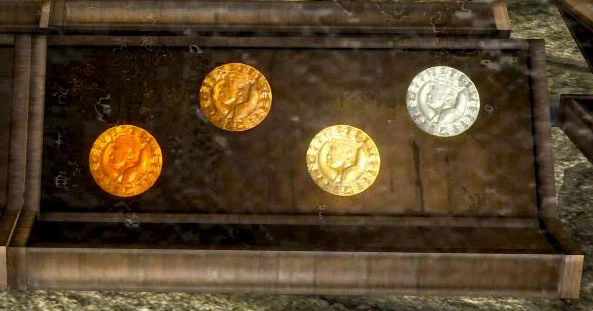
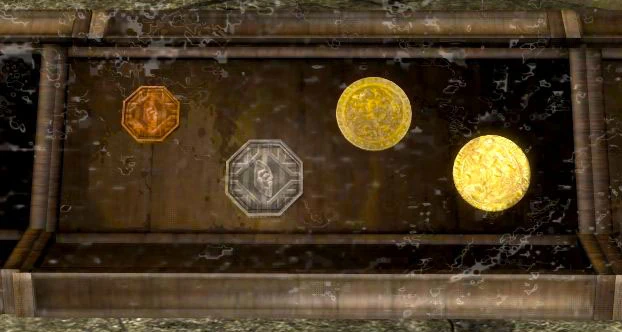
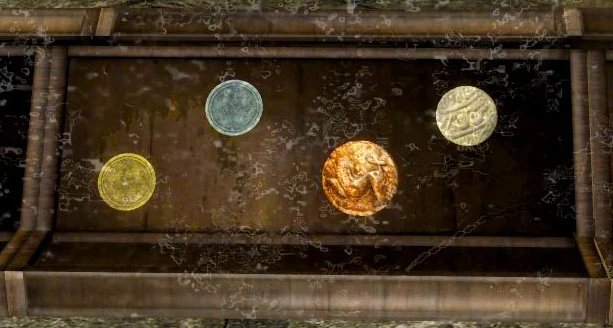
Coins Case | |
|---|---|
|
Note: You can't place single coins. If you activate the Coin Collection, | |
| Front | |
| Akaviri Royal Seal | |
| Summerset Royal Mark | |
| Valenwood Brass Star Coin | |
| Valenwood Cobalt Star Coin | |
| Akaviri Dragon Silver Piece | |
| Akaviri Dragon Gold Piece | |
| Akaviri Dragon Bronze Piece | |
| Atmoran Bronze Seal | |
| Dominion Bronze Piece | |
| Mage's Guild Copper Seal | |
| High Rock Copper Crown | |
| High Rock Bronze Crown | |
| High Rock Gold Crown | |
| High Rock Silver Crown | |
| Side | |
| Old Man's Lucky Coin | |
| Back | |
| Potema Silver Piece | |
| Potema Gold Piece | |
| Potema Copper Piece | |
| Dwemer Copper Mark | |
| Dwemer Platinum mark | |
| Akaviri Brass Token | |
| Atmoran Kingmaker Mark | |
| Whiterun Gold Proof | |
| Whiterun Silver Proof | |
| Ancient Khajiit Bronze Piece | |
| Hammerfell Steel Coin | |
| Merethic Copper Dragonmark | |
| Merethic Gold Dragonmark | |
| Merethic Silver Dragonmark | |


Misc. Case 1 | |
|---|---|
| Top Row | |
| 1) Ice's Stalhrim Spoon of Assassination | |
| 2) Draw Knife | |
| 3) Curious Silver Mold (replica) | |
| 4) Michaela's Flagon | |
| 5) The Dancer's Pipe | |
| Middle Row | |
| 6) Shiv | 9) Scales of Pitiless Justice |
| 7) Worn Out Rock Hammer | 10) Horn of Jurgen Windcaller (replica) |
| 8) Ysgramor's Soup Spoon | |
| Bottom Row | |
| 11) Bloodstone Chalice | 12) Wylandriah's Spoon (replica) |

Dibella Case | ||
|---|---|---|
| 1) Ornate Dibella Statue | 2) King Orgnum's Coffer (replica recommended) |
3) Dibella Statue x10 |
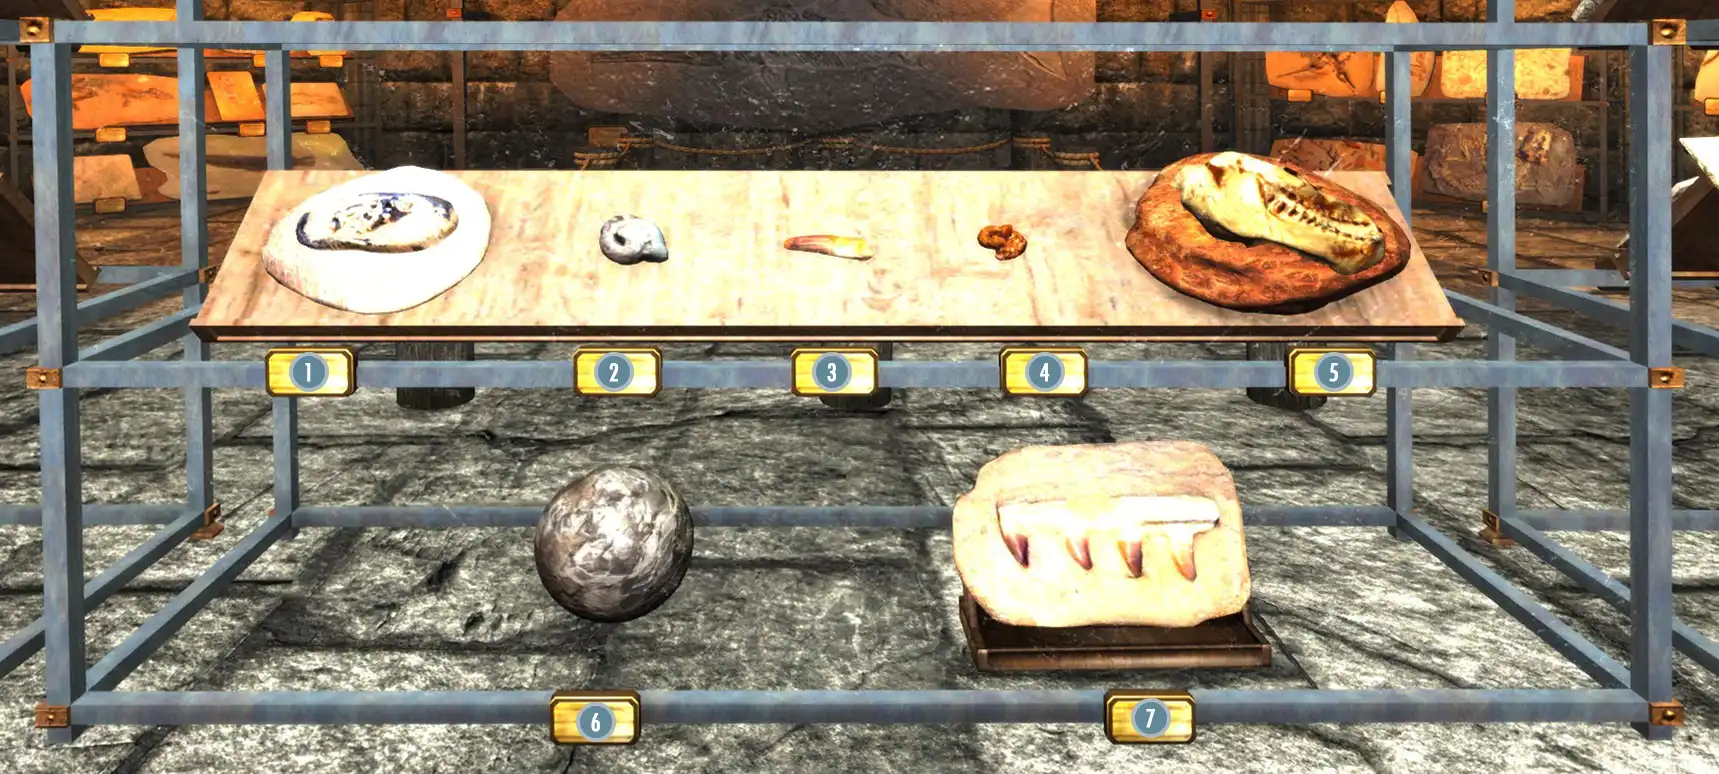
Misc. Case 2 | |
|---|---|
| Top Row | |
| 1) Imperial War Horn | |
| 2) Philter of the Phantom | |
| 3) Torygg's War Horn (replica) | |
| 4) The White Phial | |
| Middle Row | |
| 5) Torc of Labyrinthian (replica) | 8) Tolfdir's Alembic (replica) |
| 6) Saerek's Skull Key | 9) Pest Poison (replica) |
| 7) Torsten's Skull Key | 10) Balbus's Fork |
| Bottom Row | |
| 11) Weystone Focus (replica) | 13) Aretino Family Heirloom |
| 12) Death Hound Collar | |
Vigilant Room (requires Vigilant)
If Vigilant SE and its corresponding Legacy of the Dragonborn Patches (Official) SE patch are installed, this room is added to the Hall of Oddities. It houses various armor sets, relics, weapons and rings found during the story of Vigilant.
Entrance Hall
Left | |
|---|---|
| 1) Laza of Order Cuirass | |
| 2) Laza of Order Boots | |
| 3) Laza of Order Gauntlets | |
| 4) Laza of Order Helmet | |
| 5) Stone Pursuer's Greatsword | |

Right | |
|---|---|
| 1) Morihaus' Greatsword | |
| 2) Morihaus' Cuirass | |
| 3) Morihaus' Helmet | |
| 4) Morihaus' Gauntlets | |
| 5) Morihaus' Boots | |

Center Table
| 1) Vigilant Mail Breaker |
| 2) Bard's Dagger |
| 3) Old Histus Flask |
| 4) Horn of Stendarr |
| 5) Histus Flask |
Left Wall
Pelinal Set | |
|---|---|
| 1) Broken Sword | |
| 2) Bloody Cuirass | |
| 3) Bloody Boots | |
| 4) Bloody Helmet | |
| 5) Bloody Gauntlets | |
Chapter Displays
Act 1 Display | |
|---|---|
 Good Ending - Defeat Molag-Bal |
 Bad Ending - Side with Molag-Bal |
 Merciful Ending - Kill Altano and the Ugly One | |
Act 2 Display | |
|---|---|
 Good Ending - Defeat Lamae |
 Bad Ending - Side with Lamae |
Display Podium | |
|---|---|
| Adabal | |
Act 3 Display |
|---|
Good Ending - Accept Molag Bal's offer and enter Coldharbour through the portal. |
| Bad Ending - Reject Molag Bal's offer and sacrifice yourself. (As the bad ending is not lore friendly to Legacy of the Dragonborn SSE, the Good Ending is displayed)*. |

* Furthermore, if you sacrifice yourself, you will start over as a freshly recruited Vigilant. Although you will get your gear back shortly after, your stats are (and will stay) seriously messed up. You'll end up in Coldharbour anyway...
Act 4 Display | |
|---|---|
 True Ending - Tree of Life and Bard's Lute |
 Bad Ending - Molag Bal's Anchor descending into Aetherius |
 Bitter Ending - Impaled Molag Bal and Adabal |
 Madness Ending - Bones and Buried Shrine |
 Worst Ending - Sovngarde throne and Adabal | |
Back Wall
Case One | |
|---|---|
| 1) Bloody Cleaver | |
| 2) Blade of Mercy | |
| 3) Blacksmith's Hammer | |
| 4) St. Pelan's Staff | |
| 5) Pope Megus' Staff | |
| 6) Varla's Shotel | |
| 7) Beggar's Log | |
| 8) Gardener's Shotel | |

Umaril Set | |
|---|---|
| 1) Umaril's Sword | |
| 2) Umaril's Cuirass | |
| 3) Umaril's Boots | |
| 4) Umaril's Gauntlets | |
| 5) Umaril's Helmet | |

Right Wall
First Case | |
|---|---|
| 1) Arcana of Jhunal | |
| 2) St. Dulsa's Nail | |
| 3) Old Feather of Kyne | |
| 4) Bone of Jhunal | |
| 5) Unthrappa | |
| 6) Soul-Shriven Remains | |
| 7) Abbot Silorn's Hide | |
| 8) St. Sard's Ashes | |
Spike | |
|---|---|
| St. Alessia's Head | |

Second Case | |
|---|---|
| 1) Crown of the Leech King | |
| 2) Wasteland Guardian's Egg | |
| 3) Chef's Ladle | |
| 4) Frying Pan | |
| 5) Warden's Helmet | |
| 6) Lilian's Doll | |
| 7) Atima's Favorite Doll | |
Third Case | |
|---|---|
| 1) Lamae's Rose or Lamae's Rose (Withered) | |
| 2) Witch Doll | |
| 3) Mad King Dro'zel's Heart | |
| 4) Wasteland Guardian's Helmet | |
| 5) Soul Drinker | |
| 6) Beacon of Magnus | |
| 7) Eye of Marukh | |

Rings | ||
|---|---|---|
| First Row | ||
| 1) Kyne and Sard Rings: Sard's Blue Eye Ring Sard's Red Eye Ring Red Tear of Kyne Ring Blue Tear of Kyne Ring |
2) Wooden, Nirn Origin and Sithis Rings: Eye of Sithis Ring Nirn's Origin Ring Wooden Ring |
3) Magnus, Phynaster and Jhunal Rings: Phynaster's Footstep Ring Silver Ring of Jhunal Golden Ring of Jhunal Magnus' Return Ring |
| Second Row | ||
| 4) Cat Rings: Black Cat Ring Red Cat Ring Gold Cat Ring White Cat Ring |
5) Orkey's Clutch Rings: Frost Clutch of Orkey Ring Fire Clutch of Orkey Ring Spell Clutch of Orkey Ring Shock Clutch of Orkey Ring |
6) Quartz Rings: Fire Quartz Ring Frost Quartz Ring Spell Quartz Ring Shock Quartz Ring |
| Third Row | ||
| 7) Dragon Soul Stone | 8) Beacon of Order | |

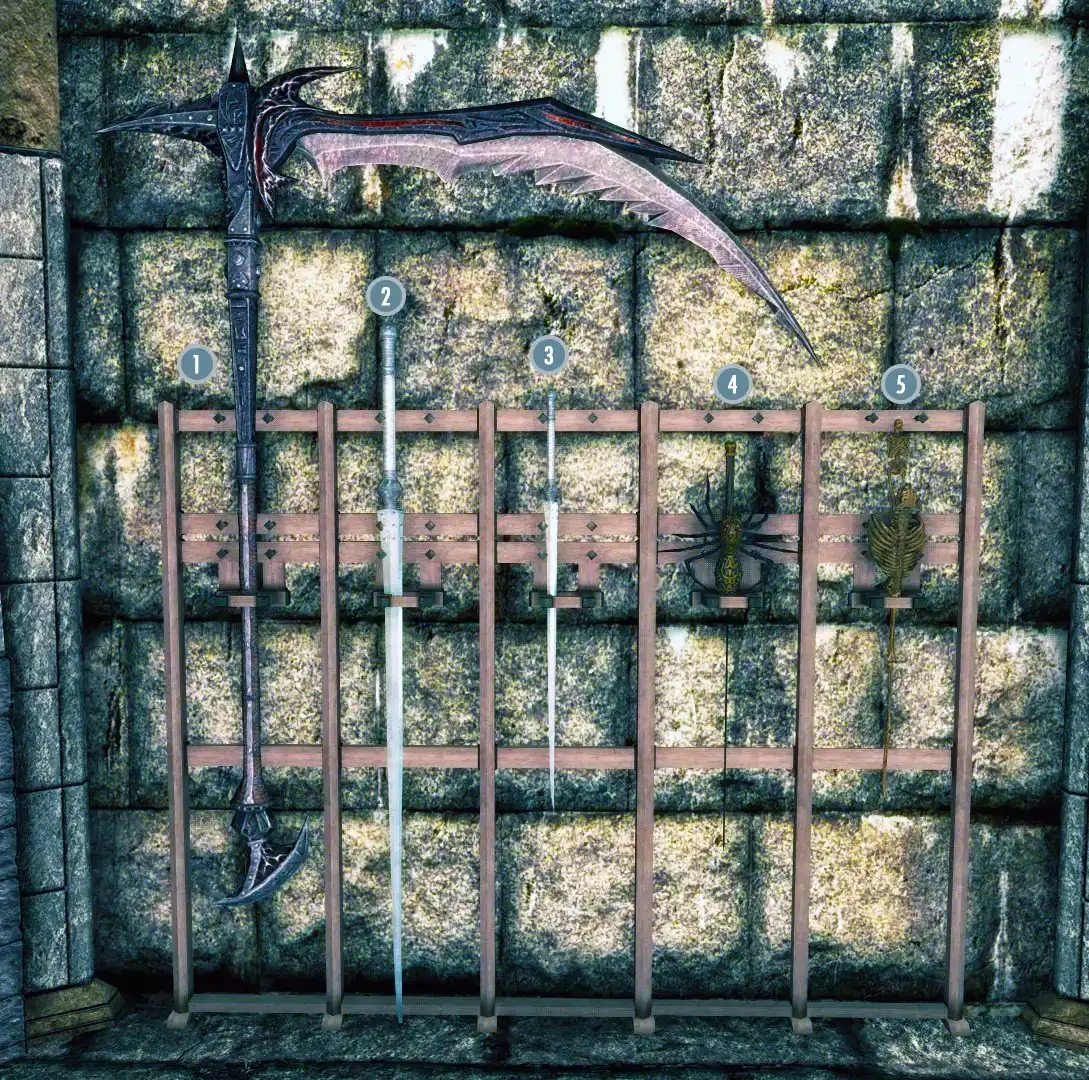
Sword Rack | |
|---|---|
| 1) Daedric Scythe | |
| 2) Vigilant Greatsword | |
| 3) Vigilant Sword | |
| 4) Whisperer's Rapier | |
| 5) Black Worm's Rapier | |
Skyrims Unique Treasures Room (requires Skyrims Unique Treasures)
If you have the Skyrims Unique Treasures mod loaded along with Legacy, an extra room will be added to the Hall of Oddities to house most of these treasures.
Below is a list of all displayable items from the mod from left to right. Note that in earlier versions of Skyrims Unique Treasures many items had the prefix Unique. This prefix was removed in the latest version.
Hallway
Left side | ||
|---|---|---|
| Tanto | Galaxy Sword | Akaviri Honorblade |
| Ichigo Kurosaki Sword | Ninjato | Ronin Sword |
| Butterfly Sword | ||
| Display Case | ||
| Oblivion Dagger | ||
Right side | ||
|---|---|---|
| Tomahawk | Hook Sword | Naginata |
| Guan Dao | Battle Arm Sword | Kama |
| Sai | S.H.A.R.K. | |
Main Room
1st Weapon Plaque |
|---|
| Executioner's Great Axe |


1st Corner Display | ||
|---|---|---|
| Hooka Pipe | ||
1st Statue Display | ||
| Clavicus Vile Figurine | Golden Dibella Statue | Nocturnal Figurine |
| Falmer Figurine | Bear Figurine | Elk Figurine |
| Cow Figurine | Sabre Cat Figurine | |
2nd Weapon Plaque | ||
| Mammoth Staff of Fire Ball | ||
2nd Statue Display | ||
|---|---|---|
| Frost Dragon Figurine | Alduin Statue | Bronze Dragon Figurine |
| Swamp Dragon Figurine | Odahviing Statue | |
2nd Corner Display | ||
| Leviathan Morganite Stone | ||


3rd Weapon Plaque |
|---|
| Scepter of Banishment |


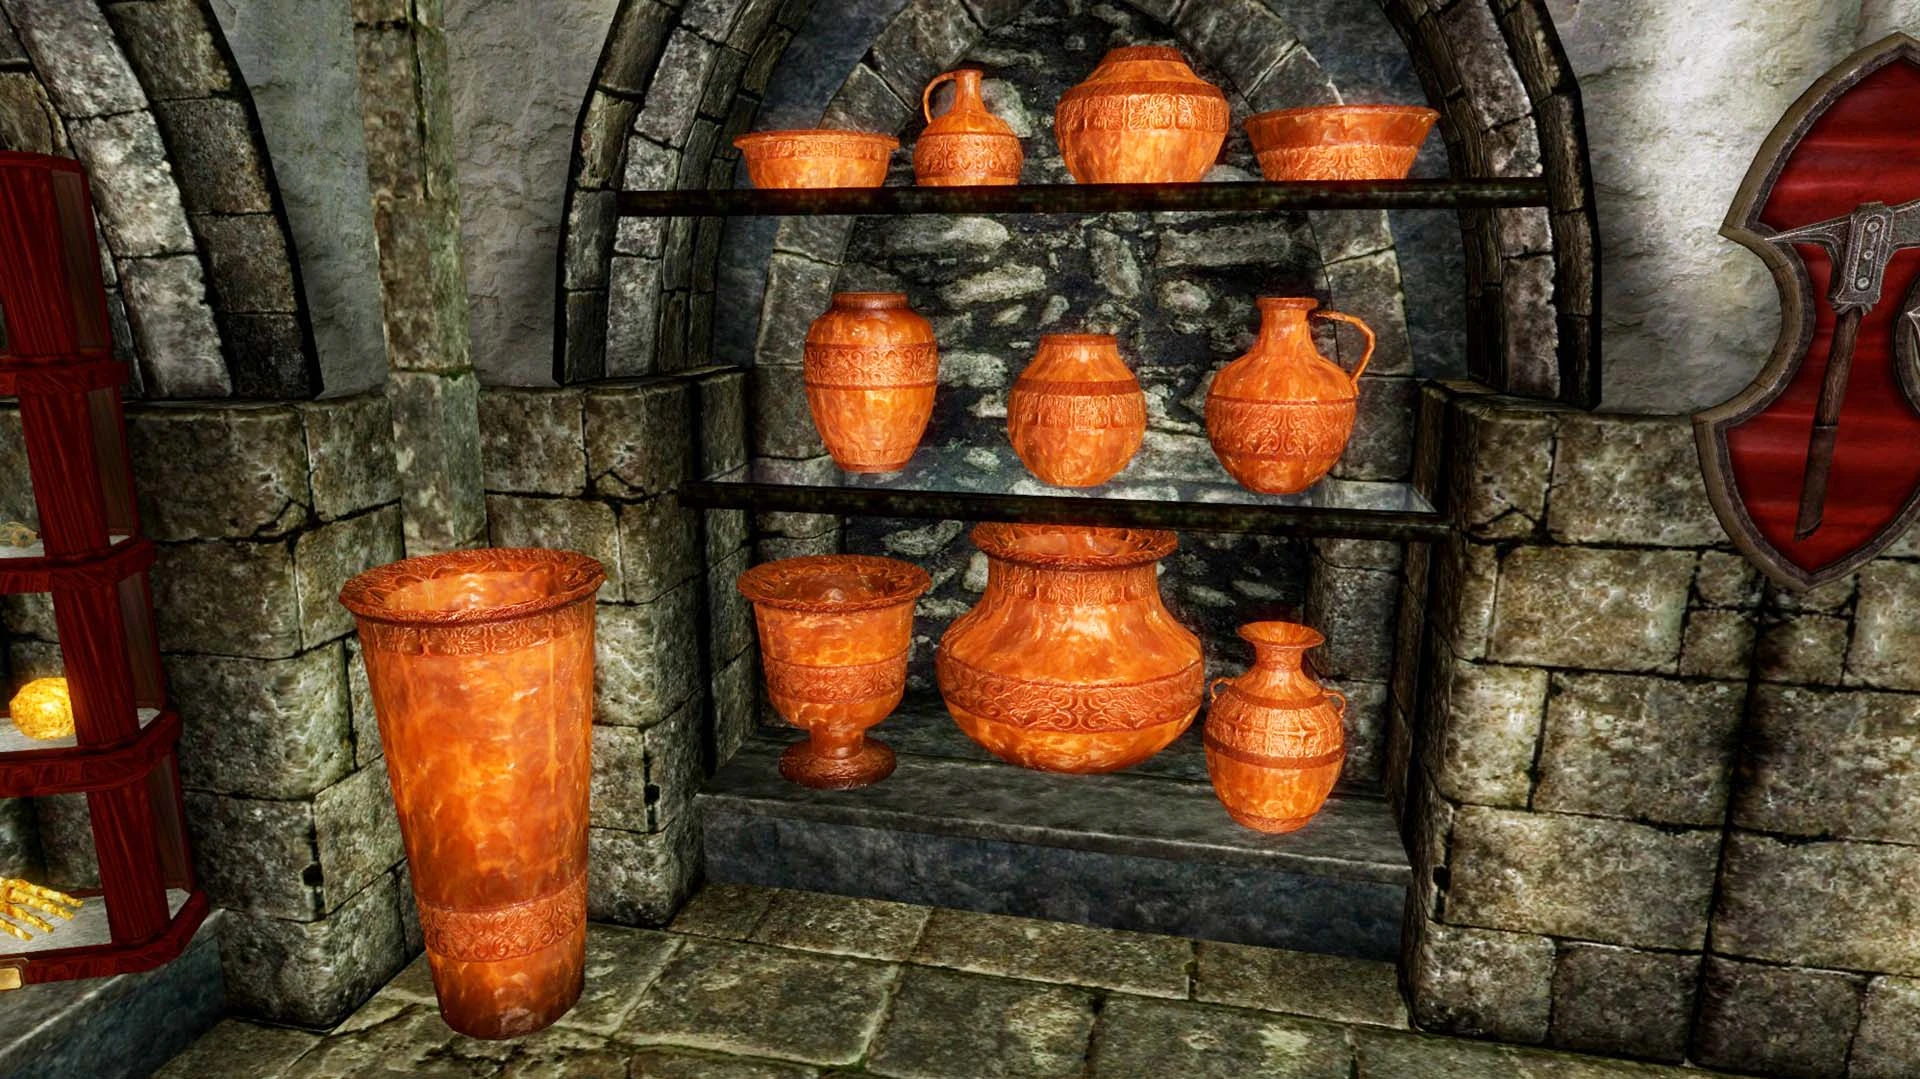
Hammered Copper Display | ||
|---|---|---|
| Corner | ||
| Hammered Copper Pot 4 | ||
| Top shelf | ||
| Hammered Copper Bowl 2 | Hammered Copper Jug 2 | Hammered Copper Urn 1 |
| Hammered Copper Bowl 1 | ||
| Middle shelf | ||
| Hammered Copper Pot 1 | Hammered Copper Urn 2 | Hammered Copper Jug 1 |
| Bottom shelf | ||
| Hammered Copper Pot 2 | Hammered Copper Pot 3 | Hammered Copper Jug 3 |

4th Weapon Plaque | |
|---|---|
| Executioner's War Axe | |
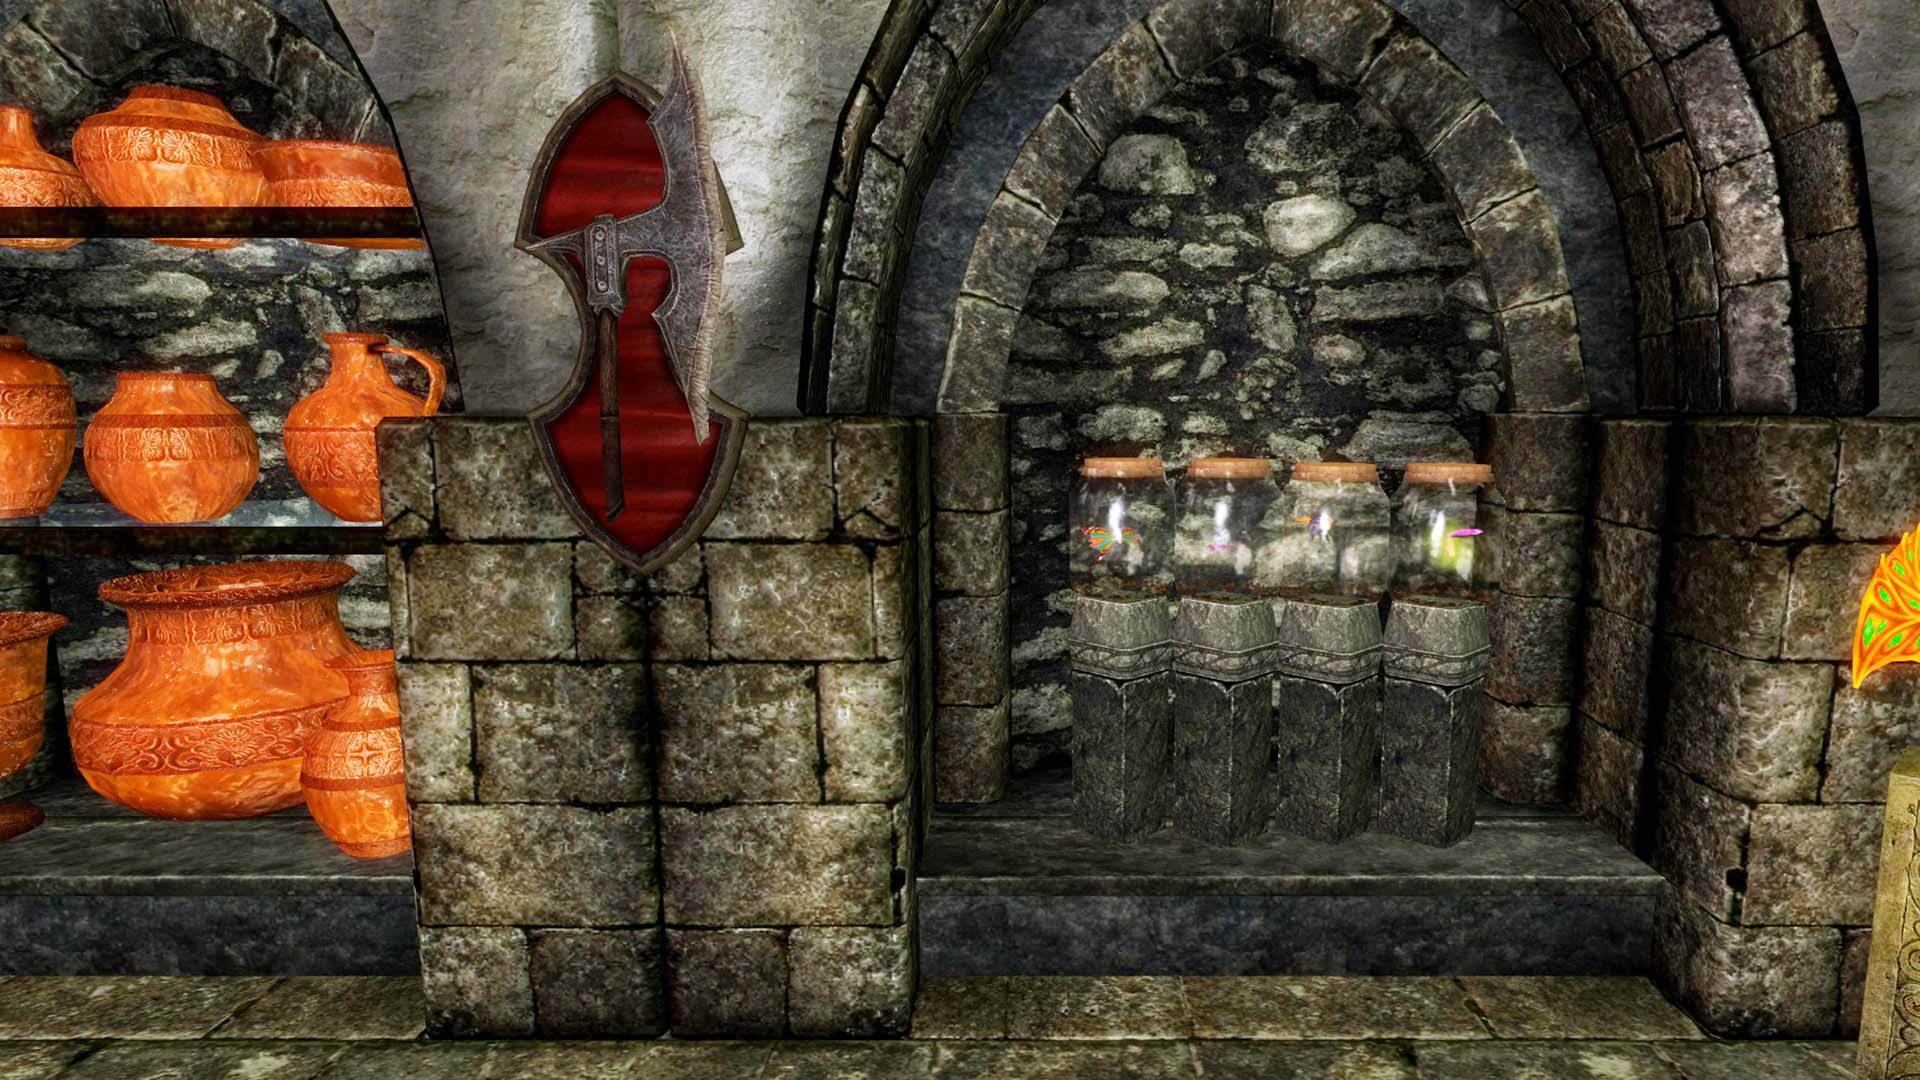
Jar Display | |
| Rainbow Butterfly in a Jar | Love Bug in a Jar |
| Stinkbug in a Jar | Pink Glofly in a Jar |
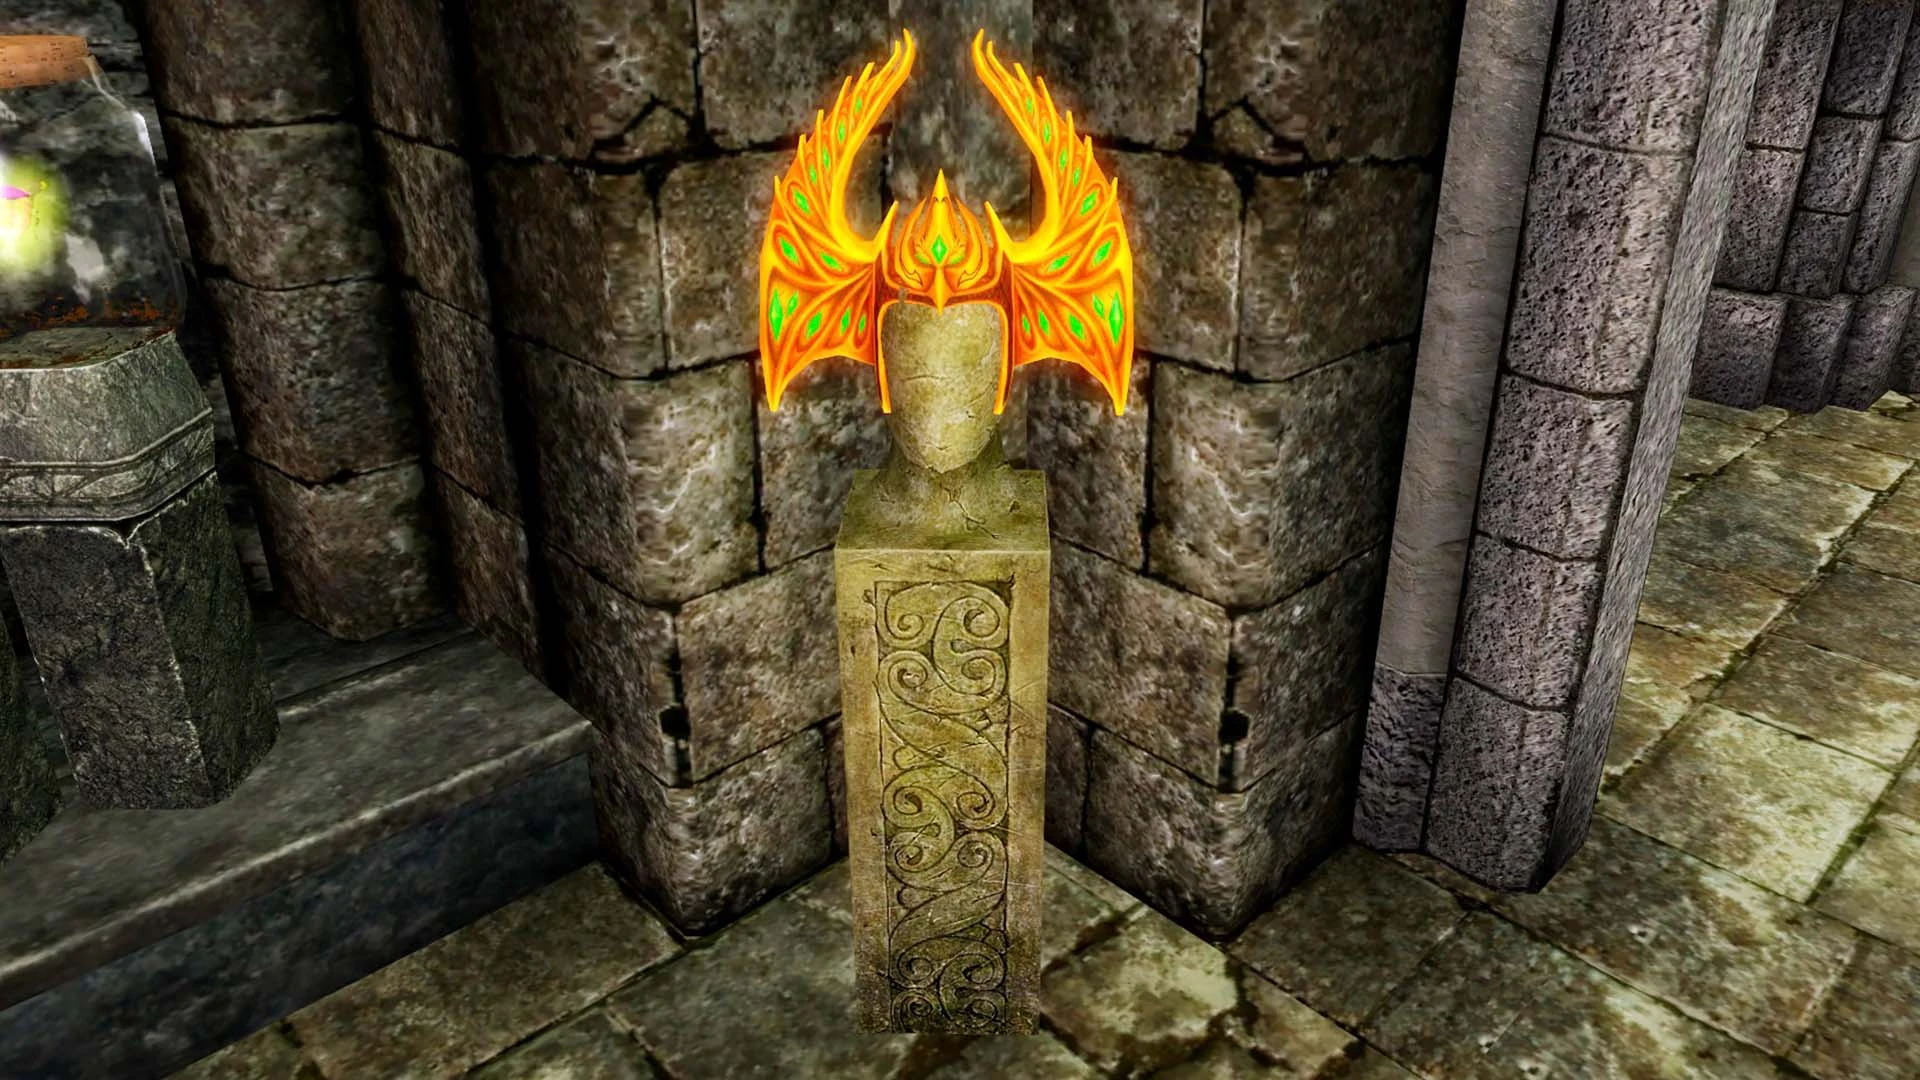
3rd Corner Display |
|---|
| Golden Headdress |

Center Display | ||
|---|---|---|
| Psaltery | Traditional Lute | 10 String Harp |
| Bongo Drum | 20 String Harp Guitar | Tenor Recorder |
| Golden Horn | Wood Flute | Pan Flute |
| Dovakin Drum | Cornamuse | Upright Harp |

Non-displayable items
The following items from the mod do not have a display in the museum, but with a mod like Jaxonz Positioner, you can place them in the museum yourself. They will not count as a display though, it is purely cosmetic. Except for the Banjo, all these items are only available with the Full version of the mod.
- Alien Console: In Honningbrew Meadery.
- Banjo: Battle-Born Farm, leaning in the corner.
- Black Ninja Doll: In Bilegulch Mine.
- Blue Ninja Doll: In Bloodlet Throne.
- Green Ninja Doll: In Broken Helm Hollow.
- Red Ninja Doll: Inside the Wreck of the Brinehammer.
- Collectible Arena Plate: Aeri's House in Anga's Mill, on a shelf.
- Collectible Battlespire Plate: Black-Briar Lodge, on a small table on the top floor.
- Collectible Bloodmoon Plate: Dainty Sload, when you enter it is to the right on a cupboard.
- Collectible Daggerfall Plate: Four Shields Tavern, on a dresser in the sleeping quarters.
- Collectible Knights of the Nine Plate: Birna's Oddments in Winterhold, on dresser on the top floor.
- Collectible Morrowind Plate: Swindler's Den, in the main dining area.
- Collectible Oblivion Plate: Red Wave in the Solitude Docks, on a barrel on the lower deck.
- Collectible Redguard Plate: Merryfair Farm, on a crate on the lower level.
- Collectible Shivering Isles Plate: Moorside Inn in Morthal, on a bottom shelf by some Nord Mead.
- Collectible Skyrim Plate: Goldenglow Estate, upper floor on a small, square table.
- Collectible Tribunal Plate: Lylvieve Family's House, on barrel behind stairway on the bottom level.
| ||||||||||||||||||||||||||||||||||||||||||
Great JarHunt Room (requires BadGremlin's Great JarHunt)
- Alduin: Smuggler's Den, an unmarked location northwest of Whiterun, on a shelf.
- Angel of Death: Lost Valkygg, hidden behind a partially buried, toppled nordic shelf near the chest in the last room.
- Blackreach Mushrooms: Outside Alftand, in front of the elevator from Alftand Cathedral.
- Butterfly Tree: Eldergleam Sanctuary, on a stone ledge by the wooden bridge.
- Cliffracer: Traitor's Post, in the back room, on top of the novice-locked chest containing Treasure Map VII.
- Dark Ship: East Empire Company store in Solitude Docks, on a crate on top of the roof.
- Dead Fairy: Dead Crone Rock, on a top shelf in a small, round room on the first of the lower levels.
- Dragon in a Jar: Bandit Camp Ilinalta Foothills, an unmarked location south of the Guardian Stones, on the treestump.
- Dwemer Junk: Understone Keep in Markarth, on a pedestal with other dwemer items at Calcelmo's excavation base.
- FSM: Temple of Kynareth in Whiterun, on a table in a side room.
- Falmer: Forgotten Vale, on a table inside a Falmer hut near Sharpslope Cave.
- Giant in a Jar: Giant's Grove, hidden inside a hollow treestump on the way to Fallowstone Cave.
- Honeybee Jar: Honeystrand Cave, next to the chest and the dead bandit.
- Jar of Skulls: Hall of the Dead in Markarth, on the floor in an alcove behind the Shrine of Arkay.
- Killer Tree: Greenspring Hollow, in front of a small shelter filled with pelts.
- Mistress of the Dead: Movarth's Lair, on the big dining table.
- Mudcrab in a Jar: Outside Fort Neugrad, in the boat at the dock near the fort, next to Fairy 04.
- Olbaid: Ilinalta's Deep, on the sacrificial altar in the last rooms with the drawbridge.
- Pegasus: The Arcanaeum in the College of Winterhold, on Urag's counter.
- Scarecrow Goblin: Witchmist Grove, on top of a barrel inside the hut.
- Ship 1: Orphan's Tear, on top of a barrel in the shipwreck.
- Ship 2: Wreck of the Brinehammer Below Deck, on top of a crate near the unlocked door to the Brinehammer Cargo Hold.
- Ship 3: Hela's Folly, hidden behind an apprentice locked chest inside the wreck.
- Slaughterfish in a Jar: Outside Brinewater Grotto, on a boat.
- Spiders Feast: Snapleg Cave, on the ground by a chest in the round room with the giant frostbite spider.
- Spriggan: Bloodlet Throne, on a dresser in the first room.
- TES Logo Jar: Pale Imperial Camp west of Dawnstar, on the table in the main tent.
- Trapped Demon: Outside Half-Moon Mill, on the table in the meat shack next to the saw mill.
- Troll Jar: The Seven Thousand Steps, in front of Emblem VIII.
- Wooly Mammoth: Arcwind Point Altar, east of Arcwind Point.
The Mad Masker Room (requires The Mad Masker)
The Mad Masker is no longer officially supported by Legacy, as the author, VICN, is no longer distributing it. The Legacy features will stay for those who already have the mod.
If you have The Mad Masker mod and the Legacy patch for it loaded, this room will be added to the Hall of Oddities.
Only the leveled list version of the mod works with Legacy. You will not be able to display most of the items if you use the non-leveled list version.
Most of the unenchanted versions of the items can be bought from The Mad Masker in Pelagius' mind (aka The Mind of a Madman).
To get to Pelagius' Mind, you need to complete the quest 'The Mind of Madness' given to you by Dervenin in Solitude. The quest will require you to go to Pelagius' Wing in the Blue Palace. After quest completion, you will be able to return to Pelagius' Mind by equipping the Wabbajack and using Pelagius' Hip Bone when in the Blue Palace or Pelagius Wing. To get back to the door of the Blue Palace, use the bedroll inside Pelagius' Mind.
Below is a list of all displays in the room, starting from the left.
Left side
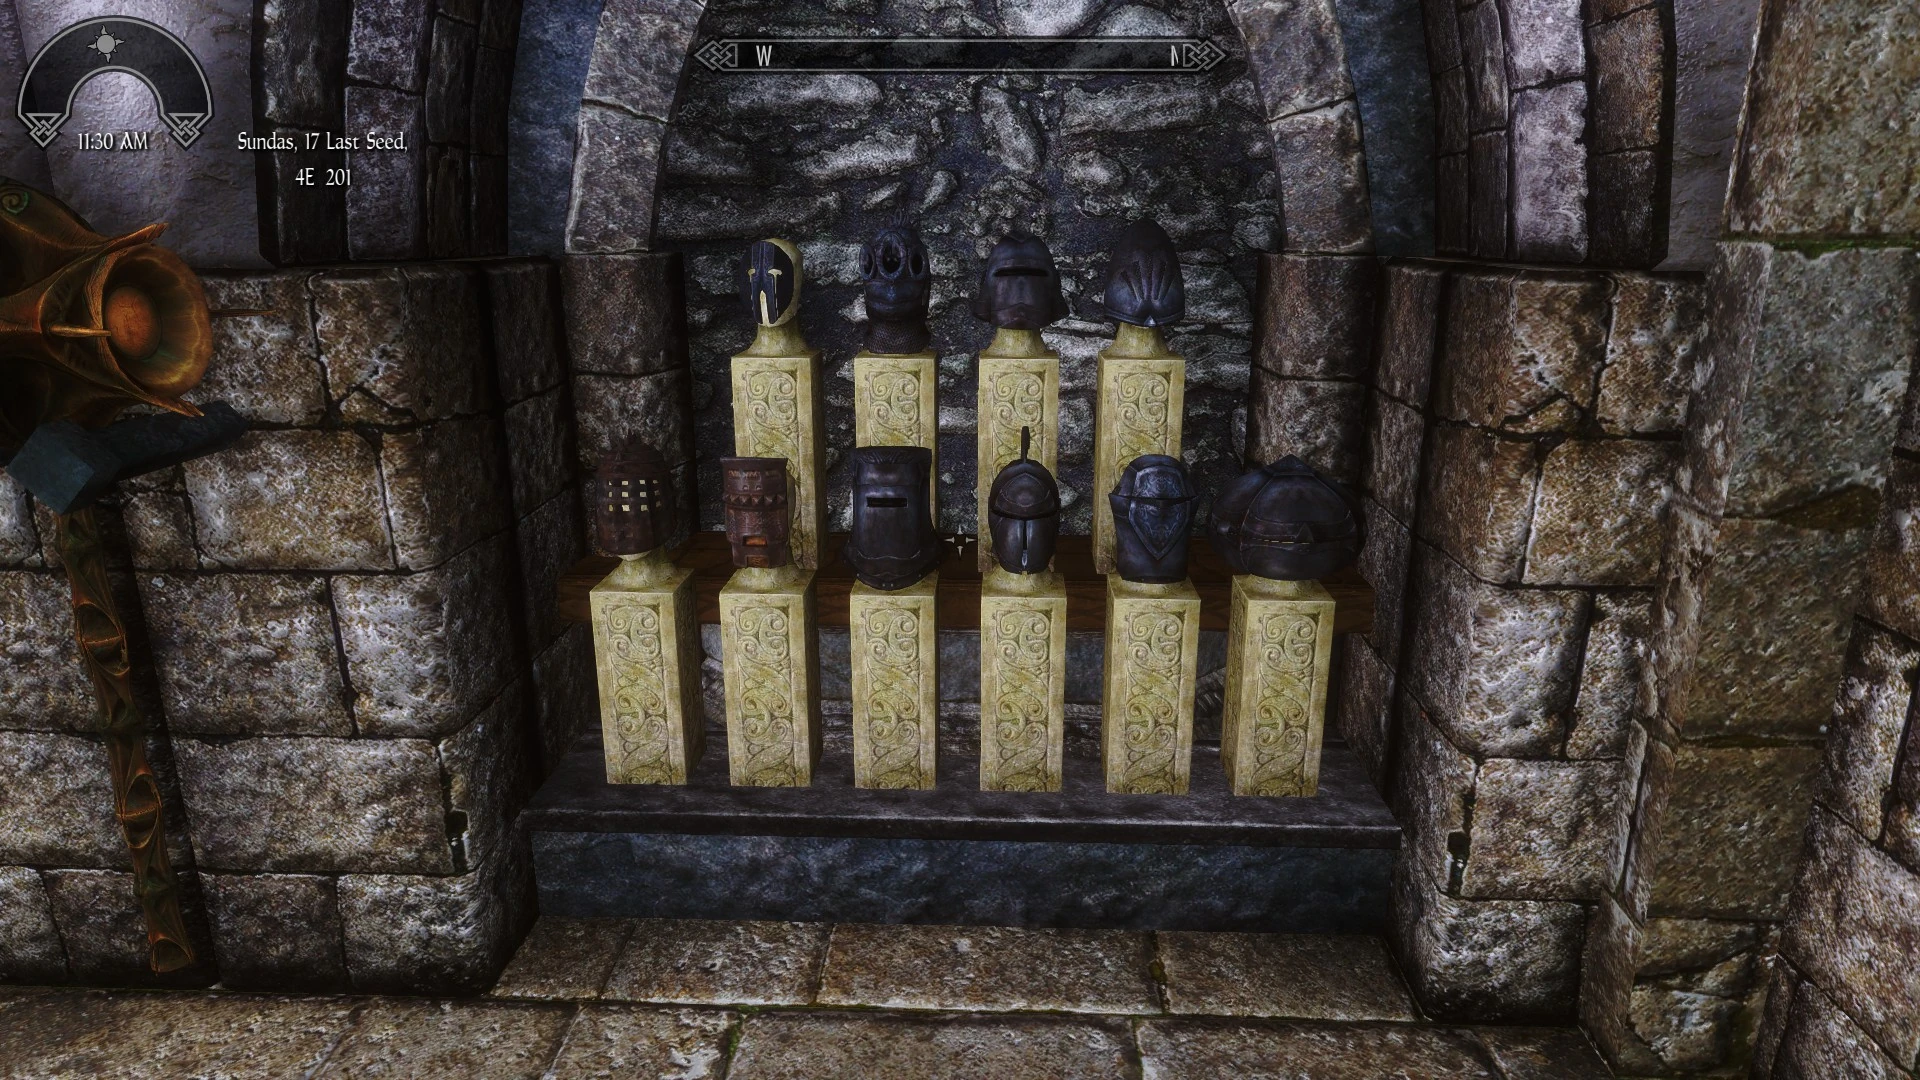
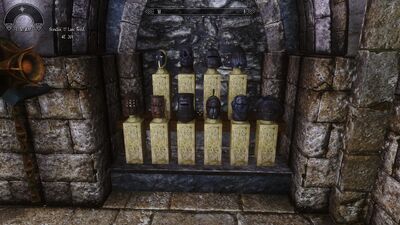
1st Masks and Helms Display | |
|---|---|
| Akaviri Death Mask | Argonian Mask |
| Khajiit Mask | Blue Mask |
| Dragonbone Helm | Red Mask |

2nd Masks and Helms Display | |
|---|---|
| Ebony Chaplain Helm | Ebony Goggles |
| Ebony Cap | Ebony Masque |
| Ebony Knight Helmet | Ebony Vinland Helm |
| Ebony Helm | |
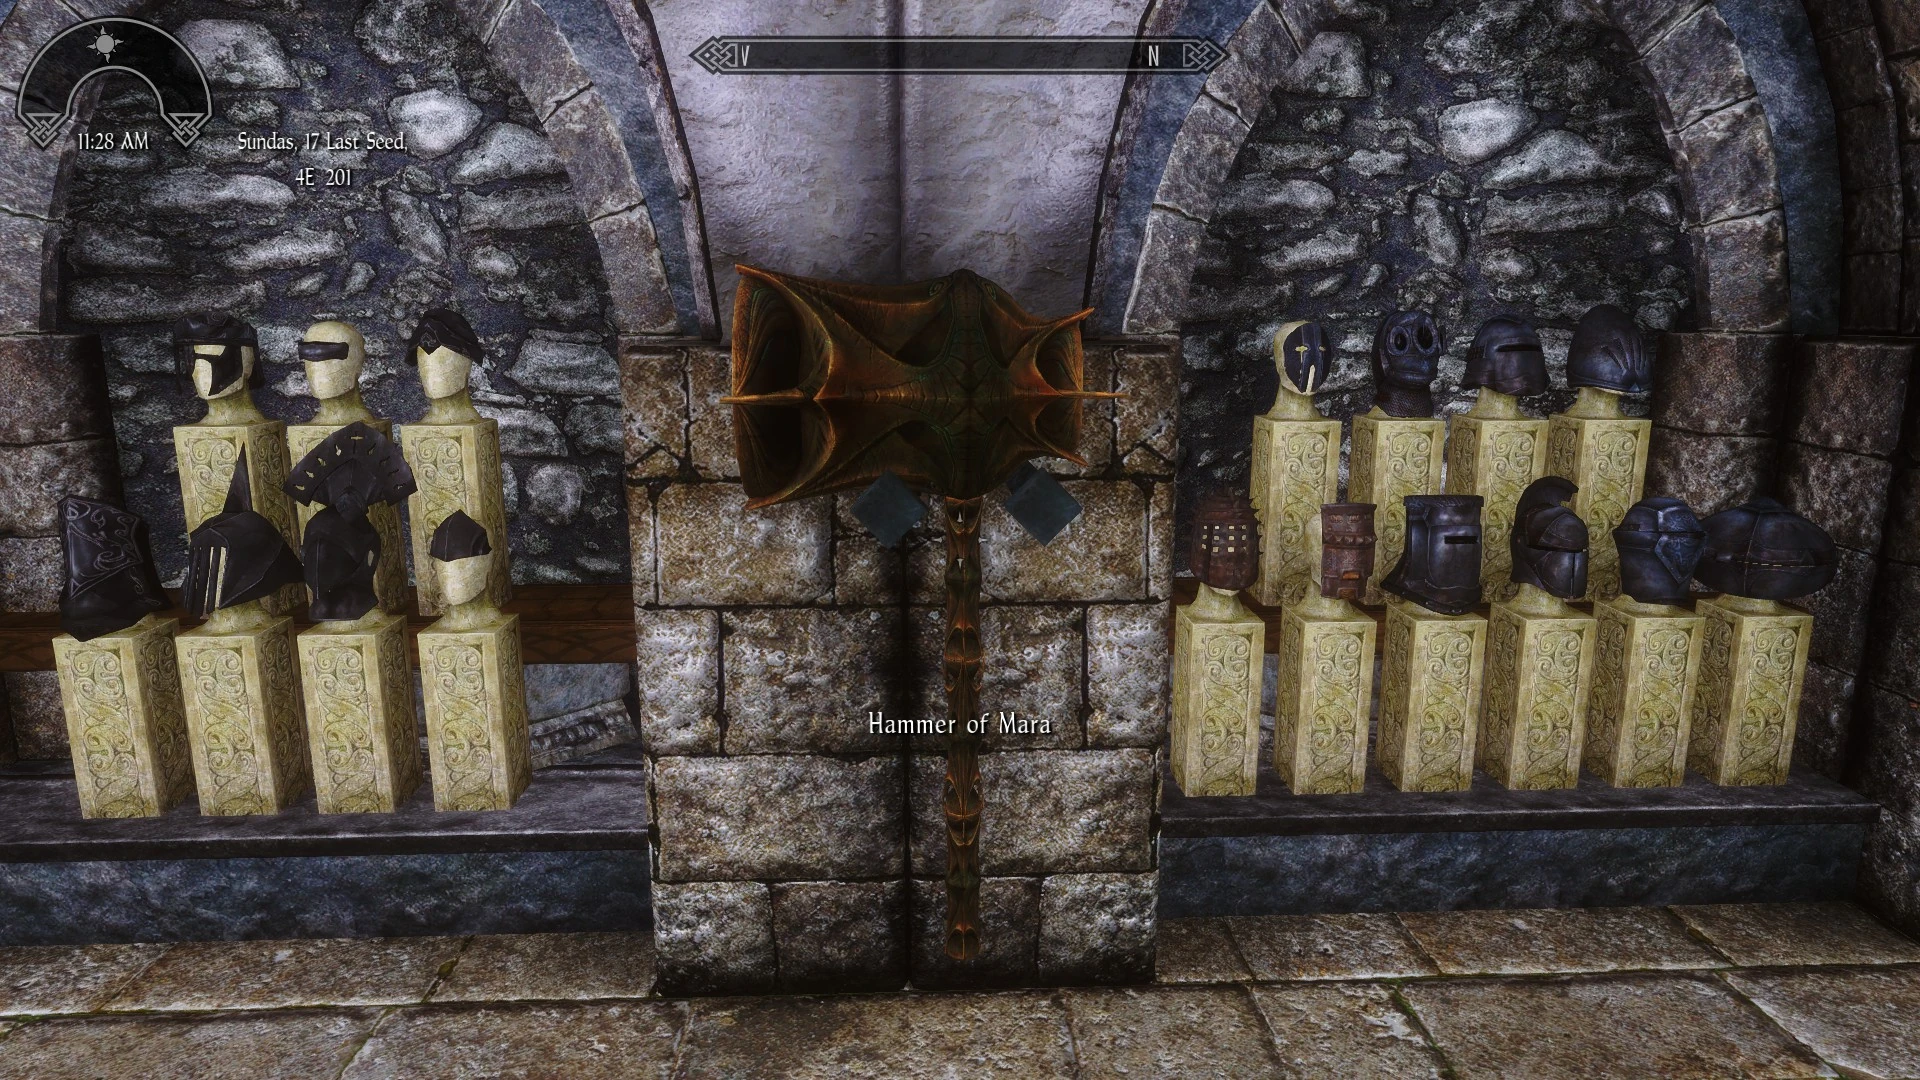
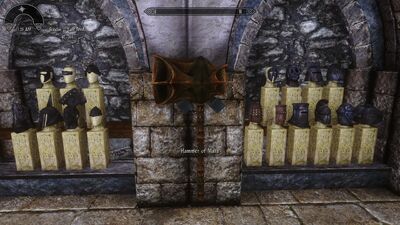
Hammer of Platonic Love Display |
|---|
| Hammer of Platonic Love or Hammer of Mara |
Mannequin Display

Note: These mannequins are generic ones. They are intended to display the following armor pieces, but this is not mandatory; and displaying items here will not increase your total display count.
Love Mannequin | |
|---|---|
| Masque of Mara | Mara's Hood |
| Mara Armor | Mara Boots |
| Mara Gauntlets | |
Hate Mannequin | |
|---|---|
| Masque of Molag Bal | Molag Bal Armor |
| Molag Bal Boots | Molag Bal Gauntlets |
Right side
4th Masks and Helms Display | |
|---|---|
| Masque of the Night Mother | Masque of Sheogorath |
| Masque of Namira or Two Face Masque | |
| Malacath Visor | Hircine Ritual Mask |
| Masque of Vaermina | Masque of Hermaeus Mora |
1st Weapons Display |
|---|
| Warhammer of Blood Curse or Molag Bal Warhammer |
| Greatsword of Blood Curse or Molag Bal Greatsword |
| Sword of Blood Curse or Molag Bal Sword |

5th Masks and Helms Display | |
|---|---|
| Ebony Duck Helm | Ebony Aron Helm |
| Black Knight Helm | Ebony Northern Helm |
| Gloom Helm | Black Iron Helmet |
| Ebony Halfmask | |
2nd Weapons Display |
|---|
| Spike of Blood Curse or Molag Bal Spike |
| Greatspike of Blood Curse or Molag Bal Greatspike |
| Greatmace of Blood Curse or Molag Bal Greatmace |

6th Masks Display | |
|---|---|
| Dwarven Guardian Helm | Dwarven Great Helm |
| Masque of Zenithar | Elven Mask |
| Elven Knight Helm | Elven Helm of Favor |
| Elven Helm of the Wheel | |
| ||||||||||||||||||||||||||||||||||||||||||
More Interesting Loot Room (requires More Interesting Loot)
- Gold Candlestick (1): Found randomly in loot containers.
- Gold Candlestick (2): Found randomly in loot containers.
- Gold Candlestick (3): Found randomly in loot containers.
- Gold Bowl (1): Found randomly in loot containers.
- Gold Plate Helmet (1): Found randomly in loot containers.
- Golden Ivory Crown: Found randomly in loot containers.
- Gold Jug: Found randomly in loot containers.
- Gold Plate: Found randomly in loot containers.
- Gold Bowl (2): Found randomly in loot containers.
- Golden Jewelled Greatsword: Found randomly in loot containers.
- Golden Jewelled Battleaxe: Found randomly in loot containers.
- Golden Jewelled Greatscepter: Found randomly in loot containers.
- Golden Jewelled Sword: Found randomly in loot containers.
- Golden Jewelled War Axe: Found randomly in loot containers.
- Golden Jewelled Scepter: Found randomly in loot containers.
- Golden Jewelled Dagger: Found randomly in loot containers.
- Gold Plate Shield: Found randomly in loot containers.
- Gold Plate Helmet (2): Found randomly in loot containers.
- Gold Plate Armor: Found randomly in loot containers.
- Gold Plate Boots: Found randomly in loot containers.
- Gold Plate Gauntlets: Found randomly in loot containers.
- Gold Goblet (1): Found randomly in loot containers.
- Gold Goblet (2): Found randomly in loot containers.
- Dovahkiin Egg with Stand: Found randomly in loot containers.
- Dovahkiin Egg: Found randomly in loot containers.
- Golden Dragon Necklace: Found randomly in loot containers.
- Dragon Gold: Found randomly in loot containers.
- Golden Jewelled Chalice: Found randomly in loot containers.
- Golden Egg: Found randomly in loot containers.
Artifacts of Skyrim Room (Special Edition) (requires Artifacts of Skyrim)
- Arondil's Phantom Staff: Wielded by Arondil, the mage in the Yngvild Throne Room.
- Brigand's Shield: Looted from Captain Hargar in Broken Oar Grotto during the quest "Lights Out!".
- Brii Dinok: Horker Standing Stones, an unmarked island north-east of High Gate Ruins, on a necromancer shrine.
- Bthurmac Repair Device: Alftand Ruined Tower, on a stone table at the very top, next to Bthurmac.
- Bthurmac: Alftand Ruined Tower, on a stone table at the very top.
- Claws of Hiefnir: Shadowgreen Cavern, on the body of a dead Nord located at the very peak next to the boss chest.
- Dwarven Stingblade: Located at a Dwarven shrine in the mountains north of Silent Moons Camp, north-west of Volunruud.
- Forgehammer: Outside Gloombound Mine in the Orc Stronghold of Narzulbur, on a table by the forge.
- Ghazorah's Inferno: Found on the corpse of Ghazorah in Serpent's Bluff Ruins, a dungeon located in Serpent's Bluff Redoubt west of Rorikstead.
- Helm of Ylgar: Skytemple Ruins, on a withered corpse at the far end of the island.
- Krofeyn: Southfringe Sanctum, wielded by Bashnag, the leader of the Spellswords.
- Matron: Lost Valley Redoubt Exterior, on the upper altar occupied by two Hagravens. The altar is in front of the word wall for the 'Become Ethereal' shout.
- Provincial Artifacts - Volume IV, Skyrim: Provincial Artifacts-Volume IV, Skyrim
- Shackles of Xalkras: Sunderstone Gorge, on the table in front of the Word Wall. It is resting on a Shrine to Mehrunes Dagon.
- Shadowsilk Robe: Worn by a necromancer wandering near the Shadow Stone.
- Shieldbreaker: White River Watch Overlook, looted off Hajvarr Iron-Hand.
- Sunna Alata: Troll Den Rkund, an unmarked Nordic barrow west of the Ruins of Rkund, lying on the ground next to a dead goat.
Culture and Art Gallery
The Fallen Falmer
- Darkwater Pass
- Gloomreach
- Shimmermist Cave
- Temple of Xrib/Sightless Pit
- Lost Echo Cave
- Liar's Retreat
- Frostflow Lighthouse
- Chillwind Depths
- Duskglow Crevice
- Stillborn Cave
The Forsworn
Primal Giants
- Bleakwind Basin
- Blizzard Rest
- Cradlecrush Rock
- Guldun Rock
- Sleeping Tree Camp
- Talking Stone Camp
- Stonehill Bluff
The Riekling of Solstheim
- Benkongerike
- Bristleback Cave
- Castle Karstaag Ruins
- Frossel
- Small island north of Haknir's Shoal (POI North)
- Moesring Pass
- Thirsk Mead Hall
- Glacial Cave
Library 1st Floor
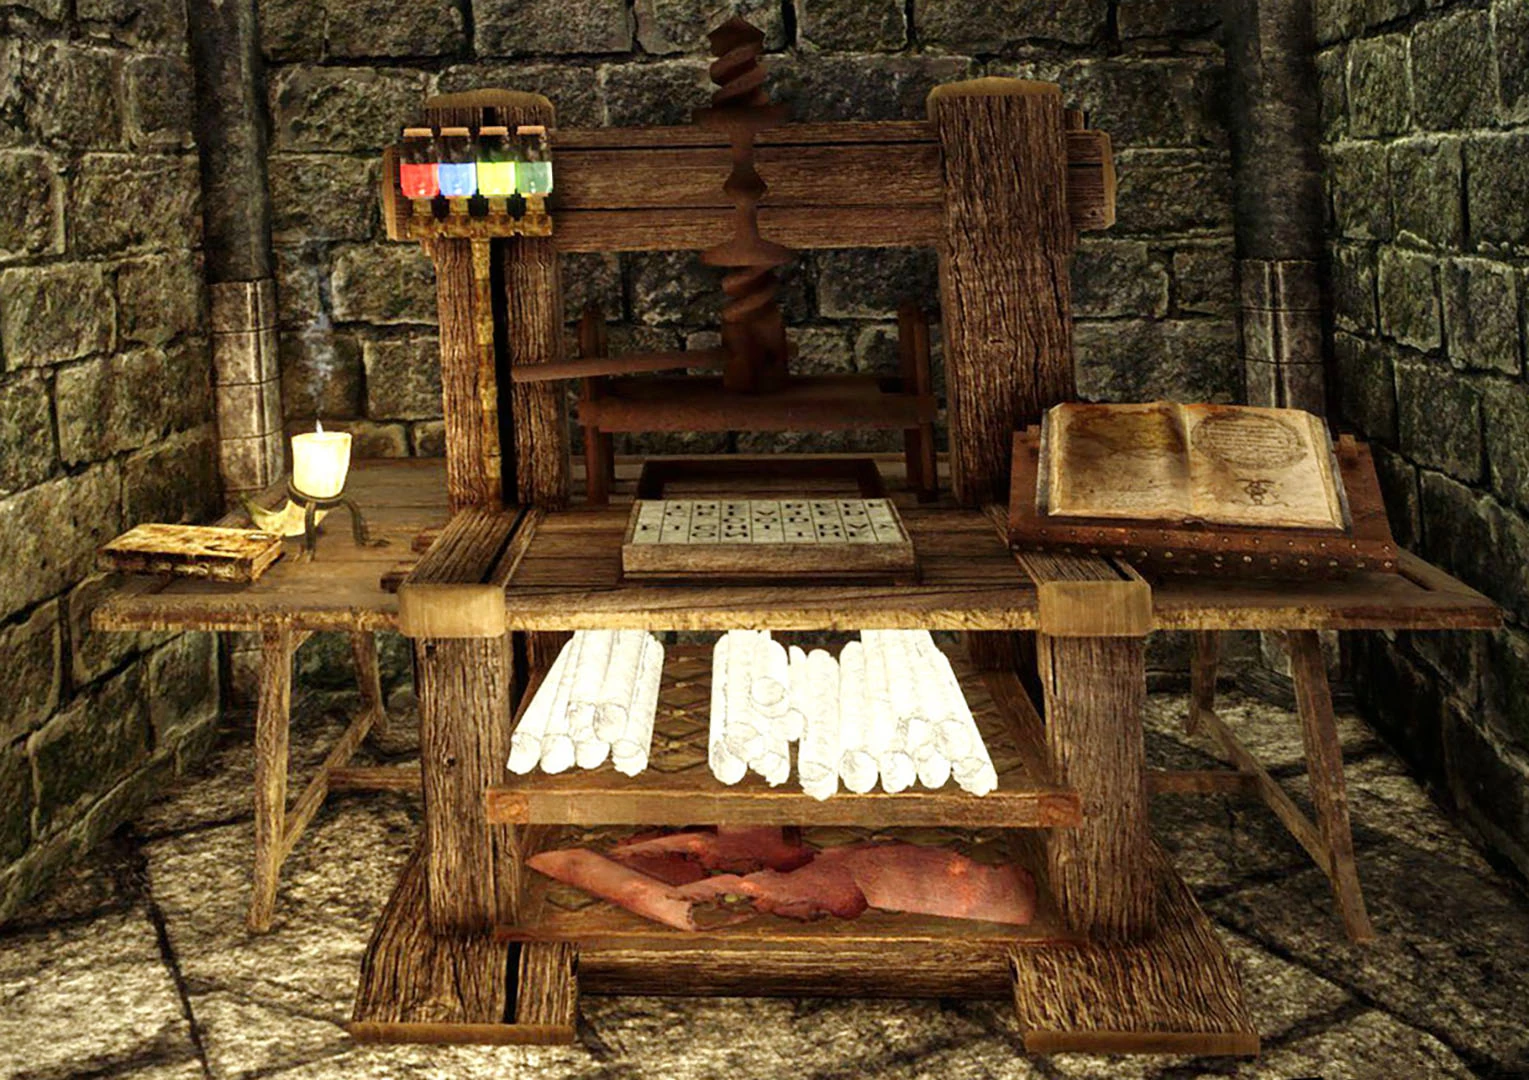

The first floor of the library consists mostly of bookshelves, a Book Returns and Card Catalog and eight bookcases that are manually fillable. It also contains a section behind a gate, for the display of special books. A Printing Press can also be found here which serves the same purpose as the Scribe's Desk in the Curator's Office.
If New Treasure Hunt SSE is installed, there will be treasure maps lining the entrance to the library from the Hall of Heroes.
Below is the list of books that can be displayed on this level of the library, listed from top to bottom, left to right.
Bookshelf 1

- 36 Lessons of Vivec, Volume 1-12:
Sermon 01, Sermon 02, Sermon 03, Sermon 04, Sermon 05, Sermon 06, Sermon 07, Sermon 08, Sermon 09, Sermon 10, Sermon 11, Sermon 12 - 36 Lessons of Vivec, Volume 13-24:
Sermon 13, Sermon 14, Sermon 15, Sermon 16, Sermon 17, Sermon 18, Sermon 19, Sermon 20, Sermon 21, Sermon 22, Sermon 23, Sermon 24 - 36 Lessons of Vivec, Volume 25-36:
Sermon 25, Sermon 26, Sermon 27, Sermon 28, Sermon 29, Sermon 30, Sermon 31, Sermon 32, Sermon 33, Sermon 34, Sermon 35, Sermon 36
Bookshelf 2
- Fools' Ebony, Volume 1-6:
Vol. 1, Vol. 2, Vol. 3, Vol. 4, Vol. 5, Vol. 6 - King Edward, Volume 1-12:
Vol. 01, Vol. 02, Vol. 03, Vol. 04, Vol. 05, Vol. 06, Vol. 07, Vol. 08, Vol. 09, Vol. 10, Vol. 11, Vol. 12 - City Guides, 13 Volumes:
Vol. 1 (Guide to Vvardenfell), Vol. 2 (Guide to Anvil), Vol. 3 (Guide to Vivec), Vol. 4 (Guide to Bravil), Vol. 5 (Guide to Skingrad), Vol. 6 (Guide to Sadrith Mora), Vol. 7 (Guide to Leyawiin), Vol. 8 (Guide to the Imperial City), Vol. 9 (Guide to Chorrol), Vol. 10 (Guide to Cheydinhal), Vol. 11 (Guide to Bruma), Vol. 12 (Guide to Balmora), Vol. 13 (Guide to Ald'ruhn) - A Tale of Kieran, Volume 1-4:
Vol. 1, Vol. 2, Vol. 3, Vol. 4 - Ancient Tales of the Dwemer, Volume 1-3, 5, 6, 10, 11:
The Ransom of Zarek, The Seed, The Importance of Where, Chimarvamidium, Song of the Alchemists, The Dowry, Azura and the Box
Bookshelf 3


- The Seven Fights of the Aldudagga, Volume 1-4, 6:
Fight 1, Fight 2, Fight 3, Fight 4, (there is no Fight 5), Fight 6, (there is no Fight 7) - Vehk's Teaching, Volume 1-7:
Vol. 1, Vol. 2, Vol. 3, Vol. 4, Vol. 5, Vol. 6, Vol. 7 - Caius Cosades' Letters, Volume 1-2:
Caius Cosades' Letter, Caius Cosades' Visit to Uriel VII's Tomb - Lusty Argonian Maid Historical Society, Volume 1-3:
Vol. 1, Vol. 2, Vol. 3 - Works of Divayth Fyr, Volume 1-3:
The Dragon's Chilled Blood, Why Were the Dwemer Considered a Great House?, Return of a Fellow Scholar - Lord Vivec's Sword-Meeting with Cyrus the Restless, Volume 1-8:
Vol. 1, Vol. 2, Vol. 3, Vol. 4, Vol. 5, Vol. 6, Vol. 7, Vol. 8 - The Xal-Gosleigh Letters, Volume 1-7:
Vol. 1, Vol. 2, Vol. 3, Vol. 4, Vol. 5, Vol. 6, Vol. 7 - Tiber Septim's Sword-Meeting with Cyrus the Restless, Volume 1-6:
Vol. 1, Vol. 2, Vol. 3, Vol. 4, Vol. 5, Vol. 6
Bookshelf 4
- Rare Dwemer Book Set, Vol. 1-3 (replicas):
Interesting Book On the Dwemer, Unique Book About the Dwemer, Rare Book Concerning the Dwemer - Herbane's Bestiary, Volume 1-3:
Automatons, Hagravens, Ice Wraiths - Falmer Collection, Volume 1-4:
The Betrayed, The Journal of Mirtil Angoth, The Diary of Faire Agarwen, Touching the Sky - Eslaf Erol, Volume 1-4:
Beggar, Thief, Warrior, King - The Book of Circles, Volume 1-3 plus Preface and Notes:
Vol. 1, Vol. 2, Vol. 3, Preface, Notes
Bookshelf 5
- Song of Pelinal, Volume 1-8:
Vol. 1, Vol. 2, Vol. 3, Vol. 4, Vol. 5, Vol. 6, Vol. 7, Vol. 8 - Brief History of the Empire, Volume 1-4:
Vol. 1, Vol. 2, Vol. 3, Vol. 4 - 2920, Volume 1-12:
Vol. 01: Morning Star, Vol. 02: Sun's Dawn, Vol. 03: First Seed, Vol. 04: Rain's Hand, Vol. 05: Second Seed, Vol. 06: MidYear, Vol. 07: Sun's Height, Vol. 08: Last Seed, 2920, Vol. 09: Hearth Fire, Vol. 10: Frostfall, Vol. 11: Sun's Dusk, Vol. 12: Evening Star - The Poison Song, Volume 1-7:
Vol. 1, Vol. 2, Vol. 3, Vol. 4, Vol. 5, Vol. 6, Vol. 7 - The Wolf Queen, Volume 1-8:
Vol. 1, Vol. 2, Vol. 3, Vol. 4, Vol. 5, Vol. 6, Vol. 7, Vol. 8
Bookshelf 6
- Rising Threat, Volume 1-4: Vol. 1, Vol. 2, Vol. 3, Vol. 4
- Songs of the Return, Volumes 2, 7, 19, 24, 56: Vol. 02, Vol. 07, Vol. 19, Vol. 24, Vol. 56
- Dwemer Inquiries, Volume 1-3: Vol. 1, Vol. 2, Vol. 3
- Feyfolken, Volume 1-3: Vol. 1, Vol. 2, Vol. 3
- History of Raven Rock, Volume 1-3: Vol. 1, Vol. 2, Vol. 3
- A Dance in Fire, Volume 1-7: Vol. 1, Vol. 2, Vol. 3, Vol. 4, Vol. 5, Vol. 6, Vol. 7
- Argonian Account, Volume 1-4: Vol. 1, Vol. 2, Vol. 3, Vol. 4
- The Real Barenziah (Unabridged), Volume 1-12:
Vol. 01, Vol. 02, Vol. 03, Vol. 04, Vol. 05, Vol. 06, Vol. 07, Vol. 08, Vol. 09, Vol. 10, Vol. 11, Vol. 12
Bookshelf 7
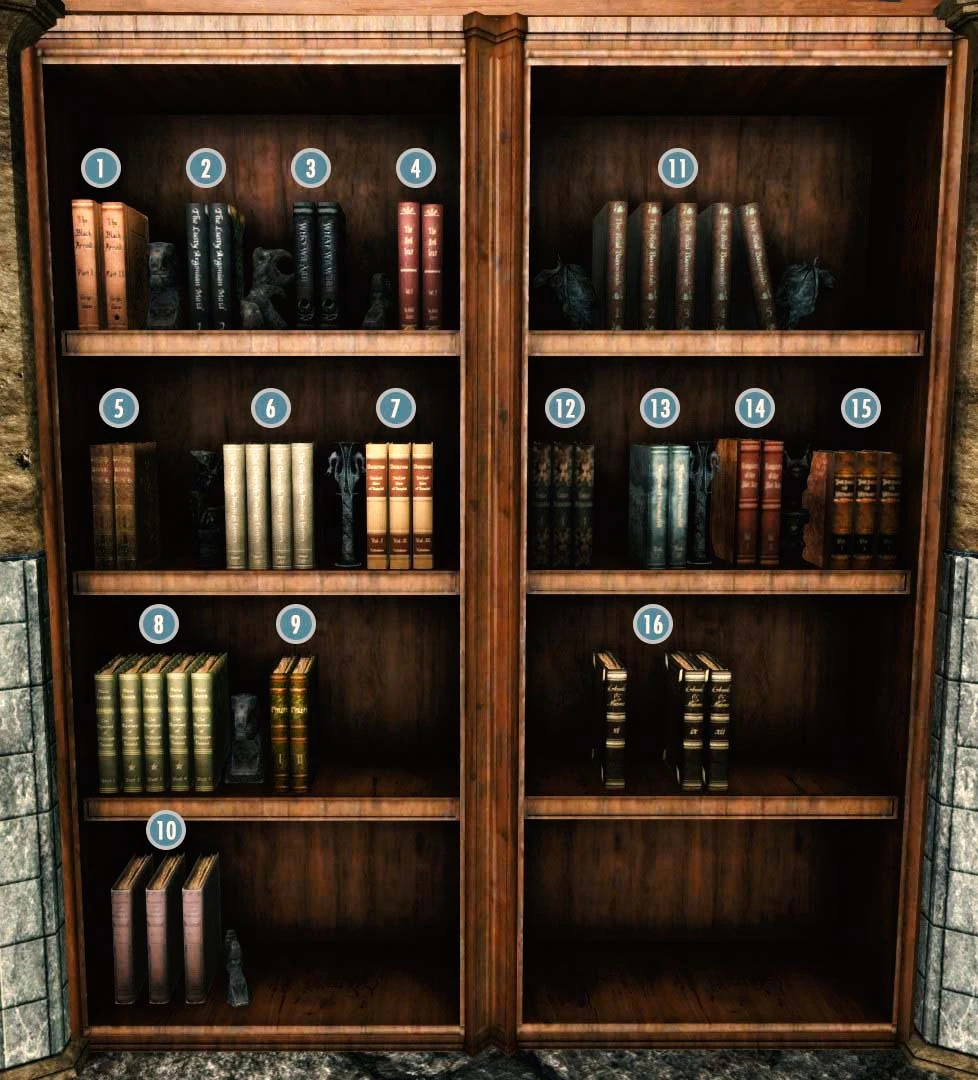
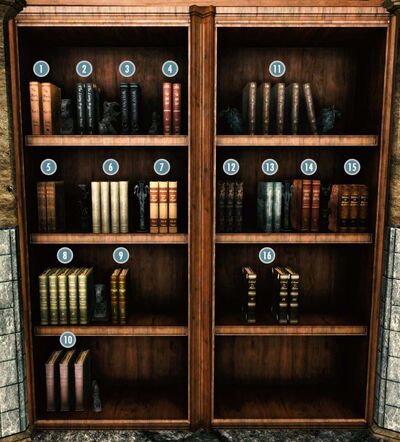
- The Black Arrow, Volume 1-2: Vol. 1, Vol. 2
- The Lusty Argonian Maid, Volume 1-2: Vol. 1, Vol. 2
- The Nightingales, Volume 1-2: Vol. 1, Vol. 2
- The Red Year, Volume 1-2: Vol. 1, Vol. 2
- Bone, Volume 1-2: Vol. 1, Vol. 2
- Charwich-Koniinge Letters, Volume 1-4: Vol. 1, Vol. 2, Vol. 3, Vol. 4
- Dwarves, Volume 1-3: Vol. 1, Vol. 2, Vol. 3
- Mystery of Talara, Volume 1-5: Vol. 1, Vol. 2, Vol. 3, Vol. 4, Vol. 5
- Palla, Volume 1-2: Vol. 1, Vol. 2
- The Biography of Barenziah, Volume 1-3: Vol. 1, Vol. 2, Vol. 3
Bookshelf 8
- The Real Barenziah, Volume 1-5: Vol. 1, Vol. 2, Vol. 3, Vol. 4, Vol. 5
- Corpse Preparation, Volume 1-3: Vol. 1, Vol. 2, Vol. 3
- Vampires of Vvardenfell, Volume 1-2: Vol. 1, Vol. 2
- Vampires of the Iliac Bay, Volume 1-2: Vol. 1, Vol. 2
- Fall of Vitharn, Volume 1-3: Vol. 1, Vol. 2, Vol. 3
- 16 Accords of Madness: Vol. 06, Vol. 09, Vol. 12
Gated Area
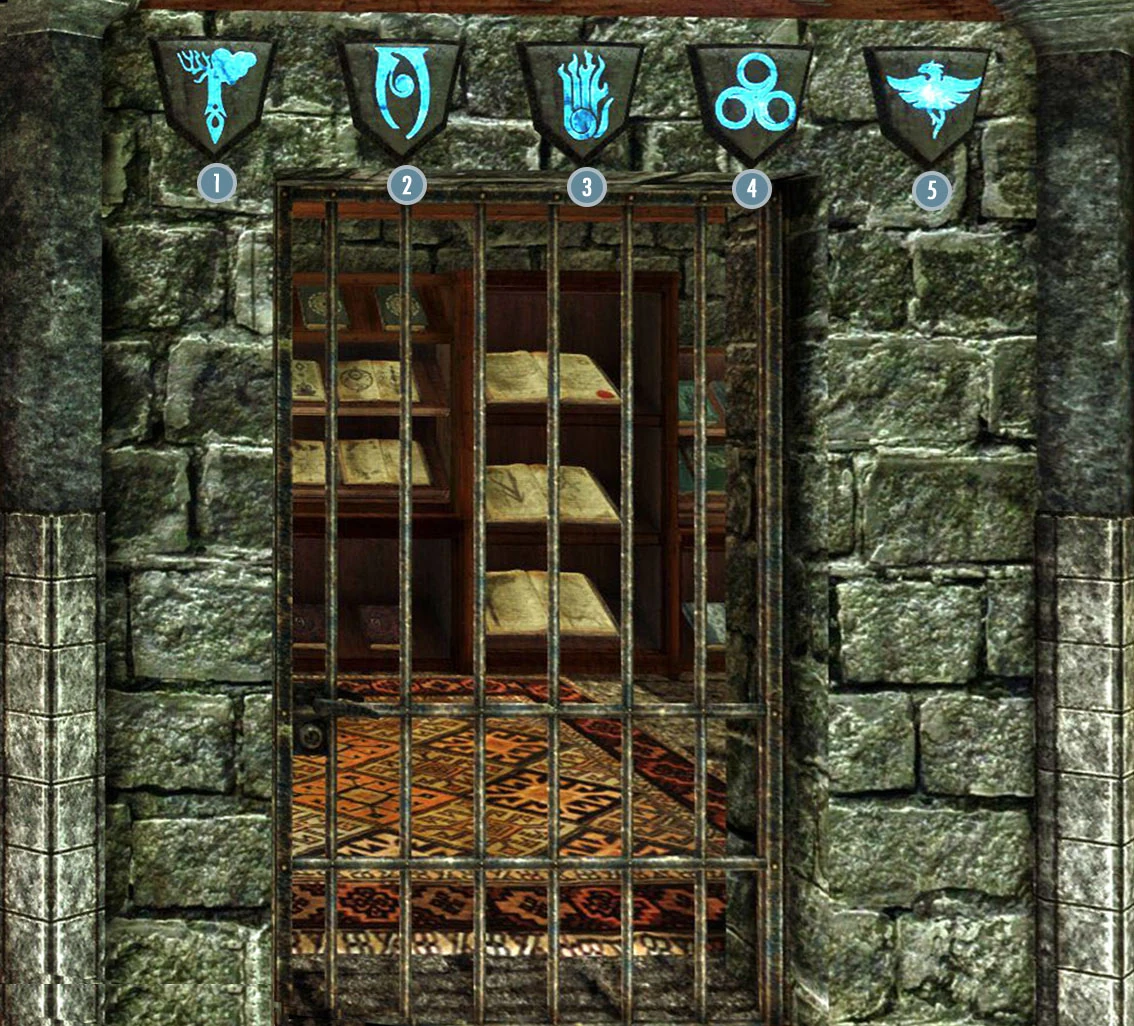
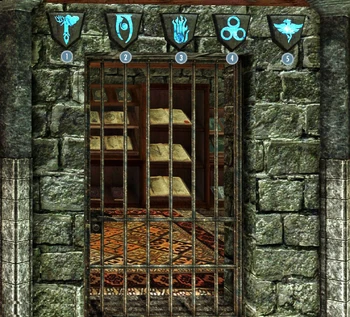
The displays above the gate activate after completing the respective quests:
- Alteration Ritual Spell
- Conjuration Ritual Spell
- Destruction Ritual Spell
- Illusion Ritual Spell
- Restoration Ritual Spell
Other than at the fixed locations listed on the individual book pages, most of the books in the Gated Bookcases section can spawn as random loot in Pods, in Vessels and on Seeker corpses in Apocrypha. The ones that can't are some of the books with obvious ties to specific quests, like The Amulet of Kings 1st edition, the Mythic Dawn Commentaries series, Malyn Varen's Grimoire and The Dreamstride.
1st Gated Bookcase | |||||
|---|---|---|---|---|---|
| 1) The Book of the Dragonborn | 2) Kagrenac's Tools | 3) The Amulet of Kings 1st edition | 4) Remanada | 5) Nerevar Moon-and-Star | 6) Skyrim's Rule |
| 7) Effects of the Elder Scrolls | 8) The Adabal-a | 9) The Guardian and the Traitor | 10) Annals of the Dragonguard | 11) Five Songs of King Wulfharth | 12) The Last King of the Ayleids |
| 13) The Legendary Scourge | |||||
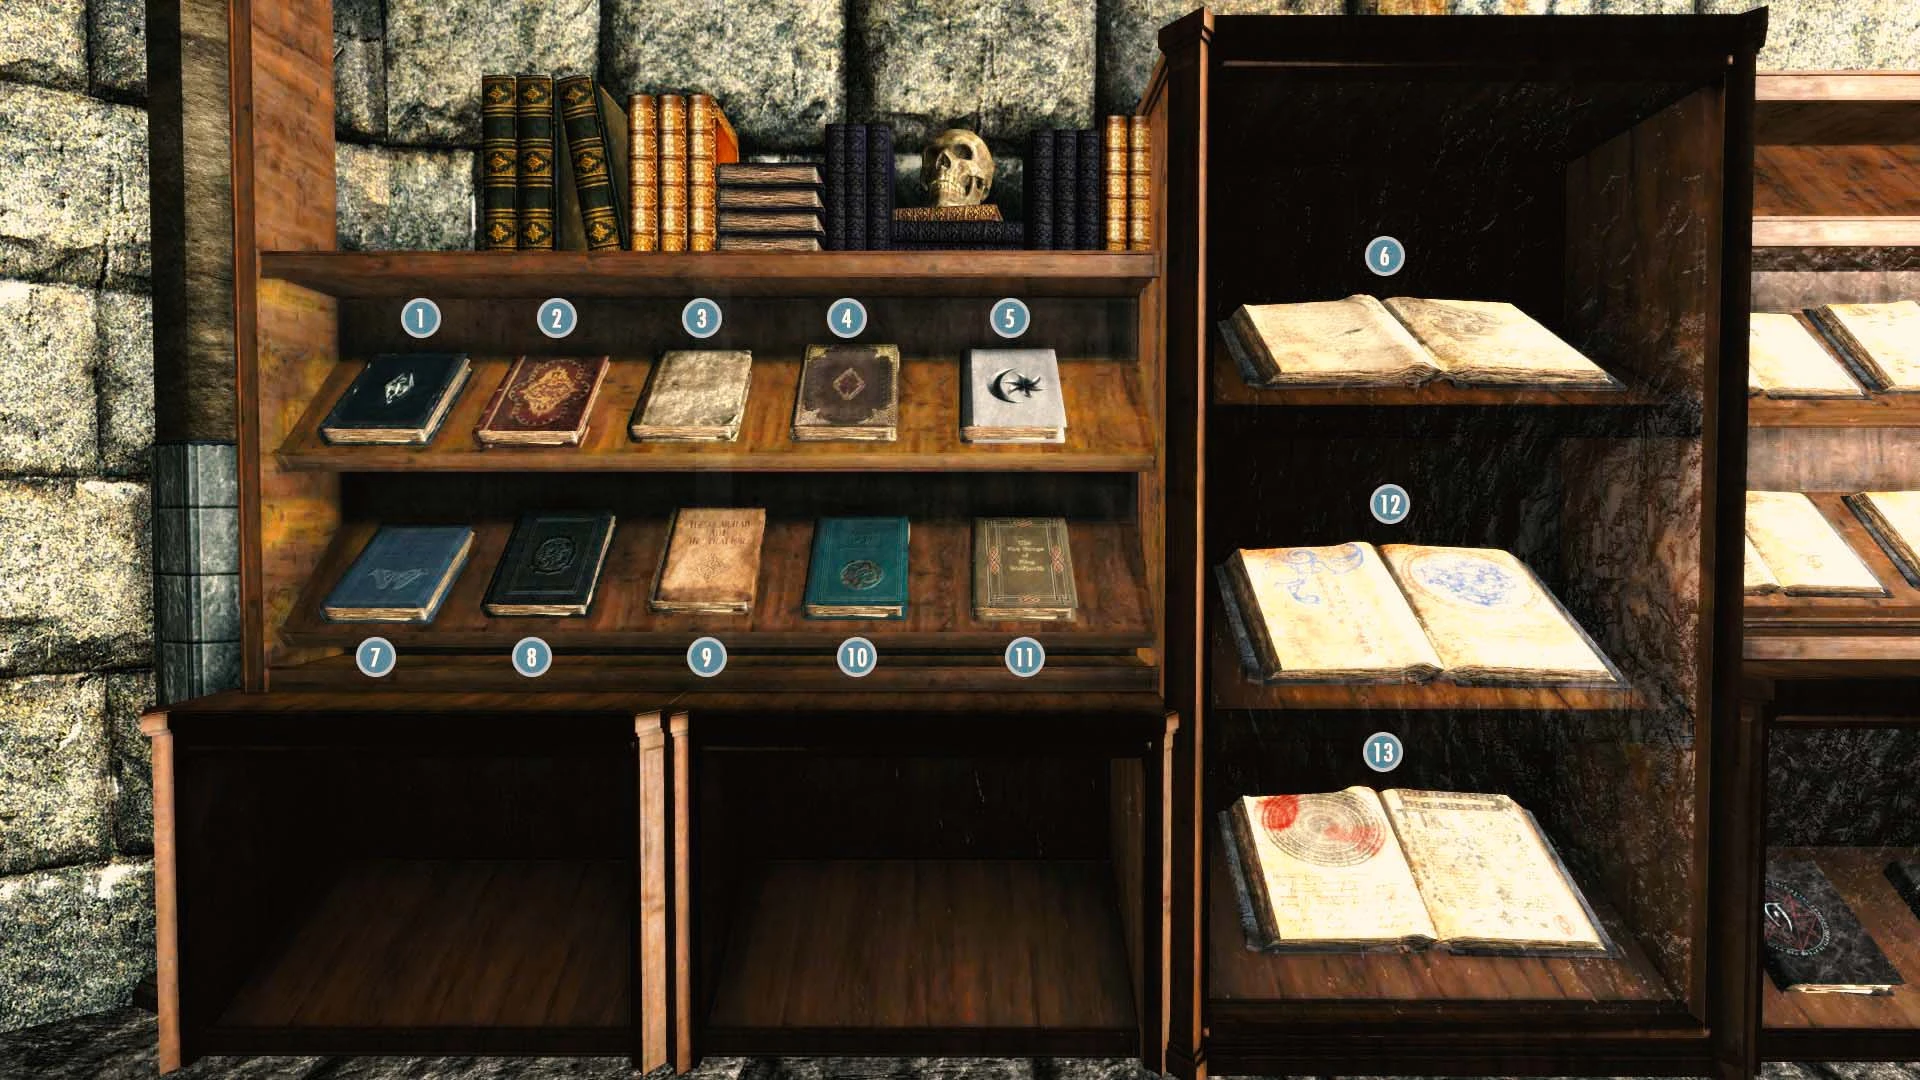

2nd Gated Bookcase | |||
|---|---|---|---|
| 1) The Secrets of Ragnvald | 2) Deathbrand | 3) Arcana Restored | 4) Sotha Sil's Last Words |
| 5) Lost Legends | 6) Cleansing of the Fane | 7) The Aetherium Wars | 8) The Legend of Red Eagle |
| 9) Mythic Dawn Commentaries, Vol. 1 | 10) Mythic Dawn Commentaries, Vol. 2 | 11) Mythic Dawn Commentaries, Vol. 3 | 12) Mythic Dawn Commentaries, Vol. 4 |
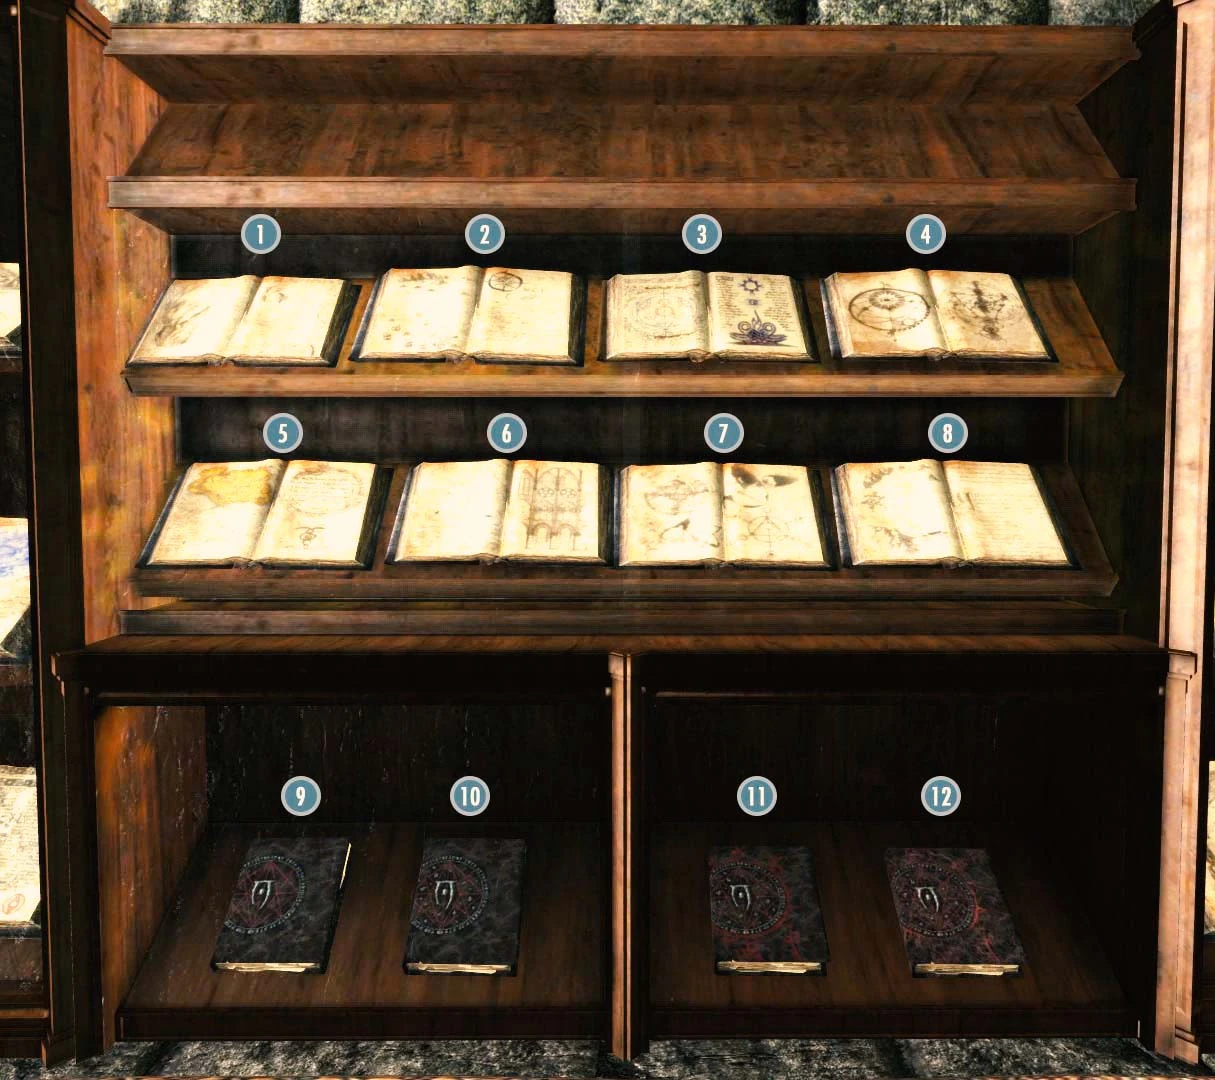

3rd Gated Bookcase | ||||||||
|---|---|---|---|---|---|---|---|---|
| 1) N'Gasta! Kvata! Kvakis! | 2) Invocation of Azura | 3) Last Scabbard of Akrash | 4) Night of Tears | 5) Brothers of Darkness | 6) Fragment: On Artaeum | 7) Glories and Laments | ||
| 8) Hanging Gardens | 9) Souls, Black and White | 10) The Old Ways | 11) War of the First Council | 12) King Olaf's Verse | 13) The Waters of Oblivion | 14) The Wild Elves | 15) Children of the Sky | |
| 16) Chronicles of Nchuleft | 17) The Dreamstride | 18) Boethiah's Proving | 19) Malyn Varen's Grimoire | 20) Boethiah's Glory | ||||
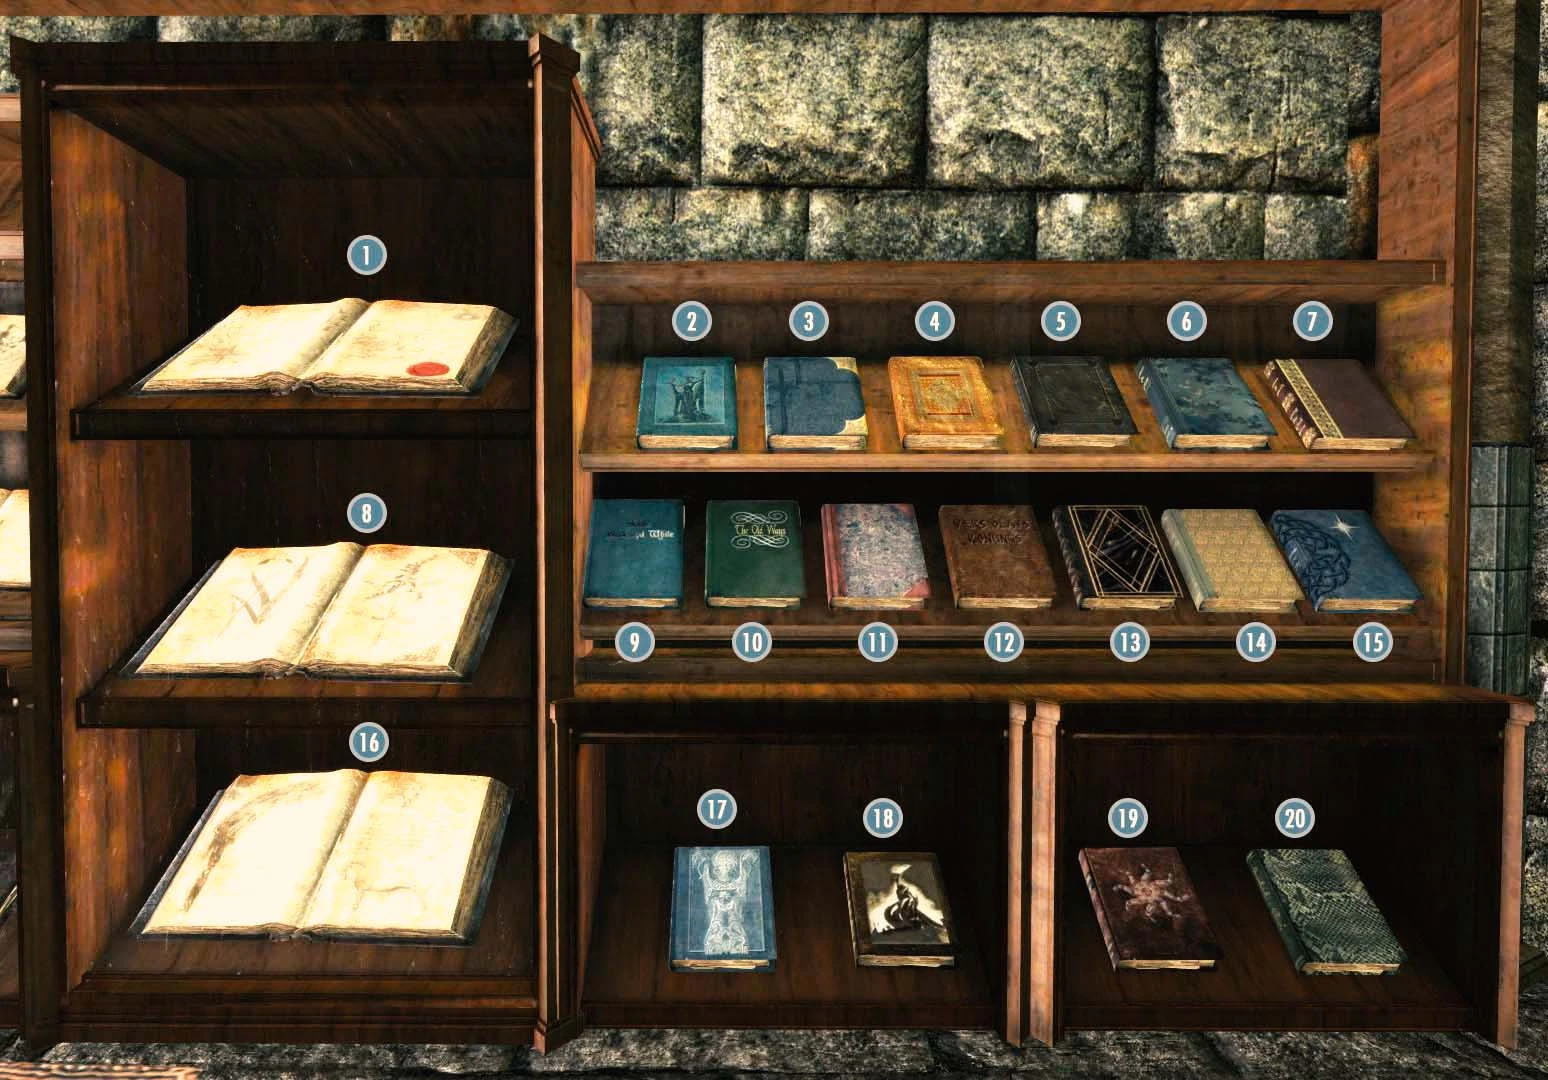
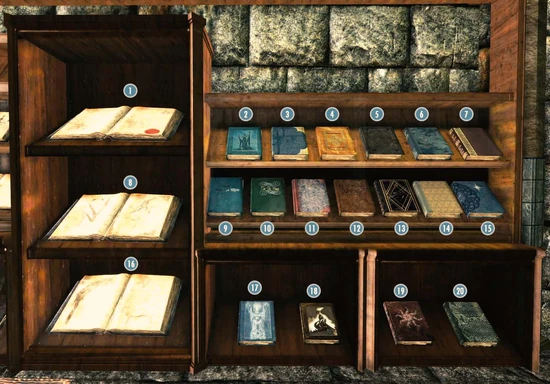
New Treasure Hunt Displays

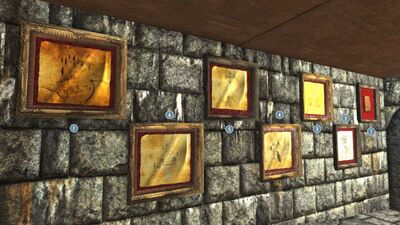

The new treasure maps added by New Treasure Hunt SSE can be displayed along the wall at the entrance to the library from the Hall of Heroes.
| New Treasure Hunt Displays | |
|---|---|
| (all items require New Treasure Hunt SSE) | |
| 1) Treasure Hunter's Journal | 8) Treasure Hunt Map VII |
| 2) Treasure Hunt Map I | 9) Treasure Hunt Map VIII |
| 3) Treasure Hunt Map II | 10) Treasure Hunt Map IX |
| 4) Treasure Hunt Map III | 11) Treasure Hunt Map X |
| 5) Treasure Hunt Map IV | 12) Treasure Hunt Map XI |
| 6) Treasure Hunt Map V | 13) Treasure Hunt Map XII |
| 7) Treasure Hunt Map VI | 14) Treasure Hunt Map XIII |
Library 2nd Floor

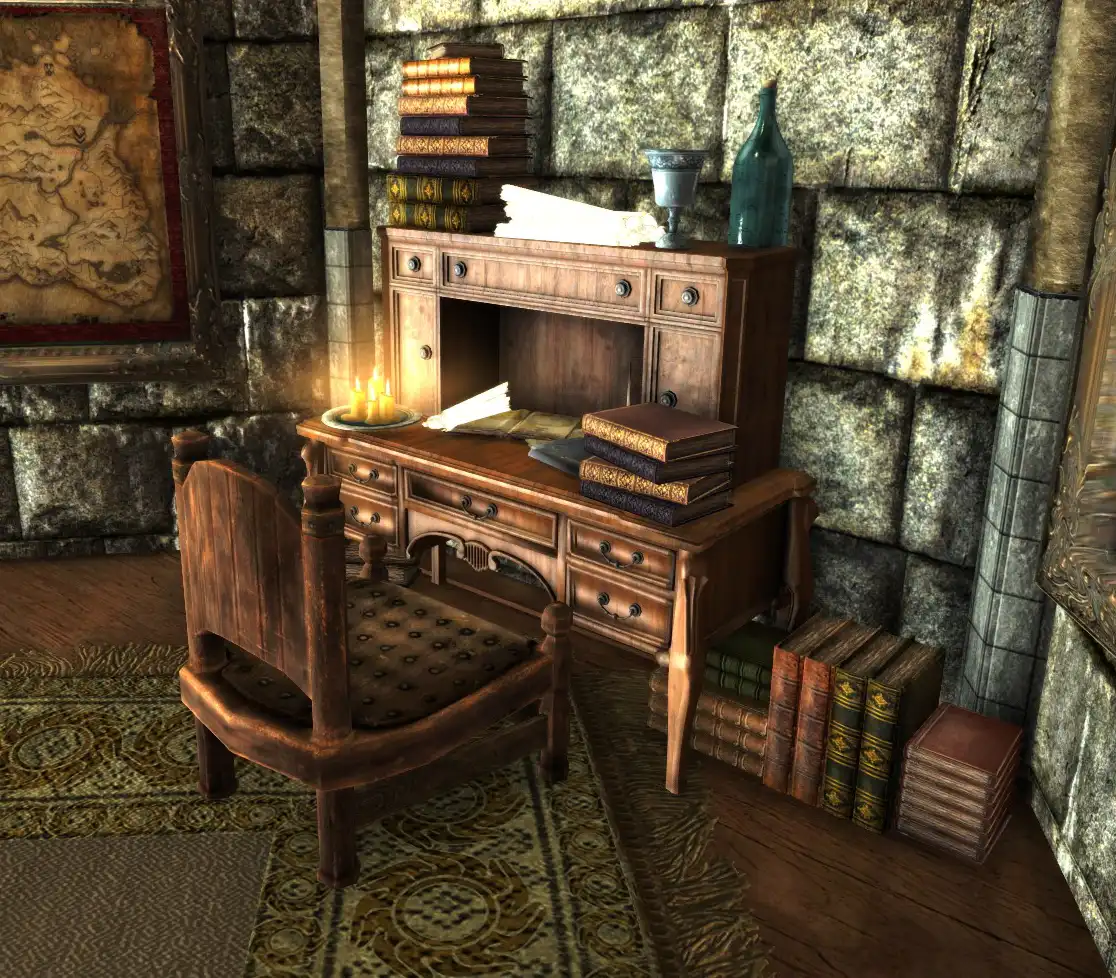
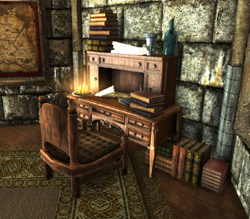
Research Station
The 2nd floor of the Library is dedicated to treasure maps and rare books. The Research Station is also located on this floor. Technically the treasure maps from Treasure Hunter for SSE start on this floor, but they are listed in Library 3rd Floor.
Below is a list of all the books and maps that can be displayed on this floor. They are divided up and arranged the way they are in game.


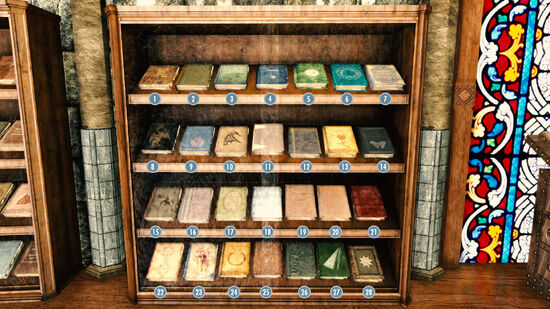
Saint Jiub's Opus Display |
|---|
| Saint Jiub's Opus |


Dragonstone Display |
|---|
| Dragonstone (replica) |


Quill of Gemination Display |
|---|
| Quill of Gemination (replica) |
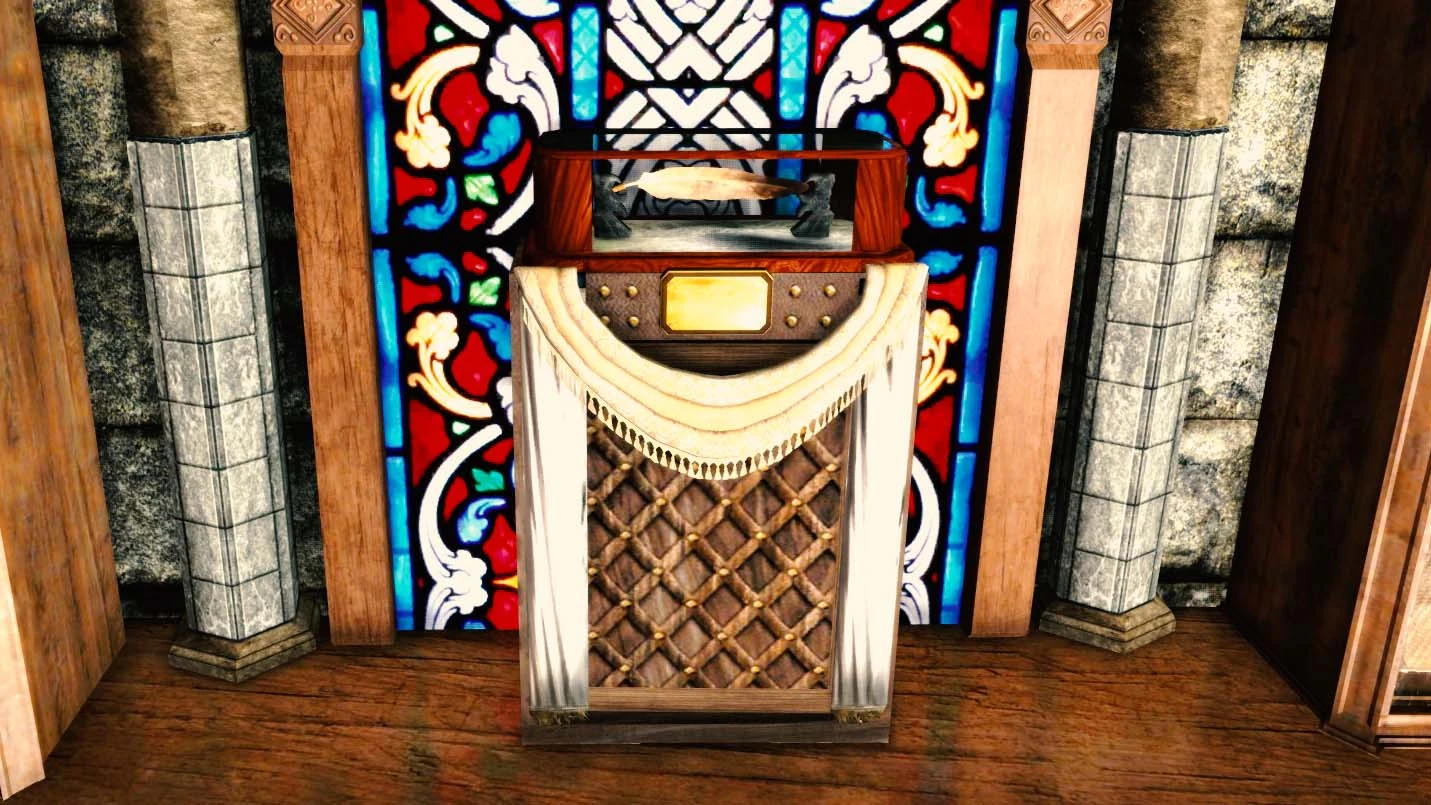


Treasure Maps Display | |
|---|---|
| Left wall display | Right wall display |
| 1) Treasure Map XXI | 7) Treasure Map, Fort Neugrad |
| 2) Treasure Map XXII | 8) Map of Dragon Burials |
| 3) Treasure Map XXIII | 9) Mercer's Plans |
| 4) Treasure Map XXIV | 10) Deathbrand Treasure Map |
| 5) Treasure Map XXV | 11) East Empire Shipping Map |
| 6) Treasure Map, Velehk Sain's | |
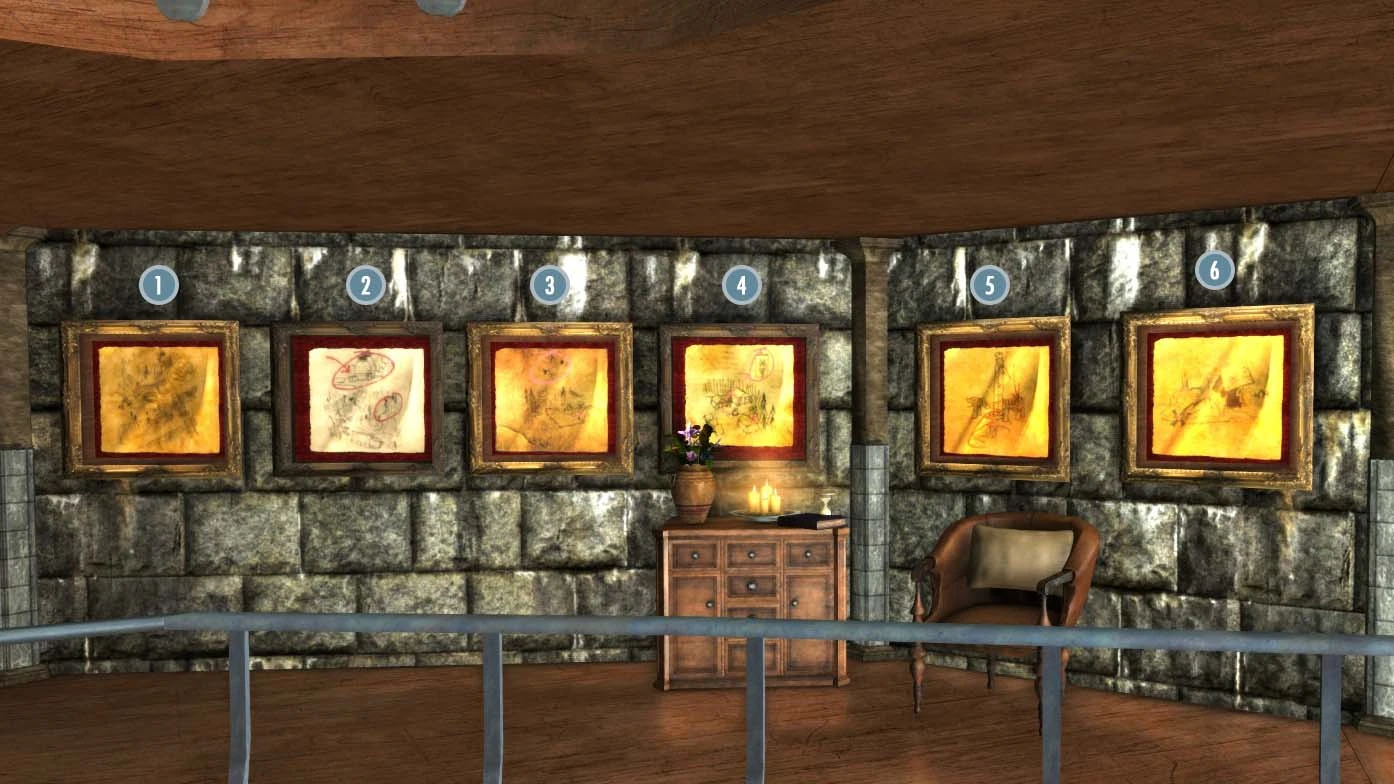

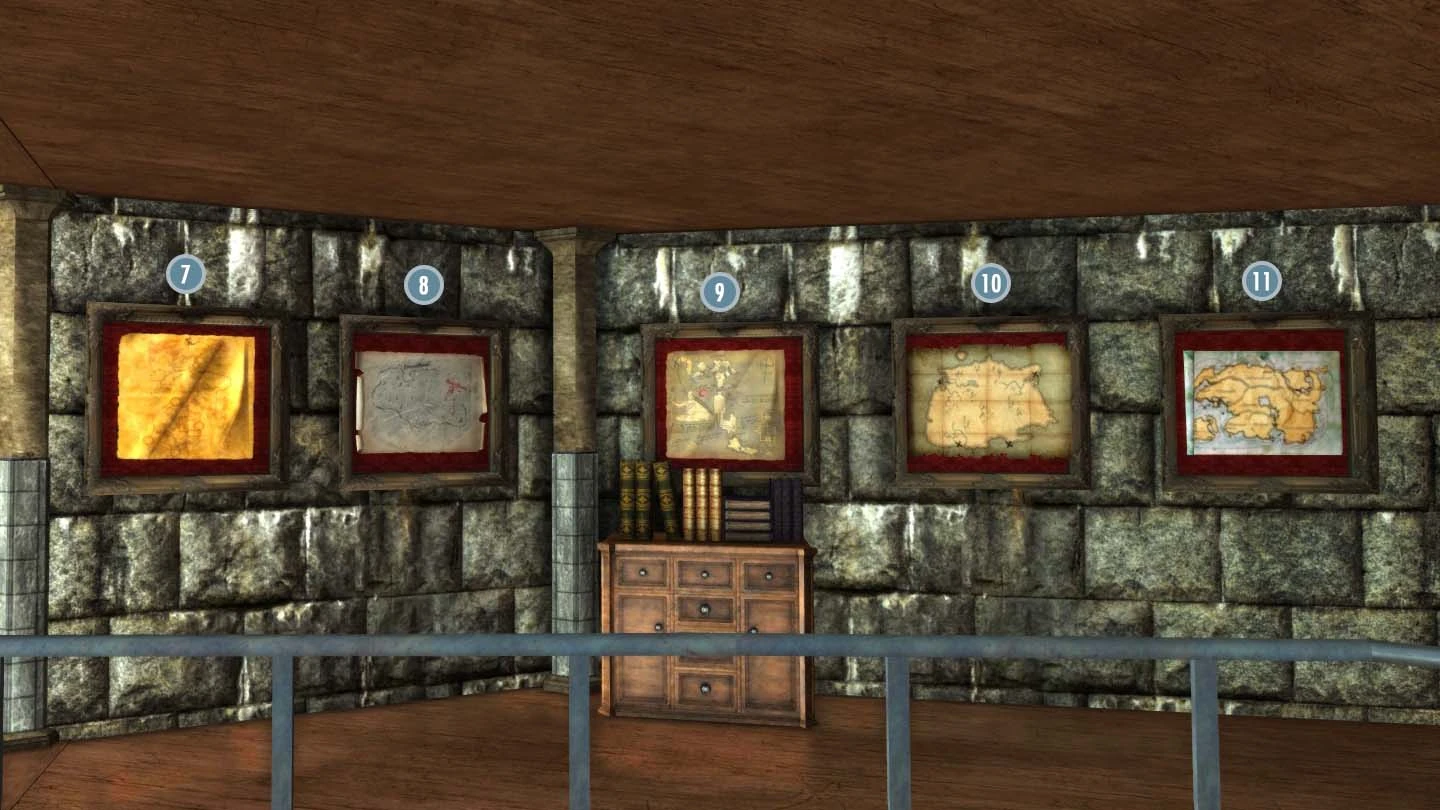

Library 3rd Floor

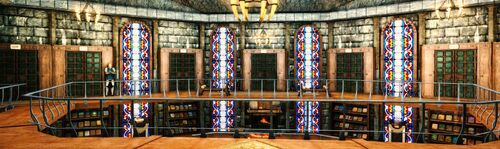

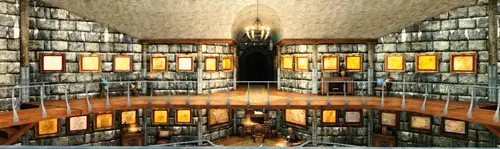
The 3rd floor of the library has labeled bookcases, one for Skill Books, one for Spell Tomes and five more alphabetically sorted. These can be used to automatically sort into by the Book Return. It also contains a lot of Treasure Maps.
Note: The Book Return will only sort unread Skill Books into the Skill Book bookcase. Since books are automatically read when picking them up (unless you have a mod like Non-Auto Skill Books installed or let your follower pick them up), the Book Return doesn't recognize that it's a Skill Book and will sort it into the alphabetical bookcases.
Treasure Maps Display 1 | |
|---|---|
| 1) Treasure Map I | |
| 2) Treasure Map II | |
| 3) Treasure Map III | |
| 4) Treasure Map IV | |
| 5) Treasure Map V | |

Treasure Maps Display 2 | |
|---|---|
| 1) Treasure Map VI | |
| 2) Treasure Map VII | |
| 3) Treasure Map VIII | |
| 4) Treasure Map IX | |
| 5) Treasure Map X | |

Treasure Maps Display 3 | |
|---|---|
| 1) Treasure Map XX | |
| 2) Treasure Map XI | |
| 3) Treasure Map XII | |
| 4) Treasure Map XIII | |
| 5) Treasure Map XIV | |
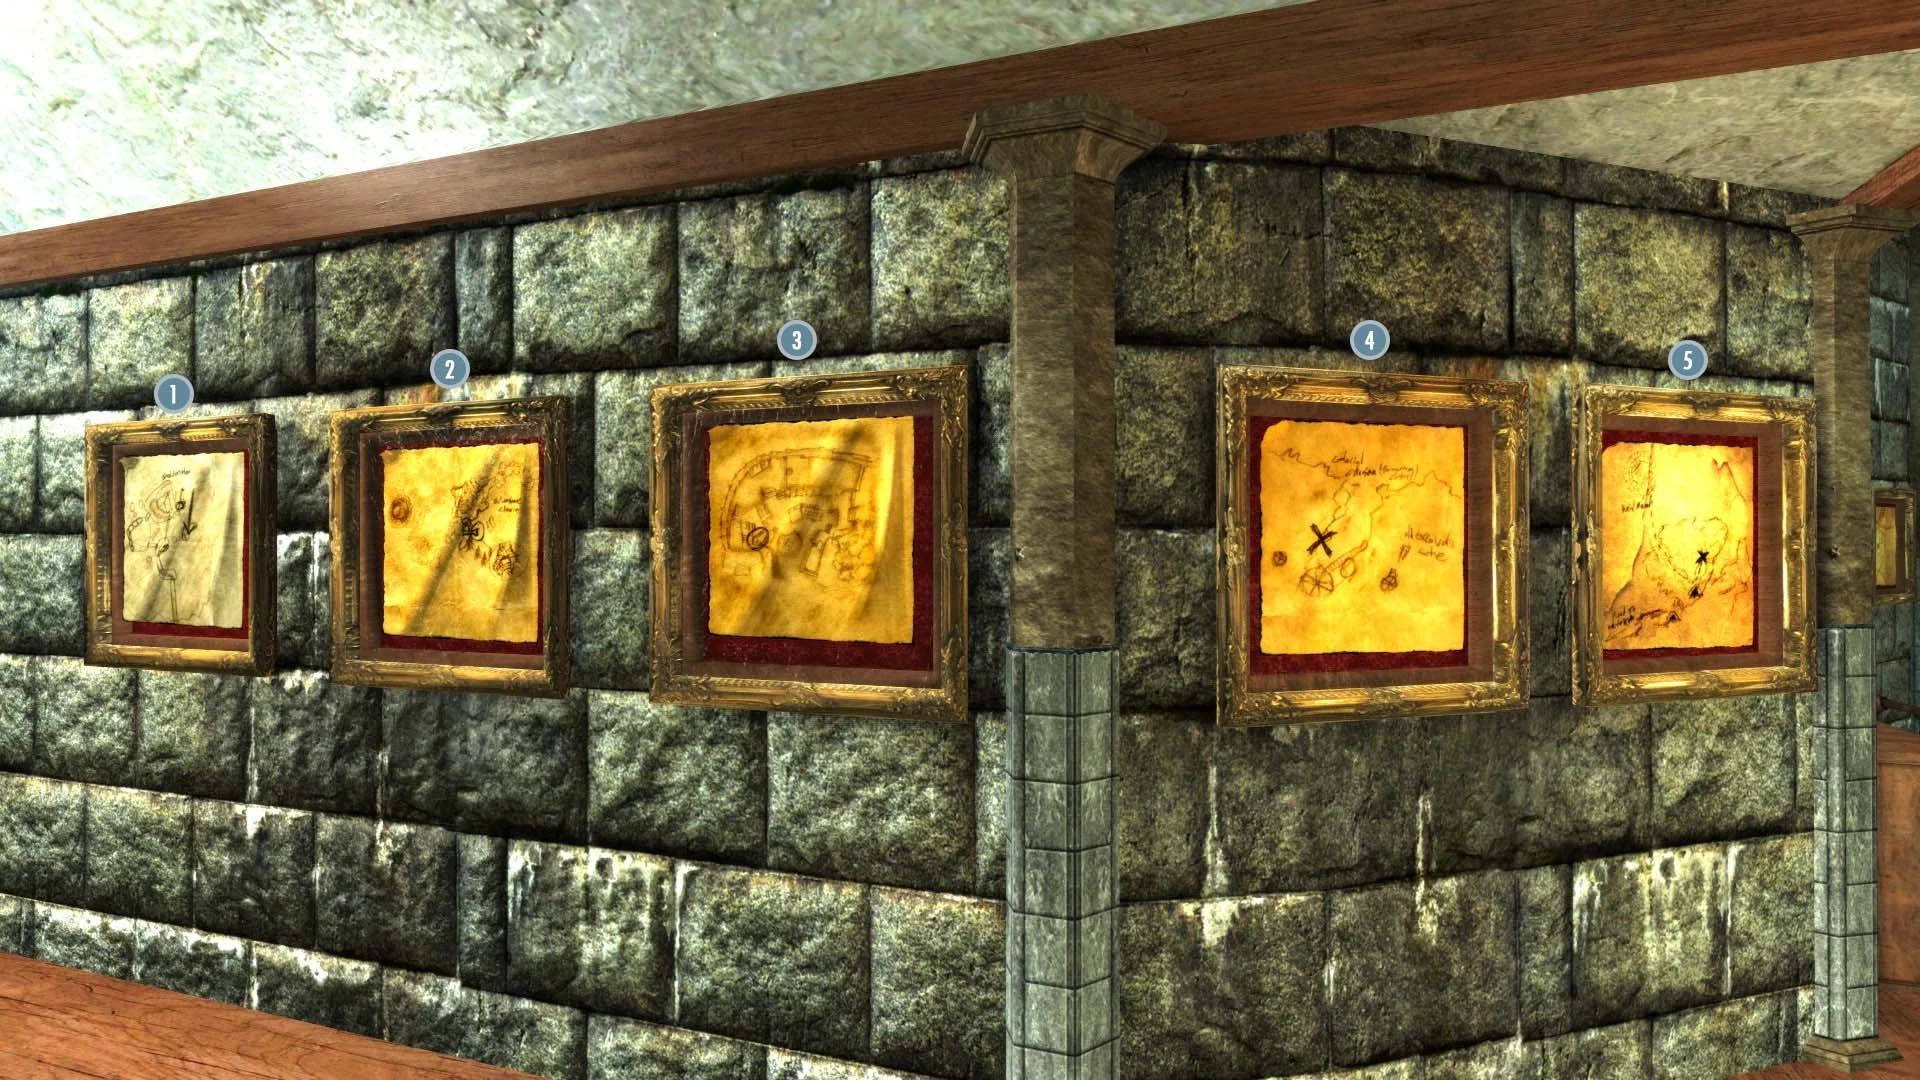

Treasure Maps Display 4 | |
|---|---|
| 1) Treasure Map XV | |
| 2) Treasure Map XVI | |
| 3) Treasure Map XVII | |
| 4) Treasure Map XVIII | |
| 5) Treasure Map XIX | |
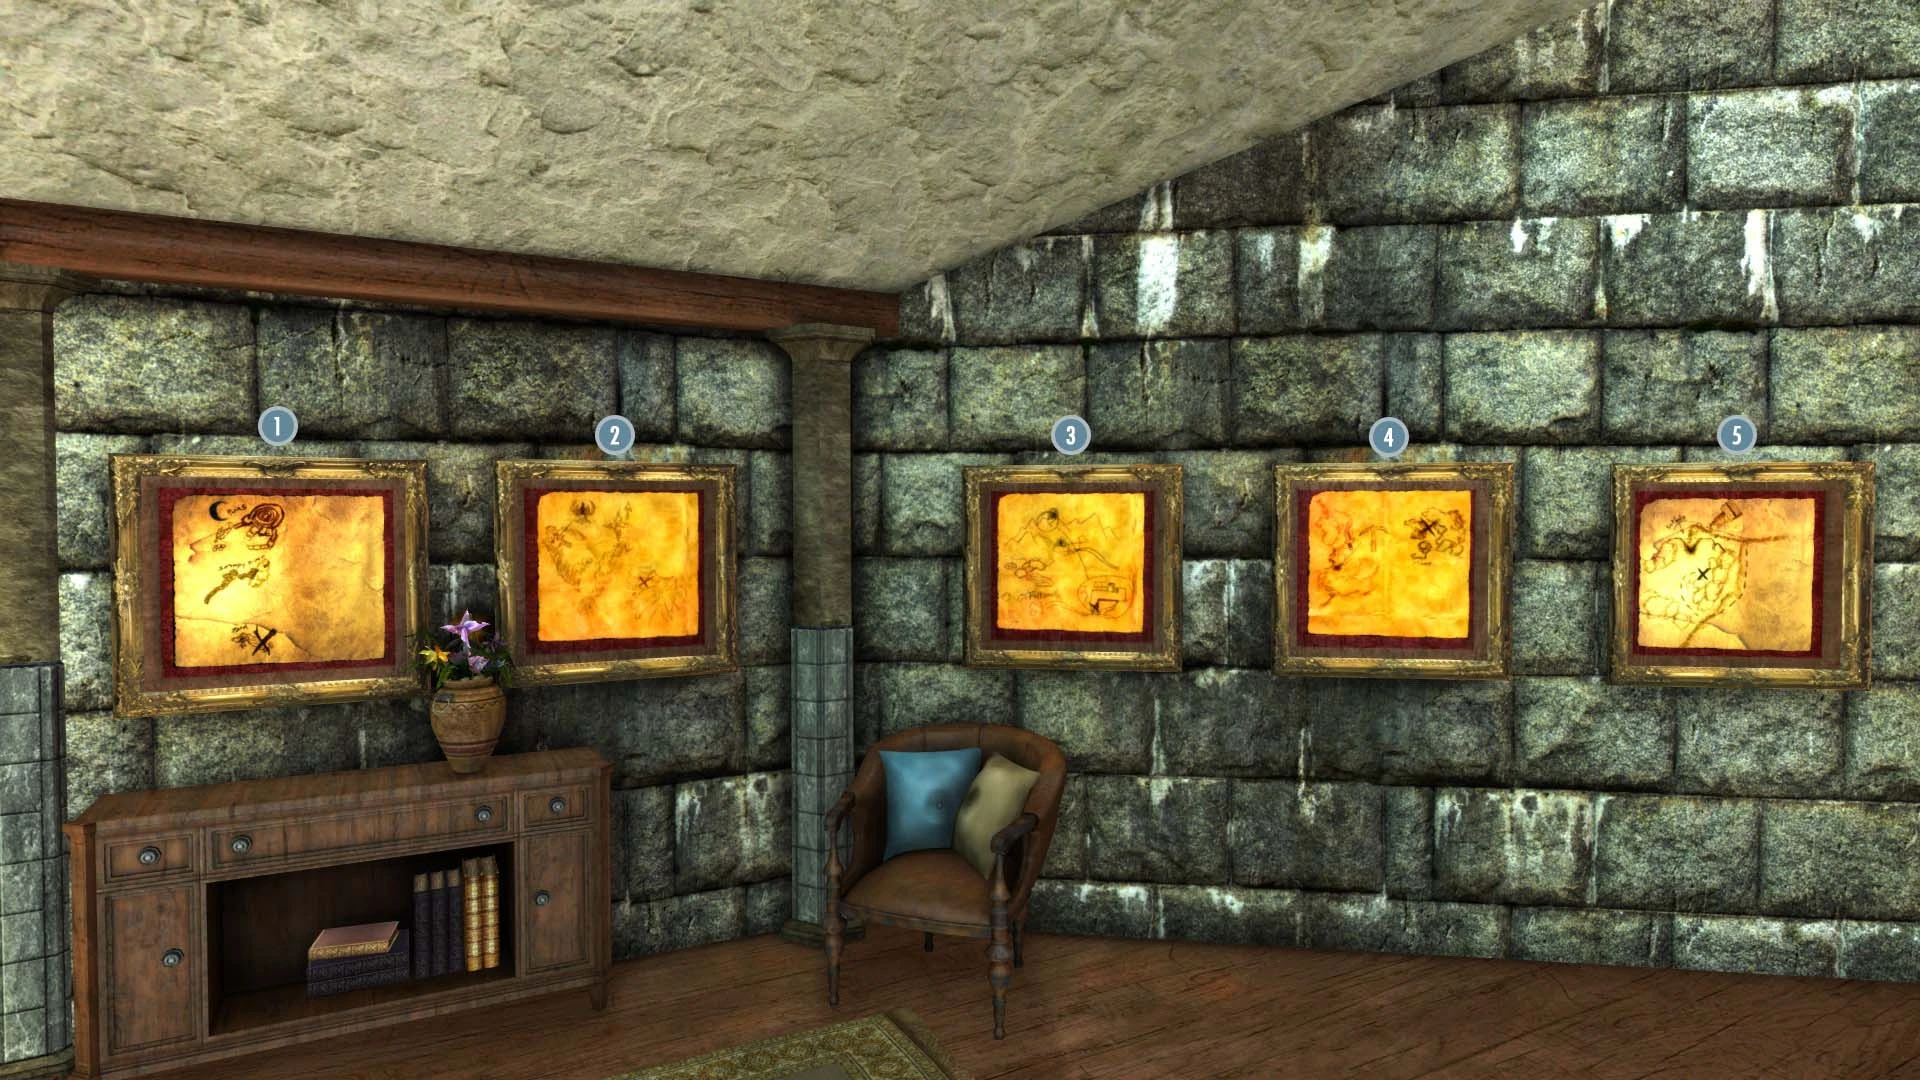

Treasure Hunter Maps Display(all items require Treasure Hunter) | ||
|---|---|---|
| 1) Treasure Hunter Map I | 5) Treasure Hunter Map V | |
| 2) Treasure Hunter Map II | 6) Treasure Hunter Map VI | |
| 3) Treasure Hunter Map III | 7) Treasure Hunter Map VII | |
| 4) Treasure Hunter Map IV | ||


Jewelry Display
Classic Skyrim
Special Edition Skyrim
Dragonborn Hall
Helgen Reborn Display
The static part of the display activates after the completion of Helgen Reborn's main quest.
Falskaar Display
The static part of the display activates after the completion of Falskaar's main quest.
Moon and Star Display
Complete the main quest of Moon and Star.
The Wheels of Lull Display
The static part of the display activates after the completion of The Wheels of Lull's main quest.
The Gray Cowl of Nocturnal Display
The static part of the display activates after the completion of The Gray Cowl of Nocturnal's main quest.
Konahrik's Accoutrements Display
The static part of the display activates after the completion of Konahrik's Accoutrements' main quest.
Konahrik's Accoutrements Armor Displays
In progress
Wyrmstooth Display
The static part of the display activates after the completion of Wyrmtooth's main quest.
Hall of Secrets
In the Hall of Secrets you can store the things you attain in unlawful ways, such as trophies from the special Thieves Guild jobs and skulls of the people you kill during the Dark Brotherhood questline. The entrance is hidden in the Dragonborn Hall.
To get the Hall of Secrets ready for display, press the button on the left side of the staircase as you descend to the lowest floor of Dragonborn Hall, then make your way to the cobwebbed storage room. This will start the quest 'Auryen Morellus and the Chamber of Secrets'.
Trophy Heads display If you have BadGremlin's Collection installed, here is where you can display the trophy heads. | |
| Argonian Head | Nord Head |
| Thalmor Head | Khajiit Head |
| Wood Elf Head | Dark Elf Head |
| Orc Head | Forsworn Head |
| Burnt Head | Graybeard Head |
| Redguard Head | Hag Head |
Skulls and remains display") ") | |
| Pelagius' Hip Bone | Ancient Traveler's Skull |
| Potema's Skull | Arvak's Skull |
| Karstaag's Skull | Habd's Remains |
| Glenmoril Witch Head x5 | |
| Kolbjorn's Skull | |

")
")
Thieves Guild display |
| Nightingale Bow |
| Nightingale Blade |
| Nightingale Armor, Boots, Gloves and Hood |
| Bust of the Gray Fox |
| Blackguard's Armor, Boots, Gloves and Hood |
| Guild Master's Armor, Boots, Gloves and Hood |
Undeath display Requires Undeath Remastered. |
| Arch Necromancer's Staff |
| Alchemist's Cap |
| Antioch's Robes |
| Black Book: Whispers of the Veil |
")
")
Dark Brotherhood mannequin: intended to show either the Shrouded Armor, Shrouded Outfit or the Jester's Outfit.
The Sinister Seven display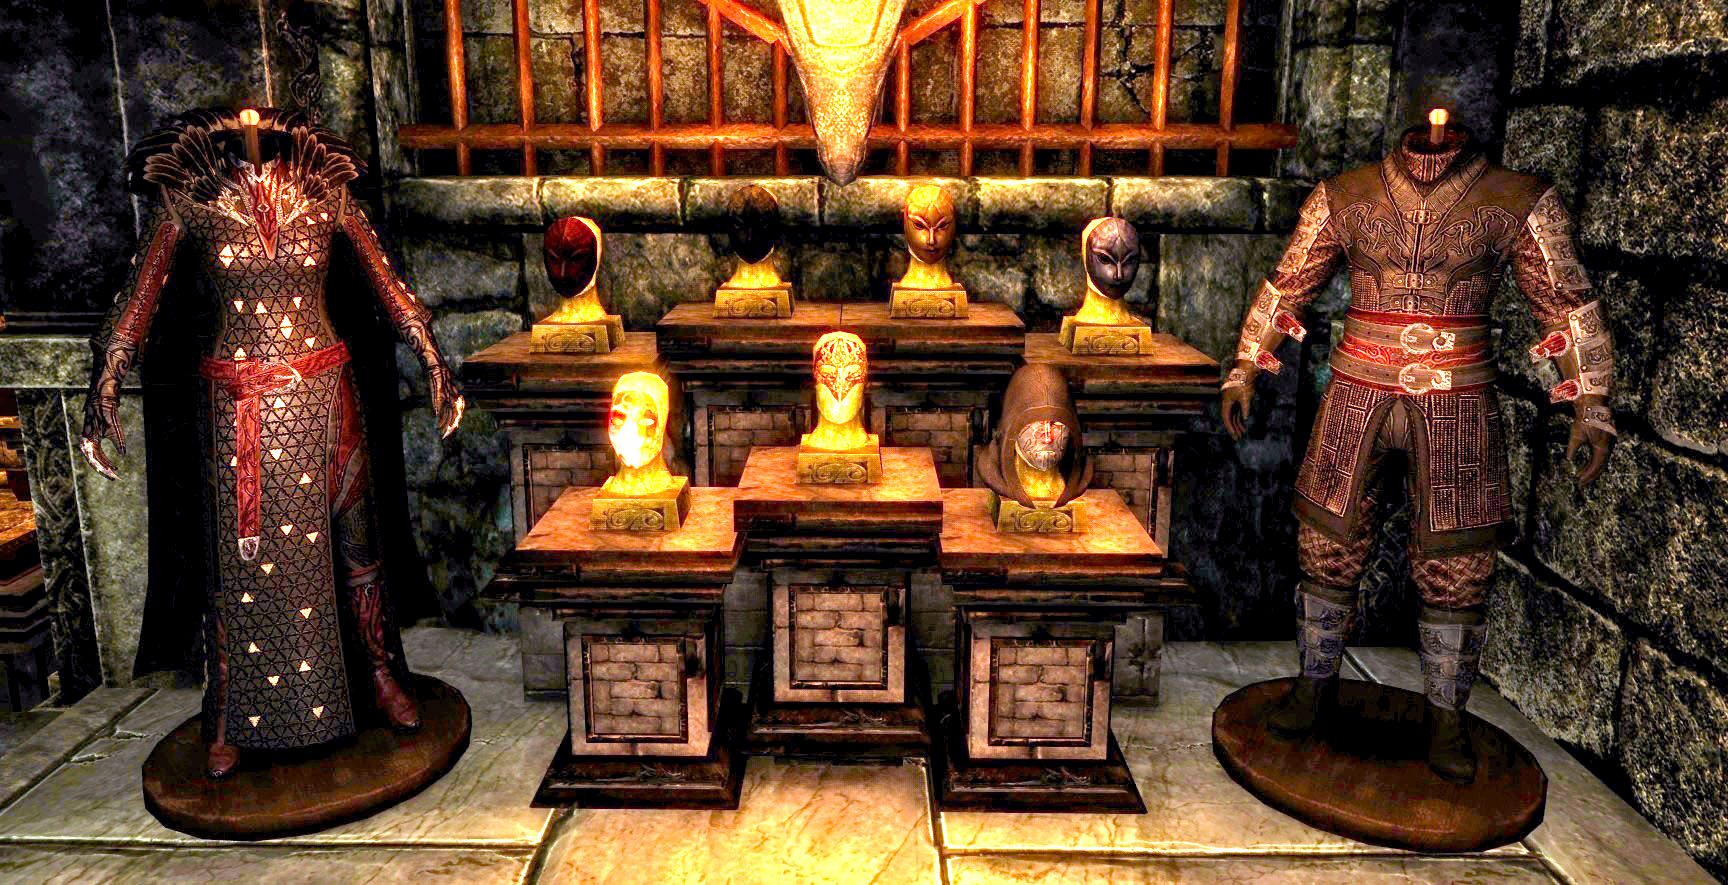 Requires The Sinister Seven |
| Raven Witch Mask, Gloves, Boots, Long Gown and Cape |
| A Sinister Bronze Mask |
| A Sinister Mask of Jack Frost |
| A Sinister Ebony Mask |
| A Sinister Gold Mask |
| A Sinister Silver Mask |
| Evil MasterMind Hooded Mask, Gloves, Boots and Cuirass |
Heads Display (requires BadGremlin's Trophy Heads)
- Wood Elf Head: Western Watchtower near Whiterun, on top of a haystack on the middle floor.
- Redguard Head: Septimus Signus' Outpost, on top of the bookshelf.
- Nord Head:
- SSE: Hall of Valor in Sovngarde, on top of a barrel along the wall across from the entrance.
- Classic: Atop the Throat of the World.
- Khajiit Head: The Ratway Warrens in Riften, Esbern's room, on a top shelf behind the desk.
- Orc Head: Skuldafn Temple, on a top shelf in a side room before the exit.
- Burnt Head: Helgen Keep, in one of the sidetunnels when escaping the attack at the start of the game. The head is beside a skeleton at the end of the tunnel.
- Dark Elf Head: Blackreach, to the left of the entrance to the Debate Hall in the central building, on the floor next to some Dwemer pipes.
- Forsworn Head: Sky Haven Temple, on a top shelf in the room on the left of the main hall.
- Graybeard Head: High Hrothgar Courtyard, at the top of the tower.
- Hag Head: Ustengrav Depths, in the largest cavern in an alcove behind the fire traps.
- Thalmor Head: Thalmor Embassy Dungeon, on a table on the upper floor.
- Argonian Head: Bleak Falls Sanctum, on a middle shelf in a side room right after the first swinging blade trap.
Explorer's Society Guild House
- Aleksey's Key: Greywater Grotto, at the bottom of a chest full of keys next to the skeleton of an adventurer.
- Alvaro's Tools:
- SSE: Folgunthur, on a bedroll next to Alvaro's Knapsack in one of the tents outside the ruin.
- Arkayn's Tool Bag: Gloomreach Hive, down one of the holes in the ground next to or below the Skeleton of Arkayn.
- Deano's Bottomless Pack:
- Above South Shriekwind Bastion, on the back of Deano's skeleton, crushed beneath a stone avalanche. Follow the path up and over the mountain to the mountain peak. Scale it to where the backpack is and carefully drop down.
- Explorer's Guild Armor:
- 2 of each version are sold by Eriana in the Explorer's Society Guild House.
- If starting the game through the Relic Hunter addon to Alternate Start - Live another Life, one more of each version can be found at the start of Akaviri Rising, in a chest in the tent across from you.
- Can also be crafted at a forge after completing Digging Up Explorers.
- Explorer's Guild Boots:
- 2 of each version are sold by Eriana in the Explorer's Society Guild House.
- If starting the game through the Relic Hunter addon to Alternate Start - Live another Life, one more of each version can be found at the start of Akaviri Rising, in a chest in the tent across from you.
- Can also be crafted at a forge after completing Digging Up Explorers.
- Explorer's Guild Gloves:
- 2 of each version are sold by Eriana in the Explorer's Society Guild House.
- If starting the game through the Relic Hunter addon to Alternate Start - Live another Life, one more of each version can be found at the start of Akaviri Rising, in a chest in the tent across from you.
- Can also be crafted at a forge after completing Digging Up Explorers.
- Kamahl's Map: Explorer's Society Guild House, top floor on the dresser beside the Note from Marassi. Will only appear after everyone has been recruited during Digging Up Explorers.
- Kriana's Quill: Raldbthar Deep Market, in the hands of Kriana's skeleton crushed under rubble, next to a Falmer hut in the large puzzle room, behind a crushed Dwarven Centurion.
- Luca's Pickaxe: Forgotten Vale, on a stone ledge below the bridge to the Inner Sanctum, next to Luca's body and the backpack which contains his Journal.
- Merrian's Spyglass: Pilgrim's Trench, in the cabin of the biggest ship, in the hand of a skeleton that got crushed between a table and a bookshelf.
- Micmou's Spade: Apocrypha, Chapter IV of the Black Book: Waking Dreams during At the Summit of Apocrypha, in the hands of the skeleton of Micmou, which has been sheared in half as he tried to travel through an unstable portal.
- Picky's Beacon: Forgotten Vessel Bowels inside the Strange Vessel at Moesring Pass on Solstheim, on a Dwemer table next to Picky's Journal and a burnt corpse.
- Rains' Shelter: Clearspring Tarn, leaning at a barrel near the eastern shore of the pond.
- Sanamia's Journal (1): Dev Aveza, in a secret room underneath a floorboard in the smuggler's hold.
- Sanamia's Journal (2): Broken Tusk Mine on Solstheim, on a barrel near the entrance.
- Sanamia's Journal (3): Dead Drop Falls under Fort Dawnguard, on the table in the last room.
- Sanamia's Journal (4): Arcwind Point Barrow, unmarked location southeast of Arcwind Point, next to a knapsack under the stairs.
- Sanamia's Journal (5): Thirsk Mead Hall on Solstheim,
- Before Retaking Thirsk: On some stacked tables to the left of the fireplace.
- After Retaking Thirsk: On the floor to the left of the fireplace.
- Sanamia's Journal (6): Riekling Island, an unmarked location north of Skaal Village and north-west of Frossel on Solstheim, in a knapsack where Sanamia's place of demise is (look for the cauldron with the skeleton enjoying a nice hot soak).
- Sands' Torch: Stillborn Cave, next to the backpack and the skeleton of Sand and his Journal.
- Schneider's Sextant:
- Outside Kolbjorn Barrow on Solstheim, carried by Ralis Sedarys. Can either be pickpocketed, taken from his corpse or taken out of his inventory if he becomes a follower.
- SSE only: If starting the game through the Relic Hunter addon to Alternate Start - Live another Life, the item is found at the start of Akaviri Rising, on a table in the tent across from you.
- Sir Jesto's Patchwork Cloak: Sancre Tor Prison, in Sir Jesto's Knapsack (together with his Journal) which is located on a hanging skeleton in the center of the prison.
- Stone's Hands: Found on the burned corpse of Stonehands at the Word Wall of Shearpoint.
Cloaks Dresser (The Safehouse)
- Ashlander's Tribal Wrap - Urshilaku: The Ratway Vaults in Riften, in the north-western room, on the table with the two small wooden chests.
- Ashlander's Tribal Wrap - Zanaib: New Gnisis Cornerclub in Windhelm, on a shelf on the top floor.
- Cape - College of Winterhold: Hall of Countenance in the College of Winterhold, on the second floor on a crate beside a spinning wheel added by Cloaks of Skyrim.
The Arcanaeum in the College of Winterhold, on the floor. - Cape - Companions:
- Jorrvaskr Living Quarters in Whiterun, two can be found:
- Under a bed in the „Whelps“ Quarters.
- On a small chest in Skjor's room.
- Worn by Kodlak, Skjor, Farkas and Vilkas. Can be pickpocketed from them (Perfect Touch perk needed).
- Cape - Silver Hand: Gallows Rock, three can be found:
- On a barrel near the tanning rack in the south-western room.
- On a dresser in the same room, up the stairs.
- On a dresser in the sleeping quarters.
- Cape - Talos: Temple of Talos in Windhelm, on a shelf in the back room.
- Cape of the Lover: Hillgrund's Tomb, in the room where you find the body of Aunt Agna, on the table to the left of the locked door.
- Cape of the Red Eagle: Rebel's Cairn, on a shelf to the left of the boss chest.
- Cloak - Daedric: Shrine of Mehrunes Dagon, in an open chest to the right.
- Cloak - Dwemer Ceremonial: Alftand Glacial Ruins, in the main room, on a ledge to the left of the Dwemer Excavation Site. Use the pistons on the left wall to get up.
- Cloak - Dwemer Purple:
- Alftand Animonculory, a few levels down in the large walkway room, in the apprentice-locked room to the east, on a table behind an expert-locked gate, next to Stormforge.
- Avanchnzel Animoncultory, in the final room, on a shelf to the left of the stairs leading to Avanchnzel Boilery. This one is difficult to target.
- Cloak - Dwemer:
- Nchuand-Zel Quarters, on a Dwemer shelf in the south-eastern area.
- Reachwind Eyrie, on a table on the top floor.
- Cloak - Scale / Scale Cloak: Valtheim Towers, northern tower, on a table on the top floor.
- Cloak of Hevnoraak:
- Valthume, looted off the Dragon Priest Hevnoraak.
- Alternatively, one can be found behind the throne.
- Cloak of Krosis:
- Dragon Lair at Shearpoint, looted off the Dragon Priest Krosis.
- Additionally, one can be found next to his sarcophagus.
- Cloak of Morokei:
- Labyrinthian Tribune, looted off the Dragon Priest Morokei during the quest 'The Staff of Magnus'.
- Additionally, one can be found next to the boss chest.
- Cloak of Nahkriin:
- Skuldafn, at the Portal to Sovngarde, looted off the Dragon Priest Nahkriin during the main quest The World-Eater's Eyrie.
- Alternatively, one can be found next to the dragon seal that opens the portal.
- Cloak of Otar the Mad:
- Ragnvald Temple, looted off the Dragon Priest Otar the Mad.
- Additionally, one can be found on the ledge next to his sarcophagus.
- Cloak of Rahgot:
- Forelhost Refectory, looted off the Dragon Priest Rahgot during the quest Siege on the Dragon Cult.
- Alternatively, one can be found on the altar right before the exit.
- Cloak of Vokun:
- High Gate Ruins, Vokun's Throne Room, looted off the Dragon Priest Vokun during the quest 'A Scroll For Anska'.
- Additionally, one is found on the table in front of the word wall.
- Cloak of Volsung:
- Volskygge Peak, looted from Volsung.
- Additionally, one can be found on the altar to the right of the word wall.
- Cloak of the Crow: Wayward Pass, on the table, next to the Shrine of Arkay.
- Cloak of the Northern Paladin: Fort Hraggstad, main building, under a bed in the sleeping quarters on the top floor.
- Himir's Hide: Hob's Fall Cave, in the last room, under the table next to the boss chest.
- Hjarvo's Blanket: Angarvunde Ruins, on a shelf on the way to the exit of the dungeon.
- Hunter's Folly: Greenspring Hollow, next to the bedroll of the dead hunter.
- Kvatch Guard Cloak: Bloodlet Throne, in a novice-locked cage to the left of the Arcane Enchanter in the first big cavern, next to a dead Khajiit.
- Mossy Wrap: Mara's Eye Pond, in the small boat docked at the island.
- Nyartuk's Mantle: Temple of Xrib in the Sightless Pit, in front of the ruined stairs on the second level in the large cavern.
- On Warm Sands: Lost Knife Hideout, in a passage behind the cages where the stream originates, next to the boss chest.
- Shroud of the Grey Fox: Lund's Hut, on a shelf to the right of the door.
- The Fall of Winterhold: Bleakcoast Cave, in the north-eastern cavern, next to a dead Khajiit.
- The Wild Hunt: Frostmere Depths in Frostmere Crypt, south-southwest of the Pale Blade altar, next to a skeleton past a fallen tree.
- Vaermina's Devotion: Nightcaller Temple, on a cupboard in the sleeping quarters.