No edit summary Tag: rte-source |
No edit summary Tag: Visual edit |
||
| (46 intermediate revisions by 7 users not shown) | |||
| Line 1: | Line 1: | ||
| + | __NOEDITSECTION__ |
||
| − | This area can be accessed from the [[Library 1st Floor|1st]] and [[Library 2nd Floor|2nd floor of the Library]]. On the first floor of this area are several static displays that will appear upon completing either specific quests withing Legacy of the Dragonborn or completing supported quest mods. The hidden entrance to the [[Hall of Secrets]] is also on this level. |
||
| + | This area can be accessed from the [[Library 1st Floor|1st]] and [[Library 2nd Floor|2nd floor of the Library]]. On the first floor of this area are several static displays that will appear upon completing either specific quests withing {{Abb|LOTD}} or completing supported quest mods. The hidden entrance to the [[Hall of Secrets]] is also on this level. |
||
The empty round pedestals are reserved for future display support. |
The empty round pedestals are reserved for future display support. |
||
| Line 7: | Line 8: | ||
The displays are listed below as they are arranged in game, from left to right. |
The displays are listed below as they are arranged in game, from left to right. |
||
| − | == |
+ | ==1st floor== |
| − | ===Alduin Display=== |
||
| − | [[File:Alduinlotd.jpg|thumb|400px]] |
||
| − | The Alduin display is located between the 2 sets of staircases going up to the 2nd floor of the Dragonborn Hall, and is in front of the Tomb of the Dragonborn leading to the [[Hall of Secrets]]. |
||
| − | The display is automatically enabled upon completing the main storyline of the vanilla game. It is a ''very'' long questline ending with '{{Wiki|Dragonslayer|Dragonslayer}}'. The entire questline must be completed for the display to be activated. Skipping quests in any way will prevent it from being enabled automatically. |
||
| − | |||
| − | Alternatively, you can enable or disable it manually by activating it in the [[Museum Storeroom]] via the hatch in the [[Armory]], without completing the required quests. It is strongly recommended that you do the quests, however, as there are items gained in the questline that have display spots in the museum. |
||
| − | |||
| − | |||
===[[Shattered Legacy]], Sancre Tor Display=== |
===[[Shattered Legacy]], Sancre Tor Display=== |
||
| − | [[File:Shattered_Legacy.jpg|thumb|400px]] |
||
Display activates after completing the Sancre Tor portion of Legacy's main quest '[[Shattered Legacy]]'. |
Display activates after completing the Sancre Tor portion of Legacy's main quest '[[Shattered Legacy]]'. |
||
{| class="article-table article-table-selected" style="width: 400px;" border="1" cellpadding="1" cellspacing="1" |
{| class="article-table article-table-selected" style="width: 400px;" border="1" cellpadding="1" cellspacing="1" |
||
| + | |- |
||
| + | |[[File:Shattered_Legacy.jpg|380px]] |
||
|- |
|- |
||
! scope="col" | |
! scope="col" | |
||
| − | Sancre Tor |
+ | '''Sancre Tor weapons display''' |
|- |
|- |
||
|[[Akaviri Fireblade of the Guardian]] (replica) |
|[[Akaviri Fireblade of the Guardian]] (replica) |
||
| Line 30: | Line 24: | ||
|[[Akaviri Frostblade of the Guardian]] (replica) |
|[[Akaviri Frostblade of the Guardian]] (replica) |
||
|} |
|} |
||
| − | {{ |
+ | {{Clrr}} |
===Helgen Reborn Display=== |
===Helgen Reborn Display=== |
||
| + | A quest and item display for the mod {{Abb|HR}}. The item display activates as soon as the mod is installed, but the quest display does not activate until you have completed the main questline. |
||
| − | [[File:Helgenreborndisplay.jpg|thumb|400px]] |
||
| − | A quest and item display for the mod {{abb|HR}}. The item display activates as soon as the mod is installed, but the quest display does not activate until you have completed the main questline. |
||
{| class="article-table" style="width: 400px;" border="1" cellpadding="1" cellspacing="1" |
{| class="article-table" style="width: 400px;" border="1" cellpadding="1" cellspacing="1" |
||
| + | |- |
||
| + | | colspan="3"| [[File:Helgenreborndisplay.jpg|380px]] |
||
|- |
|- |
||
! colspan="3"| |
! colspan="3"| |
||
| − | '''{{abb|HR}} |
+ | '''{{abb|HR}} items display''' |
|- |
|- |
||
| colspan="1" rowspan="2"|[[Helgen Guard's Armor]] |
| colspan="1" rowspan="2"|[[Helgen Guard's Armor]] |
||
| Line 45: | Line 40: | ||
| colspan="1" rowspan="4"|[[Dragon's Fang]] |
| colspan="1" rowspan="4"|[[Dragon's Fang]] |
||
|- |
|- |
||
| − | |[[Keepers Of Hattu Officers Armor]] |
+ | |[[Keepers Of Hattu Officers Armor]] or [[Keepers of Hattu Heavy Armor]] |
|- |
|- |
||
| colspan="1" rowspan="2"|[[Helgen Guard's Shield]] |
| colspan="1" rowspan="2"|[[Helgen Guard's Shield]] |
||
| Line 52: | Line 47: | ||
|[[Keepers Of Hattu Gauntlets]] |
|[[Keepers Of Hattu Gauntlets]] |
||
|} |
|} |
||
| − | {{ |
+ | {{Clrr}} |
===Falskaar Display=== |
===Falskaar Display=== |
||
| + | A quest and item display for the mod {{Abb|FAL}}. The item display activates as soon as the mod is installed, but the quest display does not activate until you have completed the main questline. |
||
| − | [[File:Falskaar_Display.jpg|thumb|400px]] |
||
| − | A quest and item display for the mod {{abb|FAL}}. The item display activates as soon as the mod is installed, but the quest display does not activate until you have completed the main questline. |
||
{| class="article-table" style="width: 400px;" border="1" cellpadding="1" cellspacing="1" |
{| class="article-table" style="width: 400px;" border="1" cellpadding="1" cellspacing="1" |
||
| + | |- |
||
| + | |[[File:Falskaar_Display.jpg|380px]] |
||
|- |
|- |
||
! |
! |
||
| − | '''{{abb|FAL}} |
+ | '''{{abb|FAL}} weapons display''' |
|- |
|- |
||
|[[Jarrik's Crusher]] |
|[[Jarrik's Crusher]] |
||
| Line 69: | Line 65: | ||
|[[Barkrot]] |
|[[Barkrot]] |
||
|} |
|} |
||
| − | {{ |
+ | {{Clrr}} |
| − | === |
+ | ===Undeath Display=== |
| + | Static quest display for {{Abb|UD}}, will be available after completing the last quest 'The Path of Transcendance'. The display requires either completing the ritual and becoming a Lich, or refusing to become a Lich. List of quests is available on [http://tes-mods.wikia.com/wiki/Undeath#Main_Quest Undeath wiki]. |
||
| − | [[File:Undeath display.jpg|thumb|400px]] |
||
| + | {| class="article-table article-table-selected" style="width: 400px;" border="1" cellpadding="1" cellspacing="1" |
||
| − | Static quest display for {{abb|UD}}, will be available after completing the last quest 'The Path of Transcendance'. The display requires either completing the ritual and becoming a Lich, or refusing to become a Lich. List of quests is available on [http://tes-mods.wikia.com/wiki/Undeath#Main_Quest Undeath wiki]. |
||
| + | |- |
||
| − | {{Clr}} |
||
| + | |[[File:Undeath display.jpg|380px]] |
||
| − | |||
| + | |} |
||
| − | |||
| − | ==='''Immersive College of Winterhold Display'''=== |
||
| − | [[File:Immersive College Display.jpg|thumb|400px]] |
||
| − | Static ques display for {{abb|ICW}}, will be available after completing que main quest of the mod called "The Fall of Winterhold" in The Midden. |
||
{{Clrr}} |
{{Clrr}} |
||
| − | === |
+ | ===Moon and Star Display=== |
| + | A quest and item display for the mod {{Abb|MAS}}. It appears after completing Kagrenar in the main questline of Moon and Star. |
||
| − | [[File:Moon_and_star_static_display.jpg|thumb|400px]] |
||
| + | {| class="article-table article-table-selected" style="width: 400px;" border="1" cellpadding="1" cellspacing="1" |
||
| − | A static quest display for the mod {{abb|MAS}}, that appears after completing Kagrenar in the main quest of Moon and Star. |
||
| + | |- |
||
| − | Note that in order for the three extra items in the [[Upper Gallery]] to be displayable the {{abb|masp}} is required and has to be installed at game creation. |
||
| + | |[[File:MAS_display.jpg|thumb|380px]] |
||
| − | The Moon and Star mod requires a compatibility patch, it is important that '''both''' the mod and the patch is loaded at the same time and this should be done before starting Legacy's own main quest: [[Shattered Legacy]], as both mods use certain unique items, one of which is a required item for Shattered Legacy. |
||
| + | |- |
||
| + | ! scope="col" | |
||
| + | '''{{Abb|MAS}} Dorana's Hammer display''' |
||
| + | |- |
||
| + | |[[Dorana's Hammer]] |
||
| + | |} |
||
| + | Note that in order for the three extra items in the [[Upper Gallery]] to be displayable, the {{Abb|MASP}} is required and has to be installed at game creation. |
||
| + | The Moon and Star mod requires a compatibility patch. It is important that '''both''' the mod and the patch is loaded at the same time and this should be done before starting Legacy's own main quest: [[Shattered Legacy]], as both mods use certain unique items, one of which is a required item for Shattered Legacy. |
||
A walkthrough is available on: [http://steamcommunity.com/sharedfiles/filedetails/?id=347340094 Steam] |
A walkthrough is available on: [http://steamcommunity.com/sharedfiles/filedetails/?id=347340094 Steam] |
||
| − | [[Dorana's Hammer]] |
||
{{Clrr}} |
{{Clrr}} |
||
| − | === |
+ | ===The Forgotten City Display=== |
| + | A quest and item display for the mod {{Abb|TFC}}. The item display activates as soon as the mod is installed, but the quest display does not activate until you have completed the main questline and gotten the good ending. |
||
| − | [[File:TESV 02-10-2016 13-13-29-137.jpg|thumb|400px]] |
||
| + | {| class="article-table article-table-selected" style="width: 400px;" border="1" cellpadding="1" cellspacing="1" |
||
| − | A quest and item display for the mod {{abb|TFC}}. The display is activated when you have installed the MOD and changes appearance when you finish the mission xx with a good ending. |
||
| − | {| class="article-table" |
||
|- |
|- |
||
| + | |[[File:The_Forgotten_City_Display.jpg|380px]] |
||
| − | !'''{{Abb|TFC}} Display''' |
||
|- |
|- |
||
| + | ! scope="col" | |
||
| − | |[[The Arbiter´s Helmet]] |
||
| + | '''{{Abb|TFC}} Display''' |
||
|- |
|- |
||
| − | |[[ |
+ | |[[Talisman of the Silver Tongue]] |
| + | |- |
||
| + | |[[The Arbiter's Helmet]] |
||
| + | |- |
||
| + | |[[Immaculate Dwarven Helmet]] |
||
| + | |- |
||
| + | |[[Immaculate Dwarven Armor]] |
||
| + | |- |
||
| + | |[[Immaculate Dwarven Gauntlets]] |
||
| + | |- |
||
| + | |[[Immaculate Dwarven Boots]] |
||
|} |
|} |
||
| − | {{ |
+ | {{Clrr}} |
| + | |||
| + | |||
| + | ===Vigilant Display=== |
||
| + | [[File:Vigilant_display.jpg|thumb|400px|Vigilant]] |
||
| + | A static quest display for the mod {{Abb|VIG}}. Activates as soon as you have completed Act 4, regardless of the decisions made. More detailed displays can be found in the [[Vigilant Room]] of the [[Hall of Oddities]]. |
||
| + | {{Clrr}} |
||
| − | === |
+ | ===Alduin's Wall=== |
[[File:Skypalace_static.jpg|thumb|400px|Alduin's Wall]] |
[[File:Skypalace_static.jpg|thumb|400px|Alduin's Wall]] |
||
| − | After completing the skyrim main quest Alduin's Wall and reaching |
+ | After completing the skyrim main quest Alduin's Wall and reaching Skyhaven Temple the back wall will change its appearance to resemble Alduin's wall from the temple. |
| − | The tomb |
+ | The tomb in front of the wall is the secret entrance to the [[Hall of Secrets]]. The tomb works just like the secret entrance to the Thieves Guild. |
| − | {{ |
+ | {{Clrr}} |
| − | === |
+ | ===Wyrmstooth Display=== |
| + | A quest and item display for the mod {{Abb|WYRM}}. The item display activates as soon as the mod is installed, but the quest display does not activate until you have completed the main questline. |
||
| − | [[File:Wheels_of_Lull_Display.jpg|thumb|400px|The Wheels of Lull Display]] |
||
| + | {| class="article-table" style="width: 400px;" border="1" cellpadding="1" cellspacing="1" |
||
| − | An alcove with multiple displays for the items found in {{abb|WOL}}. The display will be made available at the start of Wheels of Lull. |
||
| + | |- |
||
| + | |[[File:Wyrmstooth_display.jpg|380px]] |
||
| + | |- |
||
| + | ! scope="col" | |
||
| + | '''{{Abb|WYRM}} items display''' |
||
| + | |- |
||
| + | |[[Vulom's Staff]] |
||
| + | |- |
||
| + | |[[Severed Leg]] |
||
| + | |- |
||
| + | |[[Goreduster]] |
||
| + | |- |
||
| + | |[[Eyegouger]] |
||
| + | |- |
||
| + | |[[Dragonslayer]] |
||
| + | |} |
||
| + | {{Clrr}} |
||
| + | |||
| + | ===Immersive College of Winterhold Display=== |
||
| − | Not all items are obtainable as some have to be used to get other items. |
||
| − | [[File: |
+ | [[File:Immersive College Display.jpg|thumb|380px]] |
| + | A quest and item display for the mod {{Abb|ICW}}, The item display activates as soon as the mod is installed, but the quest display does not activate until you have completed "The Fall of Winterhold" in The Midden. |
||
{| class="article-table" style="width: 400px;" border="1" cellpadding="1" cellspacing="1" |
{| class="article-table" style="width: 400px;" border="1" cellpadding="1" cellspacing="1" |
||
|- |
|- |
||
! scope="col" | |
! scope="col" | |
||
| + | '''{{Abb|ICW}} items display''' |
||
| − | Left wall |
||
| + | |- |
||
| + | |[[Kettle]] |
||
| + | |} |
||
| + | |||
| + | {| class="article-table" style="width: 400px;" border="1" cellpadding="1" cellspacing="1" |
||
| + | |- |
||
| + | ! colspan="4" | |
||
| + | '''{{Abb|ICW}} Trophy Case''' |
||
| + | |- |
||
| + | |[[Toy Dragon]] |
||
| + | | colspan="2" align="center" |[[Doll (Elf Boy)]] |
||
| + | |[[Doll (Elf Girl)]] |
||
| + | |- |
||
| + | |[[Glass]] |
||
| + | |[[Teapot]] |
||
| + | |[[Teacup]] |
||
| + | |[[Beaker]] |
||
| + | |- |
||
| + | | colspan="2" align="center" |[[Waterpipe (2)]] |
||
| + | | colspan="2" align="center" |[[Waterpipe (1)]] |
||
| + | |- |
||
| + | | colspan="2" align="center" |[[Urn (1)]] |
||
| + | | colspan="2" align="center" |[[Urn (2)]] |
||
| + | |} |
||
| + | {{Clrr}} |
||
| + | |||
| + | |||
| + | ===The Wheels of Lull Display=== |
||
| + | [[File:Wheels_of_Lull_Display.jpg|thumb|380px]] |
||
| + | A room with multiple displays for the items found in {{Abb|WOL}}. The display will be made available at the start of Wheels of Lull. |
||
| + | |||
| + | Not all items are obtainable without console, as some have to be used to get other items. |
||
| + | {| class="article-table" style="width: 400px;" border="1" cellpadding="1" cellspacing="1" |
||
| + | |- |
||
| + | |[[File:Left_wall.jpg|380px]] |
||
| + | |- |
||
| + | ! scope="col" | |
||
| + | '''Left wall''' |
||
|- |
|- |
||
|[[Rod of Ohm]] |
|[[Rod of Ohm]] |
||
| Line 142: | Line 215: | ||
|[[Memodermic Greatsword]] |
|[[Memodermic Greatsword]] |
||
|} |
|} |
||
| − | {{ |
+ | {{Clrr}} |
{| class="article-table" style="width: 400px;" border="1" cellpadding="1" cellspacing="1" |
{| class="article-table" style="width: 400px;" border="1" cellpadding="1" cellspacing="1" |
||
|- |
|- |
||
! scope="col" | |
! scope="col" | |
||
| − | Center wall |
+ | '''Center wall''' |
|- |
|- |
||
|[[Lullian Shield]] |
|[[Lullian Shield]] |
||
| + | |- |
||
| + | |[[Sehtic Security Pack]] |
||
|- |
|- |
||
|[[Magnusian Visor]] |
|[[Magnusian Visor]] |
||
|- |
|- |
||
|[[Mark of Seht]] |
|[[Mark of Seht]] |
||
| − | |- |
||
| − | |[[Sehtic Security Pack]] |
||
|- |
|- |
||
|[[Microclock]] |
|[[Microclock]] |
||
| Line 163: | Line 236: | ||
<br /> |
<br /> |
||
| − | [[File:Right_wall.jpg|thumb|400px]] |
||
{| class="article-table" style="width: 400px;" border="1" cellpadding="1" cellspacing="1" |
{| class="article-table" style="width: 400px;" border="1" cellpadding="1" cellspacing="1" |
||
| + | |- |
||
| + | |[[File:Right_wall.jpg|380px]] |
||
|- |
|- |
||
! scope="col" | |
! scope="col" | |
||
| − | Armor stand |
+ | '''Armor stand''' |
|- |
|- |
||
|[[Chronographer Helm]] |
|[[Chronographer Helm]] |
||
| Line 178: | Line 252: | ||
|} |
|} |
||
<br /> |
<br /> |
||
| + | |||
{| class="article-table" style="width: 400px;" border="1" cellpadding="1" cellspacing="1" |
{| class="article-table" style="width: 400px;" border="1" cellpadding="1" cellspacing="1" |
||
|- |
|- |
||
! scope="col" | |
! scope="col" | |
||
| − | Right wall |
+ | '''Right wall''' |
|- |
|- |
||
|[[Rotational Harquebus]] |
|[[Rotational Harquebus]] |
||
| Line 197: | Line 272: | ||
|[[Artophysical Manipulator]] |
|[[Artophysical Manipulator]] |
||
|} |
|} |
||
| − | {{ |
+ | {{Clrr}} |
| + | |||
| − | === |
+ | ===The Gray Cowl of Nocturnal Display=== |
| + | A quest and item display for the mod {{Abb|GCN}}. The item displays are active as soon as the mod is installed. |
||
| − | [[File:Grey_cowl_of_nocturnal_display.jpg|thumb|400px]] |
||
| − | A quest and item display for the mod {{abb|GCN}}. The item displays are active as soon as the mod is installed. |
||
The static quest display will automatically activate after completing the main questline. After retrieving the Gray Cowl, talk to Seviana Umbranox and escort her and Luvien to the Solitude docks to complete the quest. |
The static quest display will automatically activate after completing the main questline. After retrieving the Gray Cowl, talk to Seviana Umbranox and escort her and Luvien to the Solitude docks to complete the quest. |
||
{| class="article-table" style="width: 500px;" border="1" cellpadding="1" cellspacing="1" |
{| class="article-table" style="width: 500px;" border="1" cellpadding="1" cellspacing="1" |
||
| + | |- |
||
| + | |[[File:GCON_display.jpg|380px]] |
||
|- |
|- |
||
! scope="col" | |
! scope="col" | |
||
'''The Gray Cowl of Nocturnal Item Display''' |
'''The Gray Cowl of Nocturnal Item Display''' |
||
| − | |- |
||
| − | |[[Right Eye of Coldharbour]] |
||
|- |
|- |
||
|[[Left Eye of Coldharbour]] |
|[[Left Eye of Coldharbour]] |
||
| + | |- |
||
| + | |[[Right Eye of Coldharbour]] |
||
|- |
|- |
||
|[[Alliance of Ancestral Cheetahs]] |
|[[Alliance of Ancestral Cheetahs]] |
||
| Line 217: | Line 294: | ||
|[[Eagle Eye]] (Ring) |
|[[Eagle Eye]] (Ring) |
||
|- |
|- |
||
| + | |[[Yokuda]] |
||
| − | |[[The Boots of Springheel Jak]] |
||
| + | |} |
||
| + | {{Clrr}} |
||
| + | |||
| + | {| class="article-table" style="width: 500px;" border="1" cellpadding="1" cellspacing="1" |
||
|- |
|- |
||
| + | ! colspan="2" | |
||
| − | |[[Umbra?]] |
||
| + | '''{{Abb|GCN}} Trophy Case''' |
||
|- |
|- |
||
| − | |[[ |
+ | |[[The Withdrawal]] |
| + | |[[Ocato's Dagger]] |
||
|- |
|- |
||
| + | | colspan="2" align="center" |[[Golden Scimitar]] |
||
| − | |[[Bow of the Forgotten Chaos]] |
||
|- |
|- |
||
| + | | colspan="2" align="center" |[[Bow of the Forgotten Chaos]] |
||
| − | |[[The Withdrawal]] |
||
|- |
|- |
||
| + | | colspan="2" align="center" |[[The Boots of Springheel Jak]] |
||
| − | |[[Yokuda]] |
||
|} |
|} |
||
| − | {{ |
+ | {{Clrr}} |
| + | |||
| − | === |
+ | ===Konahrik's Accoutrements Display=== |
| + | A quest and item display for the mod {{Abb|KA}}. The item display activates as soon as the mod is installed, but the quest display does not activate until you have completed the main questline. For the armor displays, see the 2nd floor. |
||
| − | [[File:Kohnarik's_accountrements.jpg|thumb|center|400px]] |
||
| − | A quest and item display for the mod {{abb|KA}}. The item display activates as soon as the mod is installed, but the quest display does not activate until you have completed the main questline. For the armor displays, see the 2nd floor. |
||
{| class="article-table" style="width: 400px;" border="1" cellpadding="1" cellspacing="1" |
{| class="article-table" style="width: 400px;" border="1" cellpadding="1" cellspacing="1" |
||
| + | |- |
||
| + | |[[File:Kohnarik's_accountrements.jpg|380px]] |
||
|- |
|- |
||
! scope="col" | |
! scope="col" | |
||
| + | '''{{Abb|KA}} items display''' |
||
| − | Konahrik's Accoutrements Item Display |
||
|- |
|- |
||
|[[Fodiiz's Robes]] |
|[[Fodiiz's Robes]] |
||
| Line 249: | Line 334: | ||
|[[Elder Scroll: Warlord]] |
|[[Elder Scroll: Warlord]] |
||
|} |
|} |
||
| − | {{ |
+ | {{Clrr}} |
| + | |||
| − | === |
+ | ===Much Ado About Snow Elves Display=== |
| + | A quest and item display for Much Ado About Snow Elves. The item display activates as soon as the mod is installed, but the quest display does not activate until you have completed the main questline. For the armor displays, see the 2nd floor. |
||
| − | [[File:Wyrmstooth_display.jpg|thumb|400px]] |
||
| − | A static quest display for the mod {{Abb|WYRM}}. The item display activates as soon as the mod is installed, but the quest display does not activate until you have completed the main questline. |
||
{| class="article-table" style="width: 400px;" border="1" cellpadding="1" cellspacing="1" |
{| class="article-table" style="width: 400px;" border="1" cellpadding="1" cellspacing="1" |
||
| + | |- |
||
| + | |[[File:Much_Ado_About_Snow_Elves_Display.jpg|380px]] |
||
|- |
|- |
||
! scope="col" | |
! scope="col" | |
||
| + | '''Much Ado About Snow Elves items display''' |
||
| − | Wyrmstooth Item Display |
||
|- |
|- |
||
| + | |[[Active Dwemer Key (Green)]] |
||
| − | |[[Vulom's Staff]] |
||
|- |
|- |
||
| − | |[[ |
+ | |[[Snow Elf Statue]] |
|- |
|- |
||
| + | |[[Active Dwemer Key (Blue)]] |
||
| − | |[[Goreduster]] |
||
| − | |- |
||
| − | |[[Eyegouger]] |
||
| − | |- |
||
| − | |[[Dragonslayer]] |
||
|} |
|} |
||
| − | {{ |
+ | {{Clrr}} |
| + | |||
| + | |||
===Moonpath to Elsweyr Display=== |
===Moonpath to Elsweyr Display=== |
||
| − | [[File:Elsweyr_static.jpg|thumb|400px]] |
||
| − | Display activates after completing '[[Moonpath to Elsweyr]]'. |
||
| − | {| class="article-table" style="width: 400px;" border="1" cellpadding="1" cellspacing="1" |
||
| − | |- |
||
| − | !Moonpath to Elsweyr display |
||
| − | |- |
||
| − | | |
||
| − | [[Ancient Siligonder Chitin Armor]] |
||
| − | |} |
||
| − | {{Clr}} |
||
| + | A quest and item display for Moonpath to Elsweyr. The display activates after completing '[[Moonpath to Elsweyr]]'. |
||
| − | =='''2nd floor'''== |
||
{| class="article-table" style="width: 400px;" border="1" cellpadding="1" cellspacing="1" |
{| class="article-table" style="width: 400px;" border="1" cellpadding="1" cellspacing="1" |
||
|- |
|- |
||
| + | |[[File:Elsweyr_static.jpg|380px]] |
||
| − | ! colspan="2" scope="col" | |
||
| − | ===='''Dragonpriest Masks'''==== |
||
|- |
|- |
||
| + | ! scope="col" |'''Moonpath to Elsweyr item display''' |
||
| − | |[[Haldriin]] |
||
| − | |[[Korthor]] |
||
|- |
|- |
||
| + | |[[Ancient Siligonder Chitin Armor]] |
||
| − | |[[Vosis]] |
||
| − | |[[Vahlok]] |
||
|} |
|} |
||
| + | {{Clrr}} |
||
| − | <br /> |
||
| + | |||
| + | |||
| + | ===Alduin Display=== |
||
| + | [[File:Alduinlotd.jpg|thumb|380px]] |
||
| + | The Alduin display is located between the 2 sets of staircases going up to the 2nd floor of the Dragonborn Hall, and is in front of the Tomb of the Dragonborn leading to the [[Hall of Secrets]]. |
||
| + | The display is automatically enabled upon completing the main storyline of the vanilla game. It is a ''very'' long questline ending with '{{Wiki|Dragonslayer|Dragonslayer}}'. The entire questline must be completed for the display to be activated. Skipping quests in any way will prevent it from being enabled automatically. |
||
| + | |||
| + | Alternatively, you can enable or disable it manually by activating it in the MCM menu, without completing the required quests. It is strongly recommended that you do the quests, however, as there are items gained in the questline that have display spots in the museum. |
||
| + | |||
| + | |||
| + | ==2nd floor== |
||
{| class="article-table" style="width: 400px;" border="1" cellpadding="1" cellspacing="1" |
{| class="article-table" style="width: 400px;" border="1" cellpadding="1" cellspacing="1" |
||
|- |
|- |
||
| Line 309: | Line 392: | ||
|} |
|} |
||
<br /> |
<br /> |
||
| + | |||
| − | ==='''Konahrik's Accoutrements Armor Displays'''=== |
||
| + | ===Konahrik's Accoutrements Armor Displays=== |
||
[[File:Robe_vs_armored.jpg|thumb|400px|Robed and Armored comparison]] |
[[File:Robe_vs_armored.jpg|thumb|400px|Robed and Armored comparison]] |
||
Requires the mod {{Abb|KA}}. |
Requires the mod {{Abb|KA}}. |
||
| Line 317: | Line 401: | ||
Mannequins in order of appearance starting left of Miraak. |
Mannequins in order of appearance starting left of Miraak. |
||
<br /> |
<br /> |
||
| + | |||
{| class="article-table article-table-selected" style="width: 400px;" border="1" cellpadding="1" cellspacing="1" |
{| class="article-table article-table-selected" style="width: 400px;" border="1" cellpadding="1" cellspacing="1" |
||
|- |
|- |
||
! scope="col" | |
! scope="col" | |
||
| − | Morokei the Glorious |
+ | '''Morokei the Glorious''' |
|- |
|- |
||
|[[Morokei]] (mask) |
|[[Morokei]] (mask) |
||
| Line 331: | Line 416: | ||
|} |
|} |
||
<br /> |
<br /> |
||
| + | |||
{| class="article-table article-table-selected" style="width: 400px;" border="1" cellpadding="1" cellspacing="1" |
{| class="article-table article-table-selected" style="width: 400px;" border="1" cellpadding="1" cellspacing="1" |
||
|- |
|- |
||
! scope="col" | |
! scope="col" | |
||
| − | Vahlok the Jailor - The Guardian |
+ | '''Vahlok the Jailor - The Guardian''' |
|- |
|- |
||
|Vahlok (mask) |
|Vahlok (mask) |
||
| Line 344: | Line 430: | ||
|[[Vahlok's Greaves|Vahlok's Greaves]] |
|[[Vahlok's Greaves|Vahlok's Greaves]] |
||
|} |
|} |
||
| + | |||
<br /> |
<br /> |
||
{| class="article-table article-table-selected" style="width: 400px;" border="1" cellpadding="1" cellspacing="1" |
{| class="article-table article-table-selected" style="width: 400px;" border="1" cellpadding="1" cellspacing="1" |
||
|- |
|- |
||
! scope="col" | |
! scope="col" | |
||
| − | Krosis the Sorrowful |
+ | '''Krosis the Sorrowful''' |
|- |
|- |
||
| − | |[[Krosis |
+ | |[[Krosis]] (mask) |
|- |
|- |
||
|[[Krosis' Robes]] '''or''' [[Krosis' Armored Robes]] |
|[[Krosis' Robes]] '''or''' [[Krosis' Armored Robes]] |
||
| Line 358: | Line 445: | ||
|[[Krosis' Greaves|Krosis' Greaves]] |
|[[Krosis' Greaves|Krosis' Greaves]] |
||
|} |
|} |
||
| + | |||
<br /> |
<br /> |
||
{| class="article-table article-table-selected" style="width: 400px;" border="1" cellpadding="1" cellspacing="1" |
{| class="article-table article-table-selected" style="width: 400px;" border="1" cellpadding="1" cellspacing="1" |
||
|- |
|- |
||
! scope="col" | |
! scope="col" | |
||
| − | Nahkriin the Vengeful |
+ | '''Nahkriin the Vengeful''' |
|- |
|- |
||
| − | |[[Nahkriin |
+ | |[[Nahkriin]] (mask) |
|- |
|- |
||
|[[Nahkriin's Robes]] '''or''' [[Nahkriin's Armored Robes]] |
|[[Nahkriin's Robes]] '''or''' [[Nahkriin's Armored Robes]] |
||
| Line 372: | Line 460: | ||
|[[Nahkriin's Greaves|Nahkriin's Greaves]] |
|[[Nahkriin's Greaves|Nahkriin's Greaves]] |
||
|} |
|} |
||
| + | |||
<br /> |
<br /> |
||
{| class="article-table article-table-selected" style="width: 400px;" border="1" cellpadding="1" cellspacing="1" |
{| class="article-table article-table-selected" style="width: 400px;" border="1" cellpadding="1" cellspacing="1" |
||
|- |
|- |
||
! scope="col" | |
! scope="col" | |
||
| − | Hevnoraak the Brutal |
+ | '''Hevnoraak the Brutal''' |
|- |
|- |
||
|[[Hevnoraak]] (mask) |
|[[Hevnoraak]] (mask) |
||
| Line 386: | Line 475: | ||
|[[Hevnoraak's Greaves]] |
|[[Hevnoraak's Greaves]] |
||
|} |
|} |
||
| + | |||
<br /> |
<br /> |
||
{| class="article-table article-table-selected" style="width: 400px;" border="1" cellpadding="1" cellspacing="1" |
{| class="article-table article-table-selected" style="width: 400px;" border="1" cellpadding="1" cellspacing="1" |
||
|- |
|- |
||
! scope="col" | |
! scope="col" | |
||
| − | Dukaan the Dishonored |
+ | '''Dukaan the Dishonored''' |
|- |
|- |
||
|[[Dukaan]] (mask) |
|[[Dukaan]] (mask) |
||
| Line 400: | Line 490: | ||
|[[Dukaan's Greaves|Dukaan's Greaves]] |
|[[Dukaan's Greaves|Dukaan's Greaves]] |
||
|} |
|} |
||
| + | |||
<br /> |
<br /> |
||
{| class="article-table article-table-selected" style="width: 400px;" border="1" cellpadding="1" cellspacing="1" |
{| class="article-table article-table-selected" style="width: 400px;" border="1" cellpadding="1" cellspacing="1" |
||
|- |
|- |
||
! scope="col" | |
! scope="col" | |
||
| − | Ahzidal the Bitter Destroyer |
+ | '''Ahzidal the Bitter Destroyer''' |
|- |
|- |
||
|[[Ahzidal]] (mask) |
|[[Ahzidal]] (mask) |
||
| Line 415: | Line 506: | ||
|} |
|} |
||
<br /> |
<br /> |
||
| + | |||
{| class="article-table article-table-selected" style="width: 400px;" border="1" cellpadding="1" cellspacing="1" |
{| class="article-table article-table-selected" style="width: 400px;" border="1" cellpadding="1" cellspacing="1" |
||
|- |
|- |
||
! scope="col" | |
! scope="col" | |
||
| − | Zahkriisos the Bloody Sword |
+ | '''Zahkriisos the Bloody Sword''' |
|- |
|- |
||
|[[Zahkriisos]] (mask) |
|[[Zahkriisos]] (mask) |
||
| Line 430: | Line 522: | ||
|} |
|} |
||
<br /> |
<br /> |
||
| + | |||
{| class="article-table article-table-selected" style="width: 400px;" border="1" cellpadding="1" cellspacing="1" |
{| class="article-table article-table-selected" style="width: 400px;" border="1" cellpadding="1" cellspacing="1" |
||
|- |
|- |
||
! scope="col" | |
! scope="col" | |
||
| − | Volsung the Horrible |
+ | '''Volsung the Horrible''' |
|- |
|- |
||
|[[Volsung]] (mask) |
|[[Volsung]] (mask) |
||
| Line 444: | Line 537: | ||
|} |
|} |
||
<br /> |
<br /> |
||
| + | |||
{| class="article-table article-table-selected" style="width: 400px;" border="1" cellpadding="1" cellspacing="1" |
{| class="article-table article-table-selected" style="width: 400px;" border="1" cellpadding="1" cellspacing="1" |
||
|- |
|- |
||
! scope="col" | |
! scope="col" | |
||
| − | Vokun the Shadow |
+ | '''Vokun the Shadow''' |
|- |
|- |
||
|[[Vokun]] (mask) |
|[[Vokun]] (mask) |
||
| Line 458: | Line 552: | ||
|} |
|} |
||
<br /> |
<br /> |
||
| + | |||
{| class="article-table article-table-selected" style="width: 400px;" border="1" cellpadding="1" cellspacing="1" |
{| class="article-table article-table-selected" style="width: 400px;" border="1" cellpadding="1" cellspacing="1" |
||
|- |
|- |
||
! scope="col" | |
! scope="col" | |
||
| − | Otar the Mad |
+ | '''Otar the Mad''' |
|- |
|- |
||
|[[Otar]] (mask) |
|[[Otar]] (mask) |
||
| Line 472: | Line 567: | ||
|} |
|} |
||
<br /> |
<br /> |
||
| + | |||
{| class="article-table article-table-selected" style="width: 400px;" border="1" cellpadding="1" cellspacing="1" |
{| class="article-table article-table-selected" style="width: 400px;" border="1" cellpadding="1" cellspacing="1" |
||
|- |
|- |
||
! scope="col" | |
! scope="col" | |
||
| − | Rahgot the Wrathful |
+ | '''Rahgot the Wrathful''' |
|- |
|- |
||
|[[Rahgot]] (mask) |
|[[Rahgot]] (mask) |
||
| Line 486: | Line 582: | ||
|} |
|} |
||
<br /> |
<br /> |
||
| + | |||
{| class="article-table article-table-selected" style="width: 400px;" border="1" cellpadding="1" cellspacing="1" |
{| class="article-table article-table-selected" style="width: 400px;" border="1" cellpadding="1" cellspacing="1" |
||
|- |
|- |
||
! scope="col" | |
! scope="col" | |
||
| − | Konahrik the Warlord |
+ | '''Konahrik the Warlord''' |
|- |
|- |
||
| − | |[[Konahrik |
+ | |[[Konahrik]] (mask) |
|- |
|- |
||
|[[Konahrik's Robes]] '''or''' [[Konahrik's Armored Robes]] |
|[[Konahrik's Robes]] '''or''' [[Konahrik's Armored Robes]] |
||
| Line 519: | Line 616: | ||
* |
* |
||
| − | </onlyinclude> |
||
| − | '''{{Nexus|mod|35841|Helgen Reborn}} Display''' |
||
| + | '''{{Abb|HR}} Display''' |
||
| − | '''{{Nexus|mod|37994|Falskaar}} Display''' |
||
| + | '''{{Abb|FAL}} Display''' |
||
| − | '''{{Nexus|mod|58672|The Wheels of Lull}}''' |
||
| + | '''{{Abb|WOL}}''' |
||
| − | '''{{Nexus|mod|52397|Moon and Star}} Quest Display''' |
||
| + | '''{{Abb|MAS}} Quest Display''' |
||
| − | '''{{Nexus|mod|58672|The Wheels of Lull}} Display''' |
||
| + | '''{{Abb|WOL}} Display''' |
||
| + | |||
| − | '''{{Nexus|mod|64651|The Gray Cowl of Nocturnal}} Display''' |
||
| + | '''{{Abb|GCN}} Display''' |
||
| Line 553: | Line 650: | ||
'''{{Nexus|mod|25704|Wyrmstooth}} Display''' |
'''{{Nexus|mod|25704|Wyrmstooth}} Display''' |
||
| + | </onlyinclude> |
||
| − | |||
| − | |||
</div> |
</div> |
||
| Line 560: | Line 656: | ||
{{Navbox gallery}} |
{{Navbox gallery}} |
||
| + | [[es:Salón del Sangre de Dragón]] |
||
| − | [[es:Salón_del_Sangre_de_Dragón]] |
||
[[Category:Gallery]] |
[[Category:Gallery]] |
||
Revision as of 23:54, 17 April 2020
This area can be accessed from the 1st and 2nd floor of the Library. On the first floor of this area are several static displays that will appear upon completing either specific quests withing Legacy of the Dragonborn or completing supported quest mods. The hidden entrance to the Hall of Secrets is also on this level.
The empty round pedestals are reserved for future display support.
The displays on the second level of this area are located along the walkway connected to the stairwell. Most of these displays are for items, weapons and armor from the mod Konahrik's Accoutrements.
The displays are listed below as they are arranged in game, from left to right.
1st floor
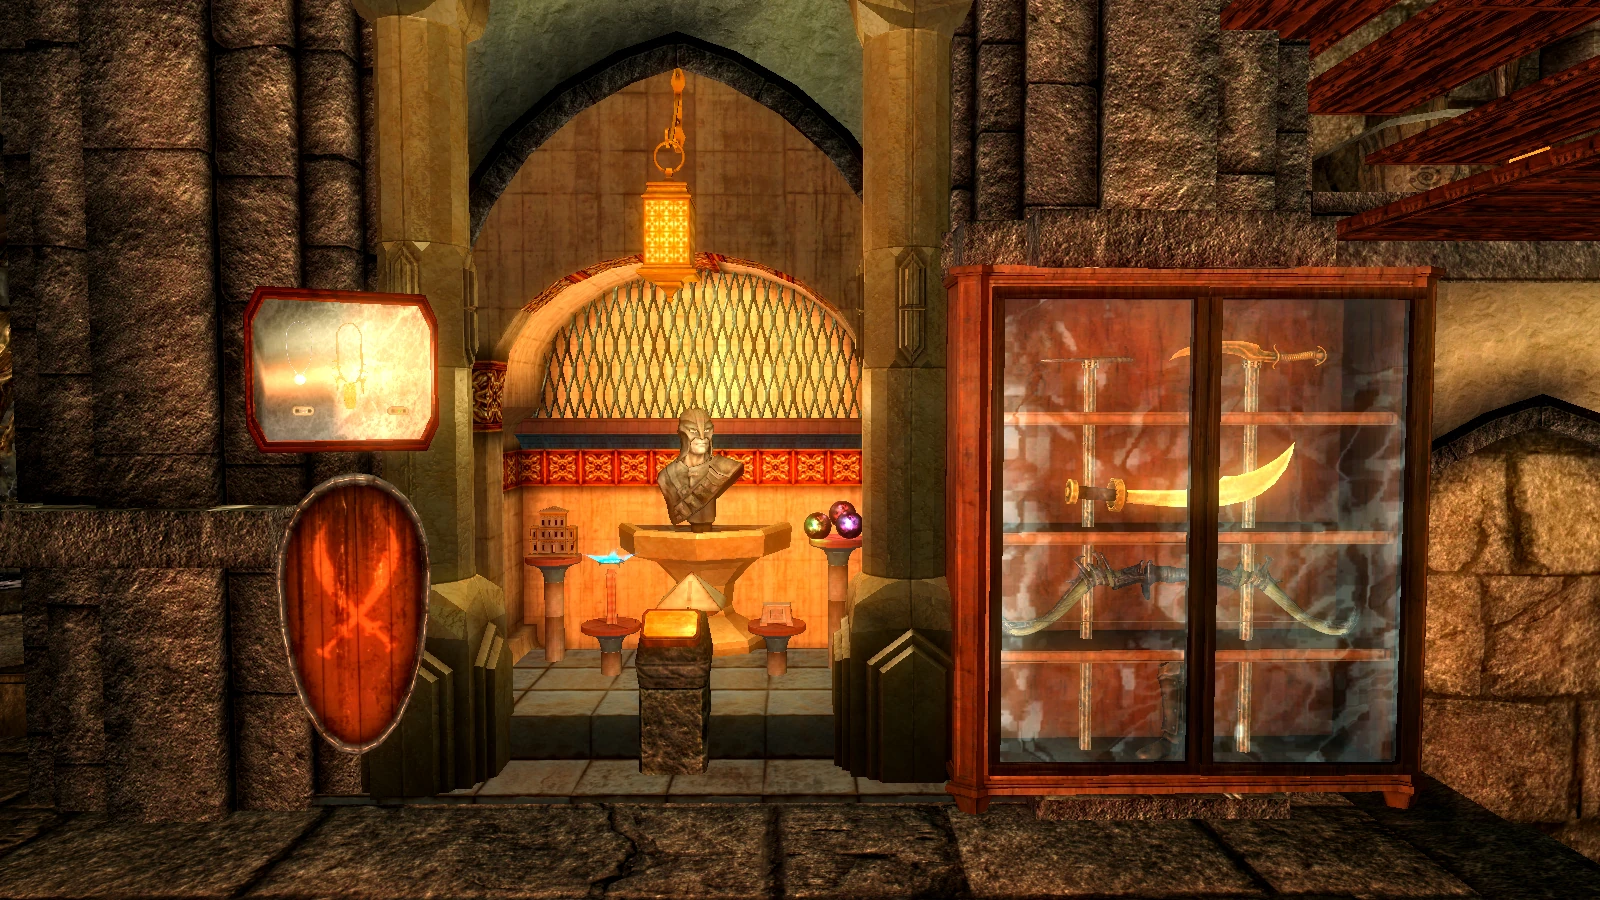
Shattered Legacy, Sancre Tor Display
Display activates after completing the Sancre Tor portion of Legacy's main quest 'Shattered Legacy'.
|
|
Sancre Tor weapons display |
|---|
| Akaviri Fireblade of the Guardian (replica) |
| Akaviri Shockblade of the Guardian (replica) |
| Akaviri Frostblade of the Guardian (replica) |
Helgen Reborn Display
A quest and item display for the mod Helgen Reborn. The item display activates as soon as the mod is installed, but the quest display does not activate until you have completed the main questline.
Falskaar Display
A quest and item display for the mod Falskaar. The item display activates as soon as the mod is installed, but the quest display does not activate until you have completed the main questline.
|
|
Falskaar weapons display |
|---|
| Jarrik's Crusher |
| Vanvir's Masterpiece |
| Barkrot |
Undeath Display
Static quest display for Undeath, will be available after completing the last quest 'The Path of Transcendance'. The display requires either completing the ritual and becoming a Lich, or refusing to become a Lich. List of quests is available on Undeath wiki.
|
Moon and Star Display
A quest and item display for the mod Moon and Star. It appears after completing Kagrenar in the main questline of Moon and Star.
  |
|
Moon and Star Dorana's Hammer display |
|---|
| Dorana's Hammer |
Note that in order for the three extra items in the Upper Gallery to be displayable, the Moon and Star Patch is required and has to be installed at game creation. The Moon and Star mod requires a compatibility patch. It is important that both the mod and the patch is loaded at the same time and this should be done before starting Legacy's own main quest: Shattered Legacy, as both mods use certain unique items, one of which is a required item for Shattered Legacy.
A walkthrough is available on: Steam
The Forgotten City Display
A quest and item display for the mod . The item display activates as soon as the mod is installed, but the quest display does not activate until you have completed the main questline and gotten the good ending.
|
|
Display |
|---|
| Talisman of the Silver Tongue |
| The Arbiter's Helmet |
| Immaculate Dwarven Helmet |
| Immaculate Dwarven Armor |
| Immaculate Dwarven Gauntlets |
| Immaculate Dwarven Boots |
Vigilant Display
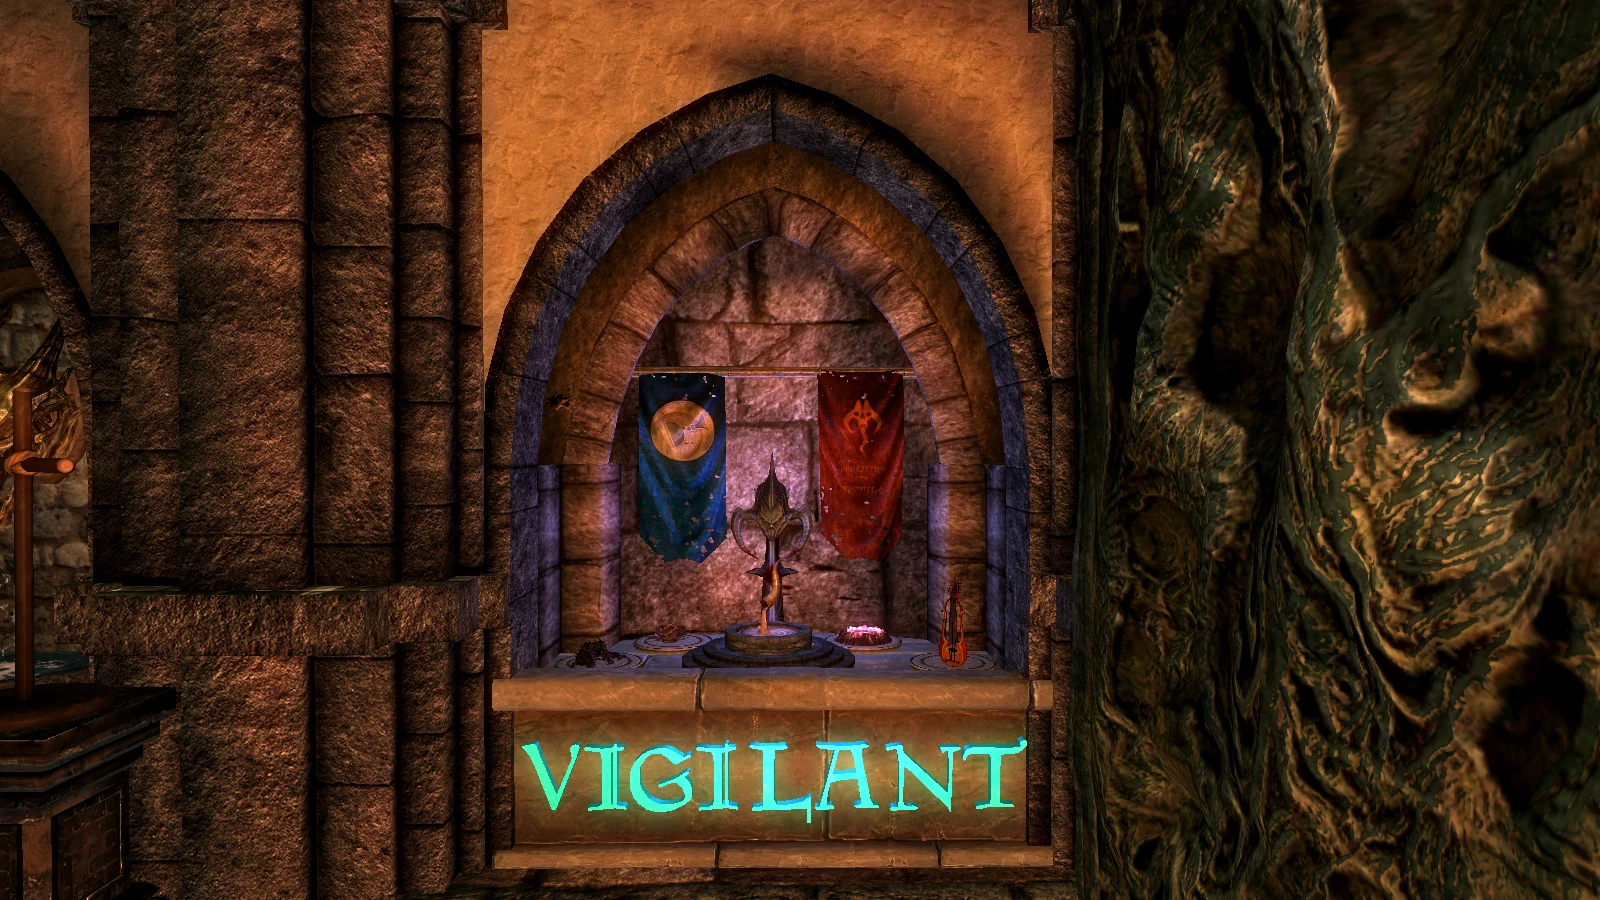

Vigilant
A static quest display for the mod Vigilant. Activates as soon as you have completed Act 4, regardless of the decisions made. More detailed displays can be found in the Vigilant Room of the Hall of Oddities.
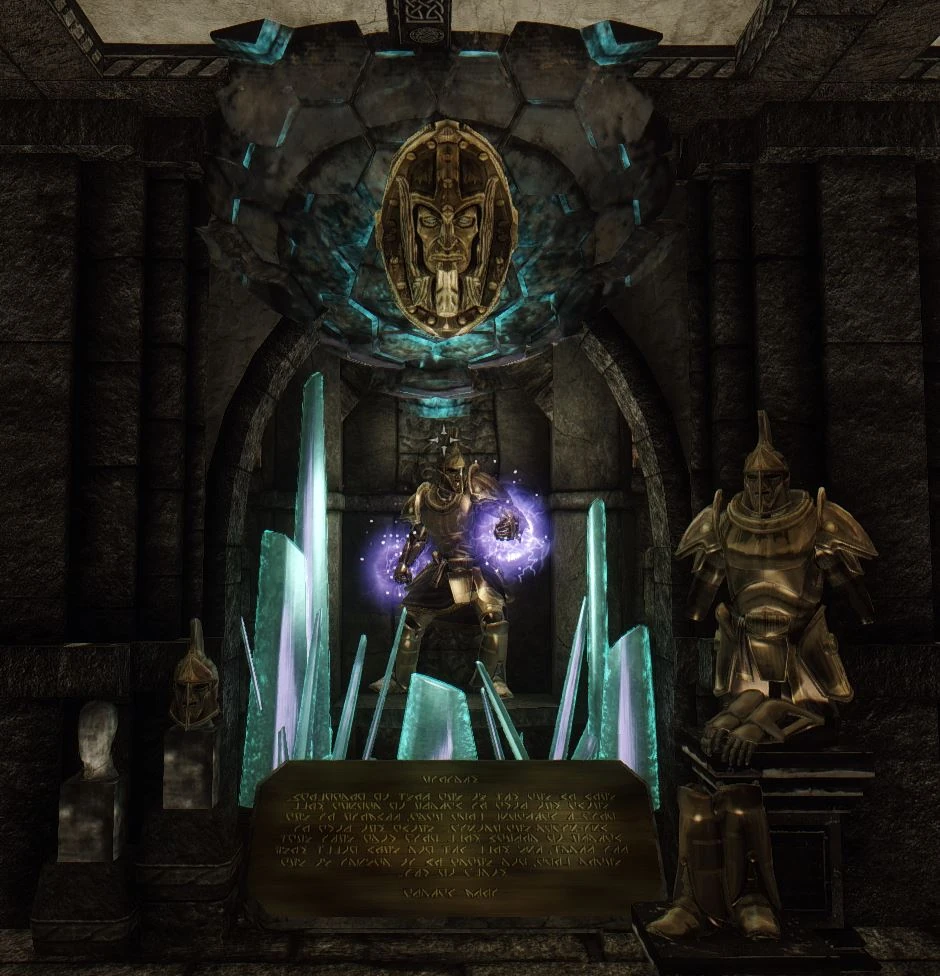
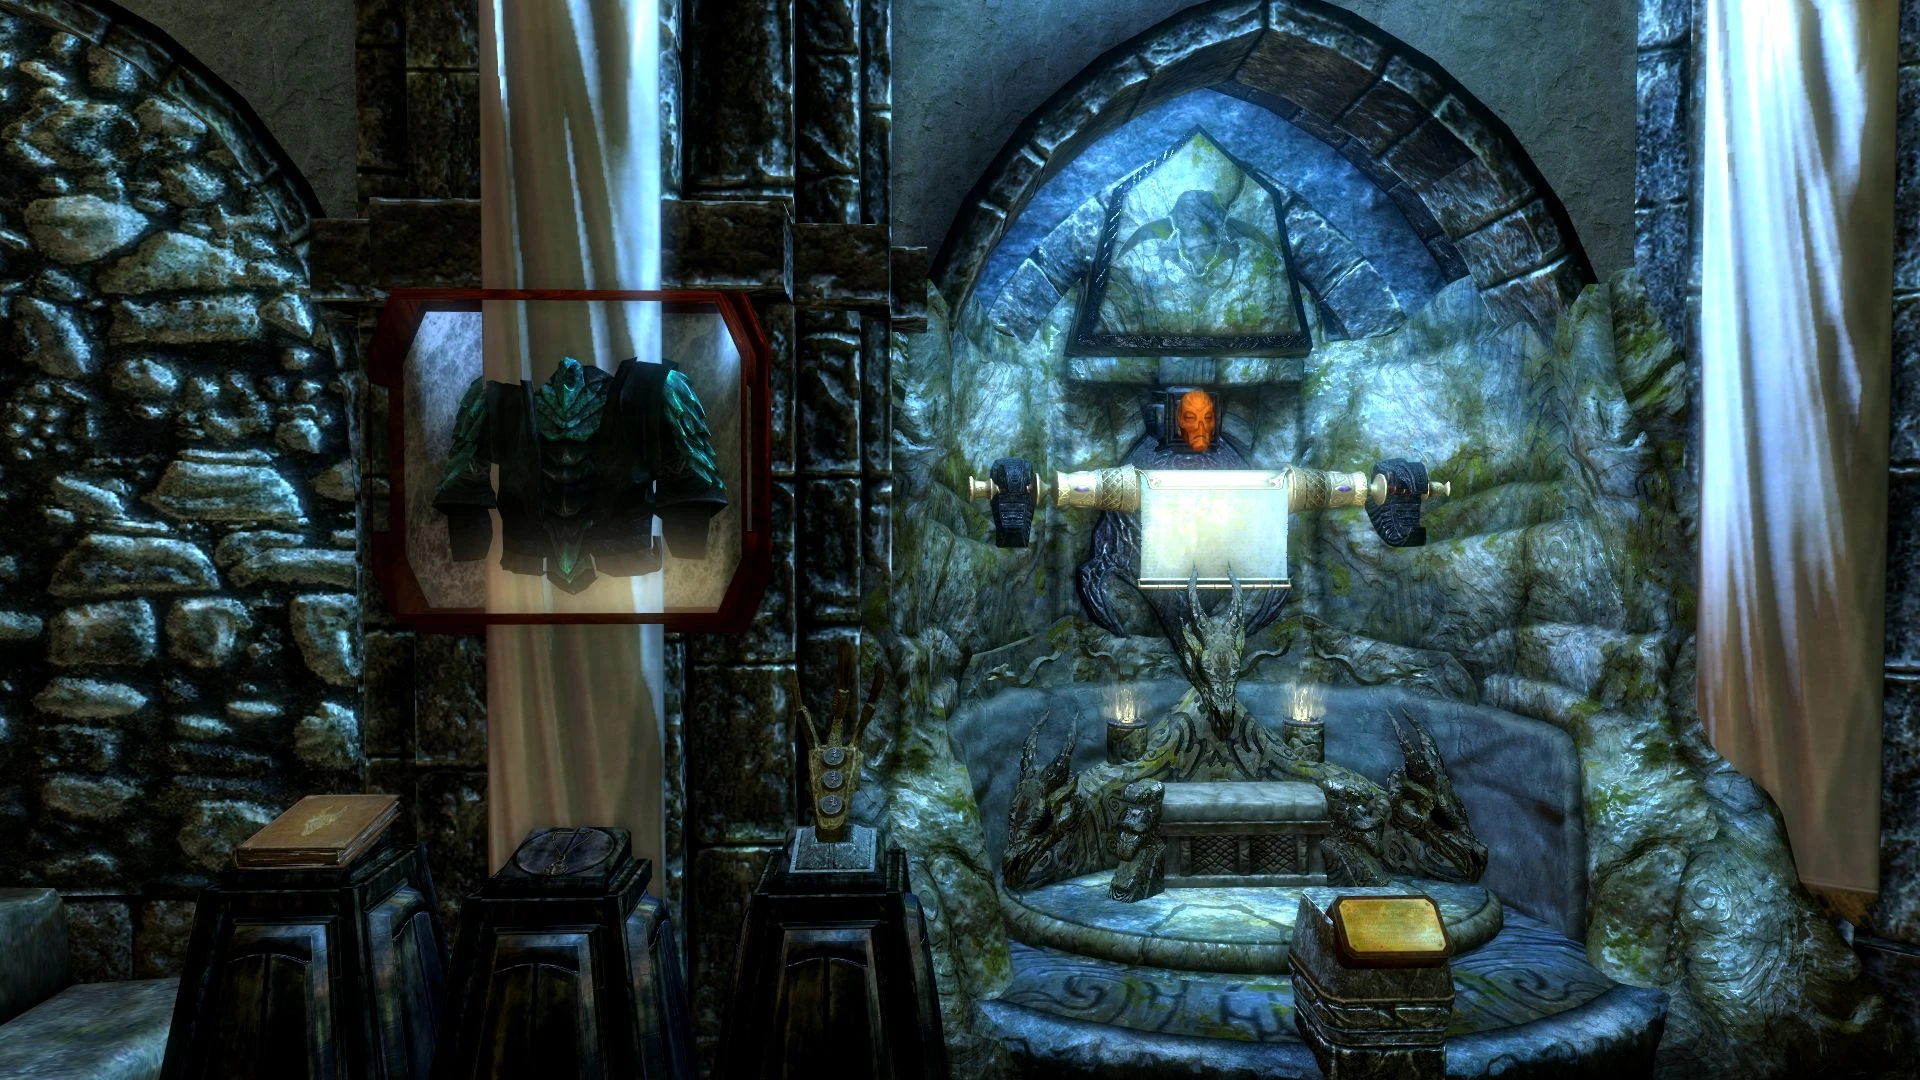
Alduin's Wall

Alduin's Wall
After completing the skyrim main quest Alduin's Wall and reaching Skyhaven Temple the back wall will change its appearance to resemble Alduin's wall from the temple.
The tomb in front of the wall is the secret entrance to the Hall of Secrets. The tomb works just like the secret entrance to the Thieves Guild.
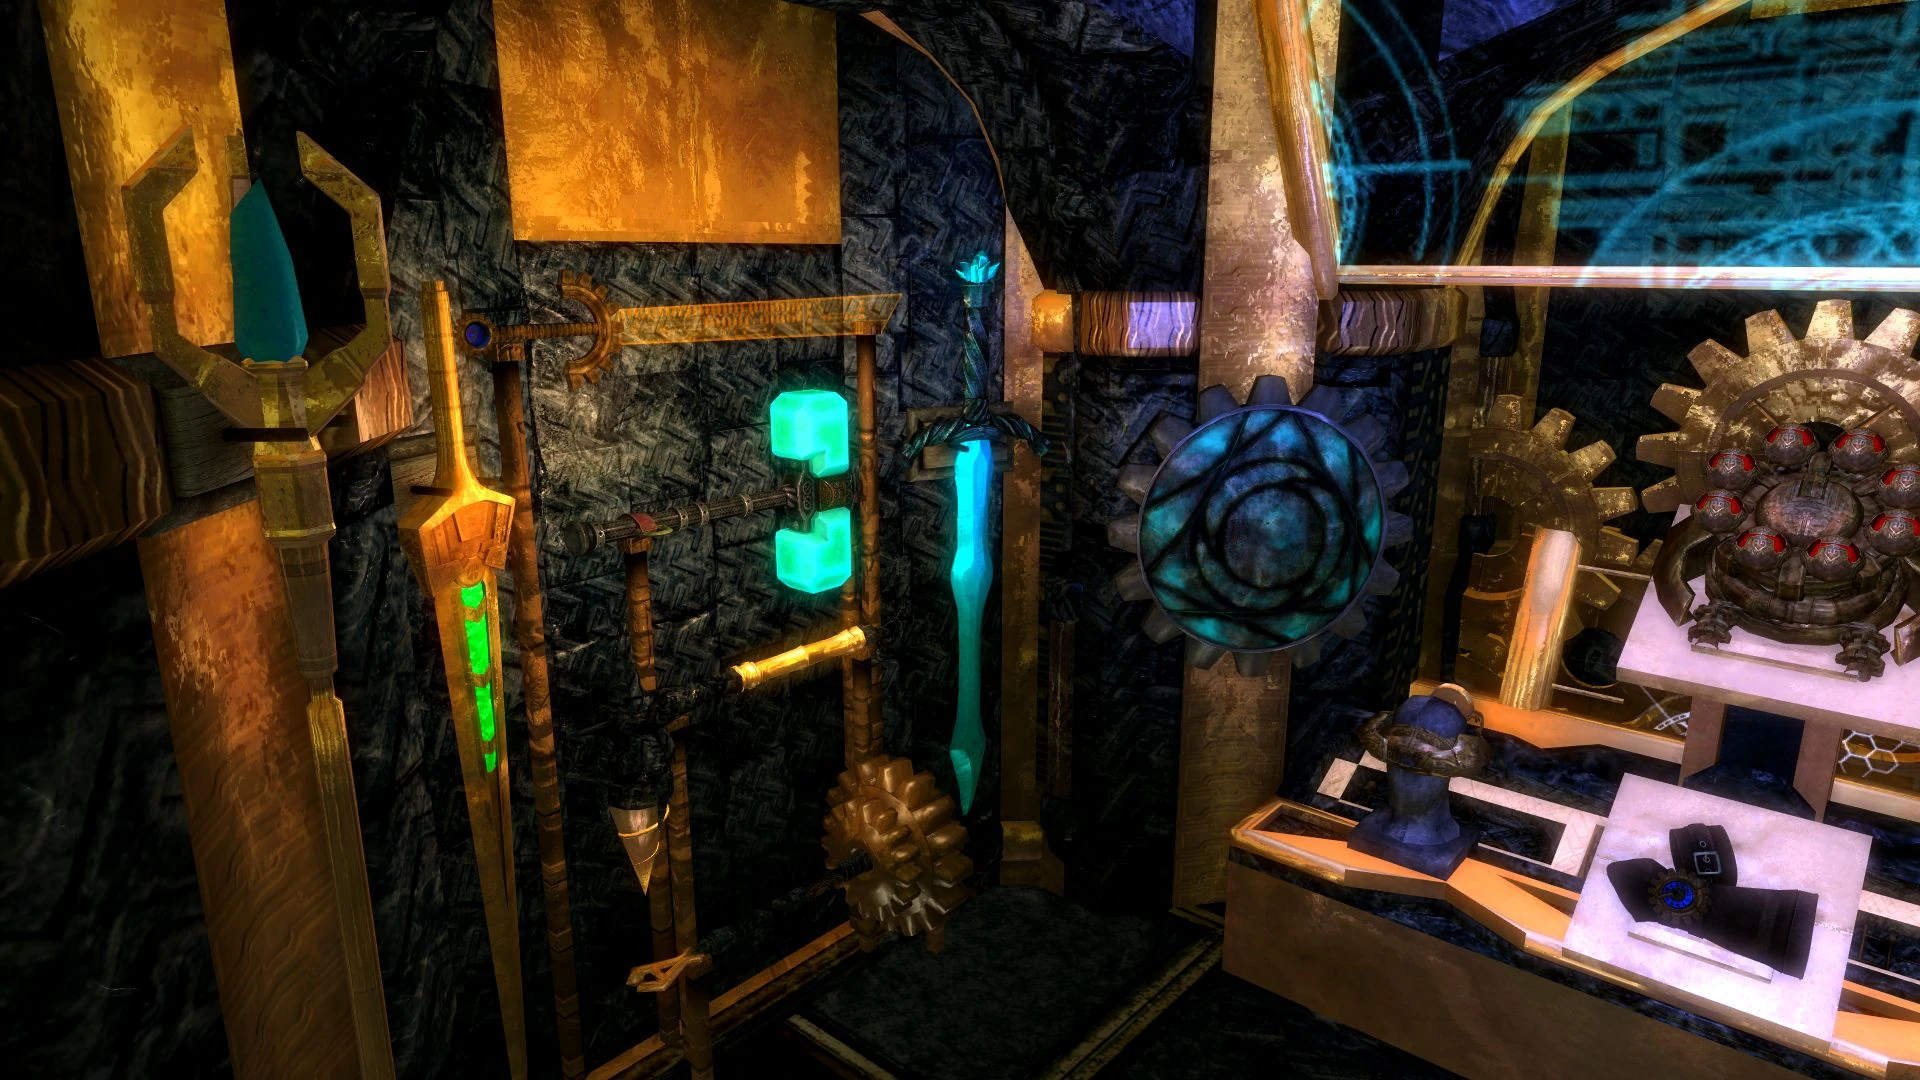
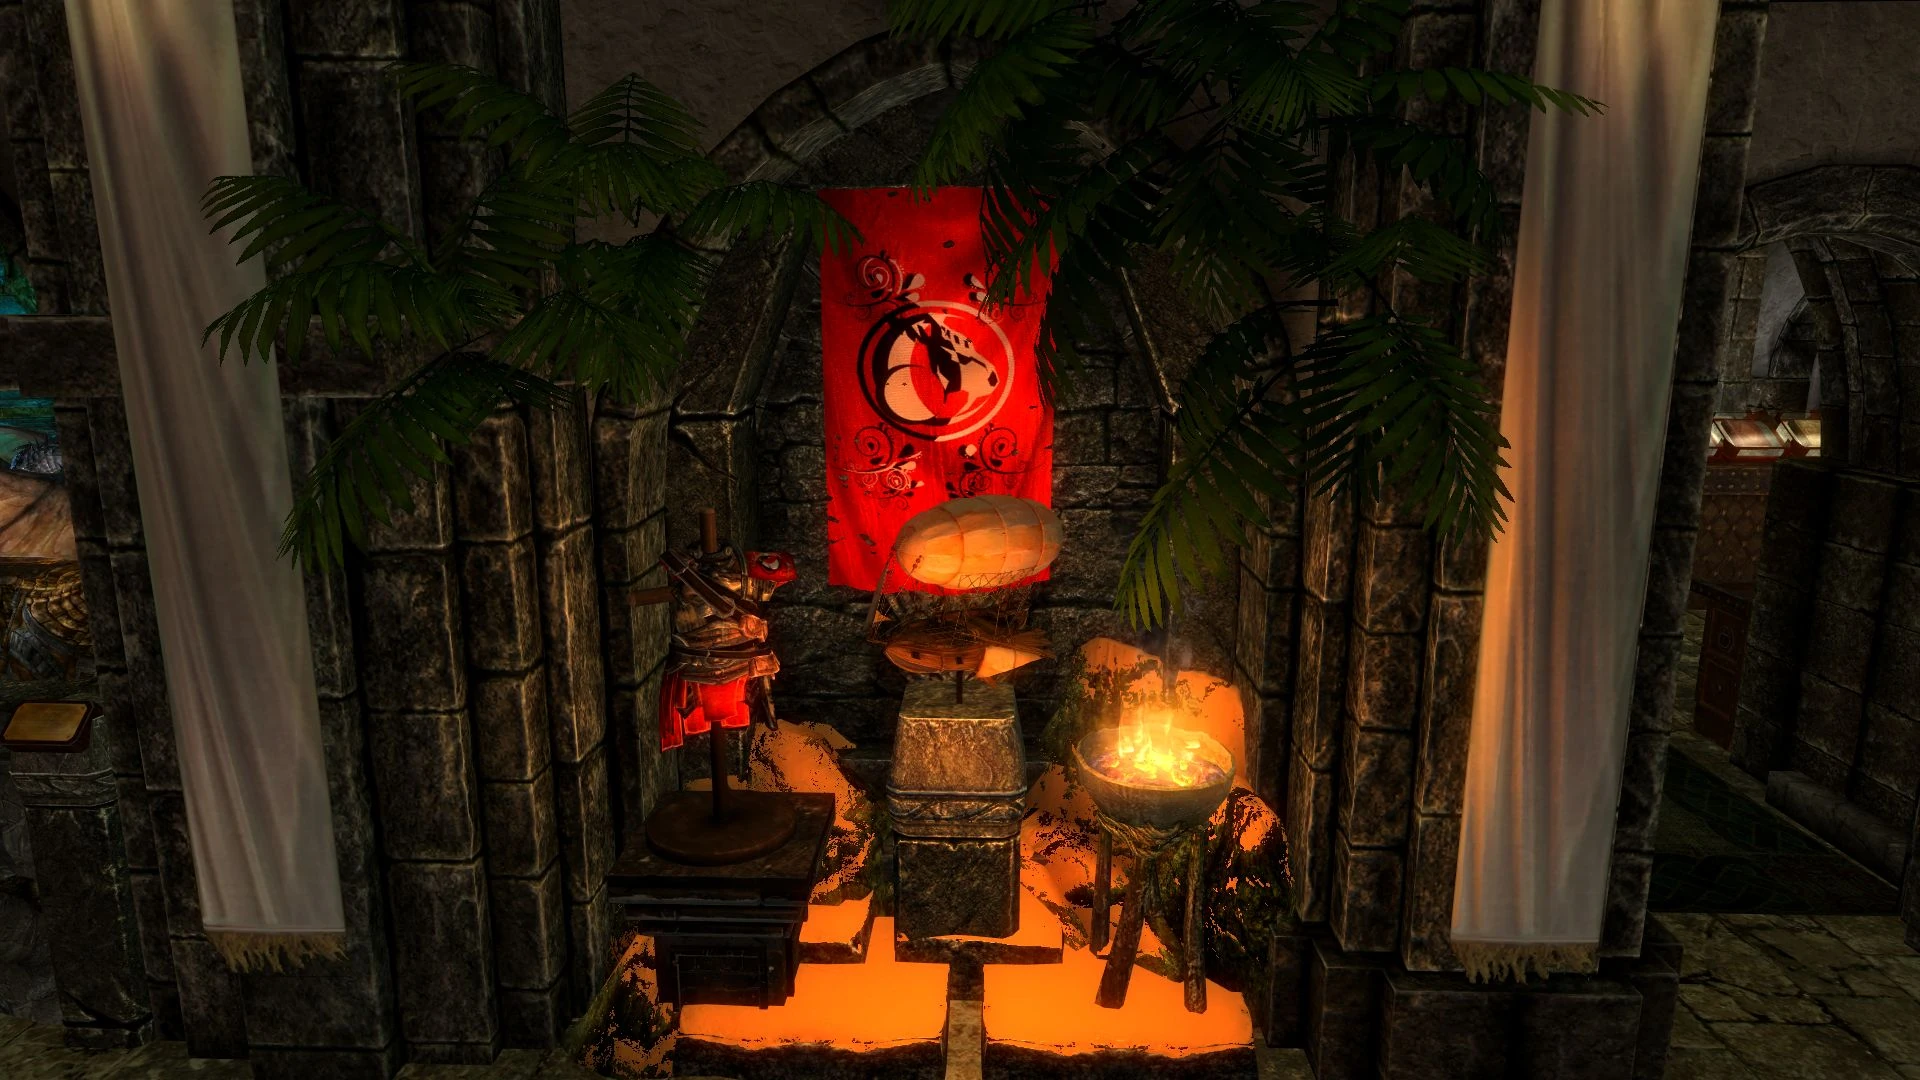
Wyrmstooth Display
A quest and item display for the mod Wyrmstooth. The item display activates as soon as the mod is installed, but the quest display does not activate until you have completed the main questline.
|
|
Wyrmstooth items display |
|---|
| Vulom's Staff |
| Severed Leg |
| Goreduster |
| Eyegouger |
| Dragonslayer |
Immersive College of Winterhold Display

A quest and item display for the mod Immersive College of Winterhold, The item display activates as soon as the mod is installed, but the quest display does not activate until you have completed "The Fall of Winterhold" in The Midden.
|
Immersive College of Winterhold items display |
|---|
| Kettle |
|
Immersive College of Winterhold Trophy Case | |||
|---|---|---|---|
| Toy Dragon | Doll (Elf Boy) | Doll (Elf Girl) | |
| Glass | Teapot | Teacup | Beaker |
| Waterpipe (2) | Waterpipe (1) | ||
| Urn (1) | Urn (2) | ||
The Wheels of Lull Display
A room with multiple displays for the items found in The Wheels of Lull. The display will be made available at the start of Wheels of Lull.
Not all items are obtainable without console, as some have to be used to get other items.
|
|
Left wall |
|---|
| Rod of Ohm |
| Gorveri's Unwinder |
| Clockwork Sword |
| Bells of Sotha Ehn |
| Clockwork Drill |
| Clockwork Mace |
| Memodermic Greatsword |
|
Center wall |
|---|
| Lullian Shield |
| Sehtic Security Pack |
| Magnusian Visor |
| Mark of Seht |
| Microclock |
| Dwemeri Cutting Sphere |
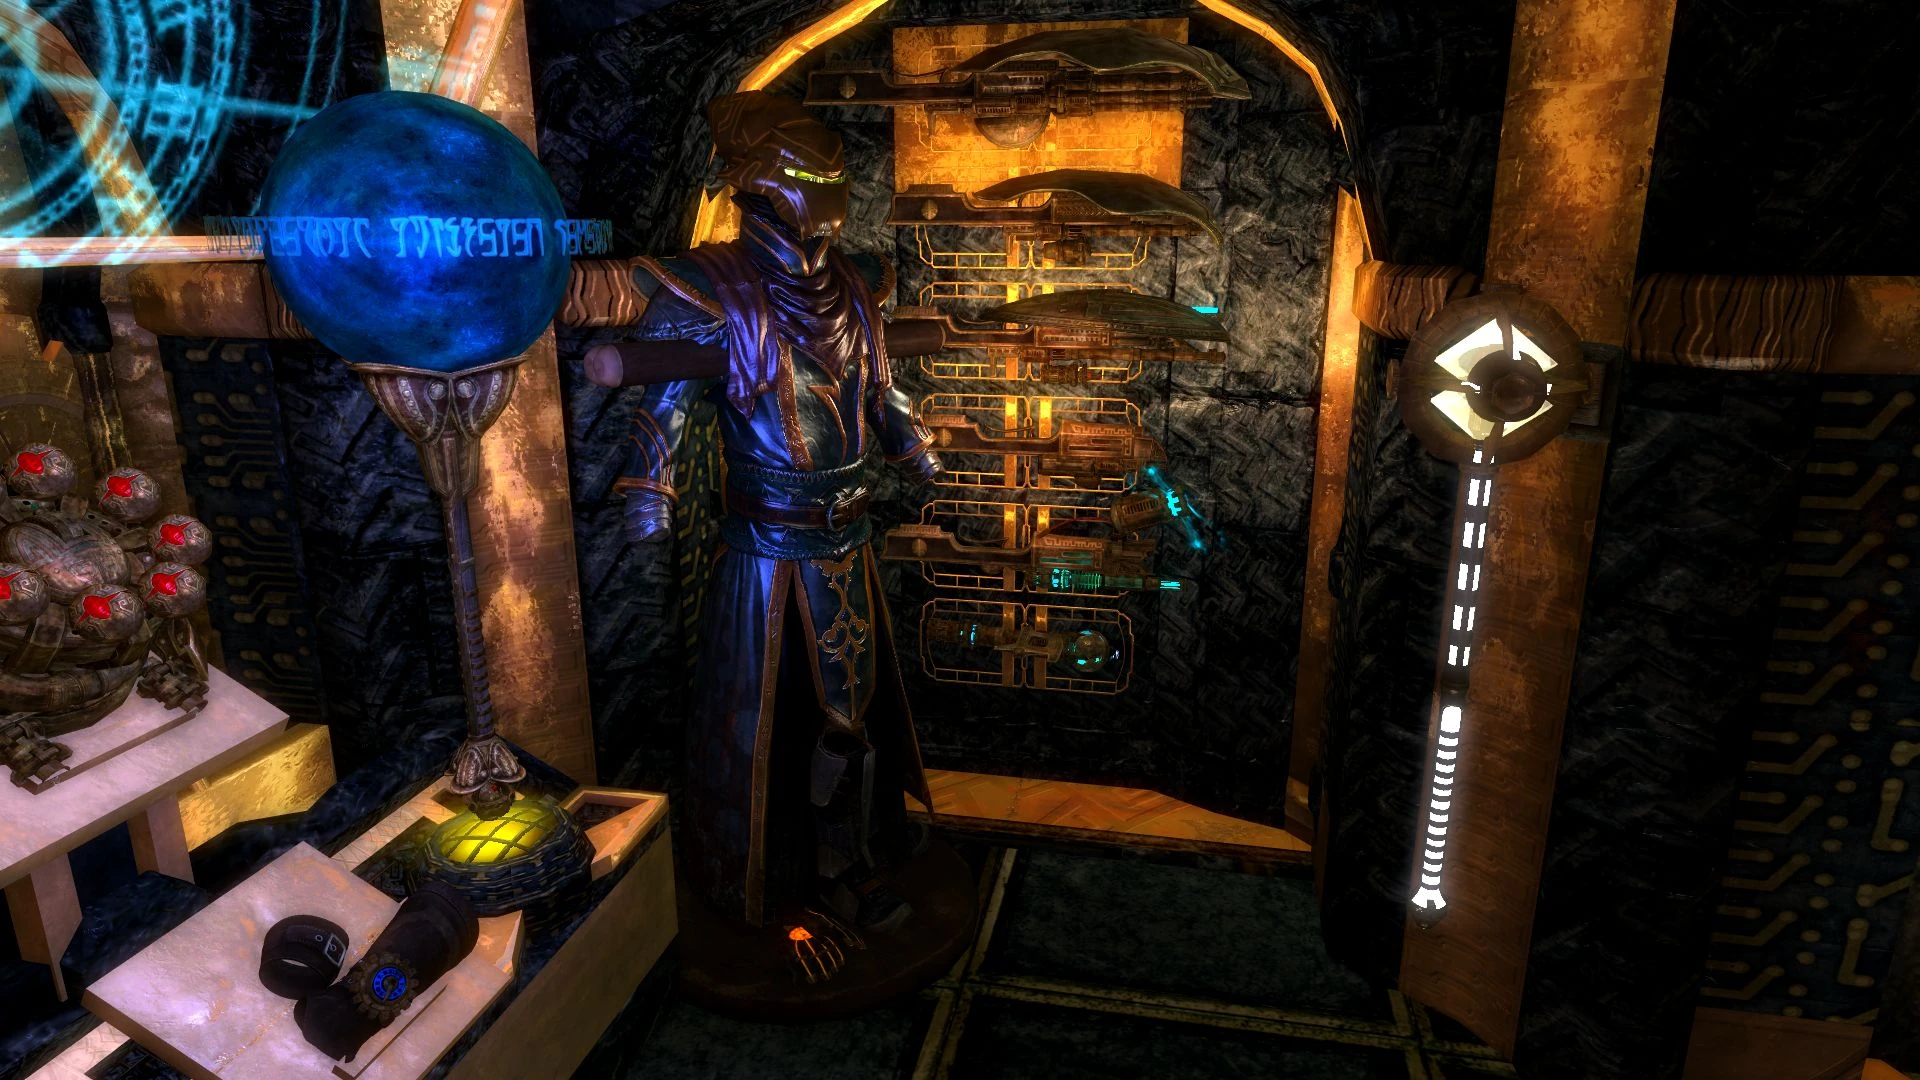
|
|
Armor stand |
|---|
| Chronographer Helm |
| Chronographer Robes |
| Chronographer Gloves |
| Chronographer Boots |
|
Right wall |
|---|
| Rotational Harquebus |
| Targetian Harquebus |
| Combative Harquebus |
| Bombastic Harquebus |
| Lullian Harquebus |
| Llavados' Accelerator |
| Artophysical Manipulator |
The Gray Cowl of Nocturnal Display
A quest and item display for the mod The Gray Cowl of Nocturnal. The item displays are active as soon as the mod is installed.
The static quest display will automatically activate after completing the main questline. After retrieving the Gray Cowl, talk to Seviana Umbranox and escort her and Luvien to the Solitude docks to complete the quest.
|
|
The Gray Cowl of Nocturnal Item Display |
|---|
| Left Eye of Coldharbour |
| Right Eye of Coldharbour |
| Alliance of Ancestral Cheetahs |
| Eagle Eye (Ring) |
| Yokuda |
|
The Gray Cowl of Nocturnal Trophy Case | |
|---|---|
| The Withdrawal | Ocato's Dagger |
| Golden Scimitar | |
| Bow of the Forgotten Chaos | |
| The Boots of Springheel Jak | |
Konahrik's Accoutrements Display
A quest and item display for the mod Konahrik's Accoutrements. The item display activates as soon as the mod is installed, but the quest display does not activate until you have completed the main questline. For the armor displays, see the 2nd floor.
|
|
Konahrik's Accoutrements items display |
|---|
| Fodiiz's Robes |
| The Dragon Forge |
| Dragon Priest Pendant |
| Clay Mask |
| Elder Scroll: Warlord |
Much Ado About Snow Elves Display
A quest and item display for Much Ado About Snow Elves. The item display activates as soon as the mod is installed, but the quest display does not activate until you have completed the main questline. For the armor displays, see the 2nd floor.
|
|
Much Ado About Snow Elves items display |
|---|
| Active Dwemer Key (Green) |
| Snow Elf Statue |
| Active Dwemer Key (Blue) |
Moonpath to Elsweyr Display
A quest and item display for Moonpath to Elsweyr. The display activates after completing 'Moonpath to Elsweyr'.
|
| Moonpath to Elsweyr item display |
|---|
| Ancient Siligonder Chitin Armor |
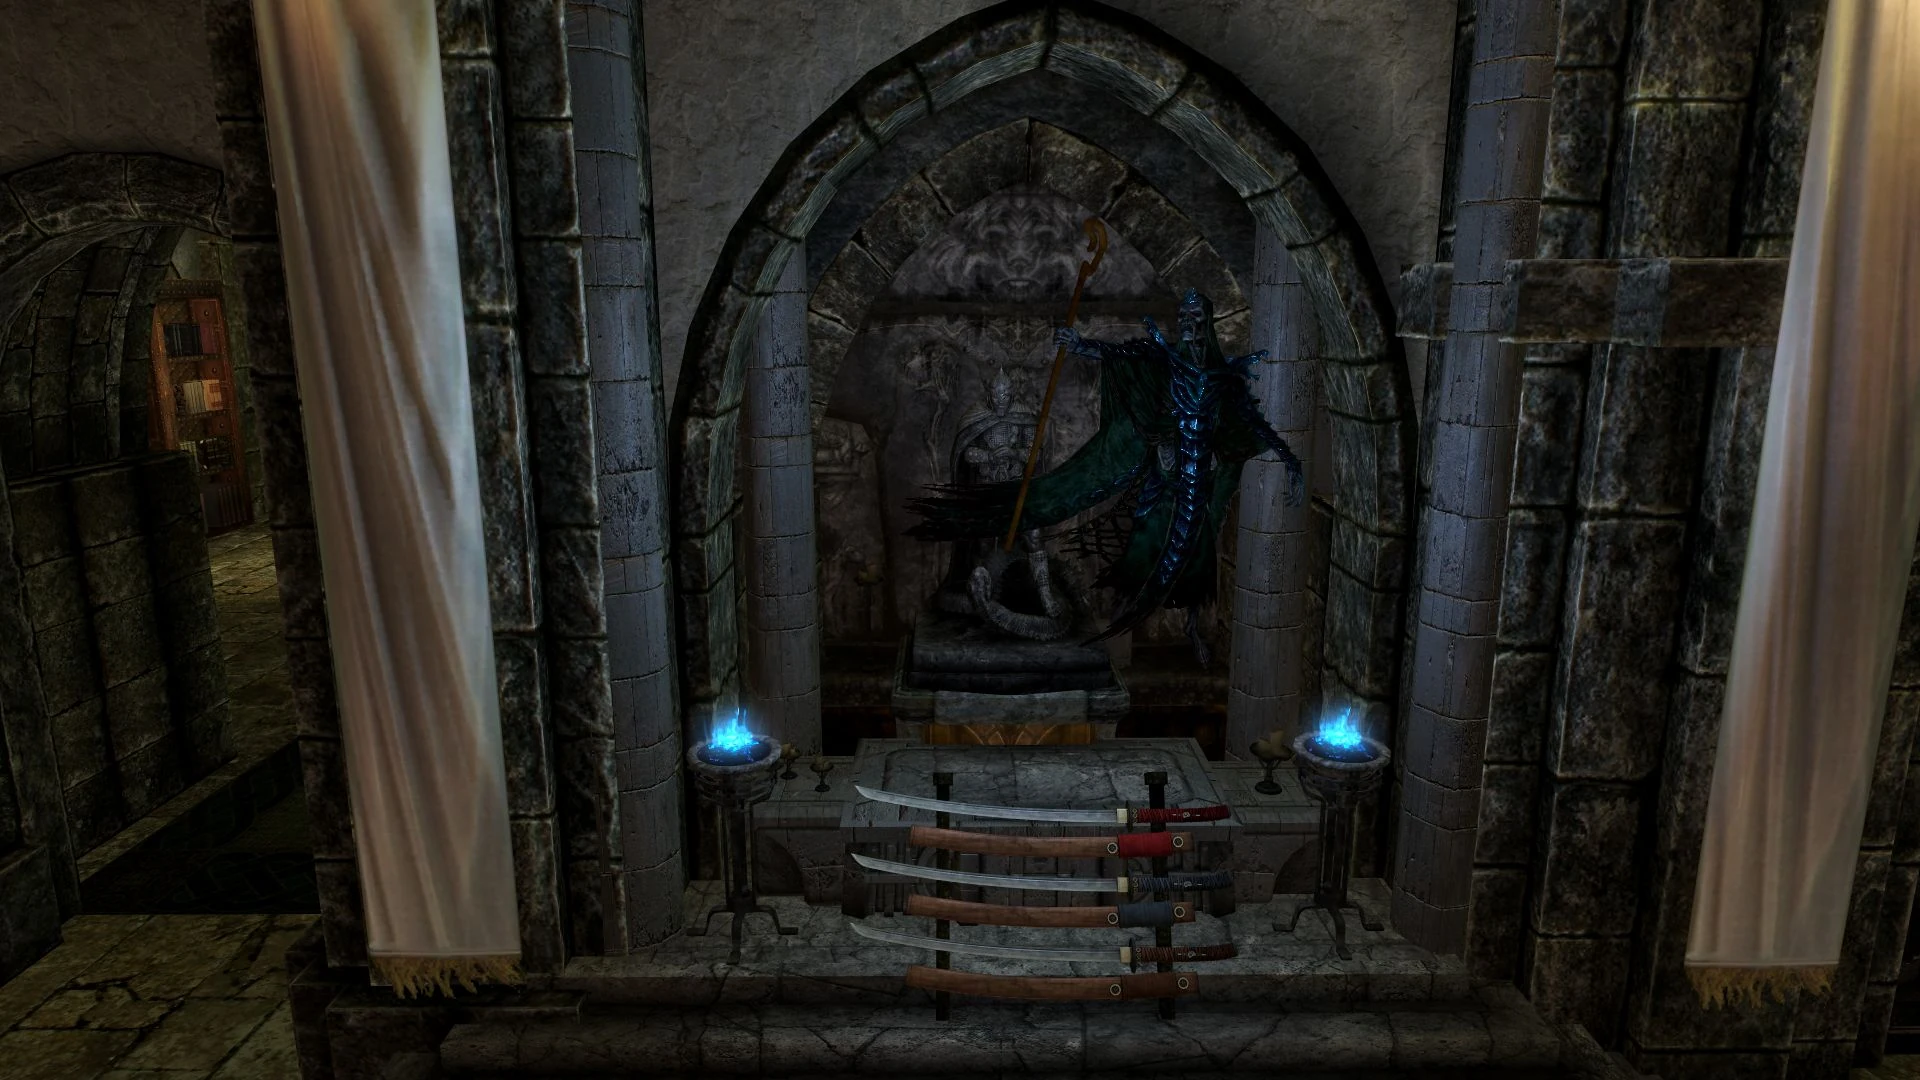
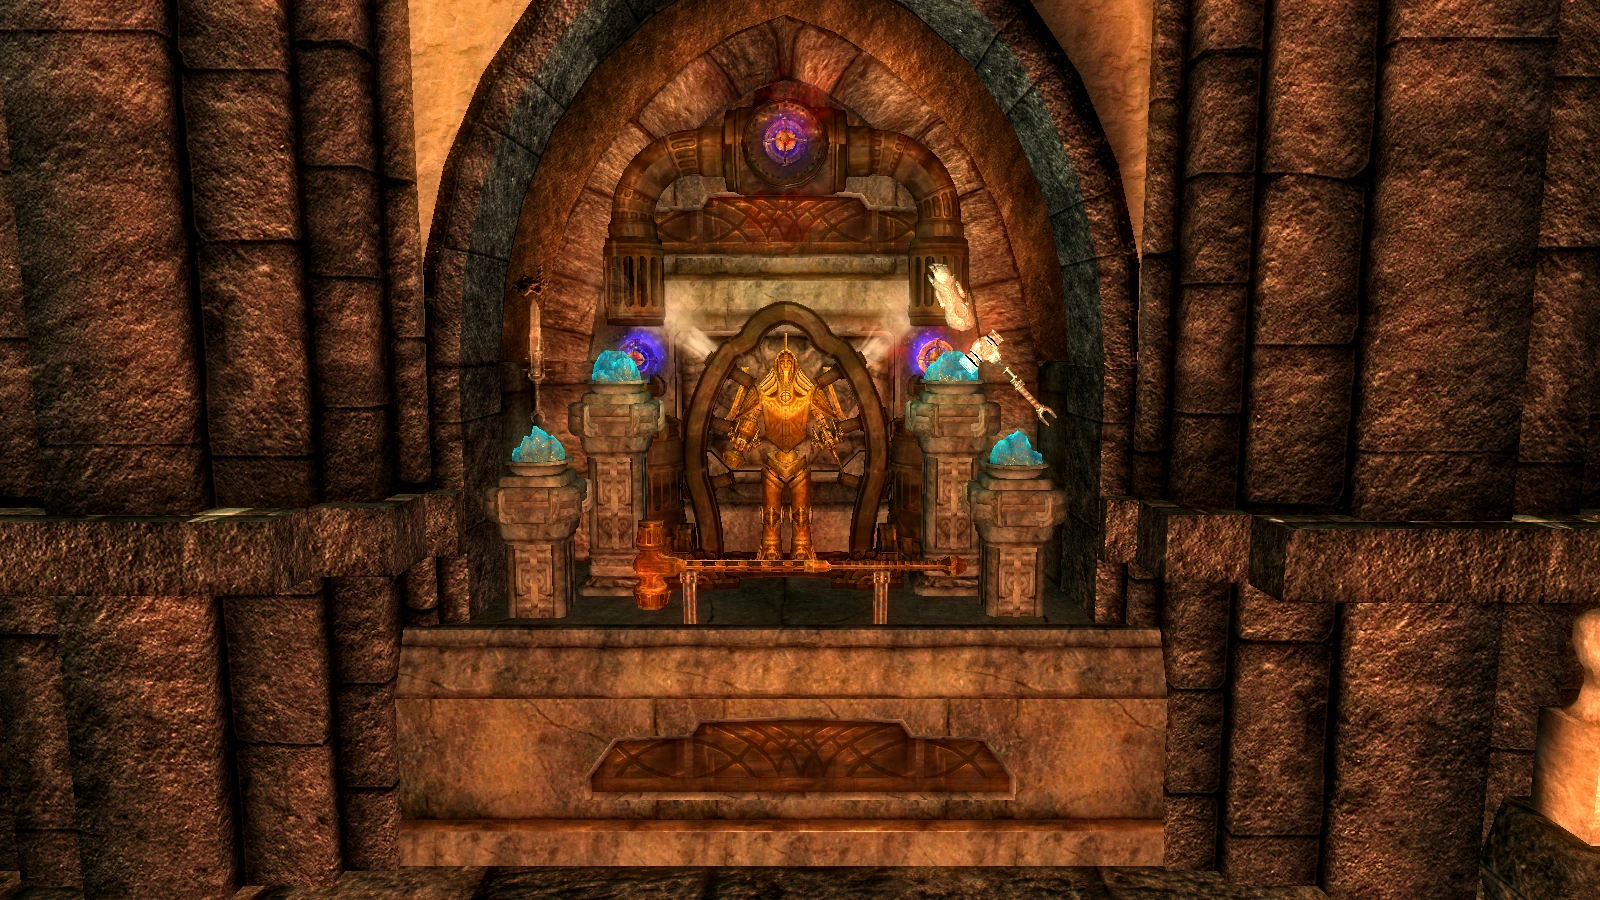
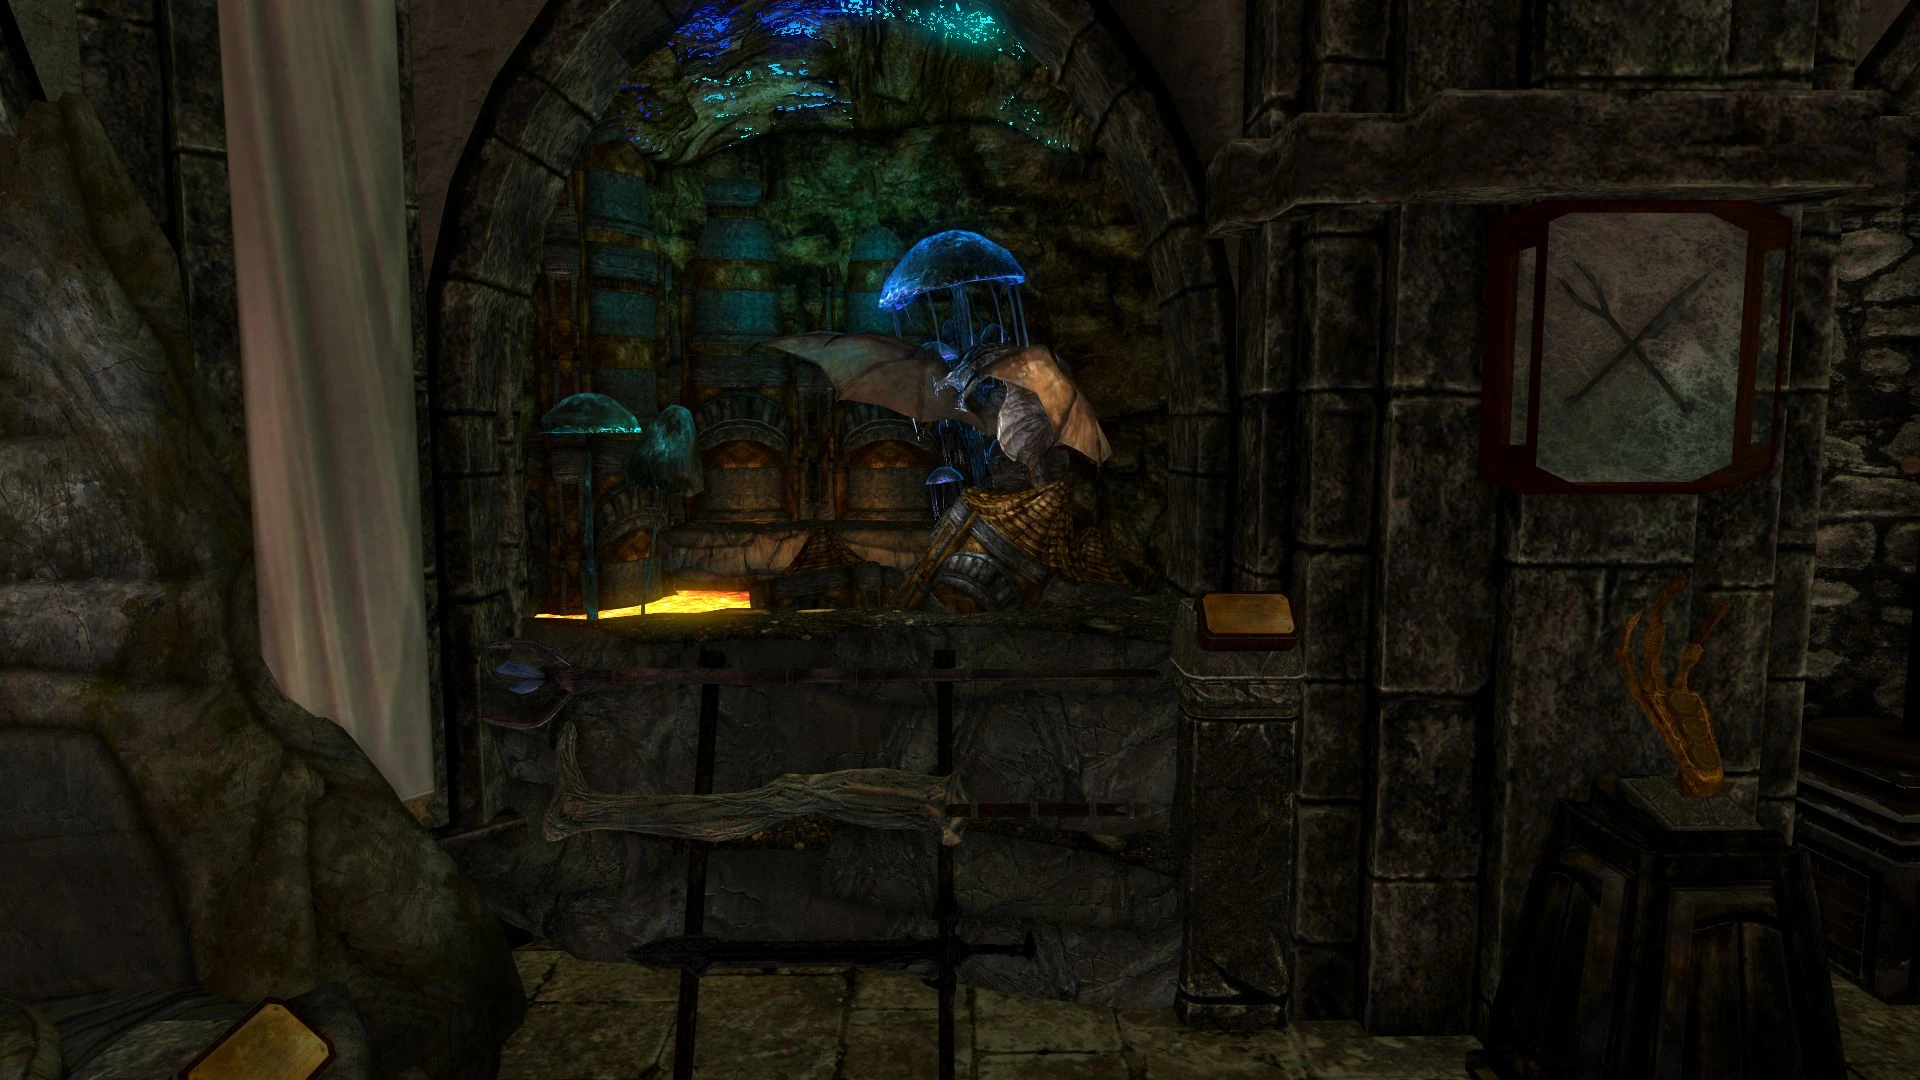
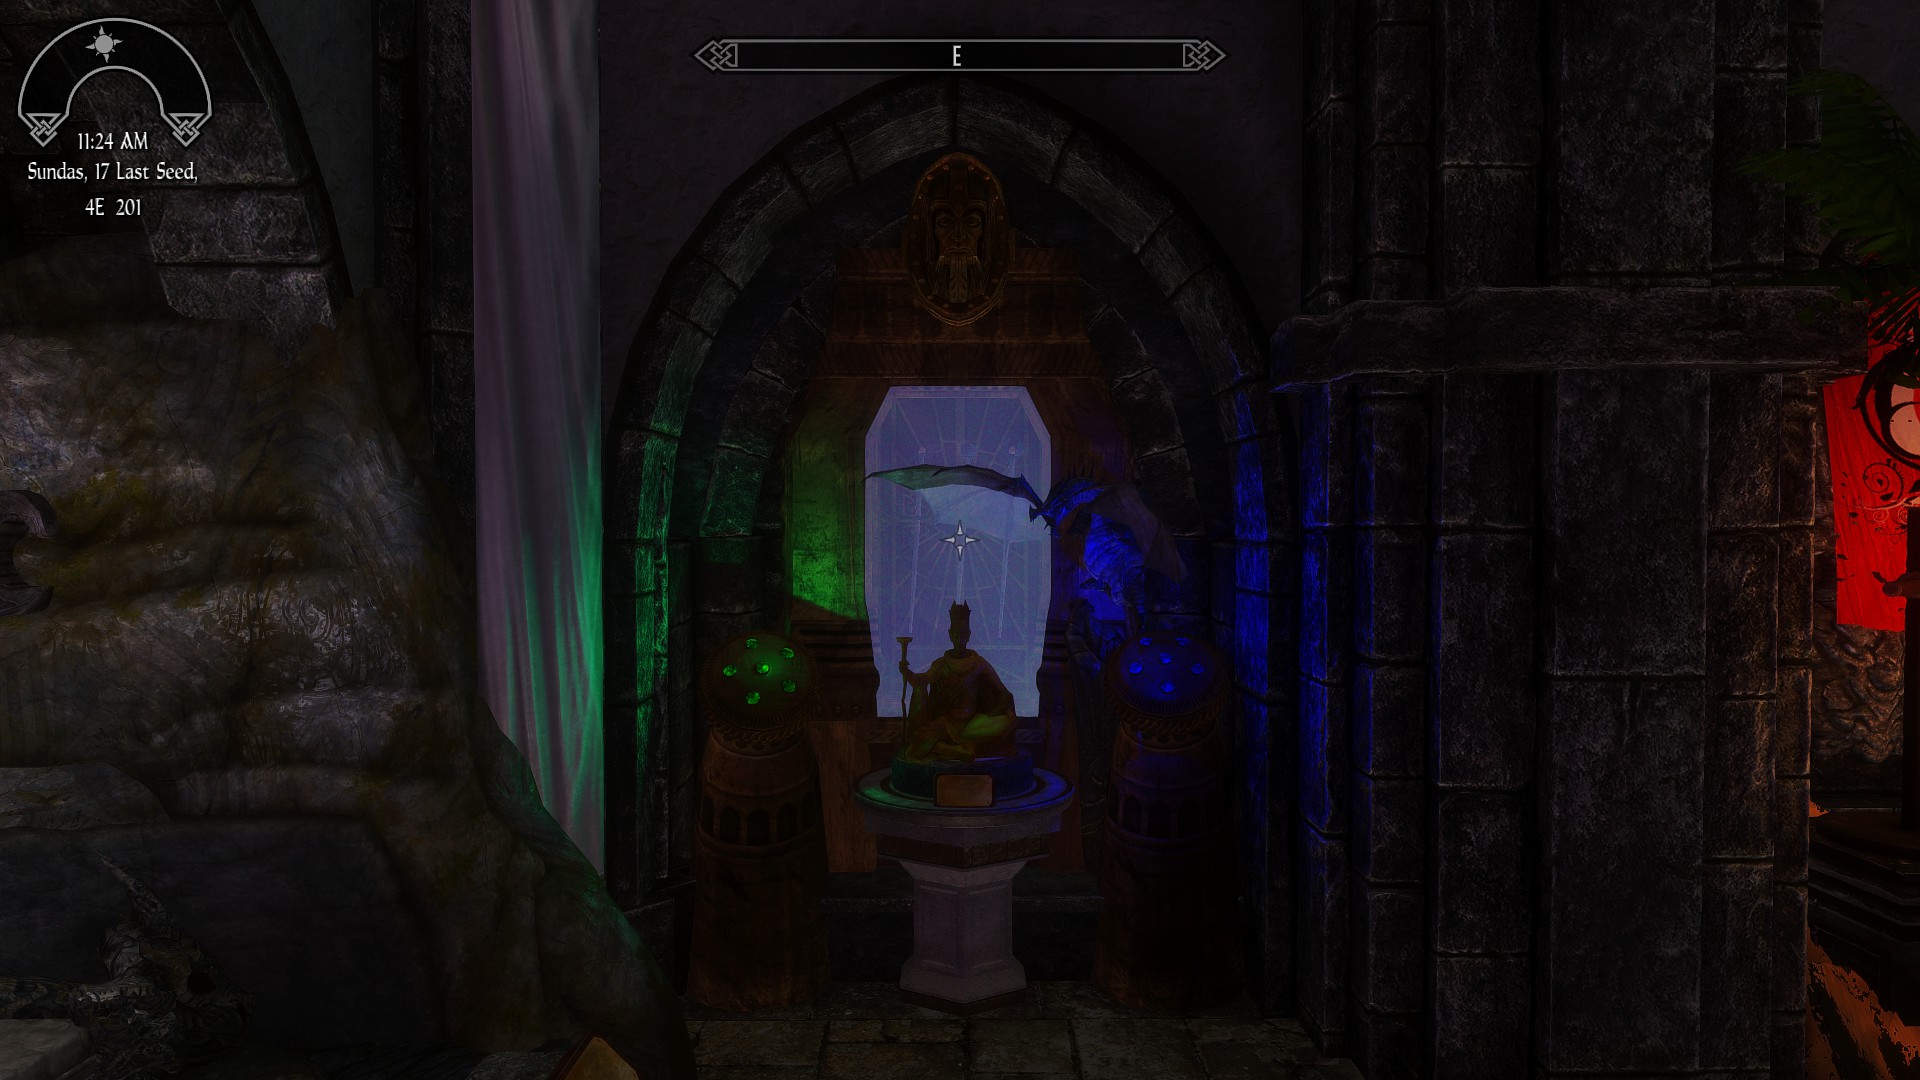
Alduin Display
The Alduin display is located between the 2 sets of staircases going up to the 2nd floor of the Dragonborn Hall, and is in front of the Tomb of the Dragonborn leading to the Hall of Secrets. The display is automatically enabled upon completing the main storyline of the vanilla game. It is a very long questline ending with 'Dragonslayer'. The entire questline must be completed for the display to be activated. Skipping quests in any way will prevent it from being enabled automatically.
Alternatively, you can enable or disable it manually by activating it in the MCM menu, without completing the required quests. It is strongly recommended that you do the quests, however, as there are items gained in the questline that have display spots in the museum.
2nd floor
Miraak the Dragonborn |
|---|
| Miraak (mask) |
| Miraak's Robes |
| Miraak's Gloves |
| Miraak's Boots |
Konahrik's Accoutrements Armor Displays

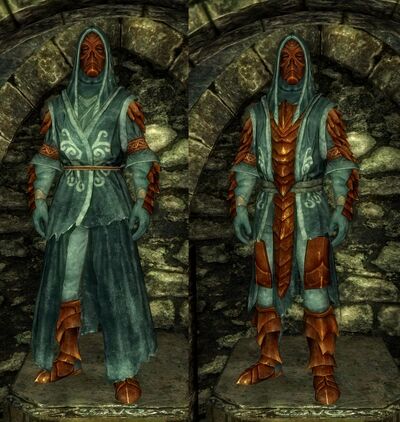
Robed and Armored comparison
Requires the mod Konahrik's Accoutrements.
The mannequins can take either the robed or armored versions. See screenshot for a comparison. In order to be displayable and usable the Cursed armored pieces have to be cleansed using a Abjuration spell. To do this drop an item on the ground and hit it with the spell.
Mannequins in order of appearance starting left of Miraak.
|
Morokei the Glorious |
|---|
| Morokei (mask) |
| Morokei's Robes or Morokei's Armored Robes |
| Morokei's Gloves |
| Morokei's Greaves |
|
Vahlok the Jailor - The Guardian |
|---|
| Vahlok (mask) |
| Vahlok's Robes or Vahlok's Armored Robes |
| Vahlok's Gauntlets |
| Vahlok's Greaves |
|
Krosis the Sorrowful |
|---|
| Krosis (mask) |
| Krosis' Robes or Krosis' Armored Robes |
| Krosis' Gloves |
| Krosis' Greaves |
|
Nahkriin the Vengeful |
|---|
| Nahkriin (mask) |
| Nahkriin's Robes or Nahkriin's Armored Robes |
| Nahkriin's Gloves |
| Nahkriin's Greaves |
|
Hevnoraak the Brutal |
|---|
| Hevnoraak (mask) |
| Hevnoraak's Robes or Hevnoraak's Armored Robes |
| Hevnoraak's Gloves |
| Hevnoraak's Greaves |
|
Dukaan the Dishonored |
|---|
| Dukaan (mask) |
| Dukaan's Robes or Dukaan's Armored Robes |
| Dukaan's Gloves |
| Dukaan's Greaves |
|
Ahzidal the Bitter Destroyer |
|---|
| Ahzidal (mask) |
| Ahzidal's Robes or Ahzidal's Armored Robes |
| Ahzidal's Gloves |
| Ahzidal's Greaves |
|
Zahkriisos the Bloody Sword |
|---|
| Zahkriisos (mask) |
| Zahkriisos' Robes |
| Zahkriisos' Gloves |
| Zahkriisos' Greaves |
|
Volsung the Horrible |
|---|
| Volsung (mask) |
| Volsung's Robes or Volsung's Armored Robes |
| Volsung's Gloves |
| Volsung's Greaves |
|
Vokun the Shadow |
|---|
| Vokun (mask) |
| Vokun's Robes or Vokun's Armored Robes |
| Vokun's Gloves |
| Vokun's Greaves |
|
Otar the Mad |
|---|
| Otar (mask) |
| Otar's Robes or Otar's Armored Robes |
| Otar's Gloves |
| Otar's Greaves |
|
Rahgot the Wrathful |
|---|
| Rahgot (mask) |
| Rahgot's Robes or Rahgot's Armored Robes |
| Rahgot's Gloves |
| Rahgot's Greaves |
|
Konahrik the Warlord |
|---|
| Konahrik (mask) |
| Konahrik's Robes or Konahrik's Armored Robes |
| Konahrik's Gauntlets |
| Konahrik's Greaves |
SPOILER list - How to get all items
- Akaviri Fireblade of the Guardian (replica):
- Akaviri Shockblade of the Guardian (replica):
- Akaviri Frostblade of the Guardian (replica):
Helgen Reborn Display
Falskaar Display
Moon and Star Quest Display
The Wheels of Lull Display
The Gray Cowl of Nocturnal Display
Konahrik's Accoutrements Display
Konahrik's Accoutrements Armor Displays
Wyrmstooth Display
| ||||||||||||||||||||||||||||||||||||||||||